Page is loading ...

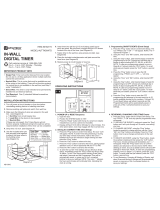
IN-WALL
DIGITAL TIMER
ITEM #0141224
MODEL #UTDT9IW7
Call customer service at 1-866-994-4148,
8 a.m. - 6 p.m., EST, Monday - Thursday,
8 a.m. - 5 p.m., EST, Friday.
CLR
Day Hour
Prog Min
ON
OFF
SYSTEM
Reset
CLR
Clear
=
12:00
A
MO
1 - 4
IMPORTANT PRODUCT INFO
• Single Pole: Timer will control devices from one location.
Do not use in a 3-Way application where multiple switches
control the same device.
• Neutral Wire: This is a wire that must be available as part
of the wiring in the building. Timer will not function
properly if a neutral wire is not available in the wall box
(see Step 3 under “Installation”).
• Direct Wire: This timer is only intended to be permanently
installed into an electrical wall box.
• Tool Required: One (1) standard flathead screwdriver
(not included).
OPERATING INSTRUCTIONS
INSTALLATION INSTRUCTIONS
1. Turn off power at circuit breaker or fuse box before
uninstalling existing device or installing new timer.
2. Remove existing wall plate and switch from wall box.
3. Make sure the following 3 wires are present in the wall
box. (see Diagram A)
a. 1 Hot Wire from circuit breaker box
b. 1 Load Wire to the device to be powered
c. 1 Neutral Wire
If these are not present, this Timing Device will not
function properly. Additional wiring to the wall box will be
required before installation of this timer can be completed.
4. Strip wires 1/2 inch. (see Diagram A)
5. Use the included wire nuts
and securely twist together
to attach the timer wires to
the building wires.
(see Diagram A)
Diagram A
Diagram B
From Timer In Wall Box
Black Wire Hot Wire
Red Wire Load Wire
White Wire Neutral Wire
Green Wire Ground Wire
*
*
or to ground post or screw terminal
6. Insert timer into wall box (2-1/2 inch) being careful not to
pinch any wires. Be sure timer is upright with the LCD
screen located at the top of the timer. (see Diagram B)
7. Fasten timer to the wall box using the screws provided.
(see Diagram B)
8. Place the included rocker/decorator wall plate around the
timer face. (see Diagram B)
9. Restore power at circuit breaker or fuse box.
e. To save the Current Time settings and go directly to
Event Setup, immediately press the “Prog” button and
skip to step 3b below. To exit Time Setup without
starting Event Setup, wait about 6 seconds and the
Programmed Time will be automatically saved, or
press any of the 3 unmarked buttons to save your
settings. NOTE: The colon “:” between the hours and
minutes will continually blink, indicating the clock is
running.
3. Programming ON/OFF EVENTS (Event Setup)
a. Press the “Prog” button twice to enter Event Setup. The
icon “PROG” and “1 ON --:--” will appear. NOTE: The
“1” represents Program 1.
b. Using the “Hour” and “Min” buttons, enter desired ON
time.
c. Using the “Day” button, enter desired day(s) of week for
programming to be ON. Choose any individual day or
blocks of days including MO-FR, SA-SU, or MO-SU.
NOTE: To clear any programming entered in error in
Steps B or C above, press the “CLR” button. To recall
what was just cleared, press the “CLR” button a second
time.
d. Press the “Prog” button once to save the ON
programming. “PROG” and “1 OFF --:--” will now
appear.
e. Using the “Hour” and “Min” buttons, enter desired OFF
time.
f. Using the “Day” button, enter desired day(s) of week for
programming to be OFF. Choose any individual day or
blocks of days including MO-FR, SA-SU, or MO-SU.
NOTE: To clear any programming entered in error in
Steps E or F above, press the “CLR” button. To recall
what was just cleared, press the “CLR” button a second
time.
g. Press the “Prog” button once to save the OFF
programming and advance to the next event (up to 18
events available denoted by the numbers 1 through 18).
To end Event Setup, wait about 6 seconds and the
Programmed Events will be automatically saved, or
press any of the 3 unmarked buttons to save your
settings.
4. REVIEWING, CHANGING & DELETING Events
a. Press the “Prog” button twice to enter Event Setup. The
icon “PROG”, “1 ON” and any specific programmed
times will appear.
b. TO REVIEW THE EVENTS, continue to press the
“Prog” button and it will cycle through all 18 events, one
setting at a time.
c. TO CHANGE AN EVENT, using the “Prog” button,
locate the event(s) to change and then use the “Hour”,
“Min” and “Day” buttons accordingly. Press the “Prog”
button once to save changes and advance to the next
event.
d. TO DELETE AN EVENT, using the “Prog” button locate
the event(s) to delete and then press the “CLR” button.
The hours, minutes and days will be deleted, and “--:--”
will appear. Press the “Prog” button once to confirm
1. POWER-UP or RESET Sequence
a. Open the door.
b. Position the SYSTEM switch to “ON”.
c. Press the “Reset” button with the tip of a small non-
metallic insulated tool, such as a pencil (not included).
d. Display will flash 12:00 AM on Monday for a few minutes.
If no other action taken, the clock may engage with the
incorrect time.
2. Setting the CURRENT TIME (Time Setup)
a. Press the “Prog” button to enter Time Setup. The icon
“CLK” will appear. NOTE: To enter Time Setup following
or during any other step in these instructions, wait for the
colon “:” between the hours and minutes to begin
blinking and then press the “Prog” button.
b. Press the “Day” button to advance the day.
c. Press the “Hour” button to advance the hours, paying
special attention to the “A” which represents AM and “P”
for PM.
d. Press the “Min” button to advance the minutes.
T
O
P
I
N
D
O
O
R
U
S
E
O
N
L
Y
Hot Wire
Black Wire
Red Wire
White Wire
Load Wire
Neutral Wire
Ground Wire Green Wire
AB13840
A

HELPFUL TIPS
• Timer has up to 18 customizable ON/OFF Event Settings to
turn devices on and off at different times and on different
days as programmed.
• To automatically advance through the Hour and Minute
selections, press and hold the “Hour” or “Min” buttons.
IN CASE OF POWER FAILURE
Timer will continue to operate on battery backup if the power
goes out; however it will not turn attached devices on or off.
Once power is restored, programming will resume. If power
remains out longer than the battery backup will operate,
re-program the timer as explained in the “Operating
Instructions”. NOTE: Battery is permanently installed and not
replaceable. It automatically recharges when power is
provided to the timer.
5. Manual ON/OFF OVERRIDE
With the door shut, press it inward
to bypass the current settings and
manually turn your attached
devices ON or OFF. Choose
between four override settings:
SAFETY INFORMATION & SPECIFICATIONS
T
HIS TIMER IS FOR USE WITH A 120 V AC POWER SOURCE.
120 V AC / 60 Hz
DO NOT ATTACH A DEVICE THAT EXCEEDS THE UNIT RATINGS:
15 A / 1,800 W Resistive (General Purpose)
10 A / 1,200 W Tungsten (Incandescent)
10 A / 1,200 W Ballast (Fluorescent)
1/2 HP (Horsepower Motor)
LIMITED 1 YEAR WARRANTY
Prime warrants this product to be free from manufacturing defects for a
period of one year from the original date of purchase (“warranty period”).
This warranty is limited to the repair or replacement of this product only and
Prime is not liable for any consequential or incidental damage to other
products that may be used with this unit. This warranty is effective only if
such unit is returned to Prime not later than thirty (30) days after the
expiration of the warranty period. Warranty is void if damage is due to
neglect, misuse, alteration, modification, improper installation, or repair by
other than Prime. This warranty is in lieu of all other warranties express or
implied. Some states do not allow limitations on how long an implied warranty
lasts or permit the exclusion or limitation of incidental or consequential
damages, so the above limitations may not apply to you.
It is our experience that a product that fails prematurely due to a
manufacturing defect in materials or workmanship, will generally do so very
early in the product’s life cycle, often the first or second time the product is
used. Products that are returned for warranty inspection after months or
years of continuous reliable service are usually the result of normal wear and
tear, which is not considered a defect in materials or workmanship and
therefore is not covered by the warranty.
This warranty gives you specific rights, and you may also have other rights
which vary from state to state. If unit should prove defective within the
warranty period, return within the time period set forth above prepaid with the
original purchase receipt to:
Prime Wire & Cable, Inc.
ATTN: Timer Warranty
280 Machlin Court
City of Industry, CA 91789
WARNING
To avoid fire, shock, or death, turn off power at circuit
breaker or fuse box before wiring.
Installation by a licensed electrician to local, state and national
codes is recommended. For INDOOR use only. Do not use to
control appliances. Do not attempt to disassemble this timer.
Do not exceed electrical ratings.
AVERTISSEMENT
Afin d’éviter les risques d’incendie, de choc électrique
ou de décès, coupez l’alimentation électrique depuis le
panneau de disjoncteurs ou de fusibles avant d’effectuer
le câblage.
Nous vous recommandons de faire appel à un électricien
agréé afin qu’il procède à une installation conforme aux
codes municipaux, provinciaux et nationaux. Pour un usage à
l’INTÉRIEUR seulement. N’utilisez pas cet article pour
commander des électroménagers. Ne tentez pas de démonter
cette minuterie. Ne dépassez pas les capacités électriques.
6. SYSTEM ON/OFF
Locate the “SYSTEM” switch.
Sliding the switch to “OFF” will turn
the entire device off and the timer
will no longer operate the attached
devices. NOTE: The clock and all
program settings will remain stored
while the system is OFF. This
setting is convenient for
permanently overriding all
settings and turning off power to
the attached devices.
CLR
Day Hour
Prog Min
ON
OFF
SYSTEM
Reset
6
Printed in China
Timer turns
ON/OFF at
incorrect times
or skips some
of the
programmed
times.
The attached
device turns
off immediately
after being
turned on.
LCD screen is
blank.
LCD screen is
on but
attached
device is off.
Programmed
event(s) are
incorrect.
The timer is wired
incorrectly.
The included
rechargeable
battery has lost its
charge.
The light or
attached device
itself may be
switched OFF.
Press ON/OFF to review
the settings and revise
them as necessary. See
OPERATING
INSTRUCTIONS.
Disconnect wires,
remove timer, re-install
per the instruction
manual. If problem
persists, contact
certified electrician.
Battery will
automatically recharge
after installation.
Make sure the light or
attached device is
switched ON and
plugged in.
TROUBLESHOOTING
PROBLEM POSSIBLE
CAUSE
CORRECTIVE
ACTION
Display Reads Override Setting
OFF/MAN Attached devices are OFF and will
(manual) remain off*
ON/MAN Attached devices are ON and will
(manual) remain on*
OFF/AUTO Attached devices are OFF temporarily,
(automatic) but the next programmed event will resume.
ON/AUTO Attached devices are ON temporarily,
(automatic) but the next programmed event will resume.
* Programmed Events will no longer function
as set. They are being manually overridden.
O
N/AUTO
5
deletion and advance to the next event. NOTE: When
deleting an event, be sure to delete both the ON and
OFF settings for that event. NOTE: To clear any
programming entered in error in Steps C or D above,
press the “CLR” button. To recall what was just cleared,
press the “CLR” button a second time.
e. To end Reviewing, Changing & Deleting of Events, wait
about 6 seconds and any changes will be automatically
saved, or press any of the 3 unmarked buttons to
save your settings.
FCC REGULATORY STATEMENT
WARNING: Changes or modifications to this unit not expressly approved by
the party responsible for compliance could void the user authority to
operate the equipment.
Notes: This equipment has been tested and found to comply with the limits
for a Class B digital device, pursuant to Part 15 of the FCC Rules. These
limits are designed to provide reasonable protection against harmful
interference in a residential installation. This device complies with Part 15 of
the FCC Rules. Operation is subject to the following two conditions: (1) This
device may not cause harmful interference, and (2) this device must accept
any interference received, including interference that may cause undesired
operation. If this equipment does cause harmful interference to radio or
television reception, which can be determined by turning the equipment off
and on, the user is encouraged to try to correct the interference by one or
more of the following measures:
1. Reorient or relocate the receiving antenna.
2. Increase the separation between the equipment and receiver.
3. Connect the equipment into an outlet on a circuit different from that to
which the receiver is connected.
4. Consult the dealer or an experienced radio/TV technician for help.
A
/