Page is loading ...

WP-75XX Series
Bezel Free All-in-One Modular Wall-Mount POS System
User Manual
Ver 2.1_2013/07/26
Before installing and operating the unit, please read this
user manual thoroughly and retain for reference.

How to Use This Manual
This manual contains information to set up and use the WP-75XX. In addition, instructions are included for
added hardware, software, upgrades, and optional items.
Chapter 1 An introduction to what you find in the box and an overview of product specifications,
appearance, and interface.
Chapter 2 Detailed installation information for the base unit and upgrades, including the HDD, and
main memory.
Chapter 3 Mounting procedures for optional devices, such as MSR, Fingerprint, I-Button, IC Card, WiFi,
Bluetooth, RFID, scanner, rear mount VFD, and swing arm kit.
Chapter 4 PEB-973J and PEB-973L main board diagrams, locations of jumpers, and connectors.
Chapter 5 Installation instructions for the Intel chip set driver, video driver, touch screen tools, audio,
LAN, RFID, Fingerprint, IC Card, system and OPOS drivers.
WARNING! Text set off in this manner indicates that failure to follow directions could result
in bodily harm or loss of life.
CAUTION: Text set off in this manner indicates that failure to follow directions could result
in damage to equipment or loss of information.
NOTE: Text set off in this manner provides important supplemental information.

Federal Communications Commission (FCC) Notice
This equipment has been tested and found to comply with the limits for a Class A digital device, pursuant
to Part 15 of the FCC Rules. These limits are designed to provide reasonable protection against harmful
interference in a residential installation.
This equipment generates, uses, and can radiate radio frequency energy and, if not installed and used in
accordance with the instructions, may cause harmful interference to radio communications. However, there
is no guarantee that interference will not occur in a particular installation. If this equipment does cause
harmful interference to radio or television reception, which can be determined by turning the equipment off
and on, the user is encouraged to try to correct the interference by one or more of the following measures:
Reorient or relocate the receiving antenna.
Increase the separation between the equipment and the receiver.
Connect the equipment to an outlet on a circuit different from that to which the receiver is
connected.
Consult the dealer or an experienced radio/TV technician for help.
NOTE: Shielded interconnect cables and shielded AC power cables must be employed
with this equipment to insure compliance with pertinent RF emission limits
governing this device. Changes or modifications not expressly approved by the
system’s manufacturer could void the user’s authority to operate the equipment.
This device complies with Part 15 of the FCC Rules. Operation is subject to the following two conditions:
1. This device may not cause harmful interference.
2. This device must accept any interference received, including interference that may cause undesired
operation.

Copyright
The information in this guide is subject to change without prior notice.
The manufacturer shall not be liable for technical or editorial errors or omissions contained herein, nor for
incidental or consequential damages resulting from the furnishing, performance, or use of this material.
This manual contains information protected by copyright. No part of this manual may be photocopied or
reproduced in any form without prior written consent from the manufacturer.
The software described in this guide is furnished under a license agreement or nondisclosure agreement.
The software may be used or copied only in accordance with the terms of the agreement.
Product names mentioned herein may be trademarks and/or registered trademarks of their respective
companies.
© 2010 All rights reserved.
First Edition May 2010

Precautions
1. Please read these safety instructions carefully.
2. Keep this User Manual for later reference.
3. Disconnect this equipment from the AC outlet before cleaning. Do not use liquid or spray detergent
for cleaning. Use only a moistened sheet or cloth.
4. For pluggable equipment, the socket outlet should be installed near the equipment and should be
easily accessible.
5. Avoid humidity and moisture.
6. Install equipment on a stable surface.
7. Do not leave this equipment running in an enclosed or non-air-circulated environment, nor store in
temperatures above 60°C. Such conditions may damage the equipment.
8. Ventilation openings on the unit are for air circulation and protect the equipment from overheating.
DO NOT COVER THE OPENINGS.
9. Check the voltage of the power source before connecting the equipment to the power outlet.
10. Place the power cord so that it will not be stepped on. Do not place anything over the power cord.
The power cord must be rated for the product and for the voltage and current marked on the
product’s electrical ratings label. The voltage and current rating of the cord should be greater than
the voltage and current rating marked on the product.
11. All cautions and warnings on the equipment should be noted.
12. If the equipment is not used for a long time, disconnect the equipment from the power outlet to
avoid damage.
13. Never allow any liquid into ventilation openings. This could cause fire or electrical shock.
14. Never open the equipment. For safety reasons, qualified service personnel should only open the
equipment.
15. If one of the following situations may arise, get the equipment checked by qualified service
personnel:
a. The power cord or plug is damaged.
b. Liquid has penetrated the equipment.
c. The equipment has been exposed to moisture.
d. The equipment does not work well or you cannot get it work according to the user manual.
e. The equipment has been dropped and damaged.
f. The equipment has obvious signs of damage.
WARNING! Not intended for outdoor use.
CAUTION: Danger of explosion if battery is incorrectly replaced. Replace only with same
type, and discard used batteries according to manufacturer's instructions.

Contents
How to Use This Manual
Federal Communications Commission (FCC) Notice
Copyright
Precautions
Chapter 1 Introduction .................................................................................................. 1
Features ............................................................................................................................................. 1
Specifications ...................................................................................................................................... 1
Package Contents ............................................................................................................................... 3
Base System ....................................................................................................................................... 4
Expandable Main Display ..................................................................................................................... 5
Convertible Pole-Type 2nd Display (optional) ......................................................................................... 6
Dimensions ......................................................................................................................................... 7
Connector Panel .................................................................................................................................. 8
Chapter 2 Standard Hardware and Upgrades ............................................................. 10
Precautions ...................................................................................................................................... 10
Opening System Box ......................................................................................................................... 11
Clearing CMOS .................................................................................................................................. 14
Memory Installation........................................................................................................................... 15
Removing and Replacing the SATA Hard Disk ...................................................................................... 18
Chapter 3 Optional Components and Peripherals ....................................................... 20
MSR/Fingerprint/I-Button/IC Card Module Installation .......................................................................... 20
Rear Mount VFD Installation .............................................................................................................. 22
Pole Mount 2
nd
Display Installation...................................................................................................... 24
Cash Drawer Installation .................................................................................................................... 26
Swing Arm Kit Installation .................................................................................................................. 27
Chapter 4 Main Board Configuration ........................................................................... 29
Jumper and Connector Locations of PEB-973J ..................................................................................... 29
Jumper Settings of PEB-973J.............................................................................................................. 31
Jumper and Connector Locations of PEB-973L ..................................................................................... 34
Jumper Settings of PEB-973L ............................................................................................................. 37
Chapter 5 Software Setup ........................................................................................... 40
Pre-Installation Requirements ............................................................................................................ 40
Intel Chipset Driver Installation .......................................................................................................... 42
Intel Graphics Driver Installation ........................................................................................................ 43
ELO Touch Screen Driver Installation .................................................................................................. 44

Abon Touch Screen Driver Installation ................................................................................................ 46
eGalax Touch Screen Driver Installation .............................................................................................. 48
Audio Driver Installation .................................................................................................................... 50
Ethernet Driver Installation for Windows XP ........................................................................................ 51
Ethernet Driver Installation for Windows 7 .......................................................................................... 51
Wireless LAN Driver Installation (optional) ........................................................................................... 52
Rear Mount VFD USB-to-Serial Driver Installation (optional) .................................................................. 54
RFID Driver Installation (optional) ...................................................................................................... 55
MSR Driver Installation (optional) ....................................................................................................... 56
Fingerprint Reader Driver Installation (optional)................................................................................... 57
IC Card Reader Driver Installation (optional) ....................................................................................... 59
System Driver Installation .................................................................................................................. 60
OPOS CCO Driver Installation ............................................................................................................. 61
OPOS Driver Installation .................................................................................................................... 63
Appendix A. Sample C++ Cash Drawer Code for Windows .................................................................... 64
Appendix B. Sample VB.NET Cash Drawer Code for Windows ................................................................ 66
Appendix C. Sample VB6.0 Cash Drawer Code for Windows .................................................................. 68

1
Chapter 1 Introduction
Features
15” TFT LCD with Bezel Free Resistive or P-CAP touch(optional)
Fanless operation with Intel
®
Luna Pier D525 1.8GHz, Intel
®
Cedar Trail Processor D2550 1.86 GHz
or Intel
®
IVY Bridge Series Processor
Support High Graphic Performance Direct 10.1, OpenGL 3.0 with Lower Power Consumption
Aluminum Die-casting and Plastic Housing
System Memory up to 4GB DDRIII SDRAM for WP-75XX-XX10/XX40 series, up to 8GB DDRIII
SDRAM for WP-75XX-XX20/XX30/XX50/XX60 series
Integrated stereo 2W+2W syste speaker
3 Mounting Options Available
Support 12V and 24V powered USB Ports for WP-75XX-XX10/XX20/XX30 series
6 x COM, 10 x USB(11 x USB for WP-75XX-XX30/60 series), 1 x HDMI, 1 x Gigabit LAN, 1 x VGA
and 1 x Half Size SSD Module
Flexible options: MSR, I-Button, Fingerprint, RFID and IC Card Reader
Support 12V/24V Selectable Cash Drawer Ports (via External Switch) except WP-75XX-XX40/50
series
RoHS compliant
Specifications
System Configuration
WP-75XX-XX10/40
WP-75XX-XX20/50
WP-75XX-XX30/60
CPU
Intel
®
Cedar Trail
Processor D2550
1.86GHz
Intel
®
Luna Pier D525
1.8GHz
Intel
®
IVY Bridge
Processor Celeron / i3 /
i5 / i7
System Chipset
Intel D2550 with NM10
Intel D525 with ICH8M
Intel
®
QM77 (IVY Bridge)
System Memory
Supports maximum 1 x
4GB DDRIII SDRAM
Supports maximum 2 x
4GB DDRIII SDRAM for
Supports maximum 2 x
4GB DDRIII SDRAM
Video Memory
Supports Intel DVMT technology
SSD
Supports 1 x Half size SSD module
HDD
1 x internal 2.5” SATA HDD bay
Power Supply
150W 12Vdc power
adapter for WP-75XX-
XX10 max. 150W
60W 12Vdc power
adapter for WP-75XX-
XX40 max. 60W
150W 12Vdc power
adapter for WP-75XX-
XX20 max. 150W
60W 12Vdc power
adapter for WP-75XX-
XX50 max. 60W
120W 19Vdc power
adapter for WP-75XX-
XX30 max. 120W
90W 19Vdc power
adapter for WP-75XX-
XX60 max. 90W
OS Support
Windows
®
XP Pro Embedded / WEPOS
®
/ Windows
®
POS Ready 2009 /
Windows
®
7 Pro Embedded / Linux
®

2
LCD Touch Panel
Resolution Size
15” TFT LCD / 1280 x 1024
Brightness
250cd/m
2
Touch Screen Type
Bezel free ELO resistive touch(Default)
Bezel free P-CAP touch(Option)
I/O Ports
WP-75XX-
XX10/20
WP-75XX-XX40
WP-75XX-XX30
WP-75XX-XX60
USB Ports
6 x External:
4 normal,
1 x 12V 1.5A
power USB,
1 X 24V 2.5A
power USB
4 x Internal USB
(for Fingerprint,
IC card reader)
6 x External:
6 normal
4 x Internal USB
(for Fingerprint,
IC card reader)
6 x External:
2 x USB2.0,
2 x USB3.0,
1 x 12V 1.5A
power USB,
1 X 24V 2.5A
power USB
5 x Internal USB
(for Fingerprint,
IC card reader) (3
x reserve)
6 x external:
4 x USB2.0,
2 x USB3.0
5 x Internal USB
(for Fingerprint,
IC card reader) (3
x reserve)
Serial Ports
3 x External: COM1, COM2 (RS232 with RJ-45 CON.), COM5 (RS232 / RS422 /
RS485 with RJ-45 CON.)
3 x Internal : COM3 (T/S) ,COM4 (VFD), COM6 (reserve)
HDMI Port
Support VGA port & Support HDMI port except WP-75XX-XX20
Ethernel Port
1 x RJ-45 Gigabit Ethernet(10/100/1000)
Audio
1 x Line out(Integrated stereo 2W+2W speaker)
Cash drawer
RJ-11(12V(default)/24V, 1 connector control 2 cash drawer)
Mechanics
Stand base type
Wall mount type
Dimensions
211(D) x 365(W) x 326(H) mm
59(D) x 365(W) x 279(H) mm
Net Gross Weight
6 Kg
4.5 Kg
Construction
Aluminum Die-casting and plastic housing
Housing Color
Black
Environment
Operating Temperature
0 °C ~ 40 °C
IP Certification
IP65 sealed front panel with touch screen for WP-7550-XXXXW
EMI/Safety
CE, FCC, RoHS

3
Package Contents
POS System
AC Power Cord
Utility and Main
Board Chipset
Driver CD
Wall Mount
Swing Arm Kit
(optional)
Options
Magnetic Stripe Reader (MSR) Module: triple track
2-in-1 Module (Magnetic Stripe Reader + Fingerprint Reader)
2-in-1 Module (Magnetic Stripe Reader + I-Button Reader)
2-in-1 Module (Magnetic Stripe Reader + IC Card Reader)
2-in-1 Module (Magnetic Stripe Reader + RFID)
3-in-1 Module (Magnetic Stripe Reader + I-Button Reader + IC card reader)
VFD Customer Display: 9 mm height, 2 lines 20 characters each (rear mount type)
Wall Mount Swing Arm Kit
Stand Base:Counter Top Base, adjustable View Angle
Pole mount:Swing-arm mount, adjustable angle VESA

4
Base System
Before you begin, take a few moments to become familiar with the WP-75XX.
15” Bezel Free Touch Screen
Base
Stand Base
Option Parts:
Color & Logo Customizable

5
Expandable Main Display
The four sides of the main display are specially designed for expandable functions and connect with one of
the available internal USB ports or PS/2 for operation. Optimized for simple installation, these interfaces do
not require any voltage setting adjustments.
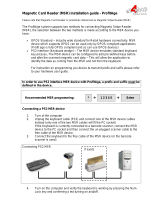
RFID module (USB interface)
MSR (PS/2 interface)
I-Button (PS/2 interface)
Fingerprint (Fingerprint for USB interface)
IC Card Reader (IC Card Reader for USB interface)
MSR+I-Button (PS/2 interface)
MSR+Fingerprint (MSR for PS/2 interface, Fingerprint for USB interface)
MSR+ IC Card Reader (MSR for PS/2 interface, IC Card Reader for USB interface)
MSR+ RFID (MSR for PS/2 interface, RFID for USB interface)
MSR+I-Button + IC Card Reader (MSR and +I-Button for PS/2 interface, IC Card Reader for USB
interface)
NOTE: The Magnetic Stripe Reader module can only be installed to the right side of the
front panel.
2.5” HDD
VFD(Optional)
MSR only
MSR+I-Buttom
MSR+Fingerprint
Single MSR

6
Convertible Pole-Type 2nd Display (optional)
The pole-type 2nd display is for use with the POS system to display purchase prices and change amounts
to customers. It is also capable of displaying advertising messages and announcements.
Five types of pole mount display choices are available: a 8.9” LCD monitor, a 10.1” LCD monitor, a 12” LCD
monitor, a 15” LCD monitor, and a 9 mm high, 2 lines with 20 characters each VFD.
The pole mount is located at the rear of the base and connects with the 2nd display port for operation.
Whether installing a VFD, 8.9” LCD, 10.1” LCD, 12” LCD or 15” LCD, there is no need to change any
settings on the main board or I/O board.
Single Pole 2
nd
display choices:
• 8.9” LCD
• 12” LCD
• 15” LCD(shown)
• 9 mm VFD

7
Dimensions
(Unit: mm)

8
Connector Panel
The WP-75XX's primary connector panel is located at the rear.
For WP-75XX-XX10
For WP-75XX-XX20
12V output
LAN
VGA
LPT
Line-Out
12V POWER USB
24V POWER USB
12 VDC IN
Power Button
4 x USB
Cash Drawer
COM1/2/5 (RI/5V/12V)
12V/24V Cash
Drawer Switch
12V output
LAN
VGA
LPT
Line-Out
12V POWER USB
24V POWER USB
HDMI
12 VDC IN
Power Button
12V/24V Cash
Drawer Switch
COM1/2/5 (RI/5V/12V)
4 x USB
Cash Drawer

9
24V POWER USB
12V output
LAN
VGA
LPT
Line-Out
HDMI
12 VDC IN
Power Button
COM1/2/5 (RI/5V/12V)
4 x USB
Cash Drawer
12V POWER USB
2 x USB
12V output
LAN
VGA
LPT
Line-Out
HDMI
12 VDC IN
Power Button
COM1/2/5 (RI/5V/12V)
4 x USB
Cash Drawer
For WP-75XX-XX30
For WP-75XX-XX40
For WP-75XX-XX60
12V/24V Cash
Drawer Switch
12 VDC IN
HDMI
LAN
Cash Drawer
Line-Out
12V output
4 x USB
LPT
VGA
12V/24V Cash
Drawer Switch
COM1/2/5 (RI/5V/12V)
2 x USB
Power Button

10
Chapter 2 Standard Hardware and Upgrades
Precautions
Before performing hardware changes, be sure to carefully read all of the applicable instructions, cautions,
and warnings in this guide.
WARNING! To reduce the risk of personal injury from electrical shock, hot surfaces, or fire:
Disconnect the power cord from the wall outlet and allow the internal system
components to cool before touching.
Do not plug telecommunications or telephone connectors into the network
interface controller receptacles.
Do not disable the power cord grounding plug. The grounding plug is an
important safety feature.
Plug the power cord in a grounded (earthed) outlet that is easily accessible at all
times.
CAUTION: Static electricity can damage the electrical components of the computer and/or
optional equipment. Before beginning these procedures, ensure that you are
discharged of static electricity by briefly touching a grounded metal object.
When the computer is plugged into an AC power source, voltage is always
applied to the main board. You must disconnect the power cord from the power
source before opening the unit to prevent damage to internal components.

11
Opening System Box
CAUTION: To prevent loss of work and damage to the system or drive:
If you are inserting or removing a drive, shut down the operating system
properly, turn off the system, and unplug the power cord. Do not remove a drive
while the system is on or in standby mode.
Before handling a drive, ensure that you are discharged of static electricity. While
handling a drive, avoid touching the connector.
1. Turn off the system power properly through the operating system, then turn off any external
devices.
2. Disconnect the power cord from the power outlet and disconnect any external devices.
3. Remove two thumb screws indicated at the rear of the main LCD display, and then remove IO cover.
4. Unplug all cables from the IO ports of the POS system.
5. Unscrew two screws that attach the monitor to the hinge as shown below to remove it. Next, slide
main LCD display upward slowly from hing and remove it.

12
6. For easier access place the main LCD display upside down, then Remove four screws and detach
the right side cover and left side cover.
WARNING! To avoid scratching the panel while dismantling the system, first place a piece of
cloth or cushion on your work surface.
7. Remove a screw and pull the mylar stuck on the HDD to remove HDD.
8. Remove logo indicated on the back of main LCD display.

13
9. Unscrew eight screws on the back cover of main LCD display as shown below to remove it.
/