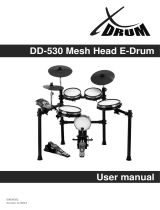
Simmons SD7PK User manual

Category
Music drums
Type
User manual

Simmons SD7PK is a digital drum kit that offers a wide range of features for both beginners and experienced drummers. With its 7 drum pads, 3 cymbal pads, and a hi-hat control pedal, the SD7PK provides a realistic and responsive playing experience. The kit includes 10 preset drum kits, 108 drum voices, and 10 songs, allowing you to create a variety of different musical styles. Additionally, the SD7PK has a built-in metronome, an MP3/CD player input, and a USB port for connecting to a computer.

Simmons SD7PK is a digital drum kit that offers a wide range of features for both beginners and experienced drummers. With its 7 drum pads, 3 cymbal pads, and a hi-hat control pedal, the SD7PK provides a realistic and responsive playing experience. The kit includes 10 preset drum kits, 108 drum voices, and 10 songs, allowing you to create a variety of different musical styles. Additionally, the SD7PK has a built-in metronome, an MP3/CD player input, and a USB port for connecting to a computer.

Electronic Drum Kit
user manual
The First Name in Electronic Drums.
www.simmonsdrums.net
SD7PK
FCC Statements
1. Caution: Changes or modifications to this unit not expressly approved by the party responsible for compliance could void
the user’s authority to operate the equipment.
2. Note: This equipment has been tested and found to comply with the limits for a Class B digital device, pursuant to Part 15 of the FCC Rules.
These limits are designed to provide reasonable protection against harmful interference in a residential installation. This equipment generates,
uses, and can radiate radio frequency energy and, if not installed and used in accordance with the instructions, may cause harmful interference
to radio communications. However, there is no guarantee that interference will not occur in a particular installation. If this equipment does cause harmful
interference to radio or television reception, which can be determined by turning the equipment off and on, the user is encouraged to
try to correct the interference by one or more of the following measures:
•Reorientorrelocatethereceivingantenna.
•Increasetheseparationbetweentheequipmentandreceiver.
•Connecttheequipmentintoanoutletonadifferentcircuit.
•Consultanexperiencedradio/TVtechnicianforhelp.
1
www.simmonsdrums.net
The First Name in Electronic Drums.
… on your purchase of Simmons’ SD7PK Electronic Drum Kit. To get the most enjoyment from
this kit, we recommend that you skim through this manual at least once, then refer back to it
to learn more about specific functions.
Location
•Toavoiddeformation,discoloration,ormoreseriousdamage,donotexposetheunitto
direct sunlight, high temperature sources, or excessive humidity.
Power Supply
•TurnthepowerswitchOFFwhentheSD7PKisnotinuse.
•TheACadaptershouldbeunpluggedfromtheACoutletiftheSD7PKisnottobeusedfor
an extended period of time.
•AvoidpluggingtheACadapterintoanACoutletthatisalsopoweringhigh-consumption
appliancessuchaselectricheatersortelevisions.Alsoavoidusingmultiplugadapterssince
these can reduce sound quality, cause operation errors and result in possible damage.
•Toavoiddamage,turnOFFtheSD7PK’spowerswitchandallrelateddevicespriorto
connecting or disconnecting cables.
Handling and Transport
•Neverapplyexcessiveforcetocontrols,connectors,andotherparts.
•Unplugcablesbygrippingtheplugrmly.Donotpullonthecable.
•Disconnectallcablesbeforemovingthemodule.
•Physicalshockscausedbydropping,bumping,orplacingheavyobjectsonthemodule
can result in scratches and more serious damage.
Cleaning
•Cleanthemodulewithadry,softcloth.
•Aslightlydampclothmaybeusedtoremovestubborngrimeanddirt.
•Neverusecleanerssuchasalcoholorthinner.
•Toavoiddiscoloration,donotplacevinylobjectsontopofmodule.
Electrical Interference
•Themodulecontainsdigitalcircuitryandmaycauseinterferenceifplacedtoocloseto
radio or television receivers. If this occurs, move the SD7PK further away from the affected
equipment.
Service and Modification
•Therearenouserserviceablepartsinthedrummodule.
•Donotattempttoopenthedrummoduleormakeanychangeinthecircuitsorpartsofthe
unit. This would void the warranty.
Congratulations!
Taking Care of your digital
drum kit
2
SD7PK digital drum kit User manual
The First Name in Electronic Drums.
SD7PK Setup
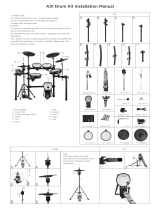
Set up your SD7PK kit following the included assembly instruction sheet.
3
www.simmonsdrums.net
The First Name in Electronic Drums.
Table of Contents
Panels 4
Top Panel 4
Rear Panel 5
Side Panel 5
Connections 6
Pads and Pedals 6
AudioEquipment 7
Headphones 7
MP3/CDPlayer 7
Power Supply 7
Power Switch 7
UsingtheSD7PKPads 8
Playing the Pads 8
Metronome 8
Kit Mode 9
Selecting a Drum Kit 9
Global Reverb 9
VoiceMode 10
SelectingtheDrumVoice 10
AdjustingPadLevel 11
AdjustingPadPan 11
AdjustingPadTuning 11
SavingUserKits 11
UtilityMenu 12
Pad Sensitivity (Gain) 12
Rim Sensitivity 12
Crosstalk 12
Curve 13
Splash Sensitivity 13
LocalMode 13
Saving Trigger Settings 13
Restoring the Factory Preset 13
Song Mode 14
Selecting a Song 14
ListeningtoaSong 14
Muting the Drum Part 14
AccompanimentVolume 15
DrumVolume 15
Song Source 15
Song Tempo 15
MIDIandUSB 16
MIDI Connection 16
USBConnection 16
LocalMode 16
MIDI Channels 16
VoiceList 18
DrumKitList 20
SongList 20
GeneralMIDIVoiceList 21
PercussionSetList 22
MIDI Implementation Chart 24
4
SD7PK digital drum kit User manual
The First Name in Electronic Drums.
Panels
Master volume knob
Controls the volume of phone and line outputs.
1
12
[+] button, [-] button
Changes values (kit number, voice number, song number,
etc.) when editing.
3
[TEMPO+] button, [TEMPO-] button
Changes current tempo.
2
Pad select buttons and indicators
InKitMode,thebuttonscanplaythepadvoices.InVoice
Mode, they select the pad to be edited and the indicators
show the current selected pad.
In Song Mode, the indicators will display which pads are
being played by the drum track.
4
[CLICK] button and indicator
Turns the metronome on or off and selects the metronome
sound (click or voice).
5
[DRUM OFF] button and indicator
Mutes the drum part of the Song.
6
[START/STOP] button
Starts and stops the selected Song.
[SONG] button
Enters or switches Song menu pages.
7
9
[VOICE] button
EntersorswitchesVoicemenupages.
10
[KIT] button
Enters or switches Kit menu pages.
8
3-digit LED
ThisLEDisthemaindisplaydeviceoftheSD7PK,whichwill
show the parameters of the current menu.
11
[UTILITY] button
EntersorswitchesUtilitymenupages.
13
[SAVE] button
This button is used to save the current kit settings in a user kit
andsavesthetriggersettingsundertheUtilitymenupages.
Top Panel
1
2
3
4
5 6 7 9 10
8
11
12
13
5
www.simmonsdrums.net
The First Name in Electronic Drums.
Rear panel
side panel
17
14
Pad input jacks
Input connections for kick,
snare, tom, cymbal pads and
Hi-Hatcontrolpedal.
Line output jacks
Stereo output connection to an
audio system or drum amplifier
such as the Simmons DA50 or
DA200S.
AUX input jack
This stereo input jack is for an
external sound source such as
an MP3 or CD player.
DC input
Connection for the DC 9V
power adapter.
15
16
21
19
18
Power switch
This switch turns the power on and off.
MIDI in and out
These ports allow communication with
other products equipped with a MIDI
interface. Please see the MIDI section
of this manual for details.
USB port
This port is used to connect to a
computer.(MIDIIn/OutviaUSB)
Phone jack
This stereo jack is used to
connect headphones.
20
14 15 16 17
18 19 20 21
6
SD7PK digital drum kit User manual
The First Name in Electronic Drums.
connections
Pads and Pedals
CAUTION!
To avoid damage, turn OFF the SD7PK’s power switch and all related devices
prior to connecting or disconnecting cables.
Usingtheprovidedcables,connecteachpadtoitscorrespondingtriggerinputjack,following
themarkingonthecables.SecureallthecablestothestandusingtheprovidedVelcrostrips.
7
www.simmonsdrums.net
The First Name in Electronic Drums.
WhenusinganampliersuchastheSimmonsDA50orDA200S,
connecttheOutputL/MONO and R jacks on the rear panel to the
input of the amplifier. For mono playback, use the L/MONO jack;
for stereo playback, connect both L/MONO and R jacks.
headphones
Anoptionalsetofstereoheadphones can beconnectedtothe
PHONES jack located on the side of the drum module.
MP3/cd player
1.ConnecttheaudiooutputofanMP3/CDplayerorotheraudio
source to the stereo AUX IN TRS jack on the rear panel.
2. The input signal is mixed with the drum signal, allowing you to
play along.
power supply
Note: Make sure the power is switched OFF when connecting
the drum module with external devices.
Connect the power adapter to the DC IN jack on the rear panel.
Power Switch
Afterconrmingthatallconnectionshavebeencompleted,rotate
the volume knob to the left (to its minimum volume level) before
switching the power on.
Setthepowerswitchtothe“ON”position.Thekitindicatorwill
light up and the display will show kit number 001.
Audio Equipment
8
SD7PK digital drum kit User manual
The First Name in Electronic Drums.
•All the drum pads and cymbal pads use a single trigger sensor for the whole pad,
except the dual zone snare pad that uses one trigger for the head and another trigger
for the rim.
•Allthe padsarevelocitysensitive.Some voicescan change soundsdependingonthe
velocity level (striking force).
•Thetriggerareaofthecymbalpads(Ride,CrashorHi-Hat)isneartheedgeofthepad.
•Similartoanacousticdrumkit,theHi-Hatsoundvariesdependingonthepositionofthe
pedal(Hi-HatControl):
•OpenHi-Hat:StriketheHi-Hatpadwithoutpressingthepedal
•HalfOpenHi-Hat:StriketheHi-Hatpadwiththepedalpressedhalf-way
•ClosedHi-Hat:StriketheHi-Hatpadwiththepedalpressedallthewaydown
•FootClose:Pressthepedalallthewaydown
•Splash:Stepfullyonthepedalandreleaseitimmediately
metronome
The SD7PK includes a Metronome feature with two types of sounds: Click (Bell sound on
therstbeat,andClicksoundontheotherbeats)orVocalCounting(“one”,“two”,“three”,
“four”,…).
Press the [CLICK] button to start the metronome with Click sound.
Press the [CLICK]buttonasecondtimetochangethemetronometoVocalCounting.
Press the [CLICK] button again to stop the metronome.
While the metronome is playing, the Beat indicator flashes at the current tempo.
Whilethemetronomeisplaying,theLEDshowsthecurrenttimesignature.
The time signature of the metronome can be changed using the [+] and [-] buttons. There are
veavailableoptions:2/4,3/4,4/4,5/4and6/8.
The SD7PK returns to the previous display when the metronome is stopped.
Press the [TEMPO +] or [T -]buttonstochangethe tempo (30—280). The LEDshows
the current tempo and returns to the previous display after about 2 seconds if there is no
operation of the Tempo [+] and [-] buttons.
The volume of the metronome can be adjusted by holding down the [CLICK] button
and pressing the [+] or [-] buttons. The LED shows “Cxx” (xx = metronome volume:
0 16), and returns to the previous display about 2 seconds after releasing the
[CLICK] button. The metronome volume resets to its default value when turning
off the SD7PK.
using the SD7PK pads
Playing the pads
9
www.simmonsdrums.net
The First Name in Electronic Drums.
Selecting a drum kit
Kit Mode
In the Kit Number page, the 3-digit LED shows the current
kitnumber.Usethe[+] and [-] buttons to select any kit (1 50,
looped) as the current kit.
TheSD7PKincludes20factorypresetkits(1—20)and30Userkits
(21—50).SeeKitListonpage20.
Note: In Kit Mode, you can use the Pad Select buttons to
play the voices associated with the pads of the currently
selected Kit.
If the SD7PK is not yet in Kit Mode, press the [KIT] button to enter
the Kit Mode. The Kit indicator will light up.
In the Kit Mode, you can select the Drum or Percussion Kit to play.
You can also turn on or off the Reverb effect.
Global reverb
When the SD7PK is in the Kit Number page, press the [KIT]
button again to access the Global Reverb page.
In the Global Reverb page, the LED shows the current Reverb
status(“roN”forReverbOnor“roF”forReverbOff).
ItcanbeturnedOnorOffusingthe[+] or [-] buttons.
Press the [KIT] button again to return to the Kit Number page.
10
SD7PK digital drum kit User manual
The First Name in Electronic Drums.
IftheSD7PKisnotyetinVoiceMode,pressthe[VOICE] button
toentertheVoiceMenu.TheVoiceindicatorlightsup.Nowthe
[VOICE]buttonwillpagethroughtheVoiceMenu.
IntheVoiceMode,youcanselectthevoiceforeachpadand
adjust the level, pan and tuning of the pad.
selecting the drum voice
In the Voice Number page, the 3-digit LED shows the current
voicenumberfortheselectedpad.Usethe[+] and [-] buttons
to select any voice (1 300, looped) for the current pad. The
SD7PK includes 300 voices sorted by category (Kick, Snare,
Tom, Cymbal, Hi-Hat, Percussions). Each category includes a
variety of acoustic, electric and effects voices.
(SeeVoiceListonpages18-19.)
Note: The voices for the snare head and rim are set
independently. When the snare pad is selected, press
the [RIM] button to select the snare rim (or strike the rim
of the snare pad).
ThevoicesfortheHi-Hat(Open,Half,Closed,Footand
Splash) are selected together as a single voice number
(voices # 237 — 252) which will contain all variations.
Voice Mode
The current pad to be edited can be selected either by pressing its
[PAD SELECT] button, or by striking the pad itself. The Pad Select
indicator lights up to show which pad is currently selected.
Note: While editing voice number, level, pan and tuning,
you can also preview the result of the current settings
by pressing the [PAD SELECT] button to play the edited voice.
11
www.simmonsdrums.net
The First Name in Electronic Drums.
adjusting pad level
Press the [VOICE] button until the LED display shows “Lxx”.
(xx=Levelvalue:0—32).Usethe[+] and [-] buttons to adjust the
level of the current pad.
Press the [VOICE]buttonuntiltheLEDdisplayshows“Pxx”.(xx=
Panvalue:-8—+8).Usethe[+] and [-] buttons to adjust the pan
of the current pad.
Press the [VOICE] button until the LED display shows “txx”.
(xx=Tuningvalue:-8—+8).Usethe[+] and [-] buttons to adjust
the tuning of the current pad.
Make sure you save your customized kit; otherwise, your changes
will be lost when you select another kit or turn off the SD7PK.
Kits 001 — 020 are factory presets. Customized kits can be saved
inUserkits021—050.
UserkitsstorealltheVoicesettings(Voicenumber,Level,Panand
Tuning) for all the pads.
TosaveyourcustomizedkittooneoftheUserkits:
1. Press the [SAVE]button.ThekitnumberashesontheLED.
2. Use the [+] or [-] buttons to set the User kit number
(021 — 050). The kit number will still be flashing.
3. Press the [SAVE] button again. The kit number stops flashing
and the SD7PK returns to Kit Mode.
Note:TocancelthesaveoperationwhiletheLEDisashing,
press the [KIT] or [VOICE] button.
adjusting pad pan
adjusting pad tuning
saving user kits
12
SD7PK digital drum kit User manual
The First Name in Electronic Drums.
Press the [UTILITY] button to enter the Utility Mode. Now the
[UTILITY]buttonwillpagethroughtheUtilitymenu.
IntheUtilityMode,youcanadjustthetriggerparameters(gain,
crosstalk, curve) for each pad, as well as the rim sensitivity of the
snarepadandthesplashsensitivityoftheHi-Hatcontrolpedal.
Those parameters are common to all kits.
IntheTriggerGainpage,therstdigitofLEDwilldisplayletter
‘E’, which is followed by the gain value (1—16, not looped).
Greater gain will allow you to trigger a signal even if you strike a
pad lightly.
In the Rim Sensitivity page, rim sensitivity of the dual trigger snare
pad can be adjusted to balance the head-rim velocities. The
lowest digit will show the rim sensitivity level (1—8) of current pad
withletters‘rE’displayedonthersttwodigitsoftheLED.Abar
will be shown instead of the sensitivity level if rim triggering is
not supported by the currently selected pad (any other pad than
the snare).
In the Trigger Crosstalk page, the last 2 digits will show the
crosstalk value (1—16) of the current pad with a letter ‘o’ displayed
ontherstdigitoftheLED.Hittingonepadmaytriggerthesound
from another pad unintentionally. This effect can be eliminated
by setting this parameter to a higher value on the pad that
is mistriggering.
Pad sensitivity (gain)
rim sensitivity
crosstalk
Utility menu
The current pad to be adjusted can be selected either by pressing
its Pad Select button, or by striking the pad itself. The Pad Select
indicator lights up to show which pad is currently selected.
13
www.simmonsdrums.net
The First Name in Electronic Drums.
In the Splash Sensitivity page, this setting controls the sensitivity of
thefootsplash.Thedatarangesfrom-4to4with‘F’displayedon
therstdigitofLED.
splash sensitivity
local mode
saving trigger settings
After adjusting the trigger settings (gain, snare rim sensitivity,
crosstalk, curve, splash sensitivity), you can save them into
memory.WhileintheUtility Mode,pressthe[SAVE] button to
store all trigger settings.
Note:
1. If you turn off the power without saving, you will lose
the trigger setting changes you have just made.
2. These parameters affect all kits.
restoring the factory preset
Restoring the factory preset can be implemented by holding down
both [TEMPO+] and [TEMPO-] when the SD7PK is powered
up. This function will replace the current settings of the following
parameters by their default preset values:
•All user kits (including Volume, Voice, Pan, Reverb, and
Tuning setting)
•Utility parameters (including Gain, Crosstalk, Curve and
Splash sensitivity)
In the Velocity Curve page, the curve setting allows you to
control the relationship between the velocity (striking force) and
loudness (the dynamic curve). The last digit will show the curve
number (1—6) of the current pad with letters ‘CU’ displayed
onthersttwodigitsoftheLED.
curve
In Local Control page, the LED shows the local control mode.
LocalONisthedefaultfunctionmode(‘LoN’).Theinternallink
between pad triggers and the sound generator will be broken
whenselectingLocalOFF(‘LoF’).Formoredetailsregardingthe
LocalMode,pleaseseetheMIDI/USBsectionofthismanual.
Note:LocalControlModealwaysreturnstoOffwhen
powering up the SD7PK.
14
SD7PK digital drum kit User manual
The First Name in Electronic Drums.
Song Mode
Selecting a song
If the SD7PK is not yet in Song Mode, press the [SONG] button
to enter the Song Menu. Now the [SONG] button will page
through the Song Menu. The Song indicator lights up.
In the Song Mode, you can select the song number, and adjust the
volume of the song’s accompaniment and drum part. In addition,
you can select whether to use the internal songs or to control an
external sequencer.
In Song Number page, the 3-digit LED shows the current
Song number.
Usethe[+] and [-] buttons to select any Song (1 50, looped)
as the current Song. The SD7PK includes 50 factory preset Songs.
(see Song list on page 20).
Press the [START/STOP] button to start Song playback. The beat
indicator will ash at the song tempo. After count-in, the Song
will start playback from the beginning. The Song will stop when it
reaches the end. You can also stop the Song during playback by
pressing the [START/STOP] button again.
If the Song number is switched while playing, the new Song won’t
start until the end of the current bar.
During Song playback in Song menu, the Pad indicators will
show which pads the drum track is triggering. This function can
be disabled or enabled by pressing the [KICK] button while in
Song Mode.
Press [DRUM OFF] to enable or disable the drum mute function.
When [DRUM OFF]is enabled, the DRUMOFF indicator will
light up, and the drum track from the current Song will be muted.
In Song Mode, the Pad indicators will still show the pads played
by the drum track. This allows you to practice playing the drum
part with the rest of the accompaniment.
To help you play together with the Song, you can also enable
the Metronome function by pressing the [CLICK] button. (See
Metronome function for details.)
listening to a song
Muting the drum part
15
www.simmonsdrums.net
The First Name in Electronic Drums.
Insongsourceselectionpage,theLEDwillshowthecurrentselectedsongsource.
Therearetwochoices:“LoC”forlocalmachine(50internalsongs,defaultsetting)or“EtN”
forcontrollinganexternalsequencerconnectedtotheMIDIOutoftheSD7PKusingMIDI
Clock. See the MIDI section of the manual for details.
Usethe [+] and [-] to select the song source. The song will stop immediately when switching
the song’s source.
When External is selected, press [START/STOP] to start or stop the external sequencer with
correspondingMIDIreal-timemessages.Theinternalsongwillnotplayback.
Note: If external sequencer is selected as current song source, the menu pages of
song number, accompaniment volume and drum volume will be not selectable.
Press the [TEMPO+] or [TEMPO-] buttons to display the current tempo.
Use[TEMPO+] and [TEMPO-] buttons to adjust the tempo.
Press both [TEMPO+] and [TEMPO-] buttons at the same time to reset
the current tempo to its default value for the current song. (This function is not available when
external song is selected.)
If there’s no operation, SD7PK will return to the previous menu page automatically
after 2 seconds.
song source
song tempo
Accompaniment volume
drum volume
Press the [SONG]buttonuntiltheLEDdisplayshows“Axx”
(xx=accompanimentvolume,0—32).
Usethe[+] and [-] buttons to adjust the song’s accompaniment volume (all instruments except
the drum part). It will be restored to default value on the next power on.
Press the [SONG]buttonuntiltheLEDdisplayshows“dxx”
(xx=drumspartvolume,0—32).
Usethe[+] and [-] buttons to adjust the song’s drum volume. It will be restored to default
value at the next power on.
16
SD7PK digital drum kit User manual
The First Name in Electronic Drums.
TheUSBconnectorallowsyoutoconnecttheSD7PKdirectlytoyourcomputer.Itcanbe
connectedwithoutdriverinstallationundertheWindowsXP&MACOSXenvironment.The
SD7PKwillberecognizedas“USBAudiodevice”toreceiveandtransmitMIDImessages
throughasingleUSBcable.USBisusedonlyforMIDImessages(MIDIviaUSB).
Note: When the USB is connected to a computer, all MIDI messages will be
receivedandtransmittedviaUSB.
The SD7PK transmission channel is fixed to Channel 10 (Drums and Percussion channel).
The SD7PK will output MIDI codes generated by the triggers when hitting the pads or
stepping onthe Hi-Hatcontrolpedal(ProgramChange, Note On/Off, andFootControl
messages). Song playback data and metronome notes are not transmitted.
TheMIDIsystemintheSD7PKhas16receptionchannelsnumberedfrom1-16.Eachchannel
is responsible for a voice. When receiving MIDI information from an external device, the
active channel is determined by the control message. Channel 10 is reserved for the Drums.
Channels 9 and 16 can be used for additional Percussion sounds. (See Percussion Set list
pages22-23.)
Allotherchannels(1-8,11-15)canbeusedtoaccessthe128GeneralMIDIinstrumentsand
sounds included in the sound module (GM standard). These are the same instruments that are
used to create the accompaniment for the internal Song player.
FromaMIDIpointofview,theSD7PKiscomposedoftwo“devices”:
•Acontrollertransmittingdata:thepadsandHi-Hatcontrolpedal(viaaninternaltrigger
to MIDI converter).
•AsoundgeneratorreceivingMIDIdata(thesoundmodule).
Innormaloperation(LocalON,defaultmode),thosetwodevicesareconnectedtogether
internally, allowing the pads to play the voices from the sound module without any external
connection.WhensettingLocalmodetoLocalOFFmodeintheUtilitymenu,thisinternal
link is disconnected. The sound module receives MIDI messages via MIDI input only, not
from the pads. However, the pad trigger data is still sent to the MIDI Output, therefore
looping externally the MIDI Out of the SD7PK back to its MIDI In will enable the pads
toplaythevoicesfromthesoundmodule.LocalOFFmodeisintendedtobeusedwhen
boththeMIDIinputandoutput(ortheUSBport)oftheSD7PKareconnectedtoaMIDI
sequencer with Soft Thru function (which loops the MIDI data received from the MIDI output
back to the MIDI input). This prevents doubling or flanging effect when playing the pads
(caused by the sound generator receiving the same MIDI data both directly from the pads
and back through the sequencer).
MIDI IN: This terminal receives MIDI data from an external MIDI device.
MIDIOUT:ThisterminaltransmitsdatafromthisinstrumenttootherMIDIdevices.
MIDIstandsforMusicalInstrumentDigitalInterface.Thisworld-widestandardcommunication
interface enables electronic musical instruments and computers to communicate so that
data can pass between them. This exchange of information creates a system of MIDI
instruments and devices that offer far greater versatility and control than is available with
isolated instruments. Whether you interface with computers, sequencers, expanders or other
controllers, your musical horizons will be greatly enhanced.
MIDI and USB
MIDI connection
usb connection
local mode
MIDI channels
17
www.simmonsdrums.net
The First Name in Electronic Drums.
Using the SD7PK as a General MIDI sound module
Connecting an external keyboard or sequencer to the MIDI Input
allowsyoutousetheSD7PKasamulti-timbralsoundmoduletoplay
various instrument parts in addition to your drums (for instance, Piano
on Channel 1, Bass on Channel 2, Strings on Channel 3, etc).
The voices on each MIDI channel are selected using MIDI Program
Changemessages.(SeetheGeneralMIDIVoicelistpage21.)
Note: For more information on received MIDI messages,
see the MIDI implementation chart.
Using the SD7PK to control a sequencer
In Song Mode, the song source can be set to External, allowing the
SD7PK to control the playback of an external sequencer.
MIDI clock (0xF8) is sent out automatically at the current tempo,
andStartandStopReal-TimeCommands(0xFA,0xFC)willbesent
when pressing the [START/STOP] button.
1.Connect the MIDI Out of the SD7PK to the MIDI In of your
sequencer. If you are using a software sequencer on a computer,
youcansimplyconnecttheUSBportoftheSD7PKtoaUSBport
ofyourcomputerusingasingleUSBA-Bcable.
2. Setup your sequencer to respond to MIDI Clock Sync.
3. Press the [START/STOP] button to start the sequence from the
top.
4. Press the [START/STOP] button again to stop the sequence
Note: You can adjust the tempo of your sequencer using
the [TEMPO] buttons on the SD7PK.
Using a sequencer to record your SD7PK
drum performance
UsingtheMIDIIn/OutorUSBconnectionswithaMIDIsequencer
allows you to record your performance on the SD7PK pads and
play it back with the same voices.
1.Connect the MIDI Out of the SD7PK to the MIDI In of your
sequencer,andtheMIDIOutofyoursequencertotheMIDIInof
the SD7PK. If you are using a software sequencer on a computer,
youcansimplyconnecttheUSBportoftheSD7PKtoaUSBport
ofyourcomputerusingasingleUSBA-Bcable.
2. Setup the active track of your sequencer on Channel 10.
3.ActivateRECORDonyoursequencer.
4. Play the pads of your SD7PK.
5. Stop recording.
6.Locateyoursequencertothestartoftherecording.
7. Play back the recorded sequence.
8. The SD7PK will play the same voices that were used during
recording.
Notes:
1. To maintain the same voice parameters (level, pan, tuning), you
should select the same Kit for playback as the Kit that was active
when recording.
2. To capture and correctly reproduce the timing of your performance,
make sure that the Quantize function of your sequencer is
turned off.
3.If your sequencer has a Soft-Thru feature, you should set the
SD7PKto“LocalOff”modeintheUtilitymenu.Ifyoursequencer
doesnothaveaSoft-Thrufeature,youshouldleavetheSD7PKin
its“LocalOn”defaultmode.
18
SD7PK digital drum kit User manual
The First Name in Electronic Drums.
Voice List
# Name
# Name
# Name
# Name
Acoustic Bass Drum
1 StandardAcousticKick1
2 StandardAcousticKick2
3 RockAcousticKick1
4 RockAcousticKick2
5 JazzAcousticKick1
6 JazzAcousticKick2
7 26”LargeAcousticKick
8 20”FunkAcousticKick
9 20”HipHopAcousticKick
10 20”TightAcousticKick
11 24”LooseAcousticKick
12 20”SmallAcousticKick
13 22”1971Kick
14 20”DeepKick
15 ‘90’s Kick
16 Metal Kick
17 OrchestraBassDrum
18 Bass Drum Roll
Electronic Bass Drum
19 House Kick 1
20 House Kick 2
21 House Kick 3
22 TR808 Kick
23 TR909 Kick
24 Space Kick
25 Filter Kick
26 Reverse Kick
27 Techno Kick
28 VoiceKick
29 LowFiKick
30 Junkyard Kick
31 Disco Kick
32 Industrial Kick
33 Cartoon Kick
34 Simmons Kick 1
35 Simmons Kick 2
36 Simmons Kick 3
37 Simmons Kick 4
Acoustic Snare Drum
38 SnareEdgew/Rim
39 Standard Snare
40 Snare Cross Stick
41 12”Snare
42 Rock Snare 1
43 Rock Snare 1 Edge
44 Rock Snare 2
45 Small Room Snare
46 LargeRoomSnare
47 Jazz Snare 1
48 Jazz Snare Brush Edge
49 Jazz Snare Brush
50 Jazz Snare 2
51 Jazz Piccolo Snare
52 Big Band Snare
53 Deep Fusion Snare
54 Effect Snare 1
55 Effect Snare 2
56 Hip Hop Snare
57 ‘60’s Snare Edge
58 ‘60’s Snare
59 506 Snare
60 506 Snare 2
61 506LowSnare
62 506LowSnare2
63 ‘69 Snare
64 Pong Snare
65 Filter Snare
66 Wood Snare 1
67 Wood Snare 2
68 Deep Maple Snare
69 Studio Snare
70 Distant Power Snare
71 Crackless Snare
72 Gunshot Snare 1
73 Gunshot Snare 2
74 Metal Snare
75 Brush Swirl Snare
76 Brush Strike Snare
77 Brush Edge Snare
78 LightBrushSnare
79 LightLongBrushSnare
Electronic Snare Drum
80 House Snare
81 House Clap
82 House Effect Snare
83 Techno Snare
84 Dance Beat snare
85 Staccato Snare
86 TR808 Snare
87 TR909 Snare
88 Electric Snare
89 Reverse Snare
90 Junkyard Snare
91 Junkyard EFX
92 Noise Snare
93 Jing Snare
94 Guak Snare
95 Voice1
96 Voice2
97 Cartoon Punch
98 Simmons Snare 1
99 Simmons Snare 2
100 Simmons Snare 3
101 Simmons Snare 4
102 Simmons Clap
Acoustic Tom
103 OpenTom1
104 OpenTom2
105 OpenTom3
106 OpenTom4
107 OpenTom5
108 Rock Tom 1
109 Rock Tom 2
110 Rock Tom 3
111 Rock Tom 4
112 Big Tom 1
113 Big Tom 2
114 Big Tom 3
115 Big Tom 4
116 Big Tom 5
117 Power Tom 1
118 Power Tom 2
119 Power Tom 3
120 Power Tom 4
121 Funk Tom 1
122 Funk Tom 2
123 Funk Tom 3
124 Fusion Tom 1
125 Fusion Tom 2
126 Fusion Tom 3
127 ‘69 Tom 1
128 ‘69 Tom 2
129 ‘69 Tom 3
130 ‘71 Tom 1
131 ‘71 Tom 2
132 ‘71 Tom 3
133 VintageTom1
134 VintageTom2
135 VintageTom3
136 Hip Hop Tom 1
137 Hip Hop Tom 2
138 Hip Hop Tom 3
139 Hip Hop Tom 4
140 Hip Hop Tom 5
141 Hip Hop Tom 6
142 Brush Tom 1
143 Brush Tom 2
144 Brush Tom 3
145 Brush Tom 4
  • Page 1 1
  • Page 2 2
  • Page 3 3
  • Page 4 4
  • Page 5 5
  • Page 6 6
  • Page 7 7
  • Page 8 8
  • Page 9 9
  • Page 10 10
  • Page 11 11
  • Page 12 12
  • Page 13 13
  • Page 14 14
  • Page 15 15
  • Page 16 16
  • Page 17 17
  • Page 18 18
  • Page 19 19
  • Page 20 20
  • Page 21 21
  • Page 22 22
  • Page 23 23
  • Page 24 24
  • Page 25 25
  • Page 26 26
  • Page 27 27
  • Page 28 28

Simmons SD7PK User manual

Category
Music drums
Type
User manual

Simmons SD7PK is a digital drum kit that offers a wide range of features for both beginners and experienced drummers. With its 7 drum pads, 3 cymbal pads, and a hi-hat control pedal, the SD7PK provides a realistic and responsive playing experience. The kit includes 10 preset drum kits, 108 drum voices, and 10 songs, allowing you to create a variety of different musical styles. Additionally, the SD7PK has a built-in metronome, an MP3/CD player input, and a USB port for connecting to a computer.

Ask a question and I''ll find the answer in the document

Finding information in a document is now easier with AI