KSM-1000RFM

KeySonic KSM-1000RFM Datasheet

  • Hello! I am an AI chatbot trained to assist you with the KeySonic KSM-1000RFM Datasheet. I’ve already reviewed the document and can help you find the information you need or explain it in simple terms. Just ask your questions, and providing more details will help me assist you more effectively!
… touch the difference
Federal Communication Commission Interference Statement
This equipment has been tested and found to comply with the limits for a Class B digital device, pursuant to Part
15 of the FCC Rules. These limits are designed to provide reasonable protection against harmful interference in
a residential installation. This equipment generates, uses and can radiate radio frequency energy and, if not
installed and used in accordance with the instructions, may cause harmful interference to radio communications.
However, there is no guarantee that interference will not occur in a particular installation. If this equipment does
cause harmful interference to radio or television reception, which can be determined by turning the equipment
off and on, the user is encouraged to try to correct the interference by one of the following measures:
- Reorient or relocate the receiving antenna.
- Increase the separation between the equipment and receiver.
- Connect the equipment into an outlet on a circuit different from that to which the receiver is con-
nected.
- Consult the dealer or an experienced radio/TV technician for help.
FCC Caution: Any changes or modifications not expressly approved by the party responsible for compliance
could void the user's authority to operate this equipment.
This device complies with Part 15 of the FCC Rules. Operation is subject to the following two conditions: (1)
This device may not cause harmful interference, and (2) this device must accept any interference received,
including interference that may cause undesired operation.
Version 1.0 (2008/10/31) © 2008 by MaxPoint Handelsges. mbH
… touch the difference
1.2 Technical data:
Mouse buttons: 2× Mouse function keys (Life expectancy >3 million clicks)
Four ways scroll wheel (Clicking on pressure as well as up, down, left, right function)
dpi shift key (incl. LED: green = dpi / red = Battery low indication)
1× synchronisation button (for new synchronisation with the USB adapter)
Mouse sensor / Wave length: Pixart PAW3603/PAN3603 830 – 860 mm
Sensor resolution:
1600 dpi / 1200 dpi / 800 dpi; Resolution selectable via shift key on the fly
dpi indication by green LED: on / low / off - for every 10 s
Acceleration / Speed /
Scanning rate:
20 g / 0.71 m/s / 6700 fps
Transmission frequency /
Modulation process:
2.402 GHz – 2.482 GHz / GFSK (Gaussian Frequency Shift Keying)
Transmission rate / Transmis-
sion spectrum:
1 Mbps / 1 MHz
Power output: 2 dBm
Operation distance: approx. 6 m / max. 10 m (under optimal conditions)
Power supply / Battery type: +3 V
D
C
±5 % / 2× AA 1.5 V / with 2× AAA 1.5 V double operation time
Power consumption approx.: Operating: 9.3 mA
Standby: 1.21 mA (after 1 sec.)
Sleep mode: 0.68 mA (after 1 min.)
Idle mode: 0.10 mA (after 5 min.)
Temperature: Operation: 0 °C up to +40 °C
Storage: -20 °C up to +60 °C
Humidity: Operating and storage: 0 % up to 90 % rel.
Required interface: USB 2.0 (downwards compatible to version 1.1)
Scope of delivery: Mouse, USB adapter, 1 set of batteries, user manual, installation CD
Certified: CE, FCC, WEEE/RoHS
Compatibility:
Win 98SE / ME / 2000 / XP / Vista
Mac OS X from V10.2 and higher
9 Version 1.0 (2008/10/31) © 2008 by MaxPoint Handelsges. mbH
Operation Manual
Red
hurtle
Safety notice
Safety Notice
1. This product complies with IEC 60825-1, class 1
laser product.
2. Your product complies with FCC and CE rules.
3. This product has no serviceable parts. Use of
controls or adjustments of procedures other than
the user guide may result in danger.
Please DO NOT direct the laser beam at anyone’s eye.
E&OE 10
… touch the difference
Functional Introduction
DPI Switch
The brightness of LED indicator on the scrolling wheel indicates the DPI setting in use. There
are three different settings:
z Bright: 1600 DPI
z Dim: 1200 DPI
z No light: 800 DPI
The default setting is 1600 DPI. You can easily switch between DPI settings. In order to save
power, the LED display will only last for 10 seconds.
11 Version 1.0 (2008/10/31) © 2008 by MaxPoint Handelsges. mbH
Operation Manual
Red
hurtle
Installing the batteries
Step 1: Pull the battery cover backward.
Step 2: Insert the batteries as shown inside the battery compartment.
Step 3: Replace the cover.
For extra usage hours, use two AA batteries instead of two AAA batteries.
Information on disposal of old batteries (Battery Regulation)
The new Regulation obliges battery manufacturers and importers to take back, sort and dispose
all old batteries. The consumer is obliged to give back used batteries in retail stores or in munici-
pal collection points. The disposal in municipal waste is explicitly prohibited according to Battery
Regulation. You can send batteries purchased from us after consumption to the following address
via sufficient stamped mail:
MaxPoint Handelsgesellschaft mbH, Kurt-Fischer-Straße 50, D-22926 Ahrensburg
Batteries, which contain pollutants, are marked with the symbol of a crossed-out dustbin, similar
to the symbol in the illustration. The chemical
description of the pollutant is situated below the
symbol of the dustbin. “Cd” stands for Cadmium,
“Pb” for Lead, “Hg” for Mercury.
E&OE 12
… touch the difference
Setup the Connection between the Receiver and the Mouse
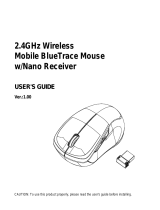
1. Plug the Nano receiver into the USB port of your computer.
2. Insert the batteries into the mouse, then follow the steps below.
3. If the mouse is not working, please put it into pairing mode.
4. Pairing: Re-plug the Nano receiver into the USB port of your computer. If the mouse does
not work after 10 seconds, then press the connect buttons on the mouse.
(Nano receiver has auto pairing function).
5. The LED indicator on mouse flashes steadily when it is in pairing mode and stops blinking
when it is successfully paired with the receiver. The mouse remains off afterwards.
6. When the battery is low, the Low Power indicator blinking.
7. Please see the included software on CD for details.
13 Version 1.0 (2008/10/31) © 2008 by MaxPoint Handelsges. mbH
Operation Manual
Red
hurtle
E&OE 14
During pairing
Manufacturer's Disclaimer Statement
The information in this document is subject to change without notice and does not represent a commitment on
the part of the vendor. No warranty or representation, either expressed or implied, is made with respect to the
quality, accuracy or fitness for any particular purpose of this document. The manufacturer reserves the right to
make changes to the content of this document and/or the products associated with it at any time without
obligation to notify any person or organization of such changes. In no event will the manufacturer be liable for
direct, indirect, special, incidental or consequential damages arising out of the use or inability to use this product
or documentation, even if advised of the possibility of such damages. This document contains materials pro-
tected by copyright. All rights are reserved. No part of this manual may be reproduced or transmitted in any
form, by any means or for any purpose without expressed written consent of its authors. Product names
appearing in this document are mentioned for identification purchases only. All trademarks, product names or
brand names appearing in this document are registered property of their respective owner.
… touch the difference
Version 1.0 (2008/10/31) © 2008 by MaxPoint Handelsges. mbH 22
/