Page is loading ...

CAR AUDIO/VIDEO SYSTEM
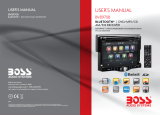
FLIP DOWN AND REMOVABLE CONTROL PANEL
4.3” Wide Color TFT Touch Screen
REMOTE CONTROL
CONTROL PANEL USB PORT AND AUX INPUT
SD/MMC CARD SLOT
BUILT-IN MW/FM-RDS TUNER
BLUETOOTH A2DP & AVRCP COMPITABLE
XM-VRSU4309BT v2
INSTALLATION MANUAL
AU X IN
US B
TA
AF
IR
/CH1~6
VOL
MU
PT Y
MI C
MO D

To ensure safety while driving
and to comply with laws,
drivers should not watch video or
operate the video device while driving.


Installation
B. Hold the left end of the control panel to slide rightwards a little and pull it towards
you to remove it .
2) Connecting all wires according ot the wiring diagram as follows:
3) Attach control panel onto chassis.
A. Make the right hollow of control panel aim at the right bulge of chassis, then push
and hold control panel rightwards; at one time, move the left end of control panel
towards chassis to make the left hollow of control panel aim at the left bulge of
chassis and then release holding .
B. Flip control panel up till hearing a click sound to attach onto chassis.
* How to clean panel connector
Frequent detachment will deteriorate panel connectors. To minimize deterioration,
periodically wipe the panel connectors with a clean/soft/dry cloth .
4) Testing it for making sure that it can work properly .
1
2
Bulge
Hollow
Bulge
Hollow
Connector

Installation
4. Installing main unit according to installation diagram:
1) Insert the chassis of the car multi-media system into the sliding metal housing.
2) Use the metal strap to fix the rear part of chassis.
* Uninstalling main unit:
1) Remove metal strap from main unit;
2) Remove plastic trim frame from main unit;
3) Insert a key plate into left and right side of main unit and draw main unit out of
sliding metal housing.
Installation diagram
HEX NUT
SPRING WASHER
PLAIN WASHER
TAPPING SCREW
DASH BOARD
METAL MOUNTING
STRAP
CONSOLE
SLIDE BRACKET
HOUSING
FIXING TAB
HEX BOLT

Electric Connection
WIRING CONNECTION
Note:
the earth connection cable (parking brake B-) must be connected in order for
pictures to be played back to the monitor. If the cable has not been correctly
connected, the message “PARKING BRAKE” appears on the monitor.
RADIO ANTENNA JACK
RCA AUDIO OUT SOCKET
RCA AUDIO OUT SOCKET
VIDEO OUTPUT SOCKET
VIDEO OUTPUT SOCKET
PINK
(B+)12V
REAR CAMERA SWITCH
(B-)PARKING BRAKE
GREY
GREY/BLACK
FRONT
RCH SPK.
VIOLET
VIOLET/BLACK
WHITE
WHITE/BLACK
GREEN
GREEN/BLACK
REAR
LCH SPK.
AUTO ANTENNA
BLUE
GROUND(B-)
MEMORY BACK-UP(B+)
IGNITION SWITCH(B+)
RED
YELLOW
BLACK
REAR
RCH SPK.
FRONT
LCH SPK.
LIGHT GREEN
FUSE
KEY GROUND(BLACK)
KEY 1(BROWN)
KEY 2(WHITE)
ISO CONNECTOR
SUBWOOFER GREY
REAR CAMERA INPUT YELLOW
White Yellow
Yellow
Red


Remote Control
Using the Remote Control
Face the remote control towards the player front face IR mark (remote control signal
receiver).
Operation angle: About 30 degree in each the direction of the front of the IR mark.
Preparing the Remote Control
1.First push to inside as the direction indicated by the arrow (See )And then
Remove the battery holder as the direction indicated by the arrow (See ).
2.Replace the battery Set a new battery property with (+)side up as illustrated
(See ).
3.Insert the battery holder. Push in the holder to the original position(See ).
1
2
3
4
Inserting the Battery
Note :
The lithium cell in the battery compartment of remote control has been secured for
transport with a . Before initial use please remove this plastic so that the
remote control is ready for operation .
plastic
Changing of the view angle on multi-angle Digital Video media.

Basic Operation
Main Menu Operation
In many modes, touch the icon
or touch the range to enter the
main menu, the message like following
as below.
ADJUSTABLE ITEMS:
ANIMATION
In RADIO mode, you can change the
playing time of animation among of
“OFF, 10S, 30S, 1M,90S, 2M, 3M and 4M ”.
Note:
Please set the playing time of the
animation to “ 10S ” for the first, when
you turn the unit on .
KEY BEEP : ON or OFF.
Disc setup as follow:
FORMAT
This player is capable of playing discs
recorded in either PAL or NTSC formats.
Make the selection based on whether
you are connecting the unit to a PAL TV
or an NTSC TV. You can also set the unit
to AUTO (auto select). The disadvantage
to auto select is that each time you turn
the unit on it checks to see what kind of
monitor is connected, which causes a
1. POWER icon
In any modes, touch the POWER icon
to switch the unit off .
2. When the unit is power on, tap to turn
off the display and the unit still work,
tap anywhere of the display to turn on
the display again.
3. SETUP icon
Touch to enter the SETTING mode,
the message will display as follow :
Touch the “ ” section on the
setting menu, touch the “ / ”
ranges to select the adjustment item,
Touch the “ ” icon to return to the
previous playback .
Setup interface 1
GENERAL
CLOCK
AUDIO
VIDEO
Setup interface 2
LANGUAGE
CALIBRATION
ILLUMINATION COLOR
General setup interface1
GENERAL
ANIMATION 2 MINUTE
KEY BEEP ON
DISC ...
RADIO ...
General setup interface2
WALLPAPER ...
BLUETOOTH ON
ABOUT ...
GENERAL
DISC
FORMAT AUTO
TV TYPE 16:9
RATING ADULT
(3)
(1)
(2)

Basic Operation
clock setup interface
CLOCK
HOUR 12
MINUTE 36
FORMAT 12HR
AM PM
RADIO
ST/MONO: touch to select stereo or mono.
LOCAL: touch to select local or distant.
REGION: touch to select radio frequency.
BT
Touch to select BT function on or off.
WALLPAPER
Touch to select wallpaper .
ABOUT
Touch to show the version information.
CLOCK SETUP
Touch the CLOCK to adjust the time and
time format.
AUDIO SETUP
Touch the audio to turn to audio quality
adjustment.
TREBLE: -7 to +7
Adjust treble level .
BASS: -7 to +7
Adjust bass level .
SUBWOOFER: touch to adjust
subwoofer on or off.
TV TYPE
This is to select the appropriate TV
aspect (4:3 or 16:9) according to the
connected TV set.
Normal/PS (For 4:3 TV)
Played back in the PAN & SCAN style.
(If connected to wide-screen TV, the
left and right edges are cut off.)
Normal/LB (For 4:3 TV)
Played back in LETTER BOX style.
(If connected to wide-screen TV, black
bands appear at top and bottom of the
screen.)
Wide (For 16:9 TV)
Select when a wide-screen TV set is
connected
RATING
Select to turn Parental Control on or off.
changes to the Parental Control
menu below .)
Key in “1234” and then turn to rating
then you can setting as follow:
KID SAFE -> G -> PG -> PG-13
-> PG R -> R ->NC-17 -> ADULT
.
small delay and some flickering of the
display image which you may find
unpleasant.
The factory default password is 1234.
(The password must be used to make
16:9
4:3 Letter Box
4:3 Pan Scan
audio setup interface1
AUDIO
BASS
TREBLE
SUBWOOFER ...
EQ USER
audio setup interface2
LOUDNESS OFF
FADER/BALANCE ...
AUDIO


Touch Screen Operation
Briefly touch “ ” to decrease frequency
by one step of channel spacing.
Automatic Search
During Radio mode, touch and hold
(for more than 2 seconds ) either “ / ”
ICONS to start search for a radio station
automatically.
To tune in strong-signal FM
Station only (LO/DX function)
Press button on the
remote control to select
mode of Local and
Long-distance traffic news.
Storing and Listening to a
Memory Station
Setting Memory
With this system, a total of 30 stations
can be stored in the memory of six
buttons. Each band stores up to six
preset stations. The stations might be
FM1, FM2, FM3, AM1(MW1), and
AM2(MW2) band.
The operation is as below :
- Store in Memory
>Select the frequency band
>Select the station
>Press and the station until it show
the frequency band your select.
- Retrieve a preset station
Touch the 1-6 ranges briefly to retrieve
a station which had been stored in the
memory in advance the chose number
is shown on display .
In radio mode, LOC
or tap icon
select LOC/DX
Selecting The Frequency Band
Touch the screen of “ BAND ” section
repeatedly to select the band , the
message will show in turn :
When an FM stereo broadcast
is hard to receive
Press ST/MO button on the remote
control to select the MONO or STEREO
mode .
Start Searching For a Station
Manual Search
During Radio mode, briefly touch “ ”
to increase frequency by one step of
channel spacing.
FM1 FM2 FM3
AM2(MW2)
AM1(MW1)
RADIO OPERATION
87.50
90.10
98.10
107.90
101.70
100.80
Listening to Radio
Touch the RADIO ICON in home menu
to enter the RADIO mode. In radio mode,
tap icon to adjust the brightness for
the display .

Touch Screen Operation
Automatic Memory Storing &
Program Scanning
3
RDS FUNCTION
ADJUSTABLE ITEMS:
REGION SET
Touch to switch the region area as:
EUROPE, USA, AMERICAN 1,
AMERICAN 2 and OIRT .
Automatic Preset Setup
In Radio Mode, touch and keep (for more
than 2 ’ S) the screen of “ ” range to
active automatic station storage.
The radio searches within the current
frequency band, e.g. FM , for the
stronger signal level until the search
cycle has finished . The six strongest
stations are then allocated to the
corresponding storage locations .
Then the station of the first storage
location is set .
Scan Function
In Radio mode, briefly touch the “ ”
section on the touch screen , the radio
briefly plays all the preset stations of the
frequency band .
In home menu, then touch the “ ”
ICON to enter the set mode, the
message in the display :
ST/MONO STEREO
LOCAL DX
REGION EUROPE
RDS REGIONAL ON
RADIO
RADIO
RDS PI MUTE
RDS TA OFF
RDS AF OFF
REG FUNCTION
at certain times some stations divide up
their programs into regional programs
with varying content .
REG ON : the message “REG ON” will
appears in the display for a few seconds .
Note :
- the display capacity is limited . It is
possible that in the double display mode
some segments of the display are deleted .
- the function REG ON prevents the
radio from switching to alternative
frequency which have a different regional
program content .
REG OFF : the program identification(PI)
of the regional program is ignored during
the search for an alternative frequency
(AF) or a program identification (PI) .
Select RDS REGIONAL to turn RDS
function on or off.
PI MUTE / PI SOUND
(only for radio operation)
f you are in an area where two program
identifications (PI) overlap, you can
select the option PI SOUND and
PI MUTE for playback of the sound.
Alternate switching of the program
identification should be avoided .
PI SOUND :
f switching nevertheless occurs the
sound of another station is heard for
less than one second .
PI SET
Touch to change between PI MUTE and
PI SOUND .
I
I

Touch Screen Operation
TA Traffic Announcement
(Priority For Traffic Information)
When the TA function is activated, the
TA symbol appears in the display .
During radio operation in one FM
frequency band the search for a traffic
announcement station is started
automatically (TA SEEK) .
If an FM station is being received which
transmits the latest traffic announce-
ments from time to time, the TP display
lights up.
When the TA function is switched on ,
the FM traffic automatically interrupt
CD operation (the word TRAFFIC
appears in the display).
The volume level is increased to the
minimum value for the transmission of
traffic announcements.
After the traffic announcements has
finished, the program that was
previously running is resumed.
Interruption of the TA Function:
If you would like to interrupt the current
traffic announcement, touch the TA
section on screen briefly . This does
switch off the TA mode .
AF FUNCTION
(Alternative Frequencies)
AF is a function that works with the help
of RDS (Radio Data System) and can
only be used with FM stations. The radio
searches in the background for the best
frequency reception of the station that
has been tuned into .
PI MUTE :
the sound of another station is
suppressed .
In Radio mode, touch the cursor button
to switch the TA function ON and OFF .
In Radio mode, touch the cursor button
to switch the AF function ON and OFF .
Touch the AF section on touch screen or
swing and keep the SEL knob in the
TA/AF direction for about 2 seconds ,
the AF function is activated. The AF
symbol appears in the display .
When the AF function has been switched
on, the radio continuously tests the
signal strength of the AF frequency .
The test interval for each AF frequency
depends on the signal strength of the
current station and varies from a few
minutes in the case of weak signals.
Whenever the new AF frequency is
stronger than the station that is currently
tuned in , the radio switched to this
frequency for a short time for a short
time and the message
“NEW FREQUENCY “ is displayed for
one or two seconds.
PTY FUNCTION
In Radio mode, touch screen of “PTY”
range to select the Program type .
PTY Selection of the program type
besides the stations name, some FM
stations also transmit information on the
type of program. This information can
be displayed by your car radio .
Examples of such types of program are :
SPORT NEWS POP WEATHER ......
With PTY function you can specifically
select stations transmitting a particular
type of program. Touch the PTY on screen
repeatedly to call up the PTY selection
menu. The message “PTY SEEK” then
appears briefly in the display .
When PTY has been selected the radio
start searching for corresponding PTY
information and stops when the PTY
information has been found, “NO PTY”
appears in the display. If the PTY
information being searched for no longer
exists, the PTY function automatically
switches to normal mode .

Touch Screen Operation
Skipping Track
During media playback, Touch the
/ section on the touch screen
to skip to next/back one track.
Rapid Forward/Rapid Reverse
During media playback, touch the
screen of “ / ” range the
speed of rapid forward/reverse
changes according to the disc as
follow:
Use the keys ( / / / on
remote control to move the enlarged
picture .
Zoom Function
Touch the button repeatedly,
the displayshow as “zoom 2,
zoom 3, zoom 4 , zoom ½,
zoom 1/3, zoom 1/4 , zoom off . ”
Pause (still picture)
Touch the “ ” section on touch
screen during playback will stop
play temporary, touch it again to
return the normal playback .
BASIC OPERATION
REPEAT AL L
REPEAT ONE REPEAT FOLDER(or DIR)
REPEAT OFF
SELECTING PLAY MODES
During the media playback, select the
“RPT, RDM ” to select your favour
play mode.
1). REPEAT FUNCTION
FOR MP3 :
Tap the icon or press the RPT button
on the remote control) to select REPEAT
mode as follows :
2). RDM(RANDOM) FUNCTION
During media playback, touch screen
of “ ” section ( press the RDM button
on on the remote control to play in random.
Each play mode the order is different .
Touch it again to cancel this function .
Note : in random mode, the button
is not available .
OSD
During playback, touch the
screen or press the DISP on the
remote control, it will display
the following as below :
Note: touch the screen or press the DISP
on the remote control again to cancel
the OSD information.
ON-SCREEN DISPLAY FUNCTION
F 001/003 T 001/001
Example for Movie or PHOTO .
When it is on, it will display the
information such as:
Search (GOTO)
For Movie/Photo:
Touch the screen as show or press the
GOTO button on remote control;
the screen will display the following
message :
Touch the to select the your
adjustment item, then select the item
your favour by touching the numberic
buttons , then touch the OK button
to confirm .
F 001/003 T 001/001

Touch Screen Operation
BT Operation
1. Pairing and Connecting
Prior to using the BT device named BC_HF_VG04 as a hands-free system
for a BT-enabled mobile phone for the first time, you must
as follows:
Press the BT hands-free icon or press
the pair button on the remote control
to turn to BT mode as right:
* During the use of the BT device named
BC_HF_VG04” as a hands-free system
for a BT- enabled mobile phone; Switch
on the BT mode of your mobile phone; then s BT device
and enter it; BT device car
BC_HF_VG04 , select it and enter it; then i
with the BT device BC_HF_VG704 of the car A/V system, Confirm it,
then the frame of the BT logo will light all the time.
* finishing pairing and ing
or the mobile phone
plays music
2. BT PHONE
In power off mode, a incoming call or call out to wake up this unit and turn to BT
hands-free mode, when the phone call ended the unit back to power off mode.
1) Make a call
(1) Dial with mobile phone directly;
(2)
a. Touch the BT PHONE icon in home menu or touch the icon during playing
to turn to BT PHONE interface,the icons function as follows:
pair and
connect them
“
elect the item to find a
When it finds the of the A/V system, the name
will be displayed t will pair and
connect
When connect , the audio of the mobile phone transfers
to the car audio system whenever a call is made or received
.
Dial with BT Phone or on touch screen;
: Tap to turn to dial interface.
: Tap to check the outgoing call.
: Tap to check the incoming call.
: Tap to check the missed call.
: Tap to turn to the contacts.
: During talk, tap to change the
sound from the phone to the unit.
: Tap to do disconnection.
: Tap to mute the sound that the
subscriber you dialed can’t hear
your vioce, tap again to return normal.
& : Same as VOL+ and VOL- or
VOL knob.

Touch Screen Operation
CONTACTS
b. Use the number icons to input your desired phone number;
* When inputting a wrong digit, use icon or < button to delete it.
c. After finishing inputting, touch icon or press button on control panel
to dial out.
2) Redial last dialed phone number
Touch icon to dial out the last dialed phone number.
3) Answer a call
During an incoming call, the incoming telephone number displays in the the BT
PHONE interface. If you want to receive it, touch icon or press button
on remote control; if you want to reject it, touch icon or press button
on remote control.
4) Ending a call
When ending a call, touch icon or use button.
5) Switch the audio between the unit and your device
During phone hands-free system of the car A/V system,
touch icon or press button on remote control to switch the audio
between the unit and your device.
6)
During phone and icon or
; use the MUTE button to mute sound
* * / # icons and buttons
they perform as * / # buttons on mobile phone.
talking using the BT
Adjusting the volume during a call
talking, use VOL knob or VOL+ and VOL-
buttons to adjust volume level .
Tap a icon such as to show as follow:
: Tap to download the contacts from
your phone.
: Tap for phone number search.
& : For page turning.

Touch Screen Operation
) using your mobile phone with BT function to audio if it
the audio of the mobile phone will change
into .
The BT device of the car A/V system support A2DP, which enables the user to
stream audio from their device.
) T BT the car A/V system so these icons on the
BT Music interface except BT Music and their buttons on control
panel or on remote control are available for audio/video playback of your mobile
phone during playback. But n for / icon,
and the function of resume playback after pausing or stopping is available only
for some mobile phone
2 When the play , is
paired and connected to the unit,
the car A/V system
3 he device of supports AVRCP,
corresponding
o fast forward/backward functions
.
Mute function
To select the Equalizer mode
To decrease the volume level
To increase the volume level
Loudness Function
Subwoofer Function
3 BT MUSIC
1 Touch BT MUSIC in home menu or pressing MODE button can pop up BT
MUSIC interface as follows:
.
)
Play/Pause the playing
To skip the next track
To skip the previous track
Tap to turn to BT PHONE mode.
(After pairing and connecting a phone
with BT function).
In BT music mode, tap icon to adjust the brightness for the display .

Touch Screen Operation
AUX IN
AUX IN
AUX IN operation
An external AV system can use the car
AV system as monitor and amplifier.
1. Use an AV cable to make the car AV
system and the external AV system
connected through the AUX IN jack on
control panel of the car AV system and
the AV Out jacks of the external AV system.
2. In radio mode, touch the screen
of “ ” ICON to enter the main menu,
touch the “ AUX ” ICON to enter the
AUX IN mode .
In AUX mode, tap icon to adjust
the brightness for the display .
MOD
VIDEO IN (yellow)
RCH IN (red)
LCH IN (white)
As the interface show, here is only the
audio output, now tap the icon,
the picture of the auxiliary input video
show on the display and tap the display
again to turn to audio mode.
Now you can watch the video from your
External video equipment such as
Digital Video players, computers, etc.
AUX INTERFACE 1
AUX INTERFACE 2
The function of the icons as follow:
Tap to mute the sound.
Tap to select EQ as the same on the
remote control.
Loudness Function.
Subwoofer Function.
Tap to adjust audio volume.
Turning pre-switching for traffic
announcements on and off.
Switching on and off an
Alternative frequency.
Tap to turn to BT PHONE mode.
(after pairing and connecting a mobile
phone with BT function).
/