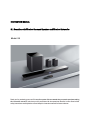
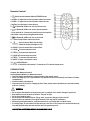
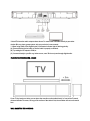
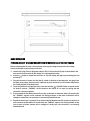
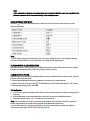
JBL S5: Elevate your home audio experience with this 5.1 sound system, featuring a soundbar with wireless surround speakers and subwoofer. Immerse yourself in cinematic surround sound with powerful audio that brings movies, music, and games to life. Enjoy the flexibility of multiple connectivity options, including Bluetooth, HDMI, optical, coaxial, and AUX inputs. Unleash the full potential of your home theater with JBL S5.
JBL S5: Elevate your home audio experience with this 5.1 sound system, featuring a soundbar with wireless surround speakers and subwoofer. Immerse yourself in cinematic surround sound with powerful audio that brings movies, music, and games to life. Enjoy the flexibility of multiple connectivity options, including Bluetooth, HDMI, optical, coaxial, and AUX inputs. Unleash the full potential of your home theater with JBL S5.


-
 1
1
-
 2
2
-
 3
3
-
 4
4
-
 5
5
-
 6
6
-
 7
7
-
 8
8
-
 9
9
-
 10
10
-
 11
11
-
 12
12
-
 13
13
-
 14
14


JBL S5: Elevate your home audio experience with this 5.1 sound system, featuring a soundbar with wireless surround speakers and subwoofer. Immerse yourself in cinematic surround sound with powerful audio that brings movies, music, and games to life. Enjoy the flexibility of multiple connectivity options, including Bluetooth, HDMI, optical, coaxial, and AUX inputs. Unleash the full potential of your home theater with JBL S5.
Ask a question and I''ll find the answer in the document
Finding information in a document is now easier with AI


