Hampton Bay G14806-WH Operating instructions
- Type
- Operating instructions
This manual is also suitable for
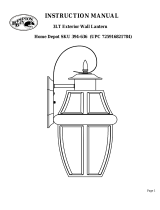
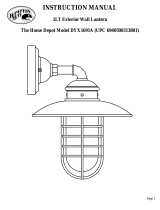
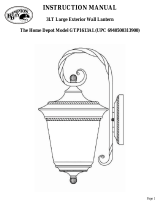
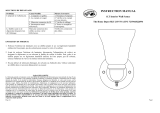
Hampton Bay G14806-WH is a one-light exterior wall lantern with beveled glass that can be used to light up outdoor areas of your home. It is made of weather-resistant material that will not fade over time. The lantern is easy to install as it only requires basic electrical knowledge and tools. It can use a 60 watt medium base incandescent light bulb (not included) or an equivalent standard base compact fluorescent light bulb (not included). It is important to note that the fixture should be installed by a qualified electrician if you have any electrical questions.
Hampton Bay G14806-WH is a one-light exterior wall lantern with beveled glass that can be used to light up outdoor areas of your home. It is made of weather-resistant material that will not fade over time. The lantern is easy to install as it only requires basic electrical knowledge and tools. It can use a 60 watt medium base incandescent light bulb (not included) or an equivalent standard base compact fluorescent light bulb (not included). It is important to note that the fixture should be installed by a qualified electrician if you have any electrical questions.


-
 1
1
-
 2
2
-
 3
3
-
 4
4
-
 5
5
-
 6
6
-
 7
7
-
 8
8
-
 9
9
-
 10
10
-
 11
11
-
 12
12


Hampton Bay G14806-WH Operating instructions
- Type
- Operating instructions
- This manual is also suitable for
Hampton Bay G14806-WH is a one-light exterior wall lantern with beveled glass that can be used to light up outdoor areas of your home. It is made of weather-resistant material that will not fade over time. The lantern is easy to install as it only requires basic electrical knowledge and tools. It can use a 60 watt medium base incandescent light bulb (not included) or an equivalent standard base compact fluorescent light bulb (not included). It is important to note that the fixture should be installed by a qualified electrician if you have any electrical questions.
Ask a question and I''ll find the answer in the document
Finding information in a document is now easier with AI
in other languages
Related papers
-
 Hampton Bay BOR1693 Installation guide
-
 Hampton Bay DYX1691A Operating instructions
-
Hampton Bay WB0318 Operating instructions
-
 Hampton Bay FXA8291A Installation guide
-
Hampton Bay WB0325 Operating instructions
-
 Hampton Bay GTP1613AL Installation guide
-
 Hampton Bay X124501 Installation guide
-
PRIVATE BRAND UNBRANDED BPL1611-WHT Installation guide
-
 Hampton Bay EFG8012A-ORB Installation guide
-
 Hampton Bay GTP1613A Installation guide


Other documents
-
Design House 517797 Installation guide
-
-
 Commercial Electric ESS1311 Installation guide
-
Triarch 25953 User manual
-
 Commercial Electric EFG1392A/BN User manual
-
 Commercial Electric DK1001-BN Operating instructions
-
 Commercial Electric GHR8991AL-NTMG Operating instructions
-
 Commercial Electric EFG1011-2-BN Operating instructions
-
-
 Commercial Electric HBV8991-BN Installation guide


