Page is loading ...

1
Congratulations
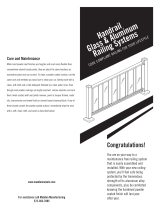
Congratulations! You are on your way to a maintenance free handrail system that is easily
assembled and installed. With your Wolf Handrail system, you’ll feel safe being protected by the
tremendous strength of its aluminum alloy components, plus be comforted knowing the hardened
powder coated finish will last year after year.
Please take a moment to read the instructions before you begin assembling your Wolf Handrail.
Introduction
Check the contents of Wolf Handrail box against the packing list adhered to the back of the Wolf
Handrail box lid. This will allow you to become familiar with the components of your new Wolf
Handrail system.
• Inspect all component parts for familiarity
• Layout recommended tools
• Before cutting any component, know its use – “measure twice and cut once.”
• THE INCLUDED WOOD FASTENERS ARE ACQ TREATED LUMBER
APPROVED.
• THE INCLUDED CONCRETE FASTENERS ARE FOR BRICK AND
CONCRETE.
Wolf Handrail shown with Wolf Posts and Base Covers sold separately.
15
www.HDEZhandrail.com (for installation Video)
Available Sizes: Typical Railing Heights:
Residential 36” W x 36” H Residential - 36” Ground level
Commercial 36” W x 42” H 2nd Floor – 42” Check with local code
Pool Gate 36” W x 48” H Commercial – 42”
Pool Gate 36” W x 54” H Pool Fencing- 48” – 54” check local codes
Color: White or Bronze
Note: Your EZ Gate can be installed onsite to swing right or left. Hinges and a Gate Latch are provided with all EZ Gates.
First, Install posts with a Rough Opening for the EZ Gate at 1” greater than the size of your gate. (E.g.: 36” gate = R.O. 37”). Next install the provided
hinges by measuring 3” down from the top cap and secure the rst hinge, then secure the second hinge 3” above the bottom rail. When installing your
gate latch measure 4” down from the top of the top rail and secure the gravity latch to the gate. Lastly, attach the latch arm on your post directly across
from the gravity latch assuring the latch arm and gravity latch will lock in place when the gate swings to its closed position.
EZ Stair & Ramp Components and Assembly
1. Review the packing slip and make yourself familiar with the items included.
2. Determine the angle of your stair run by using the angle finder provided (see pg 14), or you can
use an angle finder found at your local hardware store. A protractor also works (not included)
3. After finding the angle of your stair run, set your miter box to the desired angle then cut the
minimum off each picket to ensure correct length (preferred method). Or you can mark each
picket tip-to-tip using a pencil making sure the pickets will all be the same length and degree.
4. Cut your pickets with the desired angle either using a chop saw or hacksaw. (Note: after cutting
your first picket check for the correct angle and size, then proceed).
5. After all required pickets are cut, fasten your bottom channel to the pickets using the provided
fasteners in your EZ Handrail kit. (Note: if the angle is too steep for the fasteners provided with
the EZ Handrail kit, the EZ Pivot Mount kit includes 1” SMS fasteners. Be sure to use the 1”
fasteners on both the top and bottom of the pickets).
6. Straighten your pickets by hand, and then fasten your top snap to the open side of the pickets
using the provided fasteners.
7. After you have installed your pickets to the railing, slide your Top & Bottom Pivot Mounts to the
railing section loosely. Set your railing section into place.
8. Mark the holes needed by using a pencil on the post or wall to be installed.
9. Pre-drill the holes by using the Self Tapping screws provided.
10. Using the same fasteners that were used to pre-drill the holes, attach the Pivot Mounts to the
post, or wall.
11. After the section is in place, secure the provided fastener through the pivot mount into the top
and bottom rails eliminating any movement between posts.
(see pg 14 )
Gate Instructions
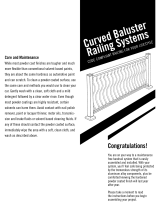
Care and Maintenance
While most powder coat nishes are tougher and much more exible than conventional solvent based paints, they are about the same hardness as
automotive paint, so they will scratch. To clean a powder coated surface, use the same care and methods you would use to clean your car. Gently wash
with a clean, soft cloth and a mild detergent followed by a clear water rinse. Even though most powder coatings are highly resistant, certain solvents
can harm them. Avoid contact with nail polish remover, paint or lacquer thinner, motor oils, transmission and brake uids or parts cleaning uids. If any
of these should contact the powder coated surface, immediately wipe the area with a soft, clean cloth, and wash as described above.
EZ Handrail 10-yr Limited Warranty – Non Transferable
1. For a time of 10 years the manufacture warrants to the original purchaser that EZ Handrail will not peel or blister as a direct result of defects
solely arising from its manufacture process.
Notice of Claims
To procure performance of Madden Manufacturing ‘s obligation under this warranty, you must simply notify Madden Manufacturing of your claim within
thirty (30) days after the occurrence of damage covered by this warranty. Your notice must be in writing, mailed by certied mail or delivered to Mad-
den Manufacturing, Warranty Service (PO Box 466 Lake Ozark, MO 65049).
This notice must (a) describe the defect claimed to exist, (b) give your name as it appears on this warranty, (c) give the purchase date and the name
/
