Page is loading ...

INSTALLATION INSTRUCTIONS
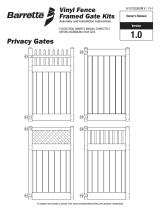
Shower Wall Kit
Read all instructions prior to installing product.
Refer to manufacturers safety instructions when operating any tools.
To register your product, please visit:
freedomproduct.com
FREEDOM-WEB

2
Line Level
Post Level
Tape Measure
Ratchet Set
Drill Gun #2, #3 Phillips
Driver Bit Extender
(Recommended)
Safety Glasses
Black Sharpie or
Carpenter's Pencil
Rags
Spray Cleaner
TOOLS/MATERIALS NEEDED:
BEFORE YOU BEGIN:
Check your local zoning laws.
• Local zoning laws and Home Owners
Associations may regulate the
location, style and height of your
product or even require a permit
signoff beforehand.
• Check local codes for frost line depth
and regulations.
• You must have the utility companies
clearly mark your property for
electrical, gas or water lines to avoid
puncturing any unseen underground
utilities.
WARNING:
• Improper installation of this product can result in personal injury. Always wear safety goggles when
cutting, drilling and assembling the product.
• Incorrect installation may cause harm to the product or individual.
NOTICE:
• DO NOT attempt to assemble the kit if parts are missing or damaged.
• DO NOT return the product to the store. For assistance or replacement parts call: 1-800-336-2383.
Component list:
Item #
Description Qty.
1
1.75" x 5.47" x 42.125" Privacy Panel Rail
2
2
1.02" x 1.379" x 46.5" U-Channel
2
3
0.875" x 6" x 50" – 0.35W Tongue and Groove Board
7
4
1.75" x 5.5" Bracket Kit
4
5
Pan Head Screw
16
6
Screw Head Cap
16
To obtain and review a copy of the warranty please go to: Freedomproduct.com/warranty. You can also
contact 1.888.418.4400 or write to Freedom Outdoor Living, 7830 Freeway Circle, Middleburg Heights,
Ohio 44130 to obtain a copy of the warranty.

3
Bottom Rail
a. Slide brackets onto bottom rail and lift rail into place
between posts.
b. Offset bottom brackets 10" above nish grade and
center bottom rail on posts (Fig. 1).
c. Mount brackets to posts using included 4 screws
per bracket. Insert white screw head caps to hide
screws (Fig. 1).
Vertical Tongue and Groove Boards
a. Insert vertical tongue and groove boards into bottom
rail from left to right.
b. Place U-Channel centered vertically on edge of
tongue and groove boards #1 and #7 (Fig. 2)
Top Rail
a. Slide brackets onto top rail and place rail on top of
vertical tongue and groove boards (Fig. 3).
b. Mount brackets to posts using included 4 screws
per bracket. Insert white screw head caps to hide
screws (Fig. 3).
Fig. 1
Fig. 2
Fig. 3
U-Channel
1
2
3

BARRETTE OUTDOOR LIVING
7830 FREEWAY CIRCLE
MIDDLEBURG HEIGHTS, OHIO 44130
TEL: (888) 418-4400
WWW.FREEDOMPRODUCT.COM
/