Page is loading ...

TOOLS NEEDED:
Safety Glasses
Pencil
Level
Chalk Line
7
⁄16" &
1
⁄8" Drill Bits
Drill
Hacksaw or Chopsaw*
Tape Measure
Scissors or Utility Knife
Tape
Rubber Mallet
Clamps
Fine-tooth Carbide Blade*
Deck Board
(For Stair Rail Spacing)
2"x8" Wooden Blocks
(For Post Support)
Shims (Steel Washers)
FASTENERS NEEDED:
Depending on Installation Method (Sold Separately)
3
⁄8" Diameter Galvanized Bolts with Nuts
(For Deck/Wood)
3
⁄8" Masonry Anchors (For Concrete)
#10x3
1
⁄2
" Deck Screws (For Deck/Wood)
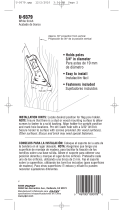
Planning:
a. Posts are designed and manufactured to accept
3
⁄8
" fasteners (sold separately). Be sure to
use appropriate fasteners for your installation.
b. Determine the desired rail placement and snap a chalk line onto the mounting surface to
ensure that all posts are aligned properly (Fig 1).
c. Plumb and level the posts using steel washers as shims (sold separately) (Fig. 2), secure the
posts in place with appropriate fasteners (sold separately) and install base trim on each post
(Fig. 3).
d. Determine the appropriate method for installing your posts below.
Concrete Surface Installations:
a. Purchase four
3
⁄8
" masonry anchors according to local building codes.
b. Mark holes through mounting plate onto concrete
surface and follow masonry anchor
manufacturer installation instructions.
c. Install base trim around post (Fig. 3).
Deck/Wood Surface Installations:
a. For decking applications, use the provided secondary mounting plate when securing posts
in place.
b. Beneath all post locations install at least two 2"x8" blocks using at least three #10x3
1
⁄2
" deck
screws penetrating through the joists at least 1
1
⁄2
" into the blocks (sold separately) (Fig. 4 &
5).
c. Mark holes through the bottom plate of steel post onto deck surface. Remove steel post and
drill
7
⁄16
" holes in all four marks through deck board and blocking.
d. Purchase
3
⁄8
" diameter galvanized bolts and nuts approximately 1" longer than the distance
between steel mounting plates (minimum 5").
e. Push bolts through post plate and attach separate bottom plate from beneath deck surface
(Fig. 6).
Posts can be leveled as needed by using shims.
f. Tighten bolts, secure in place and install base trim around each post (Fig. 3).
1
2
POST INSTALLATION
Install pyramid post top onto each post (Fig. 7).
NOTE:
A rubber mallet may be needed for a proper t.
Fig. 2
Shim/WasherShim/Washer
PostPost
LevelLevel
Fig. 3
Base trimBase trim
Fig. 4
Fig. 5
Fig. 6
Fig. 7
Fig. 1
Chalk LineChalk Line
DeckDeck
Mounting PlateMounting Plate
Pyramid TopPyramid Top
PostPost
London Aluminum Rail & Stair Kit
READ INSTRUCTIONS PRIOR TO INSTALLATION
INSTALLATION INSTRUCTIONS
RAIL INSTALLATION
Place level rail panel across the opening and ensure equal spacing on each end. Mark the rails
at the posts and cut on the marks. Install the support foot at the center of the rail section. If a
baluster is at the center of the rail section, support foot will t over the baluster inside the bottom
rail. If the center of the rail falls on the space between balusters, support foot ts inside bottom
rail and spacers will align support.
Cut two 3" tall temporary wood spacer blocks (not included) to insert under ends of railing
sections to temporarily assist in aligning section (Fig. 8).
3
Slide top and bottom rail brackets on ends of pre-built rail sections (Fig. 9).
4
Slide rail section and brackets between posts and on top of temporary wood spacer blocks.
(Position wood spacer blocks next to installed aluminum posts) (Fig. 8).
5
Using a
1
⁄8" drill bit, carefully pre-drill all four bottom bracket screw holes on one post (Fig. 10).
6
Install
3
⁄4" screws (included) to attach bracket to post (Fig. 11).
7
3" Temporary Spacer Blocks
Fig. 8
Fig. 9
Fig. 10 Fig. 11

Repeat steps 6 & 7 for remaining bottom bracket and both top brackets.
8
Using a
1
⁄8" drill bit, pre-drill all brackets (top and bottom) through side hole (Fig. 12).
9
Install
3
⁄4" screws (included) into side bracket holes to attach brackets to rails (Fig. 13).
10
Remove clamped stair kit from post.
Cutting Stair Rail to Proper Length
4
STAIR INSTALLATION
Hold top angle bracket on post adjacent to rail, and mark rail at the end of the bracket.
Repeat for other three stair rail brackets (Fig. 3).
3
Taller posts (sold separately) may be needed for either bottom or top of the stairs, depending
on the angle of the stairway or the location of where the posts will be installed relative to the
nose of the stair tread. Bottom stair posts may also be moved out from bottom step (Fig. 1).
1
Place a deck board on the stair noses spanning from post to post. Place the stair panel on
the board across the opening and plumb balusters while ensuring equal spacing on each end.
Clamp the panel in place at this location (Fig. 2).
NOTE:
Use the proper deck board thickness to result in the desired nished rail height.
2
Cut all four marks at 90º.
Slide brackets on ends of rails (top and bottom) and slide section in-between posts.
Using
1
⁄8
" drill bit - pre-drill bottom rail bracket to top stair post (Fig. 4).
Attach bottom bracket to post with
3
⁄4" screws (included).
Repeat for bottom stair post bottom rail bracket (Fig. 5).
Using
1
⁄8
" drill bit - pre-drill top rail bracket to top stair post (Fig. 6).
Attach top bracket to post with
3
⁄4" screws (included).
Repeat for bottom stair post top rail bracket.
Using a
1
⁄8" drill bit, pre-drill all brackets (top and bottom) through side hole (Fig. 7).
5
6
7
8
9
10
11
12
13
Install
3
⁄4" screws (included) into side bracket holes to attach brackets to rails.
14
Fig. 1
Fig. 3
Fig. 5
Fig. 7
Clamps
Deck
Board
Stair PanelStair Panel
BARRETTE OUTDOOR LIVING
7830 FREEWAY CIRCLE
MIDDLEBURG HEIGHTS, OHIO 44130
TEL: (
800) 336-2383
• WWW.FREEDOMPRODUCT.COM
To obtain and review a copy of the warranty please go to: Freedomproduct.com/warranty.
You can also contact 1.888.418.4400 or write to Freedom Outdoor Living,
7830 Freeway Circle, Middleburg Heights, Ohio 44130 to obtain a copy of the warranty.
To register your product, please visit: FreedomProduct.com
FREEDOM-WEB
Fig. 12
Fig. 13

HERRAMIENTAS QUE SE REQUIEREN:
Gafas de protección
Lápiz
Nivel
Línea de gis
Brocas de
7
⁄16" y
1
⁄8"
Taladro
Sierra o tronzadora*
Cinta métrica
Tijeras o navaja
Cinta
Martillo de goma
Pinzas
Hoja de carburo de
dientes nos*
Tablón
(Para el espaciamiento del
barandal de escalera)
Bloques de madera de 2" x 8"
(para apoyar el poste)
Cuñas (arandelas de acero)
SUJETADORES NECESARIOS:
Dependiendo del método de instalación (se venden por separado).
Tornillos galvanizados de
3
⁄8" de diámetro con tuercas
(para plataforma/madera)
Anclajes para concreto de
3
⁄8" (para concreto)
Tornillos de plataforma #10 de 3
1
⁄2" (para plataforma/madera)
Planificación:
a. Los postes están diseñados y fabricados para aceptar sujetadores de
3
⁄
8
" (se venden por
separado). Asegúrese de utilizar sujetadores adecuados para su instalación.
b. Determinar la ubicación deseada del barandal y marcar una línea sobre la supercie de
montaje para comprobar que todos los postes queden alineados correctamente (Fig. 1).
c. Aplomar y nivelar los postes mediante arandelas de acero a manera de cuña (se venden por
separado) (Fig. 2). Fijar los postes en su lugar con los sujetadores adecuados (se venden
por separado) e instalar la moldura base en cada poste (Fig. 3).
d. Determinar a continuación el método adecuado para la instalación de los postes.
Instalaciones en superficies de concreto:
a. Comprar cuatro anclajes para concreto de
3
⁄
8
" de acuerdo con los códigos locales de
construcción.
b. Marcar los oricios a través de las placas de montaje en la supercie de concreto y seguir
las instrucciones de instalación para el anclaje para concreto.
c. Instalar la moldura de base alrededor del poste (Fig. 3).
Instalaciones en superficies de madera o plataformas:
a. En las plataformas, utilizar la placa de montaje secundaria provista al jar los postes en su
lugar.
b. Debajo de los lugares donde se instalarán los postes, instalar al menos dos bloques de 2"x8"
utilizando al menos tres tornillos de plataforma #10 de 3
1
⁄
2
" que penetren por las viguetas a
una profundidad mínima de 1
1
⁄
2
" en los bloques (se venden por separado) (Fig. 4 y 5)
c. Marcar los agujeros a través de la placa inferior del poste de acero en la supercie de la
plataforma. Remover el poste de acero y perforar oricios de
7
⁄
16
" en las cuatro marcas a
través del tablón y el bloque.
d.
Comprar tornillos galvanizados de
3
⁄
8
" de diámetro y tuercas aproximadamente 1" (2,54 cm)
más largos que la distancia entre las placas de montaje de acero (al menos de 5" o 12,70 cm)
e. Empujar los tornillos a través de la placa de poste y jar una placa inferior adicional por
debajo de la supercie de la plataforma (Fig. 6). Los postes se pueden nivelar según sea
necesario mediante el uso de cuñas.
f. Apretar los tornillos jos en su lugar e instalar la moldura de base alrededor de cada poste
(Fig. 3).
1
2
INSTALACIÓN DEL POSTE
Instalar la cubierta de poste estilo pirámide en cada poste (Fig. 7).
NOTA:
Es posible que deba utilizar un mazo de goma para obtener el ajuste adecuado.
Fig. 2
Shim/WasherShim/Washer
PostPost
LevelLevel
Fig. 3
Base trimBase trim
Fig. 4
Fig. 5
Fig. 6
Fig. 7
Fig. 1
Chalk LineChalk Line
DeckDeck
Mounting PlateMounting Plate
Pyramid TopPyramid Top
PostPost
Kit de escalera y barandal de aluminio London
LEER LAS INSTRUCCIONES ANTES DE LA INSTALACIÓN
INSTRUCCIONES DE INSTALACIÓN
INSTALACIÓN DEL BARANDAL
Colocar el panel de barandal nivelado a lo largo de la apertura y ajustar para garantizar que el
espacio sea el mismo en cada extremo. Marcar los travesaños en los postes y cortar en las
marcas. Instalar la pata de soporte en el centro del tramo de barandal. Si hay un barrote en
el centro del tramo de barandal, la pata de soporte encajará encima del barrote dentro del
travesaño inferior. Si el centro del tramo de barandal cae en el espacio entre los barrotes,
la pata de soporte encajará dentro del travesaño inferior y los espaciadores alinearán el soporte.
Cortar dos bloques espaciadores temporales de madera de 3" (7,62 cm) (no incluidos
para insertarlos debajo de los extremos de los tramos de barandal. Esto le ayudará
temporalmente a alinear los tramos de barandal (Fig. 8).
3
Deslizar los soportes de barandal superior e inferior en los extremos de los tramos de barandal
previamente ensamblados (Fig. 9).
4
Deslizar el tramo de barandal y los soportes entre los postes y sobre los bloques espaciadores
de madera temporales. (Colocar los bloques espaciadores de madera junto a los postes de
aluminio instalados) (Fig. 8).
5
Usando una broca de
1
⁄
8
", taladrar con cuidado los cuatro oricios del soporte inferior en uno
de los postes (Fig. 10).
6
Instalar tornillos de
3
⁄
4
" (incluidos) para jar el soporte al poste (Fig. 11).
7
3" Temporary Spacer Blocks
Fig. 8
Fig. 9
Fig. 10 Fig. 11

Repetir los pasos 6 y 7 con el otro soporte inferior y los dos soportes superiores.
8
Utilizando una broca de
1
⁄
8
", taladrar todos los soportes (superior e inferior) a través del oricio
lateral (Fig. 12).
9
Instalar tornillos de
3
⁄
4
" (incluidos) en los oricios laterales del soporte para jar el soporte al
barandal (Fig. 13).
10
Remover el kit de escalera de los postes quitando las pinzas.
Corte de barandal de escalera a la longitud adecuada
4
INSTALACIÓN DE ESCALERA
Sostener el soporte de ángulo superior en el poste junto al barandal, y marcar el barandal en
el extremo del soporte. Repetir el procedimiento en los otros tres soportes de barandal de la
escalera (Fig. 3).
3
Es posible que necesite postes más largos (se venden por separado) para la parte superior
o inferior de la escalera, dependiendo de la inclinación de la escalera o la ubicación de los
postes donde se instalará el barandal con respecto a la saliente de los peldaños de las
escaleras. El poste inferior de la escalera también se puede alejar del peldaño inferior (Fig. 1).
1
Colocar un tablón sobre la saliente del peldaño que se extiende desde un poste hasta el
otro. Colocar el panel de barandal sobre el tablón a todo lo largo de la abertura, aplomar los
barrotes y comprobar que la distancia sea la misma en cada extremo. Fijar el panel en su lugar
con una pinza (Fig. 2).
NOTA:
Utilizar un tablón del espesor adecuado para que el barandal quede a la altura deseada.
2
Cortar las 4 marcas en un ángulo de 90 grados.
Deslizar los soportes sobre los extremos de los brandales (superior e inferior) y deslizar el tramo entre
los postes.
Con una broca de
1
⁄8", taladrar el soporte inferior del barandal hacia el poste de escalera
superior (Fig. 4).
Fijar el soporte inferior en los postes con tornillos de
3
⁄4" (incluidos).
Repetir la operación para el poste al pie de la escalera y el soporte inferior de barandal (Fig. 5).
Con una broca de
1
⁄8", taladrar el soporte superior del barandal hacia el poste de escalera
superior (Fig. 6).
Fijar el soporte superior al poste con tornillos de
3
⁄4" (incluidos).
Repetir la operación para el poste superior de la escalera y el soporte superior de barandal.
Utilizando una broca de
1
⁄8", taladrar todos los soportes (superior e inferior) a través del
oricio lateral (Fig. 7).
5
6
7
8
9
10
11
12
13
Instalar tornillos de
3
⁄4" (incluidos) en los oricios laterales del soporte para jar el soporte al
barandal.
14
Fig. 1
Fig. 3
Fig. 5
Fig. 7
Clamps
Deck
Board
Stair PanelStair Panel
Fig. 12
Fig. 13
BARRETTE OUTDOOR LIVING
7830 FREEWAY CIRCLE
MIDDLEBURG HEIGHTS, OHIO 44130
TEL: (
800) 336-2383
• WWW.FREEDOMPRODUCT.COM
Para obtener y revisar una copia de la garantía, ir a: Freedomproduct.com/warranty.
También puede llamar al 1.888.418.4400 o escribir a Freedom Outdoor Living,
7830 Freeway Circle, Middleburg Heights, Ohio 44130 para obtener una copia de la garantía.
Para registrar su producto, visite: FreedomProduct.com
FREEDOM-WEB
/