Armacost Lighting 840600 Installation guide
- Category
- Dimmers
- Type
- Installation guide
This manual is also suitable for

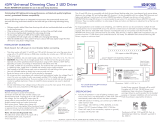
Universal Dimming LED Driver
Class 2 Constant Voltage Power Supply
Suitable for use in dry and damp locations
Models: MD24W, MD45W, MD60W with 12-Volt DC Output
IMPORTANT: Read before installing
1. This driver works with 12-volt dimmers, RGB controllers, or 120-volt
AC dimmers, but not at the same time.
LED TAPE
LIGHTING
12V DC
120-Volt
AC
Different types of white
LED lighting can be combined
in the same 12-volt circuit
Optional wireless
in-wall touchpad
controls available
Use a standard
AC dimmer
direct wired
to this LED driver
on the input side
Connect a 12-volt
dimmer or RGB
controller to the
12-volt output side
OR
MINI LED
LIGHTS
LED PUCK
LIGHTS
LED Driver
Never combine a 120-volt AC dimmer, a 12-volt DC dimmer, or an RGB
controller in the same circuit. Using a standard on/off wall switch with
a 12-volt dimmer or controller is permitted.
2. Some LED driver models may come with an AC cord. While a plug can
be used with 12-volt LED dimmers and RGB controllers, the unit must
be direct wire installed when used with a 120-volt AC dimmer. Please
read the section, “Using Direct Wire Hook Up” in these instructions.
3. One AC dimmer can be direct wired to multiple LED drivers at the
same time.
4. Never combine a 12-volt white LED dimmer and an RGB controller
in the same low-voltage circuit. Do not use more than one 12-volt
controller or dimmer in the same low-voltage circuit.
5. Always use one driver for each zone of any 12-volt LED lighting.
Never connect two LED drivers to a single run of LED strip lighting.
6. This LED driver works only with LED lighting that requires 12-volt
DC constant voltage power.
7. The dimming features of the driver will not work if your LED lighting
is not compatible with PWM dimming. If unsure, ask the
manufacturer of your LED lighting.
If you have questions about how to install and wire this product,
contact a qualifi ed professional.
Installation Guidelines
SHOCK HAZARD! If direct wiring this LED driver to a 120-volt circuit
with an AC dimmer, turn off the power at the circuit breaker before
installing. Failure to do so may result in serious injury or death.
MAINTAIN POLARITY: Observe the polarity of the 12-volt DC output and
the device or lighting to which you’re connecting. Failure to maintain the
same polarity could damage LED lighting, dimmers, and RGB controllers.
Always connect positive (+) to positive and negative (–) to negative.
The total wattage of all LED fi xtures connected to this LED driver must
not exceed the maximum watt rating of the unit. If you don’t know the
wattage rating of your lighting, ask the manufacturer.
Allow for ventilation; do not install in an airtight compartment.
Operate only within the specifi ed ambient temperature range of
4°F (-20°C) to 104°F (40°C). Operate at cooler surrounding air
temperatures to extend driver life.
Mount the driver fl ush to the surface to provide heat transfer for better
cooling. It’s normal for this LED driver to feel warm to the touch,
especially when under a full wattage load.
Protect from water. For locations that could be exposed to rain or splashing
water, install the driver in a suitable wet location power supply enclosure.
Use only insulated staples or plastic ties to secure cords and wires.
Route and secure wires so they will not be pinched or become damaged.
Do not install Class 2 low-voltage wiring in the same run as AC main
power. If AC and low-voltage wires cross, keep them at 90° angles.
All wiring must be in accordance with national and local electrical codes,
low-voltage Class 2 circuit. For wire runs inside walls, use properly
certifi ed CL2 or better cabling and appropriate mounting hardware.
LED Driver Location and Voltage Drop
The shorter the 12-volt DC wire lead is between the LED driver and
your LED lighting, the brighter and more consistent the lighting will be.
Do not coil extra wire. As a practical approach, test your LED lighting
prior to fi nal installation. If voltage drop appears to be an issue, use
thicker, heavier gauge wires or use less lighting. Visit armacostlighting.
com/voltagedrop for an easy-to-use online voltage drop calculator.
Using Direct Wire Hook Up
Electrical code requires hardwire
hookup to be used when
connecting this driver with
a 120-volt AC dimmer.
Remove end caps to access the
terminal block connectors for
both AC input and DC outputs.
Use Romex
®
style 14 gauge
cable to tie in with the 120-volt
AC line voltage. For 12-volt
DC output 18 gauge cable is generally recommended, however, DC
terminal block can also accept thicker wires up to 14 gauge if required
to reduce voltage drop. Be sure all wires are properly seated inside and
under the terminal block screw clamp. Tighten down the clamp with a
screwdriver. Do not over-tighten.
Note: Do not use AC ground wire. This LED driver uses Class II AC
inputs with a fully isolated plastic case; ground wire is not required.
Typical Wiring Diagram When Used with an AC Dimmer
Lutron
®
Skylark
®
C•L Model SCL-153P shown
All C•L dimmers have an adjustment to set dimming range.
Green Wire
Ground
Black Wire
120-Volt AC
Live HOT
White Wire
120-Volt AC
Neutral
Dimming LED Driver
12-volt output
to white LED
lighting
Dimmer Compatibility
Armacost Dimming LED Drivers are compatible with both forward
phase (leading edge, triac, incandescent) and reverse phase (electronic
low-voltage, ELV, and trailing edge) AC dimmers, including higher end
lighting controls, such as Lutron GRAFIK Eye
®
systems. They are also
compatible with low-voltage PWM dimmers and RGB color controllers.
Although virtually all dimmers will work with Armacost Dimmable
LED Drivers, Armacost Lighting recommends dimmers that can be
programmed or have an adjustment dial to set the low end dimming
range, such as Lutron
®
C•L and Leviton IllumaTech
®
Universal Dimmers.
IMPORTANT: Armacost drivers do not need a minimum wattage load for
proper operation, but some AC dimmers may have this requirement.
Check the specifi cations of your dimmer to confi rm that your lighting
exceeds this value, or choose a dimmer with little or no load requirement.
Large Area Lighting Applications and Maximum Load
For synchronized brightness control of large areas of LED lighting or
lighting in different areas, connect one 120-volt AC dimmer to multiple
dimming drivers. Do not exceed 40% of your AC dimmer’s rated
maximum allowable incandescent/halogen wattage capacity.
Use this formula to determine the number of power supplies that your
dimmer can accommodate:
[AC Dimmer Rating in Watts] X 40%
[Power Supply Rating in Watts]
For example: If the dimmer states 600 watts maximum incandescent
load, and you are using a 24 watt driver, then you can connect no more
than ten 24 watt drivers (max combined load of 240 watts).
600 Watts X 40% = 240
24 Watts = 10
Features and Specifi cations
See model-specifi c information on your unit’s case label
■
No minimum lighting load required for wide range dimming
■
No de-rating is required; load up to 100% of the model’s rated capacity
■
Rated for 30,000 hours when used 8-12 hours a day at full load;
expect longer life when dimmed or when using lesser wattage loads.
■
Full safety shut off protection in case of lighting overload, open
circuit, short circuit, over-temperature, or other fault. The driver will
automatically restart after the fault has been corrected.
■
Output: 12-volt DC constant voltage
■
Ta = -4° F (-20°C) to 104° F (40° C)
■
Class II AC input (two-wire connection, requires no ground)
■
Complies with FCC Part 15B
■
Safety Standards: UL Std. 1310 and 8750, Cert. to CAN/CSA Std.
C22.2 No. 223-M91 and C22.2 No. 250.13; For dry and damp
location use
Limited three-year warranty. Warranty will be void if LED driver is not
installed per these instructions. Disregarding warnings, failure to use
this product for its intended purpose, or improper installation will void
warranty. Proof of purchase is required for all returns.
Using Direct Wire Hook Up
Remove caps
to connect wires
© 2015-17 Armacost Lighting. All rights reserved.
170306
-
 1
1
Armacost Lighting 840600 Installation guide
- Category
- Dimmers
- Type
- Installation guide
- This manual is also suitable for
Ask a question and I''ll find the answer in the document
Finding information in a document is now easier with AI
Related papers
-
 Armacost Lighting 840450 Installation guide
-
 RibbonFlex PRO RF3528060-12WWD Installation guide
-
 Armacost Lighting 132210 User manual
-
 Armacost Lighting 142210 Installation guide
-
 Armacost Lighting 223811 Installation guide
-
 Armacost Lighting 213411 Installation guide
-
 Armacost Lighting 153250 User guide
-
 Armacost Lighting 213311 Installation guide
-
 Armacost Lighting 325100 Installation guide
-
 Armacost Lighting 224410 Installation guide
Other documents
-
Sunco Lighting SAL06P-LA-K 1X4 Selectable Ceiling Panel Operating instructions
-
 LED WORLD MD45W12VA User manual
-
Ortech OT-24200-TDWJ User manual
-
 LED WORLD MD45W12VA 45W Universal Dimming Class 2 LED Driver User manual
-
Maxim 39773BCPC Installation guide
-
Cooper Lighting H4 User manual
-
 Lutron Electronics SC-1PS-DS User manual
-
skylark SFSQ-F-GR User manual
-
 Lutron Electronics AYFSQ-F-WH User manual
-
 Crestron electronic Residential Lighting User manual


