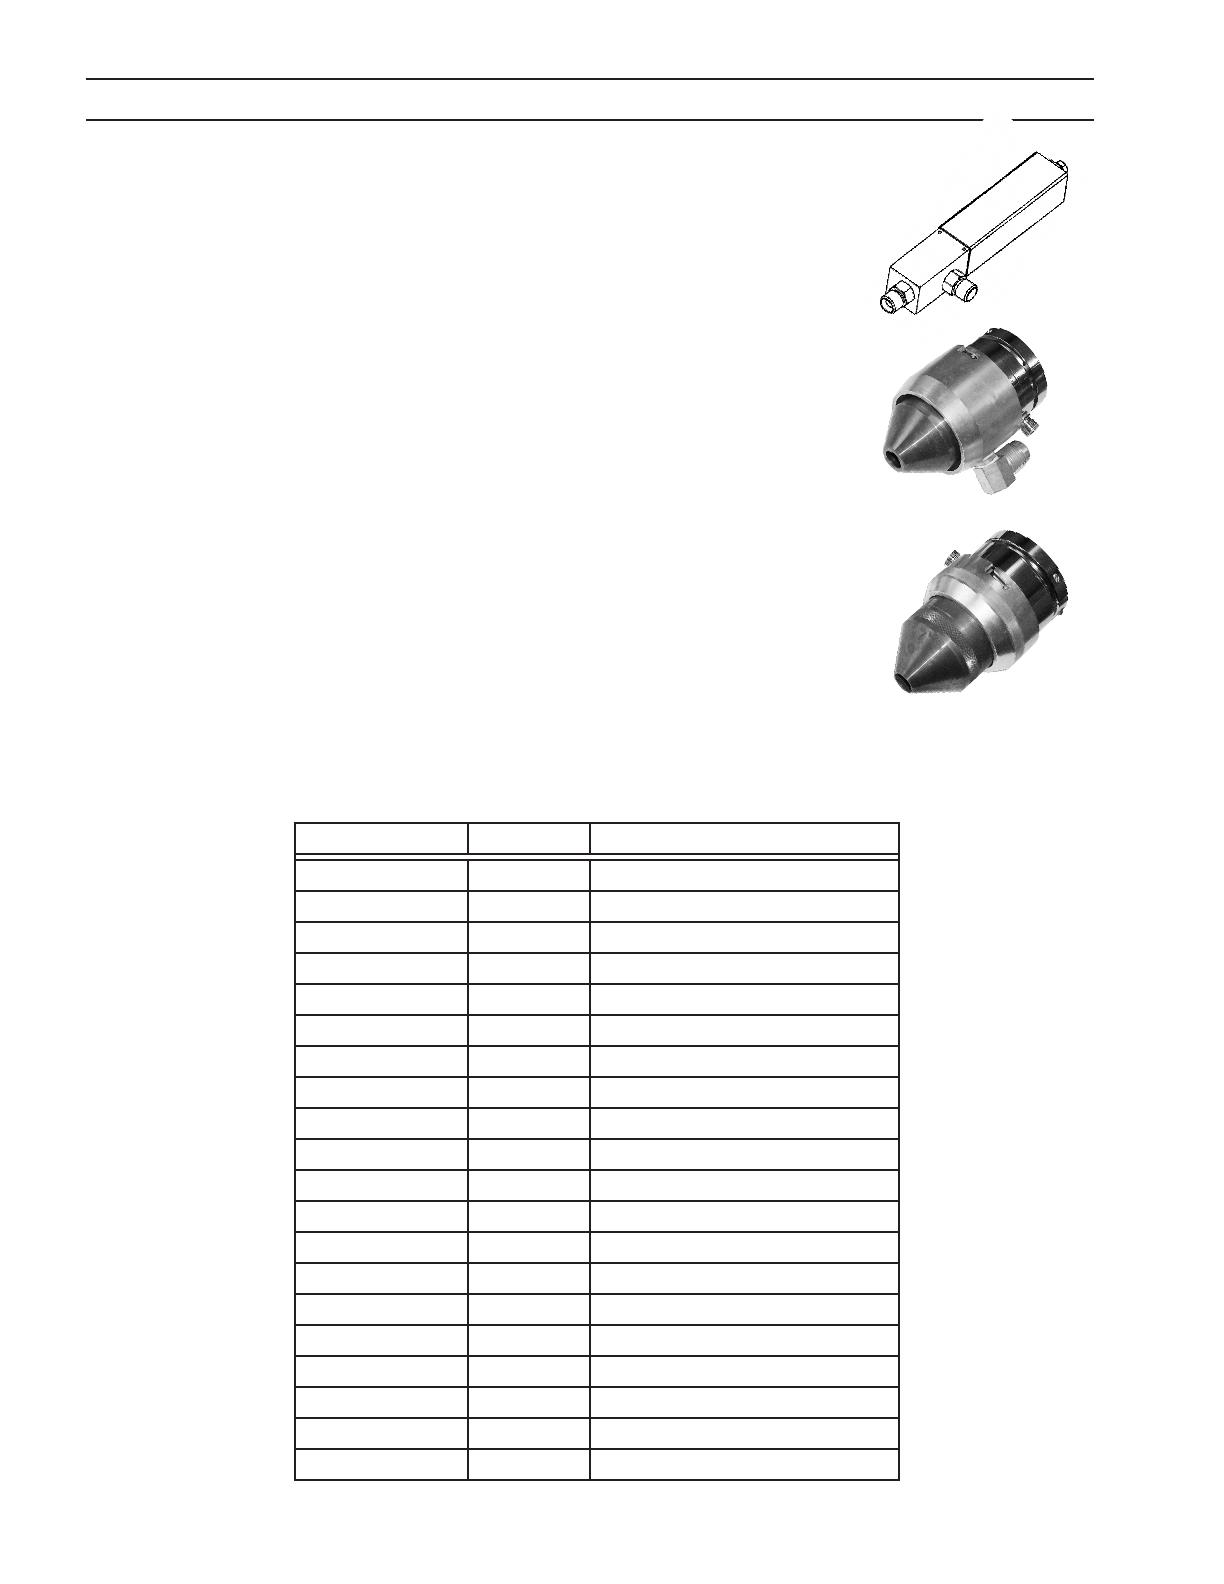
ESAB PT-36 Mechanized Plasmarc Cutting Torch User manual

Type
User manual
PT-36
Mechanized Plasmarc Cutting Torch
0558005239 07/2009
Uživatelská příručka (CS)
Instruktionsbog (DA)
Instructiehandleiding (NL)
Instruction Manual (EN)
Kasutusjuhend (ET)
Käyttöohje (FI)
Manuel d'instruction (FR)
Bedienungsanleitung (DE)
Használati útmutató (HU)
Manuale di istruzioni (IT)
2
DECLARATION OF CONFORMITY
according to the Low Voltage Directive 2006/95/EC
FÖRSÄKRAN OM ÖVERENSSTÄMMELSE
enligt Lågspänningsdirektivet 2006/95/EG
Type of equipment Materialslag
Mechanized Plasma Cutting Torch
Brand name or trade mark Fabrikatnamn eller varumärke
ESAB
Type designation etc. Typbeteckning etc.
PT-36 Series
Manufacturer’s authorised representative established within the EEA
Name, address, telephone No, telefax No: Tillverkarens namn, adress, telefon, telefax:
ESAB AB, Welding Equipment
Esabvägen, SE-695 81 Laxå, Sweden
Phone: +46 586 81 000, Fax: +46 584 411 924
Manufacturer positioned outside the EEA
Name, address, telephone No, telefax No: Tillverkarens namn, adress, telefon, telefax:
ESAB Welding & Cutting Products
411 South Ebenezer Road, Florence, South Carolina 29501, USA
Phone: +1 843 669 4411, Fax: +1 843 664 4258
The following harmonised standard in force within the EEA has been used in the design:
Följande harmoniserande standarder har använts i konstruktionen:
EN 60974-7, Arc welding equipment – Part 7: Torches
By signing this document, the undersigned declares as manufacturer, or the manufacturer’s authorised
representative established within the EEA, that the equipment in question complies with the safety requirements
stated above.
Genom att underteckna detta dokument försäkrar undertecknad såsom tillverkare, eller tillverkarens representant inom
EES, att angiven materiel uppfyller säkerhetskraven angivna ovan.
Date / Datum
Laxå 2008-11-14
Signature / Underskrift Position / Befattning
Global Director
Equipment and Automation
Kent Eimbrodt
Clarification
3
TABLE OF CONTENTS
Section / Title Page
CZECH (CS) ..........................................................................................................................................................................................................................5
DANISH (DA) ....................................................................................................................................................................................................................47
DUTCH (NL) ......................................................................................................................................................................................................................89
ENGLISH (EN) .................................................................................................................................................................................................................131
ESTONIAN (ET) ..............................................................................................................................................................................................................173
FINNISH (FI) ....................................................................................................................................................................................................................215
FRENCH (FR) ..................................................................................................................................................................................................................257
GERMAN (DE) ................................................................................................................................................................................................................299
HUNGARIAN (HU) ........................................................................................................................................................................................................341
ITALIAN (IT) ....................................................................................................................................................................................................................383
Replacement Parts ......................................................................................................................................................................................................425
4
TABLE OF CONTENTS
129
Probleem: kan niet starten
Installeer schildhouder,
luchtgordijn o/n 0558004616
Stel schildgas correct in.
Probeer hogere stroom
indien nodig.
Met
plastic
schild-
houder?
Is
schildgas
correct inge-
steld?
Stel p.a. in
op hoog
Is p.a. ingesteld
op high”?
Corrigeer luchtgordijn-
installatie
Lucht
gordijn correct
geïnstalleerd?
Verhoog lucht-
gordijninstellin
- reinig tafel
- los probleem met HF
intensiteit op
- vervang toorts
Opgelost?
Opgelost?
JA
NEE
JA
NEE
JA
JA
NEE
JA
NEE
JA
JA
JA
NEE
NEE
JA
NEE
JA
NEE
NEE
HOOFDSTUK 5 ONDERHOUD
Klaar
Klaar
Opgelost?
Opgelost?
Opgelost?
Klaar
PT-36
Mechanized Plasmarc Cutting Torch
Instruction Manual (EN)
0558005239
132
This equipment will perform in conformity with the description thereof contained in this manual and accompa-
nying labels and/or inserts when installed, operated, maintained and repaired in accordance with the instruc-
tions provided. This equipment must be checked periodically. Malfunctioning or poorly maintained equipment
should not be used. Parts that are broken, missing, worn, distorted or contaminated should be replaced imme-
diately. Should such repair or replacement become necessary, the manufacturer recommends that a telephone
or written request for service advice be made to the Authorized Distributor from whom it was purchased.
This equipment or any of its parts should not be altered without the prior written approval of the manufacturer.
The user of this equipment shall have the sole responsibility for any malfunction which results from improper
use, faulty maintenance, damage, improper repair or alteration by anyone other than the manufacturer or a ser-
vice facility designated by the manufacturer.
BE SURE THIS INFORMATION REACHES THE OPERATOR.
YOU CAN GET EXTRA COPIES THROUGH YOUR SUPPLIER.
These INSTRUCTIONS are for experienced operators. If you are not fully familiar with the
principles of operation and safe practices for arc welding and cutting equipment, we urge
you to read our booklet, “Precautions and Safe Practices for Arc Welding, Cutting, and
Gouging,” Form 52-529. Do NOT permit untrained persons to install, operate, or maintain
this equipment. Do NOT attempt to install or operate this equipment until you have read
and fully understand these instructions. If you do not fully understand these instructions,
contact your supplier for further information. Be sure to read the Safety Precautions be-
fore installing or operating this equipment.
CAUTION
USER RESPONSIBILITY
READ AND UNDERSTAND THE INSTRUCTION MANUAL BEFORE INSTALLING OR OPERATING.
PROTECT YOURSELF AND OTHERS!
133
TABLE OF CONTENTS
1.0 Safety Precautions ................................................................................. 135
2.0 Description ........................................................................................ 137
2.1 General . . . . . . . . . . . . . . . . . . . . . . . . . . . . . . . . . . . . . . . . . . . . . . . . . . . . . . . . . . . . . . . . . . . . . . . . . . . . . . . . . . . . . . . . 137
2.2 Scope ......................................................................................... 137
2.3 Package Options Available ..................................................................... 137
2.4 Optional Accessories: ......................................................................... 138
2.5 PT-36 Technical Specications..................................................................141
3.0 Installation......................................................................................... 143
3.1 Connection of Torch To Plasma System ........................................................ 143
3.2 Mounting Torch to Machine ..................................................................144
4.0 Operation ......................................................................................... 145
4.1 Set Up ......................................................................................... 147
4.2 Cut Quality . . . . . . . . . . . . . . . . . . . . . . . . . . . . . . . . . . . . . . . . . . . . . . . . . . . . . . . . . . . . . . . . . . . . . . . . . . . . . . . . . . . 147
4.3 Torch Flow Passages ......................................................................... 152
5.0 Maintenance....................................................................................... 153
5.1 Introduction ................................................................................ 153
5.2 Torch Front End Disassembly.................................................................. 154
5.3 Torch Front End Disassembly (for Production Thick Plate)....................................... 157
5.4 Assembly Of Torch Front End ................................................................160
5.5 Assembly of Torch Front End (for Production Thick Plate) ....................................... 161
5.6 Torch Body . . . . . . . . . . . . . . . . . . . . . . . . . . . . . . . . . . . . . . . . . . . . . . . . . . . . . . . . . . . . . . . . . . . . . . . . . . . . . . . . . 163
5.7 Removal and Replacement of the Torch Body..................................................164
5.8 Reduced Consumable Life ................................................................... 167
Section / Title Page
134
TABLE OF CONTENTS
135
SECTION 1 SAFETY PRECAUTIONS
1.0 Safety Precautions
Users of ESAB welding and plasma cutting equipment have the ultimate responsibility for ensuring that anyone
who works on or near the equipment observes all the relevant safety precautions. Safety precautions must meet
the requirements that apply to this type of welding or plasma cutting equipment. The following recommendations
should be observed in addition to the standard regulations that apply to the workplace.
All work must be carried out by trained personnel well acquainted with the operation of the welding or plasma
cutting equipment. Incorrect operation of the equipment may lead to hazardous situations which can result in
injury to the operator and damage to the equipment.
1. Anyone who uses welding or plasma cutting equipment must be familiar with:
- its operation
- location of emergency stops
- its function
- relevant safety precautions
- welding and / or plasma cutting
2. The operator must ensure that:
- no unauthorized person stationed within the working area of the equipment when it is started up.
- no one is unprotected when the arc is struck.
3. The workplace must:
- be suitable for the purpose
- be free from drafts
4. Personal safety equipment:
- Always wear recommended personal safety equipment, such as safety glasses, ame proof
clothing, safety gloves.
- Do not wear loose tting items, such as scarves, bracelets, rings, etc., which could become
trapped or cause burns.
5. General precautions:
- Make sure the return cable is connected securely.
- Work on high voltage equipment may only be carried out by a qualied electrician.
- Appropriate re extinquishing equipment must be clearly marked and close at hand.
- Lubrication and maintenance must not be carried out on the equipment during operation.
136
SECTION 1 SAFETY PRECAUTIONS
WELDING AND PLASMA CUTTING CAN BE INJURIOUS TO YOURSELF
AND OTHERS. TAKE PRECAUTIONS WHEN WELDING OR CUTTING. ASK
FOR YOUR EMPLOYER’S SAFETY PRACTICES WHICH SHOULD BE BASED
ON MANUFACTURERS’ HAZARD DATA.
ELECTRIC SHOCK - Can kill.
- Install and earth (ground) the welding or plasma cutting unit in accordance with applicable standards.
- Do not touch live electrical parts or electrodes with bare skin, wet gloves or wet clothing.
- Insulate yourself from earth and the workpiece.
- Ensure your working stance is safe.
FUMES AND GASES - Can be dangerous to health.
- Keep your head out of the fumes.
- Use ventilation, extraction at the arc, or both, to take fumes and gases away from your breathing zone
and the general area.
ARC RAYS - Can injure eyes and burn skin.
- Protect your eyes and body. Use the correct welding / plasma cutting screen and lter lens and wear
protective clothing.
- Protect bystanders with suitable screens or curtains.
FIRE HAZARD
- Sparks (spatter) can cause re. Make sure therefore that there are no inammable materials nearby.
NOISE - Excessive noise can damage hearing.
- Protect your ears. Use earmus or other hearing protection.
- Warn bystanders of the risk.
MALFUNCTION - Call for expert assistance in the event of malfunction.
READ AND UNDERSTAND THE INSTRUCTION MANUAL BEFORE INSTALLING OR OPERATING.
PROTECT YOURSELF AND OTHERS!
WARNING
137
2.2 Scope
The purpose of this manual is to provide the operator with all the information required to install and service
the PT-36 Mechanized Plasmarc Cutting Torch. Technical reference material is also provided to assist in trouble-
shooting the cutting package.
2.3 Package Options Available
PT-36 package options available through your ESAB dealer. See Replacement Parts section for component part
numbers.
2.1 General
The PT-36 Mechanized Plasmarc Cutting Torch is a plasma arc torch factory assembled to provide torch compo-
nent concentricity and consistent cutting accuracy. For this reason, the torch body can not be rebuilt in the eld.
Only the torch front-end has replaceable parts.
SECTION 2 DESCRIPTION
DESCRIPTIONS FOR PT-36 TORCH ASSEMBLY'S PART NUMBER
PT-36 TORCH AY 4.5 ft (1,3m) 0558003849
PT-36 TORCH AY 6 ft (1,8m) 0558003850
PT-36 TORCH AY 12 ft (3,7m) 0558003852
PT-36 TORCH AY 15 ft (4,6m) 0558003853
PT-36 TORCH AY 17 ft (5,2m) 0558003854
PT-36 TORCH AY 25 ft (7,6m) 0558003856
PT-36 TORCH AY 14 ft MINI-BEVEL (4,3m) 0558005741
138
PT-36 Repair & Accessories Kit ...................................................................................0558005221
SECTION 2 DESCRIPTION
2.4.1 PT-36 Torch Consumable Kits
2.4 Optional Accessories:
Test Flow Meter - This valuable troubleshooting tool allows measurement of the ac-
tual plasma gas ow through the torch ...............................................................................21317
Bubble Muer - When used in conjunction with a water pump recirculating water
from the table and by using compressed air, this device creates a bubble of air which
enables a PT-36 Plasmarc Cutting Torch to be used underwater with slight sacrice
of cut quality. This system also permits operation above water as the ow of water
through the muer reduces fume, noise, and arc U.V. Radiation).
(for installation/operation instructions see manual 0558006722) ............................. 37439
Air Curtain - This device when supplied with compressed air is used to improve the
performance of the PT-36 Plasmarc Cutting Torch when cutting underwater. The de-
vice mounts onto the torch and produces a curtain of air. This allows the plasma arc to
operate in a relatively dry zone, even though the torch has been submerged to reduce
noise, fume, and arc radiation. To be used in underwater applications only.
(for installation/operation instructions see manual 0558006404) .............................37440
Part Number Quantity Description
0558003804 1 Torch Body PT-36 w/O-rings
996528 10 O-ring 1.614 ID x .070
0558002533 2 Bae, 4 Hole x .032
0558001625 2 Bae, 8 Hole x .047
0558002534 1 Bae, 4 x .032 Reverse
0558002530 1 Bae, 8 x .047 Reverse
0558005457 1 Bae, 4 Hole x .022
0558003924 3 Electrode Holder PT-36 w/O-ring
86W99 10 O-ring .364 ID x .070
37082 2 Nozzle Retaining Cup, Standard
21796 1 Shield Gas Diuser, Low Current
21944 5 Shield Gas Diuser, Standard
22496 1 Shield Gas Diuser, Reverse
37081 2 Shield Retainer, Standard
0558003858 2 Contact Ring w/screw
37073 6 Screw, Contact Ring
93750010 2 Hex Key Wrench .109"
996568 1 Nut Driver 7/16" (Electrode tool)
0558003918 1 Electrode Holder Tool PT-36
77500101 1 Silicon Grease DC-111 5.3oz
139
SECTION 2 DESCRIPTION
PT-36 200A Start-up Kit ...............................................................................................0558005222
Part Number Quantity Description
0558003914 8 Electrode O2 UltraLife, Standard
0558003928 3 Electrode N2/H35, Standard
0558005459 3 Electrode O2/N2, Low Current
0558006010 3 Nozzle PT-36 1.0mm (.040")
0558006014 3 Nozzle PT-36 1.4mm (.055")
0558006020 5 Nozzle PT-36 2.0mm (.080")
0558006130 3 Shield PT-36 3.0mm (.120")
0558006141 3 Shield PT-36 4.1mm (.160")
0558008010 3 Nozzle PT-36 1.0mm (.040") PR
0558007624 3 Shield PT-36 2.4mm (.095")
0558006023 3 Nozzle PT-36 2.3mm (.090")
0558006166 3 Shield PT-36 6.6mm (.259")
0558006908 3 Nozzle PT-36 0.8mm (.030")
0558006018 3 Nozzle PT-36 1.8mm (.070")
PT-36 400A Start-up Kit ...............................................................................................0558005223
Part Number Quantity Description
0558003914 5 Electrode O2 UltraLife, Standard
0558007791 5 Electrode, High Current O2
0558003928 3 Electrode N2/H35, Standard
0558005459 3 Electrode O2/N2, Low Current
0558006010 2 Nozzle PT-36 1.0mm (.040")
0558006014 2 Nozzle PT-36 1.4mm (.055")
0558006020 5 Nozzle PT-36 2.0mm (.080")
0558006023 3 Nozzle PT-36 2.3mm (.090")
0558006025 3 Nozzle PT-36 2.5mm (.099")
0558006036 3 Nozzle PT-36 3.6mm (.141")
0558006130 3 Shield PT-36 3.0mm (.120")
0558006141 3 Shield PT-36 4.1mm (.160")
0558006166 3 Shield PT-36 6.6mm (.259")
0558008010 3 Nozzle PT-36 1.0mm (.040") PR
0558007624 3 Shield PT-36 2.4mm (.095")
0558006199 3 Shield PT-36 9.9mm (.390")
0558006908 3 Nozzle PT-36 0.8mm (.030")
0558006018 3 Nozzle PT-36 1.8mm (.070")
0558006030 3 Nozzle PT-36 3.0mm (.120")
140
SECTION 2 DESCRIPTION
PT-36 600A Start-up Kit ...............................................................................................0558005224
Part Number Quantity Description
0558003963 5 Electrode, Tungsten 3/16"D
0558003965 5 Nozzle H35 .198" Divergent
0558003964 2 Collet 3/16"D Electrode
0558005689 2 Electrode/Collet Holder PT-36
0558003967 2 Collet Body
0558002532 2 Bae, 32 Hole x .023
0558006688 5 Shield High Current
0558003918 1 Electrode Holder Tool PT-36
0558003962 1 Tungsten Electrode Tool
0558006690 2 Nozzle Retaining Cup Assy High Current
PT-36 H35 Heavy Plate Start-up Kit ............................................................................0558005225
Part Number Quantity Description
0558003914 5 Electrode O2 UltraLife, Standard
0558007791 5 Electrode, High Current O2
0558003928 3 Electrode N2/H35, Standard
0558005459 3 Electrode O2/N2, Low Current
0558006010 2 Nozzle PT-36 1.0mm (.040")
0558006014 2 Nozzle PT-36 1.4mm (.055")
0558006020 5 Nozzle PT-36 2.0mm (.080")
0558006023 3 Nozzle PT-36 2.3mm (.090")
0558006025 3 Nozzle PT-36 2.5mm (.099")
0558006036 3 Nozzle PT-36 3.6mm (.141")
0558006041 3 Nozzle PT-36 4.1mm (.161")
0558006130 3 Shield PT-36 3.0mm (.120")
0558006141 3 Shield PT-36 4.1mm (.160")
0558006166 3 Shield PT-36 6.6mm (.259")
0558006199 3 Shield PT-36 9.9mm (.390")
0558008010 3 Nozzle PT-36 1.0mm (.040") PR
0558007624 3 Shield PT-36 2.4mm (.095")
0558006908 3 Nozzle PT-36 0.8mm (.030")
0558006018 3 Nozzle PT-36 1.8mm (.070")
0558006030 3 Nozzle PT-36 3.0mm (.120")
141
SECTION 2 DESCRIPTION
2.5.2 PT-36 Torch Technical Specications
Type: Water cooled, Dual gas, mechanized plasmarc cutting torch
Current Rating: 1000 Amps @ 100% duty cycle
Mounting Diameter: 2 inches (50.8 mm)
Length of Torch without leads: 16.7 inches (42 cm)
IEC 60974-7 Voltage Rating: 500 volts peak
Striking Voltage (maximum value of HI-FREQUENCY voltage): 8000 vac
Minimum Coolant Flowrate: 1.3 USGPM (5.9 l/min)
Minimum Coolant Pressure at Inlet: 175 psig (12.1 bars)
Maximum Coolant Pressure at Inlet: 200 psig (13.8 bar)
Minimum Acceptable Rating of Coolant Recirculator:
16,830 BTU/HR (4,9 kW) at High Coolant Temperature - Ambient = 45
°
F (25
°
C) and 1.6 USGPM (6 L/min)
Maximum Safe Gas Pressures at Inlets to Torch: 125 psig (8.6 bars)
Safety Interlocks: This torch is intended for use with ESAB Plasmarc cutting systems and controls employing a water ow
switch on the coolant return line from the torch. Removal of the nozzle retaining cup to service the torch breaks the
coolant return path.
2.5 PT-36 Technical Specications
2.5.1 Gas Specications
Typical requirements for ow delivered at 125 psig: Maximum Plasma Gas: 300 scfh Maximum Shield Gas: 350 scfh
Argon 125 PSI (8,6 bar) with 0.25” NPT, 99.995% purity, Filtered to 25 microns
Nitrogen 125 PSI (8,6 bar) with 0.25” NPT, 99.99% purity, Filtered to 25 microns
Oxygen 125 PSI (8,6 bar) with 0.25” NPT, 99.5% purity, Filtered to 25 microns
H-35 (Argon/Hydrogen) 75 PSI (5,2 bar), Speciality Gas, 99.995% purity, Filtered to 25 microns
Methane 75 PSI (5,2 bar) with 0.25” NPT, 93% purity, Filtered to 25 microns
Compressed Air
(Clean, dry & oil-free shop air)
80 PSI @ 1200cfh (5,5 bar @ 35 m
3
h), Filtered to 25 microns
Note:
These do not represent actual ows used in any condition, but are the design maximums of the system.
143
3.1 Connection of Torch To Plasma System
Refer to system manual.
3.1.1 Connection to the Arc Starter Box
The PT-36 has two water cooled power cables which must be connected to the negative output from the power
supply. The right handed 7/16-20 tting is on the cable supplying coolant to the torch. The left handed 7/16-20
tting is on the cable returning coolant from the torch.
The ring terminal is used to make the nozzle connection for pilot arc starting. The fast-on connection grounds
the braided shield on the pilot arc cable.
Electric Shock Can Kill!


components.
-
out turning primary power o.



recommended lens shades for plasma cutting:
Arc Current Lens Shade
Up to 100 Amps Shade No. 8
100-200 Amps Shade No. 10 200-400 Amps Shade No. 12
Over 400 Amps Shade No. 14


glasses.


SECTION 3 INSTALLATION
WARNING
DANGER
An alternative braided shield connection is provided on the
torch. The female fast-on connection (normally in the arc
starter box) can instead be mated to a male fast-on connec-
tion taped to one of the power cables a few inches before
the end of the torch sleeving. Push the sleeving and large
brass nut towards the head of the torch to reveal this con-
nection. When this connection is made, the shield connec-
tion is grounded through the large brass nut.
Female fast-on connection
power cables (2)
Male fast-on
connection
Brass nut
144
3.2 Mounting Torch to Machine
Refer to machine manual.
Mount torch on insulated sleeve here
DO NOT mount
on steel torch
body here
Do not mount on stainless steel torch body.•
Torch body is electrically insulated, however high fre-•
quency start current may arc through to nd a ground.
Clamping near torch body may result in arcing between •
body and machine.
When this arcing occurs, torch body may require non-war-•
ranty replacement.
Damage to machine components may result. •
Clamp only on insulated torch sleeve (directly above la-•
bel) not less than 1.25" (31.75mm) from the torch end of
the sleeve.
3.1.2 Connection of Gas Hoses
1 - Female old-style air water nut for Shield Gas connec-
tion.
2 - B-IG ttings for Plasma Start gas and Plasma Cut gas.
Either hose can be attached in either location.
SECTION 3 INSTALLATION
1
2
Clamping on Torch Body May Cause Dangerous Current To Flow
Through Machine Chassis.
CAUTION
145
SECTION 4 OPERATION
Oil And Grease Can Burn Violently!




of oxygen under pressure.
WARNING
HYDROGEN EXPLOSION HAZARD.
 
       
DEATH.
 
TER TABLE. THESE POCKETS WILL EXPLODE WHEN IGNITED BY
SPARKS OR THE PLASMA ARC.
 
ES IN THE WATER TABLE MOLTEN METAL REACTION, SLOW
CHEMICAL REACTION AND SOME PLASMA GASES.
      
CUTTING PLATE AND INSIDE THE WATER TABLE.
 
TABLE FREQUENTLY. REFILL TABLE WITH CLEAN WATER.
 
 
BRATE OR JOLT IT TO BREAK UP HYDROGEN POCKETS BEFORE
LAYING PLATE ON THE TABLE.
 
UP HYDROGEN POCKETS.
 
        
TWICE THE KERF WIDTH TO ENSURE MATERIAL IS ALWAYS UN
DER THE KERF.
 
BETWEEN PLATE AND WATER SURFACE.
WARNING
EXPLOSION HAZARD.
DO NOT CUT UNDERWATER WITH H35! DANGEROUS BUILDUP OF
HYDROGEN GAS IS POSSIBLE IN THE WATER TABLE. HYDROGEN GAS
IS EXTREMELY EXPLOSIVE. REDUCE THE WATER LEVEL TO 4 INCHES
MINIMUM BELOW THE WORKPIECE. VIBRATE PLATE, STIR AIR AND
WATER FREQUENTLY TO PREVENT HYDROGEN GAS BUILDUP.
WARNING
146
SECTION 4 OPERATION
 
 
      
SAFETY INFORMATION REGARDING HAZARDS ASSOCIATED
WITH THESE ALLOYS.
DO NOT PLASMA CUT THE FOLLOWING Al-Li ALLOYS WITH WATER:
 
 
 
 
 
SPARK HAZARD.
HEAT, SPATTER, AND SPARKS CAUSE FIRE AND BURNS.
 
 
 

 
FROM YOURSELF AND OTHERS WHEN ACTIVATING PLASMA
PROCESS.
 
 
 
POSED AREAS.
 
AND SLAG.
WARNING
EXPLOSION HAZARD.
Al-Li
EXPLOSIONS WHEN PLASMA CUT WITH WATER.
WARNING
  • Page 1 1
  • Page 2 2
  • Page 3 3
  • Page 4 4
  • Page 5 5
  • Page 6 6
  • Page 7 7
  • Page 8 8
  • Page 9 9
  • Page 10 10
  • Page 11 11
  • Page 12 12
  • Page 13 13
  • Page 14 14
  • Page 15 15
  • Page 16 16
  • Page 17 17
  • Page 18 18
  • Page 19 19
  • Page 20 20
  • Page 21 21
  • Page 22 22
  • Page 23 23
  • Page 24 24
  • Page 25 25
  • Page 26 26
  • Page 27 27
  • Page 28 28
  • Page 29 29
  • Page 30 30
  • Page 31 31
  • Page 32 32
  • Page 33 33
  • Page 34 34
  • Page 35 35
  • Page 36 36
  • Page 37 37
  • Page 38 38
  • Page 39 39
  • Page 40 40
  • Page 41 41
  • Page 42 42
  • Page 43 43
  • Page 44 44
  • Page 45 45
  • Page 46 46
  • Page 47 47
  • Page 48 48
  • Page 49 49
  • Page 50 50
  • Page 51 51
  • Page 52 52
  • Page 53 53
  • Page 54 54
  • Page 55 55
  • Page 56 56
  • Page 57 57
  • Page 58 58
  • Page 59 59
  • Page 60 60
  • Page 61 61
  • Page 62 62
  • Page 63 63
  • Page 64 64
  • Page 65 65
  • Page 66 66
  • Page 67 67
  • Page 68 68
  • Page 69 69
  • Page 70 70
  • Page 71 71
  • Page 72 72
  • Page 73 73
  • Page 74 74
  • Page 75 75
  • Page 76 76
  • Page 77 77
  • Page 78 78
  • Page 79 79
  • Page 80 80
  • Page 81 81
  • Page 82 82
  • Page 83 83
  • Page 84 84
  • Page 85 85
  • Page 86 86
  • Page 87 87
  • Page 88 88
  • Page 89 89
  • Page 90 90
  • Page 91 91
  • Page 92 92
  • Page 93 93
  • Page 94 94
  • Page 95 95
  • Page 96 96
  • Page 97 97
  • Page 98 98
  • Page 99 99
  • Page 100 100
  • Page 101 101
  • Page 102 102
  • Page 103 103
  • Page 104 104
  • Page 105 105
  • Page 106 106
  • Page 107 107
  • Page 108 108
  • Page 109 109
  • Page 110 110
  • Page 111 111
  • Page 112 112
  • Page 113 113
  • Page 114 114
  • Page 115 115
  • Page 116 116
  • Page 117 117
  • Page 118 118
  • Page 119 119
  • Page 120 120
  • Page 121 121
  • Page 122 122
  • Page 123 123
  • Page 124 124
  • Page 125 125
  • Page 126 126
  • Page 127 127
  • Page 128 128
  • Page 129 129
  • Page 130 130
  • Page 131 131
  • Page 132 132
  • Page 133 133
  • Page 134 134
  • Page 135 135
  • Page 136 136
  • Page 137 137
  • Page 138 138
  • Page 139 139
  • Page 140 140
  • Page 141 141
  • Page 142 142
  • Page 143 143
  • Page 144 144
  • Page 145 145
  • Page 146 146
  • Page 147 147
  • Page 148 148
  • Page 149 149
  • Page 150 150
  • Page 151 151
  • Page 152 152
  • Page 153 153
  • Page 154 154
  • Page 155 155
  • Page 156 156
  • Page 157 157
  • Page 158 158
  • Page 159 159
  • Page 160 160
  • Page 161 161
  • Page 162 162
  • Page 163 163
  • Page 164 164
  • Page 165 165
  • Page 166 166
  • Page 167 167
  • Page 168 168
  • Page 169 169
  • Page 170 170
  • Page 171 171
  • Page 172 172
  • Page 173 173
  • Page 174 174
  • Page 175 175
  • Page 176 176
  • Page 177 177
  • Page 178 178
  • Page 179 179
  • Page 180 180
  • Page 181 181
  • Page 182 182
  • Page 183 183
  • Page 184 184
  • Page 185 185
  • Page 186 186
  • Page 187 187
  • Page 188 188
  • Page 189 189
  • Page 190 190
  • Page 191 191
  • Page 192 192
  • Page 193 193
  • Page 194 194
  • Page 195 195
  • Page 196 196
  • Page 197 197
  • Page 198 198
  • Page 199 199
  • Page 200 200
  • Page 201 201
  • Page 202 202
  • Page 203 203
  • Page 204 204
  • Page 205 205
  • Page 206 206
  • Page 207 207
  • Page 208 208
  • Page 209 209
  • Page 210 210
  • Page 211 211
  • Page 212 212
  • Page 213 213
  • Page 214 214
  • Page 215 215
  • Page 216 216
  • Page 217 217
  • Page 218 218
  • Page 219 219
  • Page 220 220
  • Page 221 221
  • Page 222 222
  • Page 223 223
  • Page 224 224
  • Page 225 225
  • Page 226 226
  • Page 227 227
  • Page 228 228
  • Page 229 229
  • Page 230 230
  • Page 231 231
  • Page 232 232
  • Page 233 233
  • Page 234 234
  • Page 235 235
  • Page 236 236
  • Page 237 237
  • Page 238 238
  • Page 239 239
  • Page 240 240
  • Page 241 241
  • Page 242 242
  • Page 243 243
  • Page 244 244
  • Page 245 245
  • Page 246 246
  • Page 247 247
  • Page 248 248
  • Page 249 249
  • Page 250 250
  • Page 251 251
  • Page 252 252
  • Page 253 253
  • Page 254 254
  • Page 255 255
  • Page 256 256
  • Page 257 257
  • Page 258 258
  • Page 259 259
  • Page 260 260
  • Page 261 261
  • Page 262 262
  • Page 263 263
  • Page 264 264
  • Page 265 265
  • Page 266 266
  • Page 267 267
  • Page 268 268
  • Page 269 269
  • Page 270 270
  • Page 271 271
  • Page 272 272
  • Page 273 273
  • Page 274 274
  • Page 275 275
  • Page 276 276
  • Page 277 277
  • Page 278 278
  • Page 279 279
  • Page 280 280
  • Page 281 281
  • Page 282 282
  • Page 283 283
  • Page 284 284
  • Page 285 285
  • Page 286 286
  • Page 287 287
  • Page 288 288
  • Page 289 289
  • Page 290 290
  • Page 291 291
  • Page 292 292
  • Page 293 293
  • Page 294 294
  • Page 295 295
  • Page 296 296
  • Page 297 297
  • Page 298 298
  • Page 299 299
  • Page 300 300
  • Page 301 301
  • Page 302 302
  • Page 303 303
  • Page 304 304
  • Page 305 305
  • Page 306 306
  • Page 307 307
  • Page 308 308
  • Page 309 309
  • Page 310 310
  • Page 311 311
  • Page 312 312
  • Page 313 313
  • Page 314 314
  • Page 315 315
  • Page 316 316
  • Page 317 317
  • Page 318 318
  • Page 319 319
  • Page 320 320
  • Page 321 321
  • Page 322 322
  • Page 323 323
  • Page 324 324
  • Page 325 325
  • Page 326 326
  • Page 327 327
  • Page 328 328
  • Page 329 329
  • Page 330 330
  • Page 331 331
  • Page 332 332
  • Page 333 333
  • Page 334 334
  • Page 335 335
  • Page 336 336
  • Page 337 337
  • Page 338 338
  • Page 339 339
  • Page 340 340
  • Page 341 341
  • Page 342 342
  • Page 343 343
  • Page 344 344
  • Page 345 345
  • Page 346 346
  • Page 347 347
  • Page 348 348
  • Page 349 349
  • Page 350 350
  • Page 351 351
  • Page 352 352
  • Page 353 353
  • Page 354 354
  • Page 355 355
  • Page 356 356
  • Page 357 357
  • Page 358 358
  • Page 359 359
  • Page 360 360
  • Page 361 361
  • Page 362 362
  • Page 363 363
  • Page 364 364
  • Page 365 365
  • Page 366 366
  • Page 367 367
  • Page 368 368
  • Page 369 369
  • Page 370 370
  • Page 371 371
  • Page 372 372
  • Page 373 373
  • Page 374 374
  • Page 375 375
  • Page 376 376
  • Page 377 377
  • Page 378 378
  • Page 379 379
  • Page 380 380
  • Page 381 381
  • Page 382 382
  • Page 383 383
  • Page 384 384
  • Page 385 385
  • Page 386 386
  • Page 387 387
  • Page 388 388
  • Page 389 389
  • Page 390 390
  • Page 391 391
  • Page 392 392
  • Page 393 393
  • Page 394 394
  • Page 395 395
  • Page 396 396
  • Page 397 397
  • Page 398 398
  • Page 399 399
  • Page 400 400
  • Page 401 401
  • Page 402 402
  • Page 403 403
  • Page 404 404
  • Page 405 405
  • Page 406 406
  • Page 407 407
  • Page 408 408
  • Page 409 409
  • Page 410 410
  • Page 411 411
  • Page 412 412
  • Page 413 413
  • Page 414 414
  • Page 415 415
  • Page 416 416
  • Page 417 417
  • Page 418 418
  • Page 419 419
  • Page 420 420
  • Page 421 421
  • Page 422 422
  • Page 423 423
  • Page 424 424
  • Page 425 425
  • Page 426 426
  • Page 427 427
  • Page 428 428
  • Page 429 429
  • Page 430 430
  • Page 431 431
  • Page 432 432
  • Page 433 433
  • Page 434 434
  • Page 435 435
  • Page 436 436

ESAB PT-36 Mechanized Plasmarc Cutting Torch User manual

Type
User manual

Ask a question and I''ll find the answer in the document

Finding information in a document is now easier with AI