Page is loading ...


Table of Contents
Revision History...............................................................................................................2
Chapter 1: ZCU1285 Board Features and Operation................................... 5
Electrostatic Discharge Caution.................................................................................................5
Zynq UltraScale+ RFSoC Compatibility......................................................................................6
ZCU1285 Board Features............................................................................................................6
Board Component Locations..................................................................................................... 8
Power Management................................................................................................................. 10
Analog Power Module.............................................................................................................. 17
Serial Transceiver Power Modules.......................................................................................... 19
Zynq UltraScale+ RFSoC............................................................................................................21
Quad SPI Flash Memory........................................................................................................... 27
SD Card....................................................................................................................................... 28
DDR3 Memory............................................................................................................................28
RF Data Converters and Sampling Clocks.............................................................................. 28
Serial Transceivers and Reference Clocks.............................................................................. 32
SuperClock-2 Module................................................................................................................37
SuperClock-RF2 Module............................................................................................................38
Balun Board............................................................................................................................... 41
FPGA Mezzanine Card Interface..............................................................................................43
System Controller......................................................................................................................50
I2C Bus Management............................................................................................................... 50
USB to Quad-UART Bridge....................................................................................................... 52
Default Jumper and Switch Positions......................................................................................53
Active Heat Sink and Power Connector.................................................................................. 53
Appendix A: Regulatory and Compliance Information........................... 56
CE Information...........................................................................................................................56
Compliance Markings............................................................................................................... 57
Appendix B: Default Jumper Settings................................................................58
Appendix C: VITA 57.1 FMC Connector Pinouts............................................ 60
UG1348 (v1.0) July 16, 2019 www.xilinx.com
ZCU1285 Board User Guide 3

Appendix D: Master Constraints File Listing.................................................62
Appendix E: System Controller..............................................................................63
Connecting the System Controller User Interface................................................................ 63
Programmable Clocks Tab....................................................................................................... 65
Power Tab...................................................................................................................................73
Read a Single Power Rail.......................................................................................................... 74
Read Multiple Power Rails........................................................................................................75
Read Power Rails Continuously............................................................................................... 76
FMC Tab...................................................................................................................................... 77
EEPROM Data Tab..................................................................................................................... 79
Write Board EEPROM Data.......................................................................................................80
Read Board EEPROM Data....................................................................................................... 81
Appendix F: Additional Resources and Legal Notices..............................83
Xilinx Resources.........................................................................................................................83
Documentation Navigator and Design Hubs.........................................................................83
References..................................................................................................................................84
Please Read: Important Legal Notices................................................................................... 84
UG1348 (v1.0) July 16, 2019 www.xilinx.com
ZCU1285 Board User Guide 4

Chapter 1
ZCU1285 Board Features and
Operation
This user guide describes the components, features, and operaon of the Xilinx
®
Zynq
®
UltraScale+™ RFSoC ZCU1285 characterizaon kit. The ZCU1285 kit provides the hardware
environment for characterizing and evaluang the radio frequency data converter subsystem (RF-
ADC/RF-DAC) and high-speed serial transceivers (GTY/PS-GTR) available on the
XCZU39DR-2FFVF1760I Zynq UltraScale+ RFSoC. The ZCU1285 schemac, bill of material
(BOM), and Allegro board les are in the XTP document package on the Zynq UltraScale+ RFSoC
ZCU1285 Characterizaon Kit website.
Electrostatic Discharge Caution
CAUTION!
ESD can damage electronic components when they are improperly handled, and can result in total or
intermient failures. Always follow ESD-prevenon procedures when removing and replacing components.
To prevent ESD damage:
• Use an ESD wrist or ankle strap and ensure that it makes skin contact. Connect the equipment
end of the strap to an unpainted metal surface on the chassis.
• Avoid touching the adapter against your clothing. The wrist strap protects components from
ESD on the body only.
• Handle the adapter by its bracket or edges only. Avoid touching the printed circuit board or
the connectors.
• Put the adapter down only on an anstac surface such as the bag supplied in your kit.
• If you are returning the adapter to Xilinx
®
Product Support, place it back in its anstac bag
immediately.
UG1348 (v1.0) July 16, 2019 www.xilinx.com
ZCU1285 Board User Guide 5

Zynq UltraScale+ RFSoC Compatibility
The ZCU1285 board is provided with the XCZU39DR-2FFVF1760I Zynq UltraScale+ RFSoC.
There are no other pin-compable devices in this package.
ZCU1285 Board Features
• XCZU39DR-2FFVF1760I Zynq UltraScale+ RFSoC
• Samtec Bulls Eye
®
cable access to all 16 radio frequency analog-to-digital converter (RF-ADC)
channels
• Samtec Bulls Eye cable access to all 16 radio frequency digital-to-analog converter (RF-DAC)
channels
• Samtec Bulls Eye cable access to all 16 GTY transceivers
• Samtec Bulls Eye cable access to all four PS-GTR transceivers
• Onboard power supplies for all necessary voltages
• Connectors for external power supplies
• SMA connectors for probing RF-ADC/RF-DAC power rails, GTY/PS-GTR power rails, and
VCCINT/VCCO_HP/VCCO_HD power rails
• Embedded USB-to-JTAG programming port
• JTAG programming header
• Programmable logic (PL) JTAG connector connected to HPIO bank 66
• System Controller (Zynq-7000 SoC XC7Z010-CLG225)
• One analog power module supporng RF data converter power requirements
• One power module to support GTY transceiver power requirements
• One power module to support PS-GTR transceiver power requirements
• 300 MHz LVDS oscillator connected to HPIO global clock (GC) pins on bank 66
• 33.3333333 MHz LVCMOS oscillator connected to processing system (PS) bank 503
PS_REF_CLK pin
• Two pairs of SMA connectors connected to HPIO global clock (GC) pins on bank 66
• SuperClock-RF2 Module (HW-CLK-103) supporng RF data converter clock requirements
• SuperClock-2 Module (HW-CLK-101) supporng GTY/PS-GTR reference clock requirements
• General purpose DIP switches, LEDs, pushbuons, and test I/O
Chapter 1: ZCU1285 Board Features and Operation
UG1348 (v1.0) July 16, 2019 www.xilinx.com
ZCU1285 Board User Guide 6

• One VITA 57.1 FPGA mezzanine card (FMC) high pin count (HPC) connector
• One VITA 57.1 FPGA mezzanine card low pin count (LPC) connector
• USB-to-UART bridge connected to PL, PS, and System Controller
• Inter IC (I2C) interface
• 4x 4 Gb DDR3 SDRAM PS memory
• 1 Gb Quad SPI ash PS memory
• PMBus connecvity to the board’s digital power supplies
Block Diagram
The ZCU1285 block diagram is shown in the following gure.
Figure 1: Block Diagram
Power In 12 VDC
Board Utility Power
On-Board Power Regulation:
UTIL_5V0_ACM 5.0V, 3A
UTIL_5V0 5.0V, 6A
UTIL_3V3 3.3V, 20A
UTIL_2V5 2.5V, 12A
UTIL_1V8 1.8V, 20A
GTY Transceivers
QUAD 128
QUAD 129
QUAD 130
QUAD 131
System Controller
FPGA Power Source
On-Board Regulation:
VCCINT 0.85V, 60A
VCCBRAM / VCCINT_IO 0.85V, 6A
VCCAUX / VCCAUX_IO 1.8V, 6A
VCCO_HP 1.8V, 6A
VCCO_HD 1.8V, 6A
VCCPINT 0.85V, 12A
VCCPAUX 1.8V, 3A
VCC_PSPLL 1.2V, 3A
VCCO_DDR 1.5V, 6A
VCCO_MIO 1.8V, 6A
VCCINT_AMS 0.85V, 20A
USB to UART Bridge
Select I/O Termination
FMC2 Interface
VCCO_HP HPC
FMC3 Interface
VCCO_HD LPC
GTY Power Module
Interface for
Quads 128-131
GTR Power Module
Interface
Push Buttons,
DIP Switches,
and LEDs
Oscillator
300 MHz LVDS
SuperClock-2 Module
Interface
(HW-CLK-101)
PMBus/I2C
UTIL_2V5
UTIL_5V0
UTIL_3V0
VCCO_HP
GTR Transceiver
QUAD 505
BullsEye
Connector
PS RF-ADC/RF-DAC
DDR3 SDRAM (2 GB)
QSPI (1 Gbit)
VCC12_SW
UTIL_5V0
UTIL_3V3
Analog Power Module
Interface for
RF-ADC/RF-DAC
Tiles 224-231
RF-ADC and RF-DAC
TILE 224
…
TILE 231
BullsEye Connectors
PL
SuperClock-RF2
Module Interface
(HW-CLK-103)
Zynq Ultrascale+ RFSoC
XCZU39DR-FFVF1760
UTIL_1V8_A
UTIL_5V0_A
UTIL_3V0_A
VCC12_SW
UTIL_5V0
UTIL_3V3
UTIL_1V8_A
UTIL_5V0_ACM
UTIL_3V0_A
PMBus/I2C
PMBus/I2C
X22890-060719
Chapter 1: ZCU1285 Board Features and Operation
UG1348 (v1.0) July 16, 2019 www.xilinx.com
ZCU1285 Board User Guide 7

Board Component Locations
The following gure shows the ZCU1285 board component locaons. Each numbered
component shown in the gure is keyed to the table in Board Component Descripons.
CAUTION! Do not remove the rubber feet from the board. The feet provide clearance to prevent short circuits on
the back side of the board.
IMPORTANT! The following gure is for reference only and might not reect the current revision of the board.
Figure 2: Board Component Locations
26
29
30
31
31
31
31
31
34
33
27
25
24
2
3 5 6 7
8
18 17
16
15
14
13
10
37
36
35
39
40
41
48
46
45
44
43
50
51
52
32
9
23
22
21
38
54
53
47
49
11
19
20
4
1
28
31
31 31
31
12
X22891-060619
31
Chapter 1: ZCU1285 Board Features and Operation
UG1348 (v1.0) July 16, 2019 www.xilinx.com
ZCU1285 Board User Guide 8

Board Component Descriptions
Table 1: Board Component Descriptions
Callout Reference Designator Feature Description
1 SW1 Power Switch
2 J28 12V Mini-Fit connector (12V Input Power)
3 J27 12V external power supply connector (12V Input Power, Using
External Power Sources)
4 J73 ATX power connector (12V Input Power)
5 J1 USB to Quad-UART Bridge (Micro-B receptacle)
6 J36 SuperClock-2 Module (HW-CLK-101-SCLK2)
7 J3 System Controller JTAG connector
8 J69 USB-to-JTAG connector (Micro-B receptacle) (RFSoC Configuration)
9 J2 Platform USB JTAG connector (alternate access for programming
cables) (RFSoC Configuration)
10 SW4, DS12, DS16, DS27, DS1 System Controller status LEDs and POR pushbutton (System
Controller Reset, System Controller Status LEDs)
11 J4, J145, J154, J8 Serial transceiver power module PMBus connectors and
isolation selection headers (Monitoring Voltage and Current)
12 J163, J164, J166, J165 Boot Mode Selection Headers
13 J121, J125 I2C bus master selection headers (I2C Bus Management)
14 J160, J275 VTT_HP external connector and selection header
15 SW15, SW14 PS_POR_B Pushbutton and PS_SRST_B Pushbutton
16 J250, J251 VCCINT power probe SMA
17 J276, J277 VCCINT_AMS power probe SMA
18 J158, J159, J156, J194 PS-GTR ref clock SMAs (Serial Transceivers and Reference Clocks)
19 J99 Active Heat Sink and Power Connector
20 J181 VCCINT external power connector and voltage sense header
21 DS18, DS2 12V and Power Good LEDs (Power Switch)
22 SW2 Power regulation inhibitor switch for onboard regulators (Using
External Power Sources)
23 DS4–DS11, DS13–DS15, DS28– DS38,
DS42–DS45, DS49
Status LEDS for RFSoC logic, processor, transceiver, data converter,
and utility power
24 J149, J148, J147 GTY voltage sense headers
25 J174, J155 GTY power module (Serial Transceiver Power Modules)
26 J150 GTY external power supply connector
27 J63, J62 PS-GTR voltage sense headers
28 J138, J93 PS-GTR power module (Serial Transceiver Power Modules)
29 J67 PS-GTR external power supply connector
30 J151, J96 RFSoC logic and processor external power supply connectors
31 J146, J144, J143, J142, J64, J23, J19, J18,
J177
RFSoC logic and processor voltage sense headers
32 J21 PMBus connector (Monitoring Voltage and Current)
Chapter 1: ZCU1285 Board Features and Operation
UG1348 (v1.0) July 16, 2019 www.xilinx.com
ZCU1285 Board User Guide 9

Table 1: Board Component Descriptions (cont'd)
Callout Reference Designator Feature Description
33 J39 PS-GTR transceiver connector pad, bank 505 (Serial Transceivers and
Reference Clocks)
34 J117, J118, J280, J281 GTY transceiver connector pads Q128, Q129, Q130, and Q131
35 U1 XCZU39DR-2FFVF1760I, Zynq UltraScale+ RFSoC
36 J124, J278, J129, J279 RF-ADC and RF-DAC Bulls Eye connector pads, tiles 224–231 (RF Data
Converters and Sampling Clocks)
37 J20 RF-ADC VCM connector
38 J75, J76, J78, J81, J79 RF-ADC and RF-DAC voltage sense headers
39 J46, J43, J60, J25 RF-ADC and RF-DAC PMBus connector and selection headers
(Monitoring Voltage and Current)
40 J114, J115, J116, J107, J113 RF-ADC and RF-DAC external power supply connectors
41 J131, J119, J120 Analog Power Module
42 J170 SuperClock-RF2 Module(HW-CLK-103)
43 SW16, SW17, J95, SW3, DS22– DS26,
DS46–DS48
User configurable I/O header, DIP switch, LEDs, and
pushbuttons (User LEDs, User DIP Switches and I/O Header)
44 SW7 RFSoC PROGRAM Pushbutton
45 DS40, DS39, DS17, DS3 RFSoC DONE LED, INIT LED, STATUS LED, and ERROR LED
46 J106, J216 VTT_HP external connector and selection header
47 J190, J189, J188, J187, J192, J191, J257,
J256, J162, J161
Power probe SMAs for DAC_AVCC, DAC_AVTT, DAC_AVCCAUX,
ADC_AVCC, and ADC_AVCCAUX
48 J243, J242 RF-DAC SYSREF SMA
49 J84, J85, J83, J86 SMA connectors to differential GC pins on RFSoC (Differential SMA
Pin Inputs)
50 J5 PL JTAG connector tied to RFSoC I/O pins
51 J254, J255, J253, J252 Power probe SMAs for VCCO_HP and VCCO_HD
52 J287 RFSoC SD Cardslot (bottom side of board)
53 JA3 FMC2 HPC connector tied to VCCO_HP banks (FPGA Mezzanine Card
Interface, FMC Tab)
54 JA4 FMC3 LPC connector tied to VCCO_HD banks (FPGA Mezzanine Card
Interface, FMC Tab)
Power Management
12V Input Power
The ZCU1285 board receives 12V main power through J28 (callout 2, Figure 2: Board
Component Locaons) using the 12V AC adapter included with the ZCU1285 characterizaon
kit. J28 is a 6-pin (2 x 3), right angle, Mini-Fit connector.
Chapter 1: ZCU1285 Board Features and Operation
UG1348 (v1.0) July 16, 2019 www.xilinx.com
ZCU1285 Board User Guide 10

CAUTION! When supplying 12V through J28, use only the power supply provided for use with this board (Xilinx
part number 3800033).
CAUTION! Do NOT use a 6-pin, PC ATX power supply connector with J28. The pinout of the 6-pin, PC ATX
connector is not compable with J28 and the board will be damaged if an aempt is made to power it from a PC
ATX power supply connector.
12V power can also be provided through:
• Connector J73 (callout 4, Figure 2: Board Component Locaons) which accepts an ATX hard
drive 4-pin power plug
• Connector J27 (callout 3, Figure 2: Board Component Locaons) which can be connected to a
bench-top power supply
CAUTION! Because connector J73 provides no reverse polarity protecon, use a power supply with a current
limit set at 6A maximum.
CAUTION! Do NOT apply 12V power to more than a single input source. For example, do not apply power to
J73 and J27 at the same me.
CAUTION! If J73 or J27 is used to supply the 12V input power, be careful that board power consumpon does
not exceed 75W (this includes the RFSoC).
Power Switch
The ZCU1285 board main power is turned on or o using switch SW1 (callout 1, Figure 2: Board
Component Locaons). When the switch is in the ON posion, power is applied to the board and
the power good LED DS18 illuminates green (callout 21, Figure 2: Board Component Locaons).
Onboard Power Regulation
ZCU1285 Power Supply Block Diagram
The following gure shows the onboard power supply architecture.
Chapter 1: ZCU1285 Board Features and Operation
UG1348 (v1.0) July 16, 2019 www.xilinx.com
ZCU1285 Board User Guide 11

Figure 3: Board Power Supply Block Diagram
Maxim 15303 U24
1.8V at 6A max
Maxim 15303 U47
0.85V at 6A max
Maxim 15303 U29
1.8V at 6A max
Maxim 15303 U31
1.8V at 6A max
Maxim 15301 U51
2.5V at 12A max
Maxim 15303 U102
5.0V at 6A max
Maxim 20751 U23
MultiPhase Master
Maxim VT1697SBFXQ U118
0.85V at 20A max
Maxim VT1697SBFXQ U137
0.85V at 20A max
Maxim VT1697SBFXQ U138
0.85V at 20A max
VCCINT
VCCAUX / VCCAUX_IO
VCCBRAM / VCCINT_IO
VCCO_HP
VCCO_HD
UTIL_2V5
UTIL_5V0
12V PWR
IN
GTR Power Module
Quad 505
1.8V at 2.5A max
0.85V at 12.0A max
MGTAVCC_GTR
MGTAVTT_GTR
GTY Power Module
Quads 128-131
1.2V at 20A max
1.8V at 2.5A max
0.9V at 12.0A max
MGTAVCC
MGTAVTT
MGTVCCAUX
Maxim 15301 U28
0.85V at 12A max
VCCPINT
Maxim 15303 U48
1.8V at 3A max
VCCPAUX
Maxim 15303 U27
1.2V at 3A max
VCC_PSPL
L
Maxim 15303 U11
1.5V at 6A max
VCCO_DDR
Maxim 15303 U96
1.8V at 6A max
VCCO_MIO
Maxim 20751 U89
MultiPhase Master
Maxim VT1697SBFXQ U20
0.85V at 20A max
Maxim VT1697SBFXQ U17
0.85V at 20A max
VCCINT_AMS
Analog Power Module
Tiles 224-231
1.8V at 2A max
0.925V at 3.5A max
0.925V at 2.0A max
ADC_AVCC
ADC_AVCCAUX
DAC_AVCC
Maxim 15301 U50
1.8V at 20A max
UTIL_1V8
Maxim 15301 U30
3.3V at 20A max
UTIL_3V3
TI LMZ31503 U155
5.4V at 3A max
Linear Tech LT1764 U154
5.0V at 3A max
UTIL_5V0_ACM
DAC_AVTT
DAC_AVCCAUX
1.8V at 2.0A max
2.5V or 3.0V at 2.0A max
X22892-071519
Chapter 1: ZCU1285 Board Features and Operation
UG1348 (v1.0) July 16, 2019 www.xilinx.com
ZCU1285 Board User Guide 12

Onboard Power System Devices
The ZCU1285 board uses power regulators and PMBus-compliant pulse width modulaon
(PWM) digital controllers from Maxim Integrated to supply the RFSoC logic and ulity voltages
listed in the following table. The board can also be congured to use an external bench power
supply for each voltage. See Using External Power Sources.
The output voltages of the controllers in the table can be reprogrammed using the Maxim InTune
Digital PowerTool.
Note: The MAX20751EKX device has limited nonvolale memory reprogramming saves (four counts).
CAUTION! Be extremely careful when aempng to modify any of the onboard regulators, because an
incorrectly programmed regulator can damage onboard components.
Table 2: Onboard Power System Devices
Device Part Number
Reference
Designator(s)
Description
Power Rail Net
Name
Voltage
RFSoC Logic
Maxim MAX20751EKX
1
U23 Multiphase master with
PMBus interface controller
(60A three phases at 20A/
phase)
VCCINT 0.85V
Maxim MAX15303 U24 InTune digital point of load
(PoL) controller, 6A
VCCAUX / VCCAUX_IO 1.8V
Maxim MAX15303 U47 InTune digital point of load
(PoL) controller, 6A
VCCBRAM / VCCINT_IO 0.85V
Maxim MAX15303 U29 InTune digital point of load
(PoL) controller, 6A
VCCO_HP 1.8V
Maxim MAX15303 U31 InTune digital point of load
(PoL) controller, 6A
VCCO_HD 1.8V
Processor
Maxim MAX15301 U28 InTune digital point of load
(PoL) controller, 12A
VCCPINT 0.85V
Maxim MAX15303 U48 InTune digital point of load
(PoL) controller, 3A
VCCPAUX 1.8V
Maxim MAX15303 U27 InTune digital point of load
(PoL) controller, 3A
VCC_PSPLL 1.2V
Maxim MAX15303 U11 InTune digital point of load
(PoL) controller, 6A
VCCO_DDR 1.5V
Maxim MAX15303 U96 InTune digital point of load
(PoL) controller, 6A
VCCO_MIO 1.8V
RF Data Converters
Maxim MAX20751EKX
1
U89 Multiphase master with
PMBus interface controller
(40A two
phases at 20A/phase)
VCCINT_AMS 0.85V
INA226 U60 Current shunt and power
monitor with I2C interface
ADC_AVCC 0.925V
Chapter 1: ZCU1285 Board Features and Operation
UG1348 (v1.0) July 16, 2019 www.xilinx.com
ZCU1285 Board User Guide 13

Table 2: Onboard Power System Devices (cont'd)
Device Part Number
Reference
Designator(s)
Description
Power Rail Net
Name
Voltage
INA226 U61 Current shunt and power
monitor with I2C interface
ADC_AVCCAUX 1.8V
INA226 U63 Current shunt and power
monitor with I2C interface
DAC_AVCC 0.925V
INA226 U64 Current shunt and power
monitor with I2C interface
DAC_AVTT 1.8V
INA226 U65 Current shunt and power
monitor with I2C interface
DAC_AVCCAUX 2.5V or
3.0V
GTY Transceivers
INA226 U141 Current shunt and power
monitor with I2C interface
MGTAVCC 0.9V
INA226 U142 Current shunt and power
monitor with I2C interface
MGTAVTT 1.2V
INA226 U143 Current shunt and power
monitor with I2C interface
MGTVCCAUX 1.8V
PS-GTR Transceivers
INA226 U99 Current shunt and power
monitor with I2C interface
MGTAVCC_GTR 0.85V
INA226 U97 Current shunt and power
monitor with I2C interface
MGTAVTT_GTR 1.8V
Utility
Maxim MAX15301 U50 InTune digital point of load
(PoL) controller, 20A
UTIL_1V8 1.8V
Maxim MAX15301 U51 InTune digital point of load
(PoL) controller, 12A
UTIL_2V5 2.5V
Maxim MAX15301 U30 InTune digital point of load
(PoL) controller, 20A
UTIL_3V3 3.3V
Maxim MAX15301 U102 InTune digital point of load
(PoL) controller, 12A
UTIL_5V0 5.0V
LMZ31503 U155 DC/DC converter, 3A UTIL_5V4 5.4V
LT1764 U154 Fixed LDO regulator UTIL_5V0_ACM 5.0V
System Controller
Maxim MAX15053 U13 Fixed LDO regulator SYS_1V0 1.0V
Maxim MAX15027 U25 Fixed LDO regulator VCC_1V2 1.2V
Maxim MAX15027 U33 Fixed LDO regulator VCC_1V8 1.8V
Notes:
1. The MAX20751EKX device has limited nonvolatile memory reprogramming saves (four counts).
Chapter 1: ZCU1285 Board Features and Operation
UG1348 (v1.0) July 16, 2019 www.xilinx.com
ZCU1285 Board User Guide 14

Using External Power Sources
Each voltage rail for the RFSoC logic, mul-gigabit transceivers (MGTs), and RF data converters
has an associated Euro-Mag spring-clamp terminal block (callout 3, 14, 20, 26, 29, 30, 40, and 46,
Figure 2: Board Component Locaons), which can be used to provide power from an external
source (see the following table).
CAUTION! Do NOT apply power to any of the RFSoC logic external power supply connectors without rst
disabling the associated regulator or regulators. Failing to disable the regulator can damage the board.
Each onboard RFSoC logic regulator can be disabled using its respecve power regulaon inhibit DIP switch
(callout 22, Figure 2: Board Component Locaons). A regulator is enabled when the power regulaon inhibitor
switch is set to the ENABLED posion. The following table lists the external power connectors for the dierent
power rails.
Table 3: RFSoC Logic and Serial Transceiver Rails
Power Rail Net Name
External
Supply
Connector(s)
Remote Sense
Header
RFSoC Logic and Processor
VCCINT
J181 J22
VCCBRAM
J96
J74
VCCAUX J23
VCCO_HP J19
VCCO_HD J18
VCCPINT J177
VCCPAUX
J151
J146
VCC_PSPLL J144
VCCO_DDR J143
VCCO_MIO J142
VCCINT_AMS J64
GTY Transceivers
MGTAVCC
J150
J147
MGTAVTT J148
MGTVCCAUX J149
PS-GTR Transceivers
MGTAVCC_GTR
J67
J62
MGTAVTT_GTR J63
RF Data Converters
ADC_AVCC J114 J79
ADC_AVCCAUX J115 J81
DAC_AVCC J116 J75
DAC_AVTT J107 J76
DAC_AVCCAUX J113 J78
Notes:
1. The serial transceiver or analog power module must be removed before providing external power to any of the
transceiver or data converter rails (see Serial Transceiver Power Modules).
Chapter 1: ZCU1285 Board Features and Operation
UG1348 (v1.0) July 16, 2019 www.xilinx.com
ZCU1285 Board User Guide 15

Monitoring Voltage and Current
Voltage and current monitoring and control for the Maxim power system is available through
either the ZCU1285 System Controller or via the Maxim PowerTool soware GUI.
The ZCU1285 System Controller is the simplest and most convenient way to monitor the voltage
and current values for the power rails listed in Onboard Power System Devices. For details on
how to use this built-in feature, see Power Tab.
The ZCU1285 board includes these PMBus connectors:
• J21 (callout 32, Figure 2: Board Component Locaons), for use with the Maxim USB-to-
PMBus interface dongle (Maxim part number MAXPOWERTOOL002) and the Maxim
PowerTool GUI.
• J4 and J145 (callout 11, Figure 2: Board Component Locaons) are used to connect to the
serial transceiver power module’s PMBus. The pinouts for J4 and J145 are shown in the
following gure
• J25 (callout 39, Figure 2: Board Component Locaons) is used to connect to the analog power
module PMBus. The pinout for J25 is shown in the following gure.
Figure 4: PMBus Connector Pinouts
1 2
3 4
5 6
7 8
9 10
11 12
13 14
15 16
CLK CTRL
DATA
NC
ALERT
NC
NC
NC
NC
GND
MAXPOWERTOOL002
1
2
3
4
5
CLK
DATA
ALERT
CTRL
GND
J4, J145
1
2
3
4
CLK
DATA
ALERT
GND
J25
X22893-051519
The onboard Maxim power controllers by default are isolated from the serial transceiver power
module’s PMBus. However, the two interfaces can be linked by removing the shunt on J8 or J154
(serial transceiver PMBus isolaon). This conguraon is required when using Maxim PowerTool
to monitor and control both the RFSoC power rails and the serial transceiver power rails using
the Maxim InTune Digital PowerTool GUI.
Chapter 1: ZCU1285 Board Features and Operation
UG1348 (v1.0) July 16, 2019 www.xilinx.com
ZCU1285 Board User Guide 16

Analog Power Module
There is one analog power module interface for connecng an analog power module (callout 41,
Figure 2: Board Component Locaons). The analog power module supplies power to the
ADC_AVCC, ADC_AVCCAUX, DAC_AVCC, DAC_AVTT, and DAC_AVCCAUX rails, which power
the RFSoC RF data converters. The analog power module connects to J131, J119, and J120. Two
analog power modules are provided with the ZCU1285 board for evaluaon. One module is
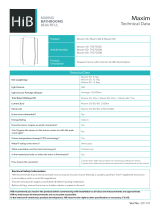
made by Intersil with part number ISL8024DEMO2Z and the other is made by MPS with part
number EVREF0102A. See the following two gures.
Figure 5: Intersil Analog Power Module
Chapter 1: ZCU1285 Board Features and Operation
UG1348 (v1.0) July 16, 2019 www.xilinx.com
ZCU1285 Board User Guide 17

Figure 6: MPS Analog Power Module
The following table lists the nominal voltage values for the ADC_AVCC, ADC_AVCCAUX,
DAC_AVCC, DAC_AVTT, and DAC_AVCCAUX power rails. It also lists the maximum current
rang for each rail supplied by the analog power modules included with the ZCU1285
characterizaon kit.
Table 4: Analog Power Module
Analog Rail Net Name Nominal Voltage (V) Maximum Current Rating (A)
ADC_AVCC 0.925 2.00
ADC_AVCCAUX 1.8 2.00
DAC_AVCC 0.925 3.5
DAC_AVCCAUX 1.8 2.00
DAC_AVTT 2.5 or 3.0 2.00
The analog power rails can also be supplied externally. The external supply connectors are listed
in the table in Using External Power Sources.
Chapter 1: ZCU1285 Board Features and Operation
UG1348 (v1.0) July 16, 2019 www.xilinx.com
ZCU1285 Board User Guide 18

CAUTION! The analog power module MUST be removed when providing external power to the RF data
converter rails.
Informaon about the analog power modules included with the ZCU1285 characterizaon kit is
available from the vendor websites Renesas Power Management and Monolithic Power Systems
Serial Transceiver Power Modules
There is one GTY transceiver power module interface (callout 25, Figure 2: Board Component
Locaons). The GTY transceiver power module supplies the MGTAVCC, MGTAVTT, and
MGTVCCAUX power rails, which connect to the RFSoC GTY transceivers. In the ZCU1285
characterizaon kit, there is one GTY transceiver power module from Maxim Integrated provided
for evaluaon, part number MAXREFDES87#. The GTY transceiver power module is labeled GTY
and connects to J174 and J155.
There is one PS-GTR transceiver power module interface (callout 28, Figure 2: Board Component
Locaons). The PS-GTR transceiver power module supplies the MGTAVCC_GTR and
MGTAVTT_GTR power rails, which connect the RFSoC PS-GTR transceivers. In the ZCU1285
characterizaon kit, there is one PS-GTR transceiver power module from Maxim Integrated
provided for evaluaon, part number MAXREFDES87#. The PS-GTR power module is labeled
PS-GTR and connects to J138 and J93.
Chapter 1: ZCU1285 Board Features and Operation
UG1348 (v1.0) July 16, 2019 www.xilinx.com
ZCU1285 Board User Guide 19

Figure 7: Maxim Integrated Serial Transceiver Power Module
The following table lists the nominal voltage values for the MGTAVCC, MGTAVTT,
MGTVCCAUX, MGTAVCC_GTR, and MGTAVTT_GTR power rails. It also lists the maximum
current rang for each rail supplied by serial transceiver modules included with the ZCU1285
board.
Table 5: Serial Transceiver Power Modules
Serial Transceiver Rail Net
Name
Nominal Voltage (V) Maximum Current Rating (A)
MGTAVCC 0.9 12
MGTAVTT 1.2 20
MGTVCCAUX 1.8 2.5
MGTAVCC_GTR 0.85 12
MGTAVTT_GTR 1.8 2.5
The serial transceiver power rails can also be supplied externally. The external supply connectors
are listed in the table in Using External Power Sources.
Chapter 1: ZCU1285 Board Features and Operation
UG1348 (v1.0) July 16, 2019 www.xilinx.com
ZCU1285 Board User Guide 20
/