OPERATION AND MAINTENANCE FOR MACH 1SL
™
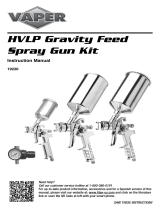
HVLP SPRAY GUN
Your new MACH 1SL HVLP spray gun
is exceptionally rugged in construction
and is built to stand up under hard, con-
tinuous use. However, like any other fine
precision instrument, its most efficient
operation depends on a knowledge of its
construction, operation and maintenance.
Properly handled and cared for, it will
produce beautiful, uniform finishing
results long after other spray guns have
worn out.
SET-UP FOR SPRAYING
Connecting Gun To Air Hose
Air should be supplied by a suitable
length of 5/16" diameter air hose fitted
with a 1/4" NPS(f) connection at gun
end. For hose lengths over 50', use 3/8"
diameter hose.
Connecting Gun To Fluid Hose
Fluid should be supplied by a suitable
length of 3/8" diameter fluid hose fitted
with a 3/8" NPS(f) connection at gun end.
1/4" diameter hose is recommended for
use with low viscosity fluids. (Fluid hoses
of different composition are available for
special fluids.)
SPRAY GUN CLEANING
INSTRUCTIONS
In certain states it is now against the law
to spray solvents containing Volatile
Organic Compounds (VOC)’s into the
atmosphere when cleaning a spray gun.
In order to comply with these air quality
laws Binks recommends one of the fol-
lowing two methods to clean your spray
finishing equipment:
1. Spray solvent through the gun into a
closed system. An enclosed unit or
spray gun cleaning station condenses
solvent vapors back into liquid form
which prevents escape of VOC’s into
the atmosphere.
2. Place spray gun in a washer type
cleaner. This system must totally
enclose the spray gun, cups, nozzles
and other parts during washing, rins-
ing and draining cycles. This type of
unit must be able to flush solvent
through the gun without releasing any
VOC vapors into the atmosphere.
Additionally, open containers for storage
or disposal of solvent or solvent-contain-
ing cloth or paper used for surface prepa-
ration and clean-up may not be used. All
containers shall be nonabsorbent.
Pointers On Cleaning
When used with 1-quart cup relieve pres-
sure in the cup. Then unscrew, empty and
carefully rinse cup out with thinners.
Place clean thinners in the cup and spray
this through the gun until it is clean.
Blow air through gun to dry it.
When Used With
Pressure Container
Shut off air supply to container and
release the pressure on the container.
Hold a piece of cloth wadded in the
hand over the gun nozzle (3) and pull the
trigger. The air will back up through the
fluid nozzle and force the fluid out of the
Hose into the container. Empty container.
Put enough thinner into the container to
wash hose and gun thoroughly and spray
this through the gun until it is clean. Then
blow out the fluid hose to dry it and
remove all traces of fluid by attaching it
to the air line.
When used with Paint
Circulating System
Shut off fluid supply and remove fluid
hose from gun. Clean as gun used with
siphon cup or pressure container or
connect quick release on paint line
solvent line. To ensure a clean air supply
to your spray gun, use Binks oil and
water extractor. See your Binks distribu-
tor for the correct model.
GENERAL MAINTENANCE
To Replace Air Valve and
Spindle Assembly
Remove fluid control knob (19), spring
(14) and fluid needle (16). Unscrew hous-
ing (15) and remove spindle assembly
(13) with springs (12 & 14), seal retainers
(11) and o-rings (10). Lubricate new
o-rings with Binks Gunner’s Mate. In the
absence of Gunner’s Mate, a sparing
amount of petroleum jelly can be used. If
too much petroleum jelly is used, the air
passages will carry it into the finished
product.
Assemble components using fluid needle.
Place this assembly along with housing
(15) into gun body and screw into posi-
tion. Remove fluid needle and tighten
housing.
To Replace Cartridge Assembly
Remove fluid control knob (19), spring
(14) and remove fluid needle (16). Pull
back trigger (23) and remove seal car-
tridge assembly (25) from fluid inlet (24).
Remove and discard plastic packing pin
in new seal cartridge assembly. Attach
seal cartridge assembly to fluid inlet.
Assemble fluid needle (16), spring (14)
and fluid control knob (19) to gun.
CAUTION
All parts on a spray gun should be
screwed in hand tight at first; this will
avoid the possibility of cross threading
the parts. If the parts cannot be turned
by hand easily, make sure you have
the correct parts, unscrew, realign, and
try again. NEVER use undue force in
mating parts.
!
EN
77-2665-R13.4 (6/2017) 3 / 8 www.carlisleft.com


