2
Table of Contents
Safety Information ......................................................... 2
Precautions ..............................................................................3
Warranty ......................................................................... 3
Pre-Operation ................................................................ 4
Product Description .................................................................4
LCD Display Definitions ............................................................5
Accuracy ..................................................................................5
Product Specifications .............................................................6
Operation ....................................................................... 6
Maintenance .................................................................. 8
Replacing the Battery and Fuse ...............................................8
Test Lead Replacement ...........................................................9
Care and Cleaning ........................................................ 9
Safety Information
Please read this manual carefully and pay attention to related
safe working standards before using this meter. Protection
provided by the instrument will be impaired if used in a manner
not specified by the manufacturer.
The digital multimeter is designed and manufactured according
to safety requirements of EN 61010-1:2010, EN 61010-2-030, EN
61010-2-033, on electronic measuring instruments and hand
held digital multipurpose meters. This multimeter also conforms
to UL STD.61010-1, 61010-2-030, 61010-2-033, Certified to CSA
STD.C22.2 NO.61010-1, 61010-2-030, and 61010-2-033. The
product meets with the requirements of 300V CAT III and
pollution degree 2. The meter can be used for measuring DC
voltage, AC voltage, resistance, diode and batteries.
Use the meter strictly according to the provisions of this manual.
Otherwise, the warranty for the meter may become invalid. The
warnings in the user manual are used to remind users of
possible danger or dangerous action. The notes in the user
manual are used to remind users of possible meter damage or a
condition or action of the measured object.
This device enters shutdown mode when the battery voltage is
lower than 2V.
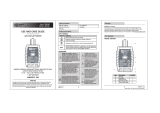
SAFETY SYMBOLS
Indicates important safety information.
Alternating current (AC).
The fuse must be replaced with the rating
specified in this manual.
Equipment protected throughout by DOUBLE
INSULATION or REINFORCED INSULATION.
Conforms to UL STD. 61010-1, 61010-2-030
and 61010-033. Certified to CSA STD C22.2
NO. 61010-1, 61010-2-030, and 61010-033.
Accord with the related EU laws and
regulations.
Measurement Category III is applicable to test
and measuring circuits connected to the
distribution part of the building’s low-voltage