Page is loading ...

B347556013COM00
Do Not Return This Product!
Contact our customer service team for help fi rst
Call: 1-800-489-3351 (toll free)
Monday-Friday 9am - 5pm CST
Visit: www.ameriwoodhome.com
–Unit can • p over causing severe injury or death.
–Anchor unit to stud in wall (if instructed to)
–Do not allow children climb on unit
–Put heavy items on lower shelves or drawers
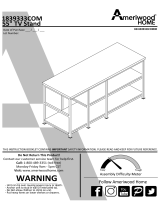
FRANKLIN STORAGE TOWER
7556013COM
Date of Purchase: ____/____/_____
Lot Number:
THIS INSTRUCTION BOOKLET CONTAINS IMPORTANT SAFETY INFORMATION. PLEASE READ AND KEEP FOR FUTURE REFERENCE.
WARNING
Easy Tough
Assembly Diffi culty Meter
Follow Ameriwood Home

Contact Us!
Helpful Hints
Do NOT return this product!
Contact our friendly customer service team fi rst for help
Call us!
1-800-489-3351
Monday-Friday
9am - 5pm CST
PEOPLE NEEDED FOR ASSEMBLY: 1-2
ESTIMATED ASSEMBLY TIME: 1 HOUR
Visit ameriwoodhome.com
Assembly Tips
2
ameriwoodhome.com
- Open your item in the area you plan to keep it for less heavy li! ing
- Iden" fy, sort and count the parts before a# emp" ng assembly
- Compression dowels are tapped in with a hammer
- Slides are labeled with a R (right) and L (le! ) for proper placement
- Make sure to always face the point on the top of the Cam Lock towards the
outer edge
- Use all the nails provided for the back panel and spread them out equally
- Back Panel must be used to make sure your unit is sturdy
- Do NOT use harsh chemicals or abrasive cleaners on this item
- Never push, pull, or drag your furniture

Before You Start
Cam Lock Fastening System
3
ameriwoodhome.com
P
P
P
P
P
This Cam Lock Fastening System will be used throughout the assembly process.
Read through each step carefully and follow the proper order
Separate and count all your parts and hardware
Give yourself enough room for the assembly process
Have the following tools: Flat Head Screwdriver, #2 Phillips Head
Screwdriver and Hammer
Cau! on: If using a power drill or power screwdriver for screwing,
please be aware to slow down and stop when screw is ! ght.
Failure to do so may result in stripping the screw.
Q
u
i
c
k
T
i
p
A
s
s
e
m
b
l
y
1
3
2
4

Board Iden• fi ca• on
Not actual size
4
ameriwoodhome.com
x1
T7556013010
TOP PANEL
x1
T7556013020
CENTER SHELF
x4
T7556013030
UPPER LEG (SHORT)
x4
T7556013040
LOWER LEG (LONG)
x3
T7556013050
FIXED SHELF
1
5
2 3
4

5
ameriwoodhome.com
* raw edges are shaded
Part List
Not Actual Size
5
ameriwoodhome.com
Hardware Bag Reference Number:
27556013COM0
x20
TUD0042
FLAT WASHER
x1
TUD0062
BALL SHAPE ALLEN KEY
M4
x20
TUD0059
JCBC Screw
M6 X 65
x4
TUD0052
JCBC Screw
M6 X 30
x24
TUD0041
SPRING WASHER
x1 SET
TUD0021
ANTI TIPPING KIT

6
ameriwoodhome.com
* raw edges are shaded
Step 1
x4
TUD0042
x4
TUD0059
x4
TUD0041
3
3
3
3
5
NOTE : DO NOT FULLY TIGHTEN ALL THE BOLT.
x1
TUD0062

7
ameriwoodhome.com
* raw edges are shaded
Step 2
x4
TUD0052
3
3
3
3
2
x4
TUD0041
NOTE : DO NOT FULLY TIGHTEN ALL THE BOLT.
x1
TUD0062

8
ameriwoodhome.com
* raw edges are shaded
Step 3
x4
TUD0042
x4
TUD0059
x4
TUD0041
3 3
3
3
2
1
NOTE : FULLY TIGHTEN ALL THE BOLT.
x1
TUD0062

9
ameriwoodhome.com
* raw edges are shaded
Step 4
x2
TUD0042
x2
TUD0059
x2
TUD0041
4
4
5
x1
TUD0062
NOTE : DO NOT FULLY TIGHTEN ALL THE BOLT.

10
ameriwoodhome.com
* raw edges are shaded
Step 5
x2
TUD0042
x2
TUD0059
x2
TUD0041
4
4
5
x1
TUD0062
NOTE : DO NOT FULLY TIGHTEN ALL THE BOLT.

11
ameriwoodhome.com
* raw edges are shaded
Step 6
x2
TUD0042
x2
TUD0059
x2
TUD0041
4
5
5
x1
TUD0062
NOTE : DO NOT FULLY TIGHTEN ALL THE BOLT.

12
ameriwoodhome.com
* raw edges are shaded
Step 7
x2
TUD0042
x2
TUD0059
x2
TUD0041
45
5
x1
TUD0062
NOTE : DO NOT FULLY TIGHTEN ALL THE BOLT.

13
ameriwoodhome.com
* raw edges are shaded
Step 8
x4
TUD0042
x4
TUD0059
x4
TUD0041
5
2
1
x1
TUD0062
NOTE : FULLY TIGHTEN ALL THE BOLT.

14
ameriwoodhome.com
* raw edges are shaded
x1 set
TUD0021
IMPORTANT: THIS UNIT MUST BE SECURE TO THE WALL TO HELP PREVENT TIPOVER.
FOLLOW THESE INSTRUCTIONS TO INSTALL THE ANTI-TIPPING SAFETY BRACKET
PROVIDED WITH THIS PRODUCT.
WARNING
Serious or fatal crushing injuries
can occur from furniture ! p over.
To prevent ! p over:
* Install ! pover restraint provided
* place heaviest items in the lowest
drawers
* Unless specifi cally designed to
accommodate, do not set TVs or
other heavy objects on the top of
this product
* Never allow children to climb or
hang on drawers, door, or shelves
* Never open more than one drawer
at a ! me
Use of ! p over restraints may only
reduce, but not eliminate the risk
of ! p over
OPTION 1: A" achment into a wall stud (preferred method)
Using a stud fi nder, locate a stud in the wall. Place your unit against the wall, with the safety bracket
aligned in this loca! on.
To make driving the screw easier, you can drill a 1/8” diameter pilot hole (3mm) through the safety
bracket into the stud.
Drive the screw through the safety bracket into the wall stud. Tighten the screw that was not fully
! ghened in step 5.
OPTION 2: A" achment into drywall
Locate your unit where desired against a wall and mark the wall through the safety bracket, then
move your unit aside.
Drill a 3/16” diameter hole (5mm) into the wallboard. Tap the wall anchor into the hole un! l it is fl ush.
Move your unit into loca! on and fasten the wall bracket to the wall anchor with the screw.
Tighten the screw that was not fully ! ghtened in step 5.
For Masonry, Concrete, or other
wall materials:
Consult your local hardware store
for appropriate anchors to securely
a$ ach the safety bracket.

15
ameriwoodhome.com
Maximum Loads
This unit has been designed to support the maximum loads shown. Exceeding these load limits
could cause sagging, instability, product collapse, and/or serious injury.
1. This cer! fi cate applies to Dorel Home Furnishings, Inc. product iden! fi ed by this instruc! on manual.
2. This cer! fi cate applies to compliance of this product with the CPSC Ban on Lead-Containing Paint ( 16 CFR 1303).
3. This product is distributed by:
4. Site of Manufacturer: Muar, Malaysia.
5. See front page of instruc! on manual for date of manufacturer.
Dorel Home Furnishings, Inc.
410 East First Street South,
Wright City, MO 63390
636-745-3351
Cer! fi cate of Confi rmity
Warning: Risk of serious injury to person - do not place a television on this furniture. This furniture
is not approved for use with a television.

16
ameriwoodhome.com
Register your product to receive the following:
* New trend details -sneak peek on what's new
* Surveys -have a voice within our community
* Exclusive deals and discount codes
* Quick and easy replacement part service
To register your product, visit
Visit your local retailer's website, rate your purchased
product and leave us some feedback!
We would like to
extend a big "Thank You" to all of
our customers for taking the
to assemble this
Seeds product, and to give us your valuable
feedback.
To register your product, visit Ameriwoodhome.com
We would like to extend a big “Thank You” to all
of our customers for taking the time to assemble
this Ameriwood Home product, and to give us your
valuable feedback

17
ameriwoodhome.com
* raw edges are shaded
Español
Cubierta Delantera
Este libro de instrucciones con! ene información IMPORTANTE de seguridad. Por favor lea y manténgalo para
referencia en el futuro.
No Regrese este producto! Comuniquese con nuestro amistoso equipo de servicio al cliente para obtener
ayuda.
Llamenos al: 1-800-489-3351 (Gra! s) Lunes - Viernes 9am - 5pm CST
Visitar: www.ameriwoodhome.com
PRECAUCION
Este mueble puede volcarse y causar graves heridas y/o muerte.
Anclar el mueble a un poste de madera en la pared (si esto se requiere).
No Permita que los niños monten el mueble.
Mantenga los ar# culos más pesados en los cajones de abajo.
Consejos Ú" les (página 2)
- Abra su ar# culo en el área donde usted planea u! lizarlo para evitar levantar y moverlo menos
- Iden! $ car, ordenar y contar las piezas antes de intentar ensamblar
- Las clavijas de compresión se golpean con un mar! llo
- Las diaposi! vas están marcadas con una R (derecha) y L (izquierda) para la colocación correcta
- Asegúrese de que siempre este el punto locaizado en la parte superior de bloqueador de leva
este volteadohacia borde exterior
- U! lizar todos los clavos para el panel de atras y distribuirlos por igual
- El panel de atras debe u! lizarse para asegurarse de que la unidad quede $ ja y $ rme
- No use quimicas fuertes ni limpiadores abrasivos en este ar! culo
- Nunca empuje, ! re ni arrastre los muebles
Antes de Que Empieces (página 3)
-Lea cuidadosamente cada paso y siga el orden correcto
-Separar y contar todas sus piezas y hardware
-Dése su$ ciente espacio para el proceso de ensamble
-Tenga las siguientes herramientas: destornillador de cabeza plana, %2 cabeza Phillips
Destornillador y mar! llo
-Precaución: Si usa un taladro electrónico o un destornillador eléctrico para atornillar, por favor asegúrese
que deje de atornillar cuando el tonillos este apretado. Fallar hacer esto puede causar barrer el tornillo
Sistema de fi jar el bloqueo de leva (página 3)
Esta sistema de $ jar el bloqueo de leva sera usado en todo el proceso ensamble
Iden" fi cación de la Junta (página 4)
Tamaño no real
Lista de (página 5)
Tamaño no real

18
ameriwoodhome.com
* raw edges are shaded
Español
Página 6, 7, 9, 10, 11 & 12
NOTA: NO APRIETE TOTALMENTE TODO EL PERNO.
Página 8 & 13
NOTA: APRIETE COMPLETAMENTE TODO EL PERNO.
Página 14
Para mampostería, hormigón u otros materiales de pared:
Consulte en su ferretería local los anclajes apropiados para sujetar de forma segura el soporte de seguridad.
IMPORTANTE: ESTA UNIDAD DEBE ESTAR SEGURA EN LA PARED PARA AYUDAR A PREVENIR AL TIPOVER.
SIGA ESTAS INSTRUCCIONES PARA INSTALAR EL SOPORTE DE SEGURIDAD ANTIDISCIPLINADOR
PROPORCIONADO CON ESTE PRODUCTO.
ADVERTENCIA
Lesiones por aplastamiento graves o fatales
puede ocurrir desde la punta del mueble. Para evitar volcar:
* Instale la restricción de vuelco provista
* coloque los ar! culos más pesados en los cajones más bajos
* A menos que esté especí" camente diseñado para
acomodar, no instale televisores u otros objetos pesados en la parte superior de este producto
* Nunca permita que los niños trepen o cuelguen de los cajones, puertas o estanterías
* Nunca abra más de un cajón a la vez
El uso de restricciones sobre volteos solo puede reducir, pero no eliminar, el riesgo
de vuelco
OPCIÓN 1: Adjunto a un montante de pared (método preferido)
Usando un buscador de pernos, ubique un perno en la pared. Coloque su unidad contra la pared, con el
soporte de seguridad alineado en esta ubicación.
Para facilitar el manejo del tornillo, puede perforar un ori" cio piloto de 1/8 “de diámetro (3 mm) a través de
la seguridad
soporte en el perno.
Introduzca el tornillo a través del soporte de seguridad en el montante de la pared. Apretar el tornillo que no
estaba completamente
Tighened.
OPCIÓN 2: " jación al panel de yeso
Ubique su unidad donde desee contra una pared y marque la pared a través del soporte de seguridad, luego
mueve tu unidad a un lado.
Taladre un ori" cio de 3/16 “de diámetro (5 mm) en el tablero. Toque el anclaje de pared en el ori" cio hasta
que quede al ras. Mueva su unidad a su ubicación y ajuste el soporte de pared al anclaje de pared con el
tornillo.
Apriete el tornillo que no estaba completamente apretado.

19
ameriwoodhome.com
* raw edges are shaded
Página 15
ETIQUETA DE PRECAUCIÓN
CARGA MAXIMA
Esta unidad ha sido diseñada para soportar la carga máxima anotada. El exceder estos límites puede causar
inestabilidad, colapsarse y/o causar serias lesiones.
Advertencia: asegúrese de quitar todos los objetos antes de mover la unidad ensamblada. La unidad debe ser
levantada por más de una persona, no arrastrada o empujada. No hacerlo así lo hará causar daño al producto,
inestabilidad, colapso del producto y / o lesiones graves.
Página 16
Registre su producto para recibir lo siguiente:
* Nuevos detalles sobre las tendencias - Sneek echa un vistazo a lo nuevo
* Encuestas - tener una voz dentro de nuestra comunidad
* Ofertas exclusivas y códigos de descuento
Servicio de piezas de repuesto rápido y fácil
Para registrar su producto, visite Ameriwoodhome.com
5 estrellas
Visite el si! o web de su distribuidor local, cali" que su producto comprado y déjenos algunos comentarios#
Nos gustaría extender un gran “Gracias” a todos nuestros clientes por tomarse el ! empo para montar este
producto Ameriwood Home, y para darnos sus valiosos comentarios
Gracias#
Español

20
ameriwoodhome.com
* raw edges are shaded
Français
capot avant
Ce livret d’instruc! ons con! ent d’importantes informa! ons de sécurité. S’il vous plaît lire et conserver pour
référence ultérieure.
Ne pas retourner ce produit" Contactez notre équipe de service à la clientèle amical pour
aider.
Appel: 1-800-489-3351 (gratuit) Lundi - Vendredi 9am - 5pm CST
Visite: www.ameriwoodhome.com
MISE EN GARDE
Ce mobilier peut basculer et causer des blessures graves et / ou la mort.
Ancrer les meubles à un poteau en bois sur le mur (si cela est nécessaire).
Ne laissez pas les enfants monter l’armoire.
Gardez les ar! cles plus lourds dans les ! roirs ci-dessous.
Conseil (page 2)
- Ouvrez votre ar! cle dans la zone où vous prévoyez de l’u! liser pour éviter de soulever et déplacer moins
- Iden! fi er, trier et compter les pièces avant de monter
- bouchons de compression sont frappés avec un marteau
- Les lames sont marqués par un R (droite) et L (à gauche) pour le posi! onnement correct
- Assurez-vous toujours ce point, je Aviana sur le dessus de la came de blocage
ce bord extérieur volteadohacia
- U! lisez tous les clous du panneau arrière et les distribuer également
- Le panneau arrière doit être u! lisé pour faire en sorte que l’unité est fi xe et ferme
- Ne pas u! liser de produits chimiques ou de produits abrasifs sur cet ar! cle
- Ne jamais pousser, ! rer ou meubles de glisser
Avant de commencer (page 3)
-Lire a$ en! vement chaque étape et suivre l’ordre
-separate et compter toutes les pièces et matériel
-Dése un espace suffi sant pour le processus d’assemblage
-Soyez les ou! ls suivants: tournevis Phillips n ° 2 tête
Tournevis et un marteau
-Precaución: Si vous u! lisez une perceuse électronique ou un tournevis électrique à vis, s’il vous plaît faire
arrêter le vissage lorsque le tonillos ce serré. Le non-respect cela peut provoquer balayer la vis
Système de régler le verrou de came (page 3)
Ce système de fi xa! on du verrou de came sera u! lisé tout au long du processus d’assemblage
Iden" fi ca" on du Conseil (page 4)
pas la taille réelle
Liste (page 5)
pas la taille réelle
/