Page is loading ...


TABLE OF CONTENTS
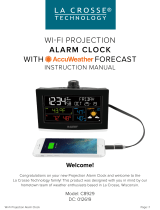
Page | 2
Power Up
Settings
Nature Sounds
Select Nature Sound
Play Nature Sound
Fall Asleep to Nature Sound on a Timer
Time Alarms
Set Sound Alarm
Set Light Alarm
Snooze for Sound and Light Alarms
Deactivate Alarms
Mood Light: Color + Intensity
Color Selection
Mood Light Intensity
Nap Feature
Set Nap Time
Use Nap Anytime
Backlight Intensity
USB Charging Port
We’re Hear to Help
Warranty Info
Specifications
Care + Maintenance
FCC Statement
Canada Statement
3
3
4
4
4
4
5
5
5
6
6
6
6
7
7
7
7
8
8
9
9
9
9
10
10

POWER UP
1. Insert power cord into the bottom of your clock (required)
2. Optional: Pull the plastic tab in the battery compartment for the
CR2032 battery to activate. Battery is for backup of time/date/
alarm settings only.
3. Select your language, time and other settings.
IMPORTANT: Only press one button at a time when setting items.
• Hold the SET button to enter time set mode.
• Press the + or - buttons to adjust the values.
• Press the SET button to confirm and move to the next item.
Settings order:
1. Language (English, Español)
2. Beep ON/OFF
3. Hour
4. Minutes
5. Year
6. Month
7. Date
8. Snooze duration (5 minutes-120 minutes) default is 10 minutes. Snooze time selected will be the same
for both alarms.
Note: when Español is selected, the instructions will be in Spanish.
SETTINGS
English | Spanish MinutesHourBeep ON | OFF
Year
Snooze DurationDate
Month
Page | 3

NATURE SOUNDS
Select from five dierent nature sounds you can listen to, fall asleep to on a timer, or wake up to as your
alarm sound (see sound alarm 2).
Select Nature Sound:
• Press SOUND button to hear Nature Sounds.
• Press SELECT button to change Nature Sound selection while listening to the sounds.
or
• Press SELECT button to change Nature Sound selection without listening to sounds.
The selected sound will have a double ring. Example: Backwoods is selected on the image below.
Play Nature Sounds:
• Press the SOUND button to listen to Nature Sound continually.
• Change volume with the + or - buttons.
• Press the SELECT button to change Nature Sounds.
• Press SOUND button again to turn o Nature Sounds.
Fall Asleep to Nature Sounds on a Timer:
1. Press the SOUND button to turn sound on.
2. Press and release TIMER button to select amount of time for nature sound to play
(15, 30, 45, 60, 75, 90, OFF).
• When selection is made timer will start.
• While a Timer is in progress the seconds area will display the time left and will count down to zero
• When the Timer reaches zero, the sound will stop and the seconds area will show 0 for 3 seconds
then return to showing seconds.
3. Press the SELECT button to change nature sound.
4. Press and release the SOUND button at any time to turn o sound and timer.
Note: Press the timer button until the display says TIMER OFF to exit timer without turning o the sound
Note: Press and release TIMER button any time to adjust the time.
Note: Press and release the SOUND button at any time to turn o sound and timer.
Rain Ocean Backwoods Thunder River
Page | 4

TIME ALARMS
Your clock allows you to wake up to sound or to light. Both alarm can be set at the same time.
Set Sound Alarm:
1. Hold SOUND ALARM 2 for 3 seconds to enter alarm settings. Alarm hour will flash.
2. Press the + or - buttons to adjust hours.
3. Press the SOUND ALARM 2 button to confirm and move to minutes. Alarm minutes will flash.
4. Press the + or - buttons to adjust minutes.
5. Press and release the SOUND ALARM 2 button to choose from 5 nature sounds or basic alarm sound.
6. The date area will read BEEP which is default.
8. Press and release the SOUND ALARM 2 button to confirm and exit. Your sound alarm is set and active.
Note: When alarm time is reached the alarm will increase in volume over a 5 minute period, to volume 8.
After 5 minutes the alarm will stop if not deactivated.
Set Light Alarm:
1. Hold the LIGHT ALARM 1 button for 3 seconds to enter alarm time set mode. The alarm hour will flash.
2.Press the + or - buttons to set alarm hour
3.Press the LIGHT ALARM 1 button to confirm and move to the minutes. The alarm minutes will flash.
4.Press the + or - buttons to set the minutes.
5.Press and release the LIGHT ALARM 1 button to exit settings.
• When alarm time is reach the White Mood light will begin to glow and increase intensity over a 5
minute period to 99%. It will stay at 99% for another 5 minutes unless turned o.
• When the alarm is turned o the alarm icon will disappear.
Page | 5

Snooze: For Light and for Sound alarms
• When alarm lights or sounds, press SNOOZE/LIGHT button to stop sound or light, and activate
SNOOZE function. SNOOZE - duration will show in date area. Appropriate alarm icon will flash.
• During snooze count down, press any button except for SNOOZE/LIGHT to exit snooze count down
• When snooze alarm sounds, SNOOZE – duration “00 00” will flash, press any button
(except SNOOZE/LIGHT) to stop alarm and exit snooze function. Press SNOOZE/LIGHT to snooze
again.
Deactivate Alarm:
1. Press and release the LIGHT ALARM 1 or SOUND ALARM 2 button.
2. Alarm time will show for 3 seconds.
3. Press and release the LIGHT ALARM 1 button or SOUND ALARM 2 button to deactivate or activate
correct alarm.
4. Alarm icon will show when active and disappear when deactivated.
5. Alarm icon will flash when alarm sounds.
6. When alarm sounds, press any button except for SNOOZE/LIGHT to stop ringing for one day
MOOD LIGHT-COLOR AND INTENSITY
Color 1 Color 2 Color 3 Color 4
Color 5 Color 6
Color 7
Color Selection:
1. Press and release the MOOD LIGHT button to turn on mood light.
2. Press and release the COLOR MODE button to select from 7 color choices or cycle through all colors
every 5 seconds (Red | Yellow | Green | Cyan | Blue | Purple | White). The word COLOR and a number
or CYCLE will show.
Note: The clock will save the last color choice, in the event the mood light is turned o.
Page | 6

Mood Light Intensity:
1. Press and release the MOOD LIGHT button to select intensity level of mood light, or to turn it o.
2. The word LIGHT and a number (1-4 or OFF) will show.
NAP FEATURE
Occasionally a nice nap is all you need. You can preset a nap time from 5 minutes to 120 minutes. Once
the nap time is programmed, a touch of the NAP button will start the nap countdown. The default nap
time is 15 minutes.
Set Nap Time:
1. Hold the NAP button for 3 seconds. NAP 15 will show.
2. Use the + or - buttons to adjust the nap time (5 minutes to 120 minutes).
3. Press NAP button to confirm and start nap count down.
Note: During the nap count down, press any button (except SNOOZE/LIGHT) to stop the nap count
down. Selected nap time will be saved.
Note: When nap countdown ends, NAP “00m 00” will flash. Alarm beeps for 2 minutes then return to
normal display or press any button to stop ringing and return to normal display.
Use Nap Anytime:
You can press the NAP button to start a nap countdown, at previous selected time, anytime.
Page | 7

USB CHARGING PORT
There is a 1 Amp USB charging port on the side of the clock.
• Connect your external device’s USB charging cable (not included) to the USB charging port.
• Charging times will vary.
• USB Power Output: 1A maximum current.
• Charge 1A devices or devices that are self-regulating.
USB Charging
BACKLIGHT INTENSITY
1. Tap the center of the SNOOZE/LIGHT button to select the intensity level of backlight (4 levels or OFF).
2. The word BACKLIGHT with the number will show.
3. Simply tap the center of the SNOOZE LIGHT button again to change the backlight intensity.
Page | 8

JOIN THE CONVERSATION
Ask questions, watch detailed setup videos, and provide feedback on our social media outlets!
NEED MORE HELP?
If you require additional support, call our friendly customer support representatives based out of our
oce in La Crosse, Wisconsin.
Phone: 1.608.782.1610
Our knowledgeable customer support team is available Monday-Friday, 8am-6pm CST.
WE’RE HERE TO HELP!
WARRANTY INFO
La Crosse Technology, Ltd. provides a 1-year limited time warranty (from date of purchase) on this
product relating to manufacturing defects in materials & workmanship.
For Full Warranty Details, Visit: www.lacrossetechnology.com/support
SPECIFICATIONS
Power: 5.0V AC6: HX13-0501500-AU-001 Optional-1- CR2032 battery (included)
USB Output: 1 Amp
Battery Life: Battery life is over 24 months
Dimensions: 5.44” W x 3.4” D x 5.5” H (13.81cm W x 8.6cm D x 13.97cm H)
CARE + MAINTENANCE
• Do not mix old and new batteries.
• Do not mix Alkaline, Lithium, standard, or rechargeable batteries.
• Always purchase the correct size and grade of battery most suitable for intended use;
• Clean the battery contacts and also those of the device prior to battery installation;
• Ensure the batteries have with correct polarity (+ / -)
• Remove batteries from equipment that will not to be used for an extended period.
• Promptly remove expired batteries.
Page | 9

This equipment has been tested and found to comply with the limits for a Class B digital device, pursuant to part 15 of
the FCC Rules. These limits are designed to provide reasonable protection against harmful interference in a residential
installation. This equipment generates, uses and can radiate radio frequency energy and, if not installed and used
in accordance with the instructions, may cause harmful interference to radio communications. However, there is no
guarantee that interference will not occur in a particular installation.
If this equipment does cause harmful interference to radio or television reception, which can be determined by turning
the equipment off and on, the user is encouraged to try to correct the interference by one or more of the following
measures:
• Reorient or relocate the receiving antenna.
• Connect the equipment into an outlet on a circuit different from
that to which the receiver is connected.
• Increase separation between equipment & receiver.
• Consult the dealer or an experienced radio/TV technician for help.
This device must not be co-located or operating in conjunction with any other antenna or transmitter.
Operation is subject to the following two conditions:
(1) This device may not cause harmful interference, and
(2) This device must accept any interference received, including interference
that may cause undesired operation.
Caution!
The manufacturer is not responsible for any radio or TV interference caused by unauthorized changes or modifications
to this equipment. Such changes or modifications could void the user authority to operate the equipment.
All rights reserved. This manual may not be reproduced in any form, even in part, or duplicated or processed using
electronic, mechanical or chemical process without the written permission of the publisher.
This booklet may contain errors or misprints. The information it contains is regularly checked and corrections are
included in subsequent editions. We disclaim any responsibility for any technical error or printing error, or their
consequences. All trademarks and patents are recognized.
CANADA STATEMENT
This device complies with CNR Industry Canada license -exempt devices.
Operation is subject to the following two conditions:
(1 ) This device may not cause interference; and
(2) This device must accept any interference, including interference that may cause undesired operation
of the device.
FCC STATEMENT
Page | 10
WARNING: This product can expose you to chemicals including styrene, which is known in the State of California to
cause cancer.
For more information go to: www.P65Warnings.ca.gov
/