9:00-12:00 14:00-18:00 (Weekday)
9:00-12:00 14:00-17:00 (Saturday)
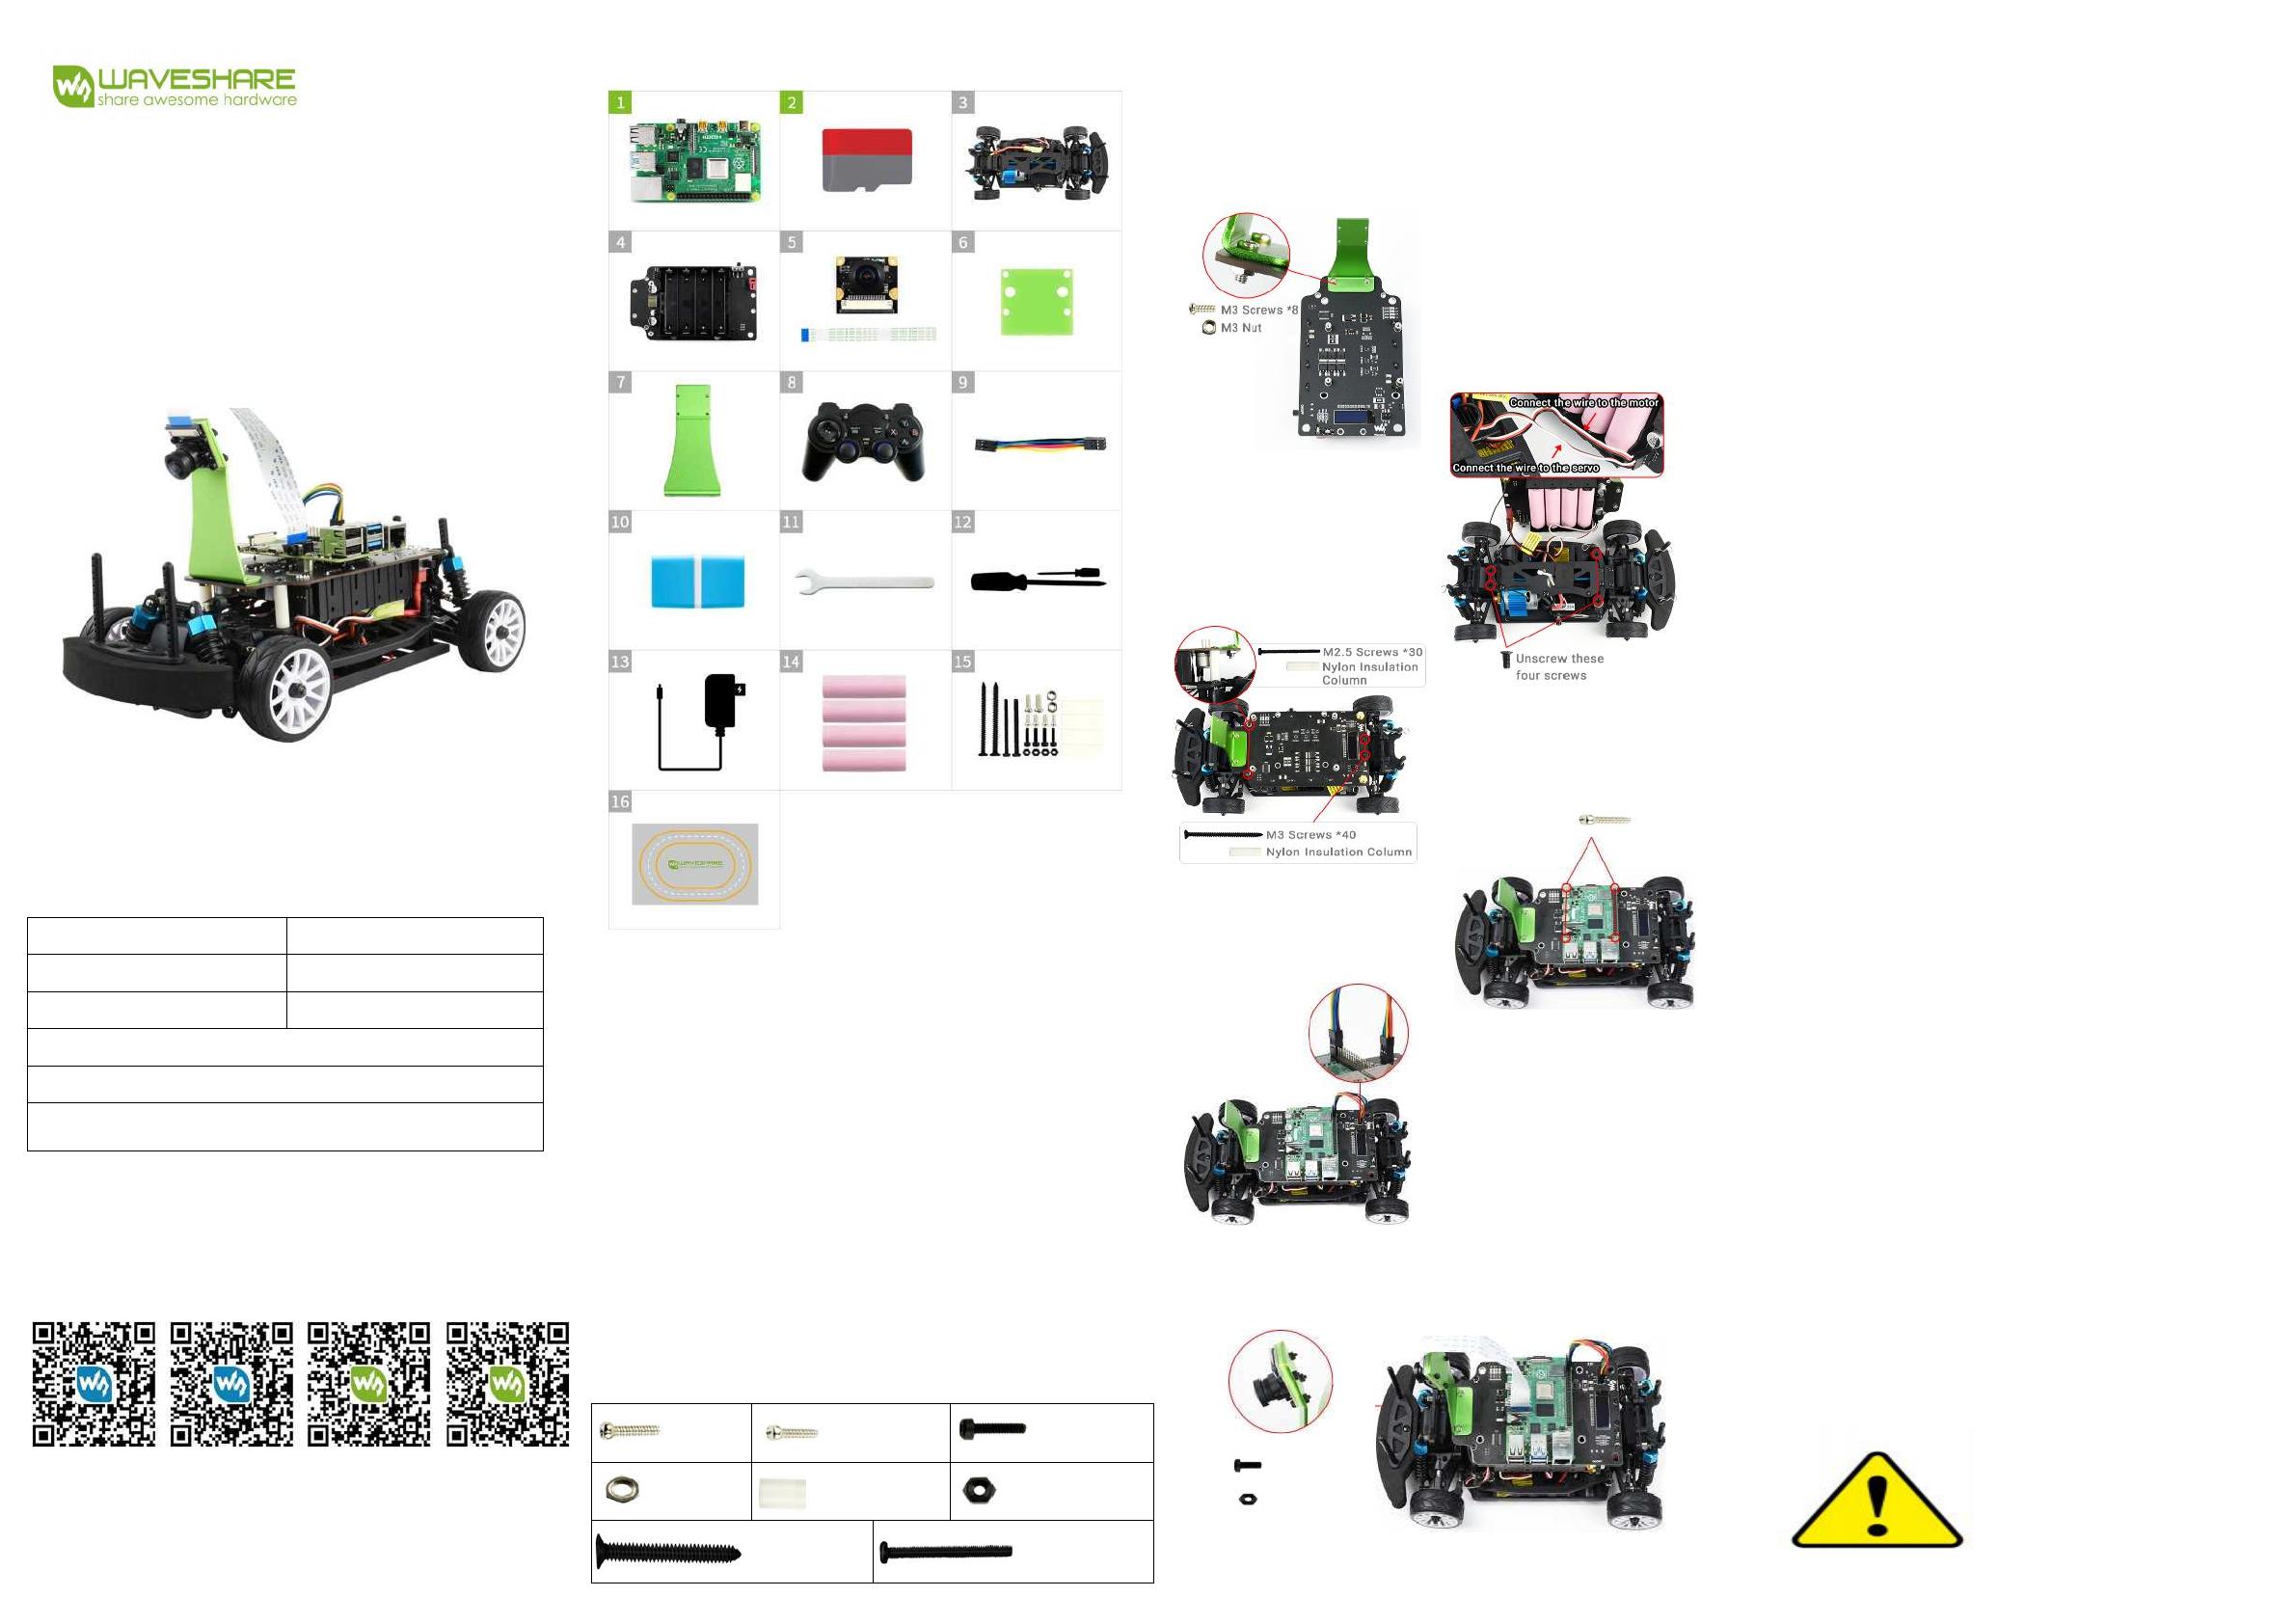
3. Fix the PiRacer Pro
expansion board on the chassis
of the car.
1. Fix the camera holder and
antenna on the PiRacer Pro
expansion board.
1. Install Image
Download the PiRacer Pro image from Wiki, extract the .img
file, and then use the programming software, such as
Diskimager, to program it to the TF card.
2. Update Your Program
In order to use the voltage and current display function
and drive motor normally, please update the relevant
program provided by Wiki. For specific operations, please
refer to the PiRacer Pro Al Kit on Wiki.
3. How to Use the Handle
Connect the handle receiver to the computer host. The handle
has three modes and the default is mode 1. You can short
press the HOME button to switch to mode 2, or press the HOME
button for more than 7 seconds to switch mode 3. When used
with the program , it is recommended to use Mode 2 or Mode
3.
4. Test the Motor
When testing the motor, you can adjust the deflection angle
of the accelerator and servo by yourself to make the car
run more stably.
2. Connect the motor, servo and
ESC power cable to the
corresponding interface, and pay
attention to the connection as
shown in the figure below,
otherwise the car cannot run.
PiRacer Pro Al Kit
Assembly Manual
1. What battery does PiRacer Pro come with?
It comes with 3.7V, 2600mAh 18650 lithium battery X4 (Two
in parallel and two in series).
2. How to charge the battery?
We provide an 8.4V battery charger. Please plug into the
8.4V circular port on the expansion board to charge, and
pay attention to the battery that can not be reversed.
Before charging, please make sure that the car is assembled
correctly. When you install the battery for the first time,
you need to charge it.
3. How to judge the charging status?
The delivered battery charger has an indicator. The red
light indicates that the battery is charging, and the green
light indicates that the battery is fully charged or the
power supply is not connected.
4. What to do when the wireless handle is not
working properly?
After the wireless controller is powered on, it is
recommended that you press and hold the HOME button for 7
seconds to switch the controller to XBOX mode, which is
convenient for working with Raspberry Pi demos.
5.Install the Raspberry Pi and
connect it to the expansion board
with a 6PIN cable.
6.Insert the camera onto the
camera holder with nylon
screws. Note that an acrylic
plate needs to be padded
between them to avoid short
circuit, and then connect to
the Raspberry Pi with a
cable. The installation is
complete.
1. Raspberry Pi (4GB)* 1
(Options)
2. Micro SD card 64GB x 1
(Options)
3. On-road chassis x 1
4. PiRacer Pro expansion
board x 1
5. IMX219-160 camera x 1
6. Acrylic camera spacer x 1
7. Camera holder x 1
8. Remote control handle x 1
9. 6Pin Dupont Line
x 1
10. Micro SD card
reader x 1
11. Spanner x 1
12. Screwdriver x 2
13. 8.4V battery
charger x 1
14. Screws pack x 1
15. Track Map x 1
Support: Please get the after-sales contact information on
Waveshare official website. Please provide product model and
purchase information when inquiring about products.
【Remarks】 There are different packages for you, and the components on
the above with the suffix (Options) are only included in the complete
package.
4.Fix the Raspberry Pi on the
expansion board with M2.5.
Reverse the battery will
damage the device!
Screw Pack Comparison Table:
Does not include the screws that come with the fan.


