FORM NO: 5908259 REV: A
7
SAFETY INFORMATION
Please read, understand, and follow all safety information contained in these instructions prior to the use of this Pre-
Engineered Rescue System. FAILURE TO DO SO COULD RESULT IN SERIOUS INJURY OR DEATH.
These instructions must be provided to the user of this equipment. Retain these instructions for future reference.
Intended Use:
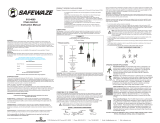
This Pre-Engineered Rescue System is intended for use as part of a complete personal fall protection and/or rescue system.
Use in any other application including, but not limited to, material handling, recreational or sports related activities, or other activities not
described in the User Instructions, is not approved by 3M and could result in serious injury or death.
This system is only to be used by trained users in workplace applications.
! WARNING
This Pre-Engineered Rescue System is intended for use as part of a complete personal fall protection and/or rescue system. It is expected
that all users be fully trained in the safe installation and operation of their Pre-Engineered Rescue System. Misuse of this system
could result in serious injury or death. For proper selection, operation, installation, maintenance, and service, refer to these User
Instructions and all manufacturer recommendations, see your supervisor, or contact 3M Technical Service.
• To reduce the risks associated with working with a Pre-Engineered Rescue System which, if not avoided, could result
in serious injury or death:
- Inspect the system before each use and at least annually. Inspect in accordance with the User Instructions.
- If inspection reveals an unsafe or defective condition in the device or a component of the device, remove the device from service
and repair or replace according to the User Instructions.
- Label the system ‘UNUSABLE’ and immediately remove the system from service if it has been subjected to fall arrest or impact
force. Inspect and handle the system according to the User Instructions.
- Ensure the rescue system and lifeline are kept free from all obstructions including, but not limited to, entanglement with other
workers, yourself, and surrounding objects.
- Follow all manufacturer recommendations when connecting a lifeline.
- When performing rescue operations, always utilize fall protection safety measures as determined by your workplace rescue plan.
- Do not touch parts of devices exposed to high friction during or after long descents, as these parts may get hot and cause burns.
- Ensure proper edge protection is used if the lifeline may contact sharp edges or corners.
- Ensure a clear descent path, and that the landing area is clear of any obstructions or hazards that you may contact.
- Ensure that systems/subsystems assembled from components made by different manufacturers are compatible and meet
the requirements of applicable standards, including the ANSI Z359 or other applicable fall protection codes, standards, or
requirements. Always consult a Competent and/or Qualied Person before using these systems.
- (AUTOMATIC DESCENT DEVICES) Only use in rescue applications.
- (AUTOMATIC DESCENT DEVICES) Always record usage as dened by the User Instructions and remove from service in
accordance with usage limits listed in the User Instructions.
- (R550 DEVICES WITH HANDWHEEL) Ensure the operator always maintains control of the hand wheel when the system is under
load.
- (ROPE LIFELINE SYSTEMS) Use only rope described and approved in the User Instructions.
• To reduce the risks associated with working at height which, if not avoided, could result in serious injury or death:
- Ensure your health and physical condition allow you to safely withstand all of the forces associated with working at height.
Consult with your doctor if you have any questions regarding your ability to use this equipment.
- Never exceed allowable capacity of your fall protection equipment.
- Never exceed maximum free fall distance of your fall protection equipment.
- Do not use any fall protection equipment that fails pre-use or other scheduled inspections, or if you have concerns about the use
or suitability of the equipment for your application. Contact 3M Technical Services with any questions.
- Some subsystem and component combinations may interfere with the operation of this equipment. Only use compatible
connections. Consult 3M prior to using this equipment in combination with components or subsystems other than those described
in the User Instructions.
- Use extra precautions when working around moving machinery (e.g. top drive of oil rigs) electrical hazards, extreme
temperatures, chemical hazards, explosive or toxic gases, sharp edges, or below overhead materials that could fall onto you or
the fall protection equipment.
- Use Arc Flash or Hot Works systems when working in high heat environments.
- Avoid surfaces and objects that can damage the user or equipment.
- Ensure there is adequate fall clearance when working at height.
- Never modify or alter your fall protection equipment. Only 3M or parties authorized in writing by 3M may make repairs to the
equipment.
- Prior to use of fall protection equipment, ensure a rescue plan is in place which allows for prompt rescue if a fall incident occurs.
- If a fall incident occurs, immediately seek medical attention for the fallen worker for the worker who has fallen.
- Do not use a body belt for fall arrest applications. Use only a Full Body Harness.
- Minimize swing falls by working as directly below the anchorage point as possible.
- If training with this device, a secondary fall protection system must be utilized in a manner that does not expose the trainee to
an unintended fall hazard.
- Always wear appropriate personal protective equipment when installing, using, or inspecting the device/system.
EN