Page is loading ...

©2014 Edelbrock LLC
Part #15882
Brochure #63-15882
Rev. 5/23/14 - QT
Edelbrock Supercharger System
2011-2014 Ford Mustang 5.0L
Stage II Upgrade for #1588
Installation Instructions
Page 1
TOOLS REQUIRED
l Ratchet and Socket Set
l 3/8 Breaker Bar
l Drill and Step Drill Bit
l 5mm Hex
l Red Thread Locker
KIT CONTENT
l 3.25” High Boost Pulley
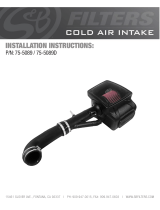
lEdelbrock Competition Air Intake System
lGatorback Drive Belt
PLEASE study these instructions carefully before beginning this installation. Most installations can be accomplished with common
tools and procedures. However, you should be familiar with and comfortable working on your vehicle. If you do not feel comfortable
performing this installation, it’s recommended to have the installation completed by a qualified mechanic. If you have any questions,
please call our Technical Hotline at: 1-800-416-8628, 7:00 am - 5:00 pm, Pacific Standard Time, Monday through Friday.
IMPORTANT NOTE: Proper installation is the responsibility of the installer. Improper installation will void
your warranty and may result in poor performance and engine or vehicle damage.
IMPORTANT WARNINGS
Before beginning installation, use the enclosed checklist to verify that all components are
present in the box then inspect each component for damage that may have occurred in
transit. If any parts are missing or damaged, contact Edelbrock Technical Support, not
your parts distributor.
WARNING: Please note that this Stage II upgrade is intended for racing and off road applications only. Use of
this kit with an E.O. Legal Supercharger (#1588) will negate its street legal status and void the optional extended
warranty.
WARNING: Installation of this Stage II upgrade will result in a significant change to the
performance characteristics of your vehicle. It is highly recommended that you take some time
to familiarize yourself with the added power, and how it is delivered, in a controlled environment.
Take extra care on wet and slippery roads, as the rear tires will be more likely to lose traction,
with the added power. It is never recommended to turn off your vehicles traction control system.
Please note that this Stage II upgrade comes with a custom calibration file. In order to receive
the calibration file specific for this upgrade, the disclaimer form included in this kit must be
filled out completely and sent back to Edelbrock. This disclaimer form can also be completed
and submitted online at: (http://www.edelbrock.com/automotive/mc/superchargers/high-hp-
kits/). It is highly recommended to complete this process prior to starting the installation.

©2014 Edelbrock LLC
Part #15882
Brochure #63-15882
Rev. 5/23/14 - QT
Edelbrock Supercharger System
2011-2014 Ford Mustang 5.0L
Stage II Upgrade for #1588
Installation Instructions
Page 2
ECU Flash Procedure
WARNING: Please note that this Stage II upgrade comes with
a custom calibration file. In order to receive the calibration file
specific for this upgrade, the disclaimer form included in this kit
must be filled out completely and sent back to Edelbrock. This
disclaimer form can also be completed and submitted online at:
(http://www.edelbrock.com/automotive/mc/superchargers/
high-hp-kits/). It is highly recommended to complete this
process prior to starting the installation.
•Original Equipment Manufacturers often release updates to
the computer programming for your vehicle. Edelbrock highly
recommends that you verify, with your new car dealer, that
your vehicle is equipped with the latest software version from
your vehicle manufacturer, before proceeding.
•Begin by downloading the SCT device updater software to your
computer. It can be downloaded from: http://www.sctflash.
com/software/SCTDeviceUpdater.exe
•Put the car into Acc mode, but don’t start the vehicle.
•Connect the supplied PCM cable to the OBD-II connector
located below the steering wheel and to the left of your knee.
•Use directional pad to highlight Vehicle Info and press the
Select button.
•Use directional pad to highlight Vehicle Info again and press
the Select button.
•Follow the on screen prompts.
•The programmer will connect to the vehicles ECU. On the
first scree, verify the vehicle’s Vin number is correct and press
select.
•On the second screen, write down the 7 digit Strategy Number
(Cal ID). This number, along with the vehicle’s Vin number
and the Programmer’s Serial number are required in order to
receive your calibration.
•Complete the disclaimer form and send it back to Edelbrock.
This disclaimer form can also be completed and submitted
online at: (http://www.edelbrock.com/automotive/mc/
superchargers/high-hp-kits/).
•Once you receive the calibration file from Edelbrock. The file
can be installed into your programmer using the following
steps:
1. Save the attached .cef file to a location you can remember
on your computer.
2. Open the SCT Device updater program and click on Load
Custom Tune File.
3. Browse to the location you saved the attached .cef file and
select it.
4. Select File 1 and give it a name, then press program and it
will write the tune to the programmer.
5. Once this is finished, put the car into Acc mode, but don’t
start the vehicle.
6. Hook the programmer up to the vehicle, select Program
Vehicle, then select Custom Tune and choose the file you
named.
7. Read disclaimer then press Select to continue.
8. Verify ignition is in the ‘Key On’ position but that the engine
is not running then press Select.
9. Use directional pad to highlight Begin Program then press
Select.
10. Depending on your specific drivetrain configuration,
several separate operations may take place during this
step. Completion of each operation will cause the progress
bar to reset to zero.
11. DO NOT unplug the programmer until prompted.
12. Turn the car off when prompted to do so by the handheld
programmer.
13. Read parting message from programmer then press Select
to continue.
14. Unplug the programmer cable from the OBD-II port.
15. Your vehicle’s ECU has been flashed, you may now proceed
with the installation.

©2014 Edelbrock LLC
Part #15882
Brochure #63-15882
Rev. 5/23/14 - QT
Edelbrock Supercharger System
2011-2014 Ford Mustang 5.0L
Stage II Upgrade for #1588
Installation Instructions
Page 3
Supercharger Installation
1. Use an 8mm socket to remove the negative battery terminal.
Tuck the terminal to the side to prevent any accidental contact
with the battery post.
2. Using a 3/8” breaker bar, rotate the tensioner clockwise to
remove the drive belt. The drive belt will not be reused.
3. Remove the tamper-proof seal on the supercharger pulley
hub and remove bolts securing the stock pulley using a 5mm hex
tool. Be aware that these bolts are secured by red loctite.
4. Install the new pulley onto the supercharger hub. Apply red
loctite on the pulley bolts and securely fasten in a star pattern.
Torque all bolts in a star pattern to 8 ft-lbs (91 in-lbs).
5. Use a 3/8” drive breaker bar to rotate the tensioner enough to
install the belt on the tensioner pulley. Install the supplied belt
according to the routing diagram shown below .
S/C
IDLER
IDLER
CRANK
WATER PUMP
TENSIONER
IDLER
A LT.
IDLER
6. Unplug and remove the MAF sensor located on the factory
airbox. Remove the factory intake airbox and previously installed
silicone elbow.
NOTE: Steps 7-8 applies to Automatic transmission only.
Manual transmissions, disregard and proceed to Step 9.
7. Locate the small dimple on the underside of the hard plastic
elbow. Use the dimple to center a step drill bit and drill through
the elbow until the hole is 5/8” in diameter. Once the hole has
been drilled, install the supplied 3/8” grommet and 10mm
fitting.
8. Install the 5/8” grommet and fitting in the boss extending
from the elbow.
9. Insert the round MAFS housing through the hole in the new
airbox so that the large end will be inside. Orient the housing so
that the MAF provision will point forward and down when the
airbox is installed then secure the housing using the three
supplied M6 x 16mm bolts.
10. Reinstall the stock MAF sensor in the new MAFS housing
using the two supplied #8-32 thread-forming screws.
11. Install the new airbox by sliding it into the rubber snorkel as
you drop the lower bosses into the grommets on the fender.
Secure the airbox using the stock bolt.

©2014 Edelbrock LLC
Part #15882
Brochure #63-15882
Rev. 5/23/14 - QT
Edelbrock Supercharger System
2011-2014 Ford Mustang 5.0L
Stage II Upgrade for #1588
Installation Instructions
Page 4
18. Reattach the MAF sensor harness to the MAF sensor on the
airbox.
IMPORTANT NOTE: The transfer function values provided in the
table below are only provided as a guide. It is always required
that you verify the Air/Fuel ratio with a wideband lambda sensor,
installed in front of the catalytic converter, while running the
vehicle on a chassis dyno through the entire RPM & load range.
Frequency Lb / Min Frequency Lb / Min
1485 0 207 7.7263
650 0.5023 200 8.3808
635 0.5315 193 9.2718
605 0.5742 188 9.8093
590 0.6022 183.5 10.4823
540 0.7071 178 11.5846
500 0.8168 173 12.6664
450 1.0423 160.5 15.8482
410 1.2679 150 19.9931
360 1.8043 143.5 21.9437
330 2.2919 139 23.9374
320 2.4382 136 25.4466
290 3.1940 132 27.9213
275 3.7304 128 31.3117
259 4.3278 123 34.9811
242 5.1202 119.8 36.9873
226 6.2118 114 42.3269
220 6.6748 107 50.3937
215.5 6.9517 101 58.6262
210 7.4370 83.3 82.8984
19. Reinstall the negative battery terminal.
20. If you have access to a diagnostic scan tool, run a ‘Key On,
Engine Off’ test to verify that all connectors are properly installed,
otherwise move on to the next step.
21. Start the vehicle and verify a smooth idle. If you are using a
diagnostic scan tool, run a ‘Key On, Engine Run’ test.
12. Install the new filter onto the MAFS housing and secure it
with the large worm clamp supplied. Install the supplied edge
trim along the top ridge of the new airbox.
13. Visually orient the hard plastic elbow so that the dimple or
drilled hole is on the bottom, then slide a worm clamp on each
end of the silicone hump hose and slide it onto the end of the
elbow that will connect to the MAFS housing.
14. Install the silicone reducer hose on the throttle body end of
the elbow, then slide two worm clamps over the hose.
15. Install the elbow and silicone hoses between the throttle body
and MAFS housing. Spraying some silicone lubricant inside the
hoses can make this process easier. Tighten all four worm
clamps once satisfied with the installation.
16. Re-clock the hose end on the driver side PCV hose and
connect it to the large fitting extending from the boss on the
elbow.
NOTE: Step 17 applies to Automatic vehicles only. Disregard
otherwise.
17. Install the brake aspirator to intake hose with the 90° quick
connect fitting onto the intake elbow and then to the brake
aspirator. Trim hose to length as needed.
/