Page is loading ...

1
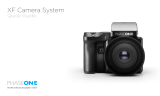
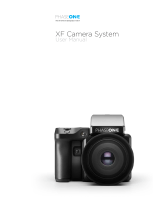
USER MANUAL
v4

2
INTRODUCTION

3
Medium format photography is about
professionalism. Camera systems have to be
professional, handling has to be professional and
captures have to be professional in quality.
Hasselblad knows it and delivers it; professionals
know that too.
The Hasselblad H series of cameras consists of building new
developments on the shoulders of the previous generation.
In this way all the previous work-experience based and
branch-demanding features are automatically included. So,
just when you think things can't get much better, they do.
And the H5D is that model - all the good things from before
and then some!
The H5D series heralds a step up that is noticeably greater
than before. There are changes and many are 'from the
ground up'. The H spirit thrives but has now matured to
reinforce further its position in the rapidly changing world of
digital imaging. Future proofing is key to a secure placing for
working photographers. The H5D provides a reliable
connection to the fleeting environment of digital imaging
technology so when the wind changes direction, the H5D
remains as the safeguarding companion to provide support.
There are five models to choose from to suit the varied
demands from the professional world. They start with the
entry level 40 MPixel model that right from the outset
confidently takes on most rivals from all brands and beats
them with star quality results. The models then just get
better and better. At the other end of the scale is the 200
MPixel MultiShot model that raises the bar so much for
product work that it is in a league of its own.
True to Hasselblad philosophy, interchangeability and
versatility span all models regarding lenses and accessories
with minimal restrictions. This applies not only to H5 but all
H1, H2, H3 and H4 models as well. The H system additionally
breaks rank regarding series limitations with the ability to use
other lenses from the V system or when using the sensor unit
on view cameras. In short, you have access to a more
comprehensive world to apply medium format quality to.
Hasselblad's best kept secret is knowing that every link in the
chain that leads to the page in the magazine has to reach a
certain standard; it is that simple. That's why Hasselblad
spends so much time and energy into checking those almost
endless behind-the-scenes details and standards because
they understand this simple concept. There is no magical
formula to Hasselblad success other than an understanding
of what is required to produce the best results available in
the world today and an acceptance that there are no short
cuts in this process. Hasselblad does its best to produce the
best; there is no other way to achieve the Hasselblad star
quality.

4
The H5 models have a good deal in common. Stainless
steel and aluminium were the materials chosen to endure the
treatment handed out in professional use – and that can be
pretty tough.
The sturdy but ergonomic integral grip incorporates not only
the battery but one of the user interfaces too. It is here, by
way of the surrounding buttons, that you enter the ‘control
room’. Customization is a very prominent concept that you
experience in the Hasselblad world that ensures it is the
photographer that controls the camera, not vice versa.
Accessed through the grip alone, there are 34 separate
custom options.
The standard prism viewfinder provides not only the most
popular way of viewing but the sophisticated light metering
system too. Don’t forget the waist-level accessory model if
you prefer it.
And when all the hustle and bustle and rushing around is
over for the latest glossy cover and you settle back into a
more reflective mode for some seriously detailed product
shot you consider your Hasselblad. You remove the sensor
unit and slip it onto your large format your studio set up
where movements, controlled depth of field and close-up
clarity rule. Now that is versatility.
On the softer side of things all models share features that
professionals rely on for fast tracking their progress.
Camera Configuration in conjunction with Phocus offers a
powerful tool to provide intuitive, easy and rapid control of
all the parameters you don't want to forget in the heat of the
moment. Custom build camera profiles with total control in
advance to ensure the optimum in shooting security.
HNCS – Hasselblad Natural Color Solution – saves time and
secures the job because skin tones or specific product tones
are going to be rendered automatically, accurately and
immediately without any fuss. That can be worth a lot.
True Focus is the pet feature for many fashion
photographers who work fast and by instinct. They don’t
have the time to double check focus for every single split
second shot and neither do they have the time to get it
wrong. True Focus delivers the sharpness in an intuitive
manner, at speed.
IFC – Immediate Focus Confirm – for True Focus users who
have a second to spare and a desire to know the focus is
exactly on target regarding specific areas. Intuitively and
directly displays inspection of captures at 100% pinpointing
the original focus selection.
JPEG & RAW files can be produced simultaneously if you
choose. The JPEG files are not only 1/4 resolution they are
also HNC profiled so you can print straight from a folder for
amazing quality. RAWs are retained of course for your final
masterpieces.
Digital Lens Correction, applied at the file editing stage,
takes a discerning look at any colour aberration, distortion
and light fall off however minor (which is inherent in any
lens, anywhere) and resolves the situation automatically.
All models feature:
• Stainless steel/aluminium camera body
• Access to 12 H system lenses
• Access to most V system lenses by CF Adapter accessory
• Access to all H accessories
• 40 Custom options
• Hasselblad Natural Color Solution
• True Focus
• Digital Lens Correction
• Access to view camera use
• Hasselblad Phocus and Adobe Lightroom
• International Warranty & Service package
50MS & 200MS models also feature:
• Multi-Shot facility
H System lenses and accessories include:
• 24, 28, 35, 50, 80,100,150, 210, 300
• 120 Macro
• 50-110 & 35-90 zooms
• 1.7x converter & Macro converter
• CF adapter (to be able to use V system lenses)
• HTS 1.5 tilt/shift adapter
• GIL (Global Image Locator)
• Battery Adapter for technical camera use
Medium format advantage means:
• Shallow depth of field
• Huge sensors for unbeatable image resolution
• Super smooth color and tone rendition
• Enlargements in breathtaking quality

5
Introduction 2
System requirements 6
Warnings & restrictions 6
General overview –
controls and displays 7
Parts, components, buttons 7
Grip buttons & controls 8
Camera body buttons & controls 9
Sensor unit 10
Viewfinder 11
Lenses 11
Display overview 12
Sensor unit display 13
Grip display 14
Viewfinder display 15
Customizable buttons 16
Camera Configuration 17
Shortcuts 18
General 18
Carrying strap 20
Rechargeable battery 20
Battery charger 20
Charging the battery 21
Battery grip − precautions 21
Battery life 22
Battery status 22
Power modes 23
Viewfinder screen 23
Attaching /removing the viewfinder 24
Eyepiece adjustment 24
Rubber eyecup 24
Accessory connection 24
PC-connector 24
Protective baseplate 25
CF cards 25
Inserting/removing CF cards 25
Formatting CF cards 26
Removing/attaching sensor unit 27
Sensor unit maintenance 27
Cleaning sensor unit filter 28
Tethered to a computer 28
Capture files 29
Phocus 30
Lenses & focus modes 31
Attaching/removing a lens 32
Lens cap 32
Lens shades 32
Shutter and aperture control 32
Filters 32
Focusing distance calculation 32
Depth-of-field preview 33
Infrared focus settings 33
Focus assist 33
Manual focus 35
Autofocus 35
Single shot 36
Continuous 36
True Focus 36
True Focus, Absolute position lock 37
True Focus and camera handling 38
Focus checking 38
True Focus, four methods 39
Exposure Control 41
ISO & white balance on grip 42
Light metering modes 42
Exposure setting modes 43
Manual exposure mode 43
Automatic exposure mode 44
Mark overexposure 44
AE-L button 45
Exp compensation/Quick Adjust 46
Fixed Exposure compensation 46
Navigating the Menus 46
Sensor unit menu 48
Navigating menu and settings on SU 49
Navigating menu and settings on grip 50
Previews and browsing 51
Preview modes 52
Browsing 53
Zooming 53
Viewing modes 53
Sensor unit settings 54
Sensor unit menu layout 55
ISO & WB setting on sensor unit 56
Image Format 57
Storage 58
Delete 58
Format 58
Settings 59
Sound 59
Date & Time 60
Display 60
Custom Options 61
P1 & P2 Buttons 61
Display Off 61
Sleep 61
Power Off 61
Image Orientation 62
Show Preview 62
Service 62
About 63
Spirit level 64
Grip Menu Settings 65
Overview of grip menu 66
Self Timer 67
Bracketing 69
Interval 71
Settings 72
Custom Options 73
Image Info 77
Image info text setting 78
Date & Time 78
System status 79
Drive 80
Profiles 81
Profiles 82
Flash /strobe 84
General 85
Integral flash 86
Flash measure 87
Accessories 88
Multi Shot 93
Appendix 94
Technical Specifications 95
Default settings 97
True Exposure 98
P & Pv modes 99
Light metering sensitivity 99
Recommended CF cards 99
Problems, Equipment care and service 100
Index 101
CONTENTS

6
• If you want to power the H5D from a PC laptop (as opposed to a Macintosh laptop), you must ensure that the FireWire port
on the computer is capable of supplying power. Please note the following:
Most recent Macintosh computers are compatible, both desktops and laptops.
Most recent desktop PC computers are compatible.
Most laptop PC computers are not compatible (but can be modified in many cases).
• Keep the H5D and computer equipment away from moisture wherever possible. If your camera becomes wet, disconnect
from power and allow it to dry before attempting to operate again.
• Always take great care when you remove the sensor unit for cleaning as the exposed CCD sensor protective filter is
vulnerable to damage.
• Keep all cables connected to or from your camera and computer out of the way where they will not be tripped over.
• Your new Hasselblad camera may have been supplied in kit form or as separate items. There are a number of possible
combinations depending on factors such as offers, bundles etc. Please ensure that all the items noted on the
accompanying packing information have been supplied and are correct.
• Contact your Hasselblad dealer or distributor immediately if anything is missing or seems faulty in any way, quoting the
serial numbers and purchase details where appropriate.
• Please keep purchase details and the warranty in a safe place.
• Become familiar with the various parts and components. Leave protective covers on as much as possible and avoid
touching glass surfaces and inserting fingers into the camera body. Hasselblad cameras have a robust construction and are
capable of withstanding fairly rough treatment but nevertheless are precision instruments and will serve you longer if
treated with respect from the beginning.
Image-storage and editing requires a certain minimum standard regarding computer capabilities. Large images require a rea-
sonably high-performance computer with plenty of memory, advanced graphics capabilities and a recent operating system. In
most cases, the computer should include a FireWire connector, which will enable you to load images directly from the camera.
To load captures stored on the removable compact-flash card, you could instead use a USB CF-card reader, but FireWire is rec-
ommended for optimum speed and flexibility.
COMPUTER SYSTEM REQUIREMENTS
WARNINGS, RESTRICTIONS AND RECOMMENDATIONS
FIRMWARE UPDATES
USER MANUAL
If you have registered your camera you should automatically receive e-mail informing you of the latest developments. Other-
wise you are advised to make regular checks regarding firmware updates to the camera body, the sensor unit and the view-
finder.
The aim is to ensure you have the latest firmware updates for camera body, sensor unit and viewfinder, which naturally en-
sures the optimum in performance. When updating you should also study the accompanying ‘Release Notes’ or ‘Read Me’ files
where you will find details about improvements, developments and changes.
This user manual is primarily designed for on-screen PDF reading to exploit search tools etc. However, there is a sufficiently
wide left margin to allow one-sided print outs to fit an ISO standard ring binder if required.
Please note that the format is A4 to conform with the most common standard. Therefore if printing out to US Letter format or
similar please ensure you select “Fit to Printable Area” in the page scaling dialogue.
Register your camera for regular news about the latest developments, updates, news, tips, and much else!
– www.hasselblad.com –

7
Shutter release button
Front scroll wheel
Grip buttons: Flash, AF, ISO/WB,
MENU, Battery check, Profile
Camera strap lug
Rear scroll wheel
Focus Assist illuminator
Mirror Up button
Remote release port
Stop Down button
Battery grip
True Focus button
Card format button
AE-L button button
Camera strap lug
Grip lever release button
Battery grip locking lever
All of the items named on this page are described
in greater detail elsewhere in this manual.
Eyesight adjustment wheel
Exposure compensation button
Exposure DISPLAY button
Power adapter port
CF card door
Camera strap lug
Integral flash
Integral flash release button
Hot shoe
Lens release button
Sensor unit release button
Camera strap lug
PC connector port
Accessory port cover
PARTS, COMPONENTS, BUTTONS AND CONTROLS – OVERVIEW
Battery Adapter port
Menu button
P1 button
Menu navigation button
P2 button
Display button
Zoom button
Ready light

8
Note that some of the buttons are modal and so
have multiple functions according to the setting be-
ing made.
1
Shutter release button
This button has half-press and full-press positions.
By pressing half-way (or softly) the camera, auto focus
function and exposure meter can be activated. By
pressing all the way down (or more firmly) the shutter
will be released (or the chosen exposure procedure
for example, the self timer is activated with this but-
ton).
2
Front scroll wheel
The front and rear scroll wheels are used to make
changes in exposure settings, provide access to the
grip menu for settings, navigate the sensor unit’s
menu as well as acting as browse controls. The effect
of the wheels’ direction is customizable.
3
FLASH / (Control Lock) button) / (EXIT)
This is a triple function button. If you press the button
for one second, the beeper will sound (if set) and a key
symbol will appear on the grip display signifying that
the controls (except the shutter release) have been
locked and therefore cannot be altered unintention-
ally in use. Press the button for one second again to
unlock (this function can be altered to lock all controls
or scroll wheels only in Custom Options #18 on grip).
Quickly clicking the button will access the flash set-
tings information on the display from the main screen.
See under Flash /Strobe - controls and displays for full
details.
This button also acts as the EXIT button for many
other settings including an EXIT button when navi-
gating the sensor unit menu.
4
AF button / (ON) / (SEL.)
This is a triple function button. Press this button to
directly access the autofocus/manual focus choice
screen from the main screen. See under Lenses for full
details. It also acts as the ON and SEL. (= select) but-
tons for many other settings.
5
ISO/WB button / (SAVE) / (ENTER)
This is a triple function button. It provides direct ac-
cess to the ISO and White Balance settings (see under
Light Metering & Exposure Control for full details).
It also acts as the SAVE and ENTER buttons for many
other settings as well as an OK button when navigat-
ing the sensor unit menu.
6
MENU button
Accesses the first level of the menu for settings
changes.
7
Illumination/Battery status button
Press to illuminate the display. Remains active until
camera enters Display Off mode. Hold down to access
battery status/general information screen.
8
ON / OFF (Profiles) button
Press the button for 1 second to activate the camera.
The H5D start-up logo will appear and then the main
screen. After a few seconds (customizable) the camera
will enter Display Off mode.
A long press of the button will turn the camera off
completely (even from Display Off mode) signified by
an audible signal (if set).
A quick ‘click’ on the button will access the Profiles
feature (see later section for deatils).
Note the difference in results between a long press
and a quick click of this button.
9
Rear scroll wheel
The front and rear scroll wheels are used to make
changes in exposure settings, provide access to the
grip menu for settings, navigate the sensor unit’s
menu as well as acting as browse controls. The effect
of the wheels’ direction is customizable.
EXAMPLE
In this example of making a Bracketing setting, the
top three buttons – Flash, AF and ISO/WB – will tem-
porarily function according to the description on the
screen – Exit, On
and Save.
The buttons re-
turn to the stan-
dard function
when you exit
from the setting.
1
3
4
5
6
7
8
2
9
GRIP BUTTONS AND CONTROLS

9
Note that some of the buttons can be re-assigned to
another function.
There are three control buttons on the rear of the
grip.
1
True Focus button
At default setting, activates True Focus (see separate
section for description) but also acts as a Zoom-in
button when browsing or Selector button when
making a setting change on the sensor unit, according
to mode.
Can be reassigned in Custom Options to another function.
2
CF Card format button
Re-formats a CF card. Purposefully recessed to pre-
vent unintentional use. Dialogue appears for confir-
mation.
3
AE-L button
At default setting, activates AE-L that can lock a light
reading made in both automatic and manual expo-
sure modes. Also acts as a Zoom-out button when
browsing or Selector button when making a setting
change on the sensor unit, according to mode.
Can be reassigned in Custom Options to another function.
See under Light Metering & Exposure Control /
AE-L button for full details.
There are three control buttons on the front of the
grip.
4
M.UP button
Press to raise the mirror and press again to lower it
(toggle function). A quick double press of the button
(two within a half second) will immediately access the
Self timer function.
Can be reassigned in Custom Options to another function.
5
Remote release cord port
For attaching a remote release cord (electrical). The
jack plug socket is protected by a captive rubber plug.
6
STOP DOWN button
Press to make a visual check of the depth-of-field on
the viewfinder screen at the chosen aperture. The ap-
erture will close according to the setting and remain
closed as long as the pressure is maintained. You can
alter the aperture at the same time to see the changes
taking place.
Can be reassigned in Custom Options to another function.
Note
Customizable buttons are parti cularly
useful and can save you a great deal of
time and effort. You are advised to inves-
tigate their potential fully!
See separate section for full details.
CAMERA BODY BUTTONS AND CONTROLS
1
2
3
5
6
4

10
SENSOR UNIT
1
MENU / (EXIT) button
Opens and closes the menu system. Also used for various other tasks (EXIT
button, for example) as you issue commands navigating the menu system.
2
P1 button
Assignable button to access a specific function. Setting is made via Cus-
tom Options on sensor unit or in the Camera Configuration tool in Phocus.
3
Navigation button
A four-way rocker button enabling you to browse images as well as navi-
gate the menu system.
4
Zoom- in/-out (Selection) button
Zoom-in /out rocker button for the preview image. You can zoom in to
view close-ups of previews for focus checking. You can zoom out to view
several at once and finally to view and select folders and media. Also acts
as a selection button for value setting on the sensor unit menu.
5
Display button
Steps through the various view modes for the preview image.
6
P2 button
Assignable button to access a specific function. Setting is made via Cus-
tom Options on sensor unit or in the Camera Configuration tool in Phocus.
7
Ready-light
Indicates sensor unit condition. GREEN signifies a new capture is possible
(steady or blinking). Blinking ORANGE signifies the unit is busy (writing to a
CF card or sending data, for example) and so a new capture is not possible,
although settings can be changed. Steady ORANGE signifies the unit is
in
‘power down’ mode and requires a few seconds to re-activate.
RED signifies
a problem (an explanatory message will be displayed).
8
CCD and IR filter
The sensor is positioned behind a permanently mounted IR filter. Always
be very careful not to touch or scratch the surface of the filter when it is
exposed. Replace the protective cover whenever the sensor unit is not
mounted on a camera.
9
Databus connectors
For digital communication with camera body.
10
Retaining bar
Main support for sensor unit.
11
Safety catch
Prevents inadvertent removal of sensor unit.
12
‘Sensor plane’ index
For physical focus measurement in critical close-up work.
13
CF-card cover
14
FireWire port
For computer connection (please carefully note the orientation of the
FireWire plug when inserting into the sensor unit).
15
Flash sync and power connector ports
Flash sync ports and port for external power supply / battery adapter for
when the sensor unit is used with a view/large format camera. Protected
behind a rubber cover.
1
2
3 4
5
6
7
8
10
11
12
13
14
15
9
Previous H2/
H3/H4D users
please note the
orientation of the
plug on the H5D!

11
1
Hot shoe
Connection for automatic flash unit (with SCA 3902
adapter) or for wireless flash connection.
2
Rubber eye cup
Can be exchanged for another model.
3
Eyesight adjustment wheel
The personal eyesight adjustment facility has a diop-
ter range of -5 to +3.5, to suit most users.
4
Exposure compensation button
Press this button to access the EV compensation
screen. Settings are made with either the front or rear
scroll wheels. An EV correction symbol appears on
the grip and viewfinder display as confirmation.
5
Exposure method / metering mode
button
The EXP (Exposure) button accesses the exposure and
metering mode options screen. Settings are made with
the front and rear scroll wheels and the appropriate sym-
bols appear on the grip and viewfinder displays accord-
ingly.
6
Integral flash unit
Guide number 12.
7
Integral flash unit release button
Slide the button towards the rear of the camera to raise
the flash. Activation is automatic.
8
Viewfinder release button
1
Lens shade index
2
Manual focus ring
3
Focusing distance scales
4
Depth-of-field scales
5
Lens index
1
2
3
4
5
VIEWFINDER
LENSES
1
2
3
4
5
6
7
8
See more user details in the ‘Lenses’ section in this
manual.
Also, you can download technical data sheets from the
Hasselblad website, or you can download a combined
version - well as a lens booklet that contains a round up of
the available lenses as well as some general information.

12
VIEWFINDER INFORMATION
• Metering method
• Aperture setting
• Shutter speed
• Exposure method
• Capture counter
• Exposure compensation
• Focus assist
• Warning triangle
• Flash warning
• Spirit level
DISPLAY INFORMATION − OVERVIEW
• ISO
• White Balance
• IAA rating
• Storage medium
Metering method
Aperture setting
Shutter speed
Flash indication
Focus
Drive
EV
Battery status
Exposure method
Capture counter
ISO
White balance
Optional instantly accessible full-screen
display of grip information to show:
.....optional.....
• Exposure compensation
• Histogram
• Date
• Time
• Focal length of lens
• Spirit level
GRIP LCD INFORMATION
REAR LCD INFORMATION
• Metering method
• Aperture setting
• Shutter speed
• Exposure method
• Capture counter
• ISO
• White Balance
• Flash indication
• Focus
• Drive
• EV
• Battery status
.....optional.....
• Histogram
PHOCUS / PHOCUS MOBILE INFORMATION
• Metering method
• Aperture setting
• Shutter speed
• Exposure method
• ISO
• White Balance
• Flash indication
• Focus
• Drive
• EV

13
When shooting, the sensor unit can
display the information most often re-
quired for a quick settings check. The
unit’s buttons, grip scroll wheels and
camera buttons are used to navigate
the main menu and change settings.
The display can show all saved cap-
tures on a CF card for browsing and
enlarge them for detailed inspection.
When shooting, you can control the
amount of information visible togeth-
er with the current preview by choos-
ing various modes
SENSOR UNIT DISPLAY AND CONTROLS − OVERVIEW
BUTTONS AND SCROLL WHEELS
In Browse mode, the scroll wheels and True Focus and AE-L
buttons on the grip duplicate the actions of the Navigation
and Zoom /selection buttons on the sensor unit.
Activate Browse mode by clicking on the Navigation button,
the Zoom button or one of the P buttons (when assigned to
Browse activation).
GRIP INFORMATION
Certain grip information (such as: aperture setting, shutter
speed, flash indication, focus setting, drive, EV, battery status,
exposure method, capture counter, ISO and white balance) can
simultaneously be displayed on the sensor unit. This feature is
activated by pressing one of the P buttons (when assigned to
Info Screen activation).
SPIRIT LEVEL
Spirit levels can be displayed on the sensor unit (a horizontal
spirit level is also visible in the viewfinder simultaneously).
This feature is activated by pressing a P1 / P2 / Custom Button
(when assigned to Spirit Level activation).
P1 & P2 BUTTONS
The P1 and P2 buttons on the sensor unit are customizable
buttons that rapidly access a variety of functions, which are:
Delete image • Format card • Info screen • Spirit level
• Focus conrm • Browse mode • Mark Overexposure
The buttons are easy to reassign either on the sensor unit
itself or by way of the Camera Configuration tool in Phocus.
P1 & P2 BUTTON ASSIGNATION ON SENSOR UNIT
(TWO METHODS)
1. Press MENU.
2. Press P1 button or P2 according to choice.
3. Step through the available options by pressing the True
Focus ( ) or AE-L (
) buttons or ZOOM (
or
)
button.
4. Save the selection option by pressing EXIT (Menu button).
Button
function
ISO setting
White
balance
Button
function
Capture
counter
File name
or
1. Press MENU > SETTINGS > CUSTOM OPTIONS.
2. Select P1 button or P2 according to choice.
3. Step through the available options by pressing the True
Focus ( ) or AE-L
(
) buttons or ZOOM (
or
) button.
4. Save the selection option by pressing EXIT (Menu button).

14
Typical camera grip display when changing
settings.
TYPICAL GRIP DISPLAY
GRIP DISPLAY − OVERVIEW
Focus setting
(Manual setting)
White balance
(Daylight)
Shutter speed setting
(1/125s)
ISO setting
(200 ISO)
Capture counter
Battery symbols
Metering method
indication
(Centre weighted)
Drive
condition
Key lock
Flash condition indication
(No exposure compensation,
normal flash synchronisation)
Aperture setting
(f/8)
Exposure mode indication
(Manual setting)
Exposure Value display
(EV 13.0)
Command indication
The upper row on the screens describes commands (that
change according to the setting). The button immediately
above each command effects the change. So in this case, for
example, you would press the FLASH button to Exit from the
screen. See note below.
Settings symbols
Symbolize the options available when settings are changed.
The active symbol is depicted by a drop shadow.
Scroll wheel description and direction
Arrowheads symbolize which scroll wheel should be used to
change the setting they are beside. In this case, the Bracket-
ing option is chosen by the front scroll wheel and the num-
ber of captures in that option is chosen by the rear scroll
wheel.
. . .
= front scroll wheel
= rear scroll wheel
Setting information
The lower row on the screen displays information about the
current state of the setting. In other words, the upper row
displays what you can do, and the lower row displays the
current state of settings or what you have done.

15
Typical viewfinder display. Note the LEDs will only be visible when activated (by the camera or a setting).
Standard settings
SOME EXAMPLES OF VARIOUS VIEWFINDER DISPLAYS
Flash LED
Exposure method indication
(‘aperture priority’ mode)
Aperture setting
(f/5.6)
Warning triangle
LED
Exposure compensation
setting reminder symbol
Metering method
setting
(Centre weighted)
Focus Assist LED
Exposure compensation
setting (+0.7 EV)
Shutter speed setting
(1/30 second)
Capture
counter
True Focus (all mod-
els) and HCD crop (60
Mpix only) icons
appear on right
hand side of display
when functions are
activated.
Normal screen with True Focus
activated
Normal screen with AE lock
activated
Display when scroll wheels and navigation button is used or when Browse
mode is activated.
Normal screen with exposure
compensation set
When activated, the integral spirit level replaces normal display.
VIEWFINDER DISPLAY − OVERVIEW
VIEWFINDER DISPLAY ACCORDING TO
SETTING
EXPOSURE INFO ON VIEWFINDER DISPLAY
Flash mode AF mode Exposure compensation
mode
A
=
Aperture priority
S
=
Shutter priority
P
=
Program
Pv
=
Program (variable)
M
=
Manual
Centre Weighted =
CentreSpot =
Spot =
Exposure and metering
mode examples
Menu mode

16
SHORTCUT ACCESS TO
BUTTON SETTING SCREENS
1) Press the MENU button fol-
lowed by the button you want
to reassign (True Focus, AE-L,
M.UP or Stop Down).
This directly accesses the par-
ticular button you chose at the
Custom options level in the
menu.
2) Rotate the REAR scroll wheel to
select the function you want the
button to activate.
3) Press SAVE (or the shutter release
button). The selected button will
now activate the newly assigned
function directly.
These four grip buttons by de-
fault are assigned according to
name but can be reassigned (in
Custom Options #4, #5, #6 and
#7 or by using the Camera Con-
figuration tool) to various other
functions listed here.
(In addition there are two customizable buttons
on the sensor unit: P1 and P2. These are set on the
sensor unit or in the Camera Configuration tool in
Phocus).
1
True Focus
2
AE-L
3
M.UP
4
STOP DOWN
· True Focus
Temporarily activates True Focus
function.
· AE-lock
Temporarily locks a light reading
in auto or manual modes. Also
used in Zone metering.
· Mirror up
Locks mirror up for vibration
reduced captures. Also lowers
mirror.
· Stop down
Activates stop down function for
depth-of-field checking.
· AF
Temporarily activates Autofocus
function.
· Self timer
Sets self timer mode. Provides
a timed remote shutter release
function with the option of a
change in sequence of the mirror
movement (to reduce vibration).
· Bracketing
Sets Bracketing mode. This func-
tion provides an automatic series
of captures; one at the standard
exposure setting (Manual or
Auto) and the others with prede-
termined deviations in EV from
the standard exposure.
· B mode
Sets B mode shutter setting.
Shutter stays open as long a
pressure is maintained on shut-
ter release button.
· T mode
Sets T mode shutter setting.
Shutter stays open after first
press of shutter release button
(toggle function to close again).
· Flash Measure
Activates manual flash measure
function.
· Interval timer
Activates interval function start
screen.
· Cycle Light Meter mode
Selects next light metering mode.
· Expose
Provides alternative to shutter
release button.
· Display Off
Activates Display Off mode im-
mediately.
· Histogram
Provides a histogram on the grip
display for the last capture.
SAVE
(ISO/WB button)
MENU
Rear scroll
wheel
CUSTOMIZABLE BUTTONS FUNCTION OPTIONS
· Focus Conf.
Provides a 100% preview on
display for focus checking.
Not available for True Focus and
AE-L buttons.
· Delete
Direct access to delete dialogue.
· Grey balance exp.
Provides selective capture for
grey balance calculations.
· Spirit Level
Activates spirit level on back (but
not in viewfinder).
· Rear Info Screen
Activates grip information on
sensor unit display.
Tip
See separate section about the
Camera Configuration tool.
1
2
3
4

17
The Camera Configuration tool in Phocus offers a very thorough and secure way of creating comprehensive profiles for the
H5D. There are three windows – Controls, Exposure and General – that present virtually all parameters to enable total control
at the press of a button. This means that separate and specific custom profiles created in advance can cover a number of
shooting scenarios leaving virtually nothing to chance. In addition these profiles can be easily imported and exported. For
instance, you can create a special profile to suit a specific type of shoot and keep it on a memory stick or laptop. So, when
renting an H5D for example, you only have to upload the saved profile to ensure that all parameters have been reset with-
out you having to go through each detail – simple and secure.
The interface has three tabs at the top, Controls, Exposure and General, that access the windows. Descriptive information ap-
pears as you mouse over the various menus and extra tool tips are additionally available as an option. To take an example,
the Controls window is illustrated here. On the left are two lists: Camera and Library. The Camera list includes the various
available configuration profiles already stored in the camera – the profile currently in use as well as the default settings and
those you have created or imported from other sources. Library contains the factory presets stored on disk.
CAMERA CONFIGURATION IN PHOCUS
This list describes
the settings in cur-
rent use as well as
the profiles already
stored in the con-
nected camera.
This list includes
the new profiles
created in Camera
Configurator as
well as factory
profiles stored on
disk.
Import, Export,
Transfer, Add
Profile etc tools
Check box to display extended information.
Controls, Exposure and General tabs
The Camera Conguration interface makes it easy to go through the parameters logically and systematically to prevent
you missing important settings.
4) Right click the Library version of the profile to
access the Transfer Profile Set to Camera option
then click on OK to complete the action. This
causes the new profile to appear on the grip dis-
play for selection when you click on the Profiles
button.
Right click a profile in Library to access the Rename,
Reset to Standard, Delete and Export options if
required. Import, Export, Transfer, Add Profile etc
tools are also available.
CREATING A PROFILE
1) Open Camera Configuation located under the
Windows menu.
2) Connect the camera and in the Camera list click on
a profile you want to change or a spare profile and
name it.
3) Cycle through the three windows, Controls,
Exposure and General, making the appropriate
selections that you require. When complete, select
the new profile and drag and drop or right click it
to store in the Library.

18
Some buttons access shortcuts if used in different ways or contexts.
1
Menu button – P1 / P2 setting option access
Press MENU on sensor unit and then P1 or P2 to
access the relevant setting options directly for that
particular button. After making any changes, press
EXIT (Menu button) or the shutter release button to
save the new setting.
2
DISPLAY button – Display
Press and hold to return to default preview display
mode.
3
Shutter release button – Camera activation
Re-activates camera from Display Off mode.
4
Shutter release button – Quick save
Half-press shutter release button to make a quick save
when making settings adjustments.
5
Front scroll wheel – Menu navigator / Browser
Functions as a horizontal navigator on sensor unit
menu as well as a capture browser in Browse mode.
6
Menu button – Custom Options access
Press MENU button twice on the grip to access the lat-
est setting made in Custom Options. After making any
changes, press the shutter release button to save the new
setting.
7
Menu button – Customizable Button access
Press MENU on the grip and then the desired custom-
izable button (True Focus, AE-L, M.UP, Stop Down)
to access the choices available in Custom Options.
After making any changes, press SAVE or the shutter
release button to save the new setting.
8
Profiles button – Camera activation
Re-activates camera from Display Off mode.
9
Rear scroll wheel – Menu navigator
Functions as a vertical navigator on sensor unit menu.
10
True Focus button – Camera activation
Re-activates camera from Display Off mode.
11
True Focus button – Zoom-in button
Automatically acts as Zoom-in button when in
Browse mode.
12
True Focus button – Selection button
Automatically acts as value selector on sensor unit
menu when in Menu mode.
13
CF Card format button – CF card format
Formats the current inserted CF card (requires
confirmation).
14
AE-L button – Camera activation
Re-activates camera from Display Off mode.
15
AE-L button – Zoom-out button
Automatically acts as zoom-in button when in Browse
mode.
16
AE-L button – Selection button
Automatically acts as value selector on sensor unit
menu when in Menu mode.
17
Mirror Up button – Camera activation
Re-activates camera from Display Off mode.
18
Stop Down button – Camera activation
Re-activates camera from Display Off mode.
3 4
5
6 7
8
9
SHORTCUTS
2
1
12
11
10
13
15 1614
17
18

19
Photo: Ken Hermann © / Hasselblad Masters
GENERAL

20
CARRYING STRAP
The carrying strap is attached by firstly withdrawing the
safety collar. The hook is then freed and can be attached to
the strap lug. Slide back the safety collar to ensure the hook
remains in the locked position between the small protruding
lugs. The collar is purposely a tight fit to avoid unintention-
ally slipping back and therefore might need some effort to
slide.
RECHARGEABLE BATTERY GRIP
The environmentally approved Battery grip Li-ion (3043356)
is the standard power source for the H5D camera. The H5D
requires a power supply for all actions as there is no me-
chanical reserve facility. When working untethered, it is
therefore advisable to keep a reserve rechargeable battery
grip at hand. As is the case with most batteries, problems
might be encountered when used in very low temperatures.
In this situation it is advisable to keep the reserve battery
in an inside pocket, for example, to maintain it near body
temperature (both sorts of battery grips are referred to as
the ‘battery’ in this manual).
FITTING AND REMOVING A BATTERY
The fitting and removing procedure is the same for both
types of battery grip.
Remove the battery from the camera by depressing the bat-
tery holder button (A) and simultaneously swinging the bat-
tery holder retaining lever (B) down until it stops. Pull the
battery downwards (C).
If you intend to store the battery separately from the camera
you should ensure that the safety cover is in place (to pre-
vent short-circuiting). It snaps into place and is removed by
pulling outwards and upwards on the locking clip.
To fit, hold the battery flat against the camera body and
aligning the two upper lugs with the slot, slide it back into
position as far as it will go. Swing back the battery holder
retaining lever until it clicks back into place.
A
B
C
BATTERY CHARGER
The battery charger is supplied with a number of plug at-
tachments to suit various types of domestic electrical sock-
ets available worldwide. Other types of socket will require a
domestic socket converter.
Attach the chosen plug by sliding it into position as in the
diagram. Removal is by the reverse procedure.
Please note that the Battery charger Li-ion 2900 (3053572)
is designed for use with Battery grip Li-ion 2900 (3043356)
but can also be used together with the Battery grip re-
chargeable 7.2V Li-Ion (3043348) intended for H4D use.
Likewise, the older Battery charger for Li-Ion battery
(3053568) also can also be used together with the Battery
grip Li-ion 2900 (3043356) but requires 50% longer charg-
ing times.
/