Page is loading ...

INSTRUMENTS
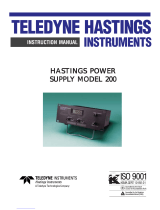
TELEDYNE HASTINGS
INSTRUCTION MANUAL
MODEL 40MODEL 40
MODEL 40MODEL 40
MODEL 40
POWER SUPPLPOWER SUPPL
POWER SUPPLPOWER SUPPL
POWER SUPPL
YY
YY
Y

Page 2
Manual Print HistoryManual Print History
Manual Print HistoryManual Print History
Manual Print History
The print history shown below lists the printing dates of all revisions and addenda created for this
manual. The revision level letter increases alphabetically as the manual undergoes subsequent
updates. Addenda, which are released between revisions, contain important change information
that the user should incorporate immediately into the manual. Addenda are numbered sequen-
tially. When a new revision is created, all addenda associated with the previous revision of the
manual are incorporated into the new revision of the manual. Each new revision includes a revised
copy of this print history page.
Revision A (Document Number 115-A) .................................................................... November 1993
Revision B (Document Number 115-112002) ........................................................... November 2002
Revision C (Document Number 115-082005).................................................................August 2005
Hastings Instruments reserves the right to change or modify the design of its equipment without
any obligation to provide notification of change or intent to change.
CAUTION
!
If equipment is not used in the manner specified by this manual,
protection provided by the equipment may be impaired
Visit www.teledyne-hi.com for WEEE disposal guidance.

Page 3
Table of Contents
1.0 GENERAL INFORMATION ....................................................5
1.1 Features ..................................................................................................................5
1.2 Specifications........................................................................................................... 5
1.3 Accessories.............................................................................................................. 5
2.0 INSTALLATION AND OPERATION ........................................7
2.1 Receiving Inspection................................................................................................ 7
2.3 Power Requirements ................................................................................................ 8
2.3 Output Voltage ......................................................................................................... 8
2.4 Electrical Connection .............................................................................................. 8
2.5 Operation................................................................................................................. 9
3.0 CALIBRATION AND ADUSTMENTS .................................... 11
3.1 Range Change ...................................................................................................... 11
3.2 Correction Factro ................................................................................................. 12
4.0 TROUBLESHOOTING......................................................... 15
4.1 Test Points............................................................................................................. 15
4.2 Troubleshooting Chart.......................................................................................... 16
5.0 WARRANTY ........................................................................ 17
5.1 Warranty Repair policy ......................................................................................... 17
5.2 Non-Warranty Repair policy ................................................................................ 17

Page 4

Page 5
General Information
SECTION 1
The Hastings Model 40 Power Supply is a combination power supply and digital readout monitor,
for up to four Hastings Flow Instruments having the model number prefixes of HFM, ST, or FST
and up to 2 of the HFM-D series. The gas conversion factor can be set individually for each channel
by front panel mounted potentiometers. This allows meters calibrated for air to be used for other
gases without recalibration. These controls provide for easy monitoring of the flow instruments with
minimal time required to get the flow instruments on line.
1.1 Features:
Front panel dial-in gas conversion factors for each channel.
The power supply fuse is user-accessible from the rear of the instrument without disassembly of the
case.
A rear panel terminal strip provides the user with analog output from flow instruments.
A 3-1/2 digit LCD display monitors the flow instruments.
Input voltage is internally switchable between 115 and 230 VAC.
Display can be set up to read directly in the units in which the flow instrument is calibrated.
1.2 Specifications:
• Weight: Approximately 4 lbs.
• Dimensions: 3.47"(H) X 9.47"(W) X 7.19"(D) — see page 20.
• Meter: 3-1/2 digit LCD
• Power: 90-125/180-250 VAC 50 or 60 HZ
• Output: 15 VDC @ ±300 mA
• Use: 1 to 4 channels
• Scaling: Individual channel meter adjustment.
• Signal Output: 0-5 VDC into 2K Ohms minimum load. All four channels can be read simulta-
neously.
• Feet and a stand are standard. They are easily removeable for rack mounting. (mtg screws can
cause electrical shorts if reinstalled without feet and stand)
OPTIONAL CABLES:
• Type AF-(length)-AM for “D” connector
• Type CE-(length)-AM for edge connector
8, 25, 50, 100 ft. lengths available as separate item.
Cables DO NOT have to be the same length.

Page 6

Page 7
Installation and Operation
SECTION 2
This section is designed to assist you in getting a new power supply into operation as quickly and
easily as possible. Please read the following very thoroughly before attempting to install the instru-
ment.
2.1 Receiving Inspection:
Carefully
unpack the Hastings Power Supply and any accessories that arrive with it. Inspect it
for any obvious signs of damage due to shipment. Immediately advise the carrier if any damage is
suspected.
Compare each component shipped against the packing list. Ensure that all parts are present
(i.e. power supply, cables, etc.). Optional equipment or accessories will be listed separately on the
packing list (see Section 1.4 - Accessories). There may also be one or more OPT- options on the
packing list. These normally refer to special ranges or special gas calibrations. They may also refer
to special helium leak tests or high pressure tests, or special modifications such as high temperature
or special O-ring materials. In most cases these are not separate parts, but rather special options or
modifications built into the flowmeter power supply.
2.2 Power Requirements:
The Model 40 Power Supply normally operates on either 115 or 230 VAC. It can be switched
between these two supplies by the black switch next to the transformer on the PC board, front left
corner (see Figure 2.1). Access the switch by removing two top screws in the rear panel and sliding
the top cover aft. 115 and 230 positions are marked on the PCB. Units will be shippedfor the
voltage specified in the order.
FIG 2.1
FRONT
PANEL

Page 8
2.3 Output Voltage:
The output of the flow instrument is a 0-5.00 VDC signal proportional to the flow rate. The
output is sent to the display and is available at terminals at the rear of the Model 40 Power Supply.
It is recommended that the load resistance be no less than 2K Ohms.
2.4 Electrical Connection:
Ensure that the power switch is turned off. Plug the AC line cord into an appropriately rated
receptacle. Then plug the 15 pin D connector cable, purchased separately from Hastings Instru-
ments, into the top of the flow instrument and into the back of the power supply. When looking at
the back panel of the power supply the different channels are numbered from left to right (see
Figure 2.2).
Figure 2.3 shows a close-up of the terminal block label.
FIG 2.3
15
VDC
COMMON
-15 VDC
COMMON
NC
COMMON
NC
COMMON
CHANNEL 1
FLOW OUT
CHANNEL 2
FLOW OUT
CHANNEL 3
FLOW OUT
CHANNEL 4
FLOW OUT
FLOW
COMMON
CASE GND
FIG 2.2

Page 9
2.5 Operation:
2.5.1 Displa2.5.1 Displa
2.5.1 Displa2.5.1 Displa
2.5.1 Displa
yy
yy
y
If the power supply was purchased with the flow instruments, the power supply will be already
set up so that the display reads directly in the units of flow to be monitored. EXAMPLE: A 5 SLPM
unit is connected to channel 1. When the CHANNEL SELECTOR switch is turned to channel 1,
the display will read 5.00 at 5 SLPM flow rate. A 50 SCCM unit will have the display for its
channel read 50.0 at full flow. Note that the display has 3-1/2 digits, but only two decimal points are
active, therefore a 1 SLPM unit will read 1000 SCCM.
2.5.2 Channel Selection2.5.2 Channel Selection
2.5.2 Channel Selection2.5.2 Channel Selection
2.5.2 Channel Selection
The CHANNEL SELECTOR switch in the lower right-hand corner of the front panel (see Fig.
2.4) is used to switch the display between the different flow instruments to be monitored. Note that
the OFF position removes all power from the flow instruments and from most of the power supply.
If the CHANNEL SELECTOR switch is inadvertently turned to the OFF position, the flowmeters
will shut down. After turning the instrument back on, there will be a short period of time before the
flowmeters will correctly indicate the gas flow.
FIG 2.4
2.5.3 Cor2.5.3 Cor
2.5.3 Cor2.5.3 Cor
2.5.3 Cor
rection Frection F
rection Frection F
rection F
actor Switchactor Switch
actor Switchactor Switch
actor Switch
On the left hand side of the front panel is a switch labeled CORRECTION FACTOR. De-
pressing the right side of this switch will display the gas conversion factor for the channel correctly
selected by the channel selector switch. Normally this will read 1.000. This gas conversion factor is
a multiplier that is factored into the flow signal before it is sent to the front panel display. This
factor will be changed to some value other than 1.000, only if the flowmeter has some gas flowing
through it other than the gas for which the flowmeter is calibrated.
2.5.4 Cor2.5.4 Cor
2.5.4 Cor2.5.4 Cor
2.5.4 Cor
rection Frection F
rection Frection F
rection F
actor Pactor P
actor Pactor P
actor P
otentiometerotentiometer
otentiometerotentiometer
otentiometer
ss
ss
s
Refer to Fig. 2.4. To set a correction factor, turn the CHANNEL SELECTOR switch to the
desired channel. Depress and hold the CORRECTION FACTOR switch. The display is now
reading the correction factor currently set for the channel. This factor can be adjusted by turning
the CORRECTION FACTOR POTENTIOMETER for the corresponding channel with a small
screw driver while holding the correction factor switch in the depressed position. Turning clockwise
will increase the factor, and counterclockwise will decrease the factor. Release the CORRECTION
FACTOR switch. The display is now showing the correct flow of the new gas.

Page 10
2.5.5 Fuse2.5.5 Fuse
2.5.5 Fuse2.5.5 Fuse
2.5.5 Fuse
The fuseholder is mounted on the lower right-hand corner of the back panel. To remove the
fuse, insert a screwdriver into the slot and turn counterclockwise 1/4 turn. Replace the fuse with a
250 volt 1/4 amp Slo-Blo<190> fuse, 1/4" x 1-1/4". Insert fuse into fuseholder. Place into fuse base
and turn clockwise 1/4 turn. Attempting to turn past the stop may damage the fuseholder.
2.5.6 Rear 2.5.6 Rear
2.5.6 Rear 2.5.6 Rear
2.5.6 Rear
TT
TT
T
erer
erer
er
minal Boardminal Board
minal Boardminal Board
minal Board
There is a 14-position terminal board on the rear panel . See Fig. 2.4. The pins are numbered
from left to right. Pin 1 is the 15 VDC regulated output of the power supply. Pin 3 is the -15 VDC
regulated output of the power supply. These terminals can supply up to 150 mA each for use in
external display boards, etc. Pins 2, 4, 6, 8 and 13 are common for both the positive and negative
supplies. All five of these terminals are tied together internally. Pins 7 - 10 are the 0 - 5 VDC flow
output signals from the flowmeters on channels 1 - 4 respectively. All four of the terminals can be
monitored simultaneously. These signals are referenced to pin 13 (flow common) and to the power
supply common terminals.

Page 11
Calibration and Adjustments
SECTION 3
This section contains instructions to change the configuration of the power supply from the way
it was set up at the factory.
3.1 Range Change:
Since the display uses a 3-1/2 digit LCD, the highest number that can be displayed is 1999. If
the display is to read directly in the flow units being used, it must be adjusted whenever the highest
digit of the maximum flow rate changes, such as, a 20 SLPM flow instrument being changed to 5
SLPM. If a 10 SLPM unit is exchanged for a 10 SCCM unit, the display will not need to be
changed at all. If a 5 SLPM unit is changed to a 500 SCCM unit, then only the decimal point needs
to be changed, per Section 3.1.2.
3.1.1 Displa3.1.1 Displa
3.1.1 Displa3.1.1 Displa
3.1.1 Displa
y y
y y
y
AdjustmentAdjustment
AdjustmentAdjustment
Adjustment
To change the display, remove the two screws on the top of the back panel. Slide the aluminum
perforated top cover out. Turn the CHANNEL SELECTOR switch to the desired channel. Verify
that the conversion factor has been set to the correct value, by depressing the CORRECTION
FACTOR switch. The correction factor should be 1.000 if the factor has not been changed by the
customer since the factory setup. If the value has been changed by the customer, determine the
correct value for the gas flowing through the flowmeter per Section 3.2. Compare the observed
value to the calculated value. Generate the maximum flow signal (5.000 volts) from the flowmeter,
Switches are shown
set for one place
to the right of the
decimal point for
Channel 3.
DISPLAY-ADJUST
POTENTIOMENTERS
FRONT of PANEL
CHANNELSCHANNELS
CHANNELSCHANNELS
CHANNELS
FIG 3.1FIG 3.1
FIG 3.1FIG 3.1
FIG 3.1
Not operator serviceable, observe precautions when handling, do not pull cover further
back more than necessary, some components toward the rear of the PC Board may be
High High
High High
High
VV
VV
V
oltage,oltage,
oltage,oltage,
oltage,
leave servicing to qualified personnel
..
..
.
4 3 2 1

Page 12
or supply a 5-volt dummy signal to the FLOW-OUT terminals on the back panel. Turn the DIS-
PLAY-ADJUST potentiometer for the channel to be set until the display reads the desired full scale
reading. The DISPLAY-ADJUST potentiometers are located on the PC board near the front/center
as shown in Fig3.1. Channel 1 is on the right when looking from the front of the Power Supply.
3.1.2 Decimal P3.1.2 Decimal P
3.1.2 Decimal P3.1.2 Decimal P
3.1.2 Decimal P
ointoint
ointoint
oint
Remove the two screws that hold the aluminum perforated upper cover in place. Slide te cove
out. The dipsSwitches are located beind the CHANNEL SELECTOR switch ( see Fig 3.2). Turn
on the desired point for a particular channel by pressing its respective dipswitch down towards the
channel number (OPEN indicates that the switch is off).
Switches 1 and 2 are for Channel 1Switches 1 and 2 are for Channel 1
Switches 1 and 2 are for Channel 1Switches 1 and 2 are for Channel 1
Switches 1 and 2 are for Channel 1
(Switch 1 provides 2 places to the right of the decimal point, and Switch 2 provides 1 place to the
right of the decimal point).
Switches 3 and 4 are for Channel 2Switches 3 and 4 are for Channel 2
Switches 3 and 4 are for Channel 2Switches 3 and 4 are for Channel 2
Switches 3 and 4 are for Channel 2 (Switch 3 provides 2 places to the
right of the decimal point, and Switch 4 provides 1 place to the right of the decimal point).
Switches 5, 6, 7, 8 are used for channels 3 and 4 in the same fashion (see Figure 3.2 and table "A"
on page 7 for examples).Reinstall cover if no further modifications are needed.
Channel Switch Selection Decimal Position
1 ....................................... 1............................................................... xx.xx
......................................... 2............................................................... xxx.x
2 ....................................... 3............................................................... xx.xx
......................................... 4............................................................... xxx.x
3 ....................................... 5............................................................... xx.xx
......................................... 6............................................................... xxx.x
4 ....................................... 7............................................................... xx.xx
......................................... 8............................................................... xxx.x
TABLE “A”
3.2 Correction Factor:
Normally mass flowmeters are calibrated using a standardized volumetric unit as a unit of mass,
for example a standard liter is a liter of the gas at 760 Torr and 0
o
C. Thermal mass flowmeters
measure gas flow by monitoring this heat capacity is constant, but it varies from gas to gas. If a
different gas is measured than the gas for which the flowmeter is calibrated, the flowmeter will have
a different mass flow through it in volumetric units for the same voltage output. This difference in
volumetric mass flow for the different gases is due to every gas having a different heat capacity.
Under normal situations the gases will respond as ideal gases and this difference in flow can be
Some components on the PC Board are at
High High
High High
High
VV
VV
V
oltage,oltage,
oltage,oltage,
oltage,
only qualified personnel
should perform this test
..
..
.

Page 13
calculated by comparing ratios of their respective heat capacities. These ratios have been calculated
and are tabulated on a chart on page 16 of this manual as THR conversion factors. These factors
are used as written only when an instrument calibrated for
AIR AIR
AIR AIR
AIR is being used to measure the flow of
a different gas. These correction factors are theoretical and they are believed to be correct by the
manufacturer, but due to the wide variety of gases and the toxic or caustic properties of many of
them, the accuracy of most of the correction factors has not been verified.
3.2.1 Calcula3.2.1 Calcula
3.2.1 Calcula3.2.1 Calcula
3.2.1 Calcula
tion of Cortion of Cor
tion of Cortion of Cor
tion of Cor
rection Frection F
rection Frection F
rection F
actoractor
actoractor
actor
s Fs F
s Fs F
s F
or Standard or Standard
or Standard or Standard
or Standard
VV
VV
V
olumetrolumetr
olumetrolumetr
olumetr
ic Unitsic Units
ic Unitsic Units
ic Units
Often customers would like to measure a variety of gases with the same flowmeter without
having to go through the trouble some process of recalibrating the flowmeter each time a new gas is
measured. The alternative has always been that each flow reading could be calculated by multiply-
ing the display by the conversion factor, but this has always been time consuming and the actual
flow of a process cannot be continously monitored without having a calculator present. By incorpo-
rating the multiplication network into the Model 40 Power Supply, the calculations can now be
made by the power supply itself continuously. All that is required is for the customer to calculate
the conversion factor once as per instructions below, and then dial it in for each channel using the
CONVERSION FACTOR potentiometer on the front panel.
This factor can displayed for each channel of the power supply by turning the CHANNEL
SELECTOR switch to the desired channel and pressing the CORRECTION FACTOR SWITCH.
The flowmeter output is being multiplied by the number that is displayed before the flow signal is
sent to the display. When the flowmeter is measuring the same gas for which it is calibrated,
the correction factor is 1.000 and the flow signal will be sent to the display unchanged by the
multiplication network.
EXAMPLE: A 100 SLPM flowmeter is calibrated for air. The power supply is set up to display
100.0 when the flowmeter has the full scale output of 5.000 VDC. With helium flowing through the
same flowmeter, the display would still read 100.0 at 5.00 VDC, however, the flow would be ap-
proximately 143 SLPM. If the calibration factor for a selected channel is set to 1.430, then
the display will correctly indicate the flowrate of helium, which would be 143.0 SLPM at full scale.
If a flowmeter is calibrated for a gas other than air by the manufacturer, then the correction
factor will be set to 1.000 when that gas is being measured. If a different gas is being used in the
same flowmeter, then the correction factor can be calculated by taking the factor for the new gas and
dividing by the factor of the gas for which the flowmeter is calibrated.
EXAMPLE: If a flowmeter is calibrated for helium at 100.0 SLPM, the correction factor will
read 1.000 when the CORRECTION FACTOR switch is depressed. The display will read 100.0
when the flowmeter has an output of 5.000 volts. This indicates the full scale flowrate of 100.0
SLPM. If carbon dioxide is now measured by the flowmeter, the correction factor should be set to
.510, which is the THR correction factor for carbon dioxide (.73) divided by the factor for helium
(1.43). The display will now read full scale (51.0 volts) when the flowmeter has 51.0 SLPM of
carbon dioxide flowing through it, and the flowmeter will have an output of 5.000 volts.

Page 14
3.2.2 Calcula3.2.2 Calcula
3.2.2 Calcula3.2.2 Calcula
3.2.2 Calcula
tion of Cortion of Cor
tion of Cortion of Cor
tion of Cor
rection Frection F
rection Frection F
rection F
actoractor
actoractor
actor
s Fs F
s Fs F
s F
or Mass Unitsor Mass Units
or Mass Unitsor Mass Units
or Mass Units
Occasionally, a customer will request a flowmeter calibrated in units of mass such as grams/min.
or lbs/hour. In this case, another factor must be calculated in to compensate for the different
densities of the gases. Calculate the factor as detailed above, then multiply this factor by the ratio of
the specific gravity of the new gas to the specific gravity of the gas for which the flowmeter was
calibrated. Since air has a specific gravity of 1.000, this will be just the specific gravity of the new
gas when the flowmeter has been calibrated for air. Specifc gravities for various gases can be found
on the chart on page 16 .
The factor would be calculated as follows:
CF
m
= (CF
2
/CF
1
) X (s2/s1)
CFm = conversion in mass units
CF1 = conversion factor of gas for which the flowmeter is calibrated
CF2 = conversion factor of the gas being measured
s1 = specific gravity of gas for which the flowmeter is calibrated
s2 = specific gravity of gas being measured
EXAMPLE: A flowmeter is calibrated for 100 grams per minute of nitrous oxide and it now
has neon flowing through it. Divide the correction factor of neon (1.38) by the correction factor of
nitrous oxide (.75), and multipliy by the ratio of the specific gravity of neon (.70) to the specific
gravity of nitrous oxide (1.54): (1.38/.75) X (.70/1.54) = 0.836. This is the number that must be
set per Section 2.5.4 for the display to automatically read out in grams per minute of neon.

Page 15
Troubleshooting
SECTION 4
This section contains a troubleshooting guide to help locate and repair failed components.
This troubleshooting guide is designed as a general reference only, and will not cover every possible
component failure. It is possible for problems with theflow instruments to appear as a failed power
supply and vice versa. Therefore, if possible, try to verify the proper operation of the flow instru-
ments on a different power supply. The components and test points mentioned in this section can
be located by referring to the component layout drawing in Section 6.0.
NOTE: SOME OF THE TROUBLESHOOTING PROCEDURES WILL INVOLVE RE-
PLACING FAILED COMPONENTS ON THE PRINTED CIRCUIT BOARD. DO NOT
PERFORM THESE STEPS IF THE POWER SUPPLY IS STILL UNDER WARRANTY, SINCE
PRINTED CIRCUIT BOARD MODIFICATIONS WILL VOID THE WARRANTY.
TP5TP5
TP5TP5
TP5
TP3TP3
TP3TP3
TP3
TP2TP2
TP2TP2
TP2
FRONT of PANEL
TP6TP6
TP6TP6
TP6
TP1TP1
TP1TP1
TP1
FIG 4.1
4.1 Test Points:
Refer to Figure 4.1. Test point 1 (TP-1) is common. All of the voltages specified in this section
are referenced to this point unless stated otherwise. These voltages should be checked under load
condition. Test point 2 (TP-2) is the output of the positive regulator and should read between
+14.25 and+15.75 VDC. Test point 3 (TP-3) is the output of the negative regulator and should
read between -14.25 and -15.75 VDC. Test point 5 (TP-5) is the voltage applied to the front panel
display. Since the display is a miniature digital voltmeter, the voltage on TP-5 should be the same
as the number on the display.
Some components on the PC Board are at
High High
High High
High
VV
VV
V
oltage,oltage,
oltage,oltage,
oltage,
only qualified personnel
should perform this test
..
..
.

Page 16
Check these voltages prior to using the troubleshooting chart.
TP-6 is one lead of R27 and should be 2.00 VDC. The flow signals sent by flowmeters on
channels 1 - 4 can be accessed by test points on one lead of C7 thru 10 respectively in the left rear
of the main PC board. These do not have test point numbers, but their positions are screen printed
on the PC board.
4.2 Troubleshooting Chart:
SYMPTOM: Display has no indication regardless of the position of the Channel Selector
switch and all TP voltages are 0.0VDC.
ACTION: Ensure the unit is plugged into an operating source of AC power of the proper
voltage for the unit. Remove the fuse from the back of the unit. Replace it with
a 0.5 Amp 250 volt fuse if it has failed.
SYMPTOM: TP-2 is 0, but TP-3 is correct.
ACTION: The positive voltage regulator (U1) has failed; replace it.
SYMPTOM: TP-3 is 0, but TP-2 is correct.
ACTION: The negative voltage regulator (U2) has failed replace it.
SYMPTOM: All Correction factors are approximately 0 or out of range.
ACTION: Check TP-6 (one end or R27). If this is not 2.00 VDC replace U3 (AD580
voltage reference).
SYMPTOM: Correction factors not displayed when CORRECTION FACTOR switch
depressed or the factors are displayed regardless of the postion of the
CORRECTION FACTOR switch.
ACTION: The analog switch (U6) has failed; replace it.
SYMPTOM: The decimal point is stuck in either the flow position or in the position used by
the correction factor.
ACTION: The decimal point analog switch (U8) has failed; replace it.
SYMPTOM: TP-3 and TP-2 are both low but non-zero.
ACTION: Check to see if the power supply source selector switch (S2) is in the proper
position for the AC supply being used.

Page 17
Warranty
SECTION 5
5.1 Warranty Repair Policy
Hastings Instruments warrants this product for a period of one year from the date of shipment to be free
from defects in material and workmanship. This warranty does not apply to defects or failures resulting
from unauthorized modification, misuse or mishandling of the product. This warranty does not apply to
batteries or other expendable parts, nor to damage caused by leaking batteries or any similar occurrence.
This warranty does not apply to any instrument which has had a tamper seal removed or broken.
This warranty is in lieu of all other warranties, expressed or implied, including any implied warranty as to
fitness for a particular use. Hastings Instruments shall not be liable for any indirect or consequential
damages.
Hastings Instruments, will, at its option, repair, replace or refund the selling price of the product if
Hastings Instruments determines, in good faith, that it is defective in materials or workmanship during the
warranty period. Defective instruments should be returned to Hastings Instruments,
shipment prepaid,
together with a written statement of the problem and a Return Material Authorization (RMA) number.
Please consult the factory for your RMA number before returning any product for repair. Collect freight
will not be accepted.
5.2 Non-Warranty Repair Policy
Any product returned for a non-warranty repair must be accompanied by a purchase order, RMA form
and a written description of the problem with the instrument. If the repair cost is higher, you will be
contacted for authorization before we proceed with any repairs. If you then choose not to have the
product repaired, a minimum will be charged to cover the processing and inspection. Please consult the
factory for your RMA number before returning any product repair.
TELEDYNE HASTINGS INSTRUMENTS
804 NEWCOMBE AVENUE
HAMPTON, VIRGINIA 23669 U.S.A.
ATTENTION: REPAIR DEPARTMENT
TELEPHONE (757) 723-6531
1-800-950-2468
FAX (757) 723-3925
E MAIL [email protected]
INTERNET ADDRESS http://www.hastings-inst.com
Repair Forms may be obtained from the “Information Request” section of the
Hastings Instruments web site.
/
