Page is loading ...

®
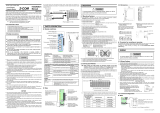
RKC INSTRUMENT INC.
All Rights Reserved, Copyright 2015, RKC INSTRUMENT INC.
USB Communication Converter
COM-K2 Instruction Manual
IMR01Z02-E2
Thank you for purchasing this RKC product. In order to achieve maximum
performance and ensure proper operation of your new instrument, carefully read
all the instructions in this manual. Please place the manual in a convenient
location for easy reference.
This is a Class A instrument. In a domestic environment, this
instrument may cause radio interference, in which case the user
may be required to take additional measures.
All precautions described in this manual should be taken to avoid
damage to the instrument or equipment.
NOTICE
This manual assumes that the reader has a fundamental knowledge
of the principles of electricity, process control, computer technology
and communications.
The figures, diagrams and numeric values used in this manual are
only for explanation purpose.
RKC is not responsible for any damage or injury that is caused as a
result of using this instrument, instrument failure or indirect damage.
RKC is not responsible for any damage and/or injury resulting from
the use of instruments made by imitating this instrument.
Periodic maintenance is required for safe and proper operation of this
instrument. Some components have a limited service life, or
characteristics that change over time.
Every effort has been made to ensure accuracy of all information
contained herein. RKC makes no warranty expressed or implied,
with respect to the accuracy of the information. The information in
this manual is subject to change without prior notice.
No portion of this document may be reprinted, modified, copied,
transmitted, digitized, stored, processed or retrieved through any
mechanical, electronic, optical or other means without prior written
approval from RKC.
1. PRODUCT CHECK
Before using this product, check each of the following:
Model code
Check that all of the accessories delivered are complete.
Check that there are no scratch or breakage in external appearance
(case, terminal, etc).
COM–K2–
: Loader communication cable (Optional)
N: None
1: W-BV-01 cable (1.5 m)
for loader communication
3: W-BV-03 cable (1.5 m)
for loader communication
4: W-BV-05 cable (1.5 m)
for loader communication
The connector on the instrument side of the W-BV-05 cable is
not USB-compatible. Do not connect this cable to any USB
devices.
The USB device driver can be downloaded from the official
RKC website: http://www.rkcinst.com/english/soft/index.asp
If any of the products are missing, damaged, or if your manual
is incomplete, please contact RKC sales office or the agent.
2. PARTS DESCRIPTION
USB connecto
r
RS-485/RS-422A communication
connecto
r
Display lamp
Loader communication
connector
Display lamp
Loader power * Communication state Lamp state
Supply the power
Standby/during data receive A orange lamp turns on
During data send A orange lamp is flashing
Power not
supplied
Standby/during data receive A green lamp turns on
During data send
A green lamp is flashing
* The power is supplied from the loader communication connector of the
controller (RKC product).
3. MOUNTING
Mounting Cautions
(1) Use this instrument within the following ambient temperature and
ambient humidity.
Allowable ambient temperature: 10 to 50 C
Allowable ambient humidity: 5 to 95 %RH
(Absolute humidity: MAX. W. C 29.3 g/m
3
dry air at 101.3 kPa)
(2) Avoid the following when selecting the mounting location:
Rapid changes in ambient temperature, which may cause
condensation.
Corrosive or inflammable gases.
Direct vibration or shock to the mainframe.
Water, oil, chemicals, vapor or steam splashes.
Excessive induction noise, static electricity, magnetic fields or noise.
Direct air flow from an air conditioner.
Exposure to direct sunlight.
Excessive heat accumulation.
(3) Mounting consideration
Install the module 200 mm away from the main power line.
Ensure at least 50 mm space on top and bottom of the control unit
for maintenance and operating environment.
Dimensions
70
3.5
60
28
φ
3.5
(Unit: mm)
48
39
(13.4)
DIN rail Mounting
1. Pull down the mounting bracket at the bottom of the module (A).
Attach the hooks on the top of the module to the DIN rail and push
the lower section into place on the DIN rail (B).
2. Slide the mounting bracket up to secure the module to the DIN rail.
(C) Locked
(B) Push
Mounting
bracket
DIN rail
(A) Pull down
Panel Mounting
Mount COM-K directly on the panel with screws which are inserted in
the mounting holes of the top and bottom mounting brackets.
Recommended tightening torque: 0.3 Nm (3 kgfcm)
The customer needs to provide the M3 size screws. Select
the screw length that matches the mounting panel.
CAUTION
Mounting
dimensions
60
2-M3
39
(Unit: mm)
USB cable (1 m) ................................................................. 1
Instruction Manual (IMR01Z02-E2) .................................... 1
Accessories
Loader port
shape
φ3.5

HEADQUARTERS: 16-6, KUGAHARA 5-CHOME, OHTA-KU TOKYO 146-8515 JAPAN
PHONE: 03-3751-9799 (+81 3 3751 9799) E-mail: info@rkcinst.co.jp
FAX: 03-3751-8585 (+81 3 3751 8585) Website: http://www.rkcinst.com/ JUL. 2016
®
RKC INSTRUMENT INC.
The first edition: MAY 2015 [IMQ00]
The second edition: JUL. 2016 [IMQ00]
Company names and product names used in this manual are the trademarks or registered trademarks of
the respective companies.
4. WIRING
Wiring Cautions
To avoid noise induction, keep communication signal wire away
from instrument power line, load lines and power lines of other
electric equipment.
If the personal computer is easily affected by noise, use the
ferrite core in the USB cable. For an installation position of a
ferrite core, please refer to the following figure.
Ferrite core * (sold separately)
* Recommended ferrite core:
ZCAT2032-0930 (TDK Corporation)
USB cable
Method to connect
(1) For loader communication
W-BV-01 or W-BV-05 loader communication cable:
COM-K2 can supply USB bus power to the controller
whether or not it is powered on or off.
(When connecting an RZ series controller, the controller
must be powered on.)
W-BV-01: COM-K2 starts supplying USB bus power to the
controller two seconds after the cable is connected.
W-BV-05: COM-K2 starts supplying USB bus power to the
controller as soon as the cable is connected.
W-BV-03 loader communication cable:
Controller should be always ON to use with COM-K2.
Display of controller (RKC product) being powered by COM-K2:
FB series,
RB series etc.
Displays “----” at the PV/SV monitor display.
PF900/901
Lights all State monitor lamps: RESET, RUN,
FIX, MAN, HOLD, STEP.SET and PTN.END.
Other displays and lamps are OFF.
FZ series
Displays “
LoAd” at the PV monitor display.
Displays “
-----” at the SV monitor display.
(2) For RS-485/RS-422A communication
The shielded twisted pair wire must be provided by the customer.
Connector pin configuration
1
2 3
4
5
RS-485/RS-422A
communication
connector
[RS-485] [RS-422A]
Pin No. Signal name Symbol Pin No. Signal name Symbol
1 Signal ground SG 1 Signal ground SG
2
Send data/
Receive data
T/R (A) 2 Send data T (A)
3
Send data/
Receive data
T/R (B) 3 Send data T (B)
4 * Unused
4 Receive data R (A)
5 * Unused
5 Receive data R (B)
* Do not connect wires to 4 and 5 pins. Malfunction may result.
Connection diagram
[RS-485]
[RS-422A]
* The termination resistor is built into the COM-K2.
Attention in connector wiring
The lead wires use the stranded wire.
Use the stranded wire from size 0.25 to 0.5 mm
2
(AWG 26-20).
Stripping length is as follows.
8 mm (Stripping length)
Conductor cross section:
0.25 to 0.5 mm
2
(AWG 26-20)
Connector type:
FK-MC 0,5/5-ST-2,5
(Products by Phoenix
contact Ltd.)
Installation of USB device driver
For installing the USB driver, refer to the following instruction manuals.
The manuals can be downloaded from the official RKC website.
Installation of USB driver for COM-K2 communication converter (IMT01D13-E)
USB Communication Converter COM-K2 USB Driver Installation Manual
(IMT01D12-E)
5. SPECIFICATIONS
USB function
Interface: Based on USB Ver. 2.0
Communication speed: Full speed (12 Mbps)
Connection: Connected by universal USB cable
(Mini-B connector)
Power source method: Bus power (The power is supplied from the
USB port on the personal computer side)
Compatible OS: Windows XP */Windows Vista */Windows 7 *
/Windows 8 */Windows 8.1 *
*32-bit/64-bit
Communication function
Interface: Based on RS-485, EIA standard
Based on RS-422A, EIA standard
Connection method: 2-wire system,
half-duplex multi-drop connection (RS-485)
4-wire system,
half-duplex multi-drop connection (RS-422A)
Synchronous method: Half-duplex start-stop synchronous type
Communication speed: 2400 bps, 4800 bps, 9600 bps, 19200 bps,
38400 bps
Data bit configuration: Start bit: 1
Data bit: 7 or 8
Parity bit: Without, Odd or Even
Stop bit: 1 or 2
Protocol: Protocol depends on application of the
personal computer side
Number of connecting controllers
Maximum 31 controllers (RS-485, RS-422A)
Termination resistor: Built-in termination resistor (120 )
General specifications
Power supply voltage: 5 V DC 5 (Supplied by USB bus cable)
Current consumption: 150 mA max. (Loader communication)
60 mA max. (RS-485/RS-422A communication)
Allowable ambient temperature range:
10 to 50 C
Allowable ambient humidity range:
5 to 95 %RH (Non condensing)
Absolute humidity:
MAX.W.C 29.3 g/m
3
dry air at 101.3 kPa
Weight: Approx. 40 g (Instrument only)
RS-485/RS-422A
Connected to USB
port of a personal
computer
Connected to communication
terminals of controller
(Example: FB400/900)
Connected to USB connector
Connected to
RS-485/RS-422A
communication
connector
COM-K2
Shielded twisted pair wire
USB cable
Shielded twisted
pair wire
Controller
(Example: FB400/900)
RS-485/RS-422
A
communication
connector
Communication terminals
(Communication 1 side)
R: Termination resistors (Example: 120
1/2 W)
If communication errors occur frequently due to
the operation environment or the communication
distance, connect termination resistors.
T/R (A)
T/R (B)
1
SG
2
R
COM-K2*
3
4
5
25
SG
26
27
T/R (A)
T/R (B)
Shielded twisted
pair wire
Controller
(Example: FB400/900)
RS-485/RS-422A
communication
connector
Communication terminals
(Communication 1 side)
T (A)
R (A)
1SG
2
COM-K2*
3
4
5
T (A)
R (A)
25 SG
26
27
28
29
T (B)
R (B)
T (B)
R (B)
Connected to loader communication connector
of the controller (Example: FB400/900)
Connected to USB
port of a personal
computer
Connected to USB connector
Connected to loader
communication
connector
Loader communication
cable [Optional]
W-BV-01, W-BV-03 or
W-BV-05
USB cable
COM-K2
To prevent electric shock or instrument failure, turn off the
power before connecting or disconnecting the instrument
and peripheral equipment.
WARNING
!
/