Boss Audio Systems 639UA User manual
- Category
- Car media receivers
- Type
- User manual
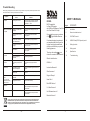
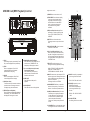
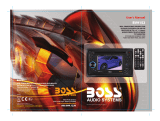
Boss Audio Systems 639UA is a digital media receiver that allows you to enjoy your favorite music, audio books, or podcasts from a variety of sources. With its built-in CD player, you can listen to your favorite CDs, while the USB and SD card ports allow you to connect and play music from external storage devices. The front panel AUX input lets you connect your smartphone or other audio device for direct playback. The 639UA also features a built-in FM radio tuner, so you can listen to your favorite radio stations.
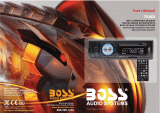
Boss Audio Systems 639UA is a digital media receiver that allows you to enjoy your favorite music, audio books, or podcasts from a variety of sources. With its built-in CD player, you can listen to your favorite CDs, while the USB and SD card ports allow you to connect and play music from external storage devices. The front panel AUX input lets you connect your smartphone or other audio device for direct playback. The 639UA also features a built-in FM radio tuner, so you can listen to your favorite radio stations.


-
 1
1
-
 2
2
-
 3
3
-
 4
4
-
 5
5
-
 6
6
-
 7
7
-
 8
8
-
 9
9


Boss Audio Systems 639UA User manual
- Category
- Car media receivers
- Type
- User manual
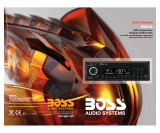
Boss Audio Systems 639UA is a digital media receiver that allows you to enjoy your favorite music, audio books, or podcasts from a variety of sources. With its built-in CD player, you can listen to your favorite CDs, while the USB and SD card ports allow you to connect and play music from external storage devices. The front panel AUX input lets you connect your smartphone or other audio device for direct playback. The 639UA also features a built-in FM radio tuner, so you can listen to your favorite radio stations.
Ask a question and I''ll find the answer in the document
Finding information in a document is now easier with AI
Related papers
-
Boss Audio Systems 634CA Owner's manual
-
 Boss Audio Systems 615UA User manual
-
 Boss Audio Systems BV9152 Owner's manual
-
 Boss Audio Systems MR1400S User manual
-
 Boss Audio Systems BV9152 Specification
-
 Boss Audio Systems 835UI User manual
-
 Boss Audio Systems 830UA User manual
-
 Boss Audio Systems 754DI Owner's manual
-
 Boss Audio Systems 840UBI User manual
-
 Sound Storm DD405 User manual


Other documents
-
Lanzar VBD2000MU Owner's manual
-
Macrom M-DL4100BT User manual
-
Premier SCR-0934MR User manual
-
Caliber MCD275 Owner's manual
-
-
Caliber MCD 375 Owner's manual
-
Sencor SCT 6011DBMR User manual
-
Caliber MCD 365 User manual
-
Lanzar Car Audio Lanzar Vibe VBD2600MP User manual
-
Blitz BZC-1806MPCH Owner's manual