Page is loading ...

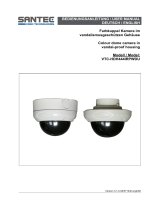
High Resolution Mini Color IR Camera
CAUTION AND WARNING
1. Please read/follow all instructions and heed all warnings before
operating the camera.
2. If the camera is to be mounted outdoors a secondary waterproof
enclosure should be used.
3. To reduce the risk of fire or electric shock, the camera cannot be
exposed to water or moisture.
4. Installing the camera in a humid, dusty or sooty location may
cause fire or electric shock.
5. Use the camera within the specified temperature (-10℃ ~ 50℃).
6. Handle with care. Dropping it can cause serious damage to the
camera.
7. Avoid aiming the camera directly at the sun or other very bright
objects as this may damage the image sensor.
8. If this camera fails to operate normally, contact your distributor
or Videology Imaging Solutions. Never disassemble or modify
this product in any way.
9. Use an AC adaptor 12VDC, 500mA regulated.
If the product is to be put out of operation definitively,
take it to a local recycling plant for a disposal which is
not harmful to the environment.
10/31/13 INS-20H705IR Rev B Preliminary
BOX CONTENTS
• CAMERA - 20H705IR (NTSC) OR 21H705IR (PAL)
• LENS
• ADJUSTABLE MOUNTING BRACKET
• POWER/ VIDEO CABLE
CONTACT INFORMATION
For technical assistance with this product, please contact the
supplier from whom the product was purchased.
Please visit our website at: http://www.videologyinc.com
VIDEOLOGY IMAGING SOLUTIONS is an ISO 9001 registered video
camera developer and manufacturer serving industrial, machine
vision, biometric, security, and specialty OEM markets.
Videology designs, develops, manufactures, and distributes video,
image acquisition, and display technologies and products to OEMs
worldwide.
For OEM inquiries:
North/South America
37M Lark Industrial Parkway
Greenville, RI 02828
email: support@videologyinc.com
Europe
Neutronenlaan 4
NL
-5405 NH Uden, Netherlands
email:support@videology.nl
DIMENSIONS
SPECIFICATIONS
Electrical
20H705IR
(NTSC)
21H705IR
(PAL)
Image Sensor
1/3” Sony Super Had II CCD
Effective Pixels (H x V)
768 x 494
752 x 582
Pixel Size (H x V)
6.35µm x 7.4µm
6.5µm x 6.25µm
Resolution
650 TVL Color
720 TVL B&W
Sensitivity
0 Lux (10M Range): LED ON
0.01 Lux (F/1.2): LED OFF
Signal To Noise Ratio
>52dB (AGC Off)
Gamma
0.45 (adjustable)
Gain
Low/ Middle/ High / Off
Synchronization
Internal
Scan Mode
2:1 Interlaced
Back Light
Compensation
OFF/ BLC/ HLC/ DWDR
White Balance
ATW (2,500°k ~ 9,500°k)/ Manual/ AWC
Day/Night Mode
Electronic (Auto/ color/ B&W)
Shutter Speed
1/60 – 1/100,000
1/50 – 1/100,000
Motion Detection
ON/ OFF (4 ZONES)
Mirror Mode
ON/ OFF
DNR (3D)
Auto/ Low/ Middle/ High/ Off
Privacy Zone
On/ Off (8 Zones)
Iris Controls
Electronic (No DC signal)
Video Output
Composite Video 1Vp-p (75 Ohms)
Power Supply
Regulated 12VDC (+/- 10%)
Power Consumption
< 250mA
OSD Control
Yes (Multi language)
Environmental
Operating Temperature
-10°C ~ 50°C (-14°F ~ 122°F)
Operating Humidity
20% ~ 93% RH
Storage Temperature
-20°C ~ 60°C (-4°F ~ 140°F)
Storage Humidity
Up to 98% RH
Mechanical
Dimensions W x H x D
37mm x 37mm x 38.4mm
(1.46” x 1.46” x 1.52”)
Weight
100g (3.52oz)
Lens
2XH705IR
3.6mm fixed lens
2XH705IR-1
6mm fixed lens
Please refer to Videology’s board mount
lens guide for options.
www.videologyinc.com/lenses
Instruction Manual
Miniature IR Camera
2XH705IR Series
IMAGING SOLUTIONS INC.
Original Equipment Manufacturer
2XH705IR 3.6mm fixed lens
2XH705IR-1 6mm fixed lens

FUNCTION SETTING
FUNCTION SETUP*
How to use the Dip Switches
1. LED Brightness Adjustment
Brightness of LED light can be controlled by 3 levels.
Factory default is "High".
2. Menu setup push buttons
• ENTER: Used to access the menu and confirm selection.
• UP, DOWN: Used to move the cursor to up or down.
• LEFT, RIGHT: Used to move the cursor to left or right and
change the value.
*Pressing 2 buttons at one time might cause an error.
In this case, exit and enter the menu again or turn off and on.
OSD MENU STRUCTURE
Function
Setting
menu
Select
menu
Sub menu Contents
1. EXPOSURE
LENS
MANUAL
BRIGHTNESS
0~99 : Adjust brightness with a manual iris lens
E. SHUTTER
AUTO, 1/60, 1/100FLK, 1/120, 1/250, 1/500,
1/1000, 1/2000, 1/4000, 1/10000, 1/100000
: Adjust shutter speed
DC
BRIGHTNESS
0~99 : Adjust brightness with a DC iris lens
E. SHUTTER
AUTO, 1/60, 1/100FLK, 1/120, 1/250, 1/500,
1/1000, 1/2000, 1/4000, 1/10000, 1/100000
: Adjust shutter speed
AGC OFF, LOW, MIDDLE, HIGH
You cannot use the Auto D&N change mode
when AGC is off
SENSE-UP
AUTO, OFF, X2, X4, X8, X16,
X32, X64,X128, X256, X512,
X1024
Sense-up levels for low luminance
(x2 ~ x1024)
BACKLIGHT
BLC
BLC LEVEL
OFF, LOW, MID, HIGH
TOP
0~15: Adjust top position of BLC zone
BOTTOM
1~16 : Adjust bottom position of BLC zone
LEFT
0~15: Adjust left position of BLC zone
RIGHT
1~16 : Adjust right position of BLC zone
HLC
HBLC
OFF : Deactivates HBLC function
MANUAL
HBLC LEVEL : OFF, LOW, MID, HIGH
TOP : 0~15
BOTTOM : 1~16
LEFT : 0~15
RIGHT : 1~16
MODE
ALL DAY : Activates HBLC function all day
NIGHT : Use the function at night only
HLC LEVEL
1~100 : Level adjust
MASK 1~4
ON
TOP : 0~33
BOTTOM : 1~34
LEFT : 0~44
RIGHT : 1~45
OFF : HLC MASK OFF
D-WDR
SET LEVEL
0~20 : DWDR level adjust
3D-DNR OFF, LOW, MID, HIGH, AUTO
Reduce noise in low illumination (Level
selectable)
RETURN
Go back to previous menu
2. WHITE BALANCE
AWB MODE
ATW
Color temperature 2500
0
k ~ 9500
0
k
MANUAL
M-WR
0~128 : Adjust the Red value to shift the color of
the image
M-WB
0~128 : Adjust the Blue value to shift the color of
the image
RETURN
Move back to previous menu
PUSH
Automatically set white balance for current
luminance environment
R-Y GAIN
0~255
Adjust Red tone of the image
B-Y GAIN
0~255
Adjust Blue tone of the image
RETURN
Go back to previous menu
3. DAY & NIGHT
D&N MODE
AUTO
DAY→NIGHT
7~30
Select brightness of illumination about
changing the day↔night mode by AGC
NIGHT→DAY
6~29
DELAY TIME
0~15 : Select the delay time
RETURN
Move back to previous menu
AUTO-CDS
A. DAY→NIGHT
6~36
Select brightness of illumination about
changing the day↔night mode by AGC
A. NIGHT→DAY
6~36
C. DAY→NIGHT
0~255
Select brightness of illumination about
changing the day↔night mode by CDS
C. NIGHT→DAY
0~255
DELAY TIME
0~15 : Select the delay time
RETURN
Go back to previous menu
COLOR
Fixed at color
B&W
Fixed at B/W
EXT
DELAY TIME
0~15 : Change the color↔ B/W by external signal
(N/A)
RETURN
Move back to previous menu
BURST
ON, OFF
Transmit the burst signal or not in B/W mode
C_SUP
0~100
Color suppress controllable
A_SUP
0~100
Iris suppress controllable
SMART IR ON, OFF
Decreases screen saturation of objects within a
short range
RETURN
Go back to previous menu
Function
Setting
menu
Select menu
Sub menu Contents
4. IMAGE ADJUST
MIRROR
MIRROR, OFF
Set a vertical image inversion
SHARPNESS
0~30
Sharpness adjustable
GAMMA
0.45, 0.55,
0.65
Set a gamma value
USER
GAMMA
0.20, 0.25, 0.30, 0.35, 0.40, 0.45, 0.50, 0.55,
0.60, 0.65, 0.70, 0.75, 0.80, 0.85, 0.90, 0.95,
1.00 : Gamma adjustable
RETURN
Move back to previous menu
LSC
ON
SET LEVEL
0~30 : Use the LSC and level adjustable
RETURN
Move back to previous menu
OFF LSC OFF
RETURN
Go back to previous menu
5. MOTION
MOTION
ON, OFF
Motion detection function activate/deactivate
AREA
AREA 1~4
TOP
0~143
To create a zone for motion detection
BOTTOM
2~145
LEFT
0~190
RIGHT
2~192
RETURN
Go back to previous menu
RETURN
Go back to previous menu
SENSITIVITY
1~30
Motion detection sensitivity
DISPLAY
OFF, MESSAGE, TRACE
Select notification method of motion detection
HOLD TIME
0~15
Set the duration of alarm out
ALARM
OUTPUT
ON, OFF Alarm ON/OFF
RETURN
Go back to previous menu
6. PRIVACY
MASK 1~8
OFF
Display each privacy mask or not
ON
DOT SEL
L_TOP, L_BOT, R_BOT, R_TOP : Determines
which of the 4 vertices of each MD area is to be
used
DOT XY
ENTER SETTING : Determines the coordinate
MOVE XY
ENTER SETTING : Move the mask
COLOR
BLACK, WHITE, … : Select mask color(8 colors)
RETURN
Go back to previous menu
RETURN
Go back to previous menu
7. SPECIAL
LANGUAGE
ENGLISH, … : Select language(9 languages)
TITLE OFF- -ON
EDIT
Display the camera name on the screen
RESET
Camera name reset
POSITION
Camera name position
RETURN
Go back to previous menu
COMMUNICAT
ION (N/A)
OFF- -ON
ID
1~255 : Select the camera ID for RS-485
communication
BAUDRATE
2400, 4800, 9600 : Select baud rate
PROTOCOL
PELCO-D : Camera protocol
RETURN
Go back to previous menu
DPC
OFF
Deactivates Defect Pixel Correction in low
illumination
AUTO
WHITE THR
0~255 : Setup the limited value of white pixel
correction
LUMA THR
0~255 : Setup the limited value of white pixel
correction
RETURN
Go back to previous menu
FACTORY SET
YES, NO
Reset your camera to factory default condition
RETURN
Return to previous menu
(Communication setting is not changed)
8. EXIT
SAVE AND
EXIT
Save the value and exit menu
EXIT
Escape the menu without save
RETURN
Go back to previous menu
(Optional)
To create a zone
for HBLC
To create a zone for
HLC mask
Both switches in
the down position
Both switches in
the up position
/