DMP XT Series User guide

Category
Access control readers
Type
User guide

DMP XT Series is an advanced security system designed to protect your home or business. It allows you to add keypads, wireless zones, and wired zones to customize your security system to your specific needs. With built-in cellular communication, you can receive alerts and control your system remotely from anywhere with an internet connection. The XT Series also features a user-friendly interface and supports Z-Wave devices for home automation integration.

DMP XT Series is an advanced security system designed to protect your home or business. It allows you to add keypads, wireless zones, and wired zones to customize your security system to your specific needs. With built-in cellular communication, you can receive alerts and control your system remotely from anywhere with an internet connection. The XT Series also features a user-friendly interface and supports Z-Wave devices for home automation integration.

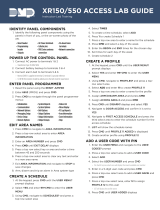
XT SERIES LAB GUIDE
Instructor-Led Training
IDENTIFY PANEL COMPONENTS
1. Identify the following panel components using your
panel or the on-screen photo:
êReset header
êProgramming
header
êOutputs
êAC Power terminals
êCellular pins
ê1100 Series antenna
connection
êOn-board zone
terminals
êNetwork connection
êEXP header
POWER UP THE CONTROL PANEL
1. Connect AC power to terminals 1 & 2
êTransformer type: 16.5VAC 40VA
2. Connect battery backup to terminals 3 & 4
3. Connect alarm bell to terminals 5 & 6
êNormal 12VDC is supplied to terminal 5, terminal 6 is ground reference
ê1/2 W 1K Ohm resistor should be added across the bell circuit for supervision
ENTER PANEL PROGRAMMER
1. Reset the panel using the RESET JUMPER
2. Enter 6653 (PROG) and press CMD
3. Press CMD to navigate through the panel
programmer menus:
êInitialization
êCommunication
êNetwork Options
êDevice Setup
êRemote Options
êSystem Reports
êSystem Options
êBell Options
êOutput Options
êOutput Setup
êArea Information
êZone Information
êStop
êSet Lockout Code
ADJUST COMMUNICATION TYPE
1. Navigate to to COMMUNICATION and press a top-
row select area
2. Press a top-row select area to clear the default
account number
3. Enter in a new account number
4. Press CMD to navigate to COMM TYPE
5. Press a top-row select area to display the
communication types
6. Select NET
7. Press CMD to navigate to FIRST IP ADDRESS
8. Press a top-row select area and enter in the DMP
Tech Support receiver IP Address
ê209.248.148.051 (Port 2001)
9. Press CMD to exit COMMUNICATION
ADD A KEYPAD
1. Navigate to DEVICE SETUP and press a top-row
select area
2. Enter a device number and press CMD
êThe valid range for an XT panel is 1-8
3. Press a top-row select area and enter a device name
4. Press CMD to exit DEVICE SETUP
ADJUST THE KEYPAD ADDRESS
GRAPHIC TOUCHSCREEN KEYPAD
1. Select OPTIONS from the carousel
2. Select the INSTALLER OPTIONS icon
3. Enter 3577 (INST) and press CMD
4. Select KPT OPT (KEYPAD OPTIONS)
5. Press a top-row select area and enter a new
keypad address
6. Press CMD to exit KEYPAD OPTIONS
7. Select STOP to save keypad programming
THINLINE KEYPAD
1. Press and hold the BACK ARROW and CMD for 2
seconds
2. Enter 3577 (INST) and CMD
3. Select KPD OPT (KEYPAD OPTIONS)
4. Press a top-row select key and enter a new
keypad address
5. Press CMD to exit KEYPAD OPTIONS
6. Select STOP to save keypad programming
CONFIGURE SYSTEM OPTIONS
1. Navigate to SYSTEM OPTIONS and press a top-row
select area
2. Press CMD to navigate to ENTRY DELAY 1
3. Press a top-row select area and choose a time from
30 to 250 seconds
4. Repeat this process for ENTRY DELAY 2
5. Press CMD to navigate to EXIT DELAY
6. Press a top-row select area and enter a time from
45 to 250 seconds
7. Press CMD to navigate to HOURS FROM GMT
8. Press a top-row select area and enter in the
appropriate hours from GMT for your location and
press CMD
9. Press CMD to navigate to HOUSE CODE
10. Press a top-row select area and enter a house code
from 1-50 and press CMD
11. Press CMD to navigate to ENTER WEATHER ZIP
CODE
12. Press a top-row select area and enter a local ZIP
code to display weather alerts on the keypad
©2022 Digital Monitoring Products, Inc. | 22214 | LT-2361©2022 Digital Monitoring Products, Inc. | 22214 | LT-2361
XT SERIES LAB GUIDE
ADD A WIRELESS ZONE
1. Navigate to ZONE INFORMATION and press a top-
row select area
2. Enter a ZONE NUMBER and press CMD
êValid wireless zone numbers are 11-84
3. Press a top-row select area and enter a ZONE NAME
4. Press a top-row select area and select a ZONE TYPE
5. Press a top-row select area to display the list of
available areas and select the appropriate area for
this zone
6. At the NEXT ZONE? prompt, select NO to program a
wireless zone
7. At the WIRELESS? prompt, select YES and press
CMD
8. Enter a SERIAL NUMBER and press CMD to navigate
to the NEXT ZONE? Prompt
ADD A WIRED ZONE
1. Navigate to ZONE INFORMATION and press a top-
row select area
2. Enter a ZONE NUMBER and press CMD
3. Press a top-row select area and enter a ZONE NAME
4. Press a top-row select area and select a ZONE TYPE
5. Press a top-row select area to display the list of
available areas and select the appropriate area for
this zone
6. At the NEXT ZONE? prompt, select YES
7. Navigate to STOP to save programming
STANDARD WALK TEST
1. At the keypad, enter 8144 (WALK) to enter the
WALK TEST menu
2. Select STD to begin the standard walk test
3. Walk around the installation site, tripping wired and
wireless zones to complete the standard walk test
WIRELESS CHECK-IN TEST
1. At the keypad, enter 8144 (WALK) to enter the
WALK TEST menu
2. Select WLS to begin the wireless check-in test
without leaving the keypad
3. The panel will send a message to each wireless
device to ensure it is communicating properly
PIR WALK TEST
1. At the keypad, enter 8144 (WALK) to enter the
WALK TEST menu
2. Select PIR to begin the PIR walk test
DIAGNOSTIC MENU
1. At the keypad, enter 2313 (DIAG) to enter the
DIAGNOSTIC MENU
2. Navigate to CELL STATUS and press a top-row
select area to begin the CELL STATUS test
3. Press CMD to navigate to CELL SIGNAL and press a
top-row select area to begin the CELL SIGNAL test
4. Press CMD and select STOP to exit the DIAGNOSTIC
MENU
ADD A USER CODE WITH PIN
1. Enter the USER MENU and navigate to the USER
CODES? prompt
2. Press a top-row select area to add a USER CODE
3. Select ADD
4. Select the USER NUMBER and press CMD
5. Enter in a 4-digit user code and press CMD
6. Press a top-row select area to clear any text, add a
USER NAME and press CMD
7. Press a top-row select area to display the USER
LEVEL
8. Press CMD to save this user
ADD A USER CODE WITH CARD
1. Enter the USER MENU and navigate to the USER
CODES? prompt
2. Press a top-row select area to add a USER CODE
3. Select ADD
4. Select the USER NUMBER and press CMD
5. Scan the card by waving it over the blue status LED
6. Press a top-row select area or key to clear any text,
add a USER NAME and press CMD
7. Press a top-row select area to display the user level
8. Press CMD to save this user
ARM & DISARM
1. Arm the system, trip an alarm and disarm
CHANGE THE SYSTEM TYPE TO H/S/A
1. Enter the panel programmer by entering 6653
(PROG) at the keypad
2. Navigate to SYSTEM OPTIONS and press a top-row
select area
3. Press a top-row select area to display the list of
system types
4. Select H/S/A as the system type
5. Exit SYSTEM OPTIONS and navigate to STOP to
XT SERIES LAB GUIDE
save changes
6. Arm, disarm and trip an alarm in H/S/A system type
CHANGE THE SYSTEM TYPE TO AREA
1. Enter the panel programmer by entering 6653
(PROG) at the keypad
2. Navigate to SYSTEM OPTIONS and press a top-row
select area
3. Press a top-row select area to display the list of
system types
4. Select AREA as the system type
EDIT AREA NAMES
1. Press CMD to navigate to AREA INFORMATION
2. Press a top-row select area to enter AREA
INFORMATION
3. Enter an AREA NUMBER and press CMD
4. Press a top-row select area to clear any text and
enter in a new area name
5. Exit AREA INFORMATION and navigate to STOP to
save changes
6. Arm, disarm and trip an alarm in Area system type
CONNECT THE 738Z PLUS
1. Connect the 738ZPLUS by connecting the RED,
YELLOW, GREEN AND BLACK wire terminals to the
matching keypad bus terminals on the XT PCB
êThe 738Zplus requires no additional programming before you can add a Z-Wave device
ADD A Z-WAVE LAMP MODULE
1. At the keypad, press CMD until the USER MENU?
prompt displays
2. Select YES and enter a master level user code to
enter the USER MENU
3. Using CMD, navigate to Z-WAVE SETUP? and press
a top-row select area
4. Select ADD
5. When the keypad displays ‘PRESS BUTTON ON
Z-WAVE DEVICE’ press the button on the front of
the lamp module
6. When the panel recognizes the device, it will display
‘DEVICE FOUND’
7. When the keypad displays ‘DEVICE ADDED’ press
CMD
8. Press a top-row select area to clear any text and
name this Z-Wave device and press CMD
OPTIMIZE Z-WAVE
1. At the Z-WAVE SETUP? menu, press CMD to
advance the list and select OPT to optimize the
Z-Wave signal
êAfter adding any Z-Wave device, it is recommended to optimize Z-Wave
CREATE A FAVORITE
2. At the Z-WAVE SETUP? menu, press CMD to
advance the list and select FAV
3. Enter a favorite number from 1-20 and press CMD
4. Press a top-row select area to clear any text and
name this favorite and press CMD
5. Select ADD
6. Press a top-row select area to add this device to the
favorite
7. Select SETTING and set the desired setting and
press CMD to exit the FAVORITES menu
CREATE A FAVORITE SCHEDULE
1. Enter the USER MENU and navigate to the
SCHEDULES? prompt
2. Press a top-row select area to enter the
SCHEDULES? menu
3. Select FAV to create a favorite schedule
4. Enter a FAVORITE NUMBER and press CMD
5. Select a day of the week and set the ACTIVATE TIME
6. Continue this process for every day of the week
7. Press the BACK ARROW to exit the USER MENU
BASIC ACCESS CONTROL
1. Connect the 734 module to the KEYPAD BUS
2. Use the dip switches on the 734 to address the
module
3. Reset the panel and enter 6653 (PROG) to enter the
panel programmer
4. Navigate to DEVICE SETUP, and program the 734 at
the same address you set with the dip switches
5. Connect the reader to TERMINALS 1–4 on the 734
6. Connect the POSITIVE terminal on the external
power supply to the C (common) terminal on the
734
7. Connect the NEGATIVE terminal on the door strike
to the NEGATIVE terminal on the external power
supply
8. Connect the POSITIVE terminal on the door strike to
the NO (Normally Open) terminal on the 734
9. Install the model 333 suppressor between the C and
NO terminals on the 734
XT SERIES LAB GUIDE
QUESTIONS
What else would you like to learn about the XT Series?
NOTES:
  • Page 1 1
  • Page 2 2
  • Page 3 3
  • Page 4 4

DMP XT Series User guide

Category
Access control readers
Type
User guide

DMP XT Series is an advanced security system designed to protect your home or business. It allows you to add keypads, wireless zones, and wired zones to customize your security system to your specific needs. With built-in cellular communication, you can receive alerts and control your system remotely from anywhere with an internet connection. The XT Series also features a user-friendly interface and supports Z-Wave devices for home automation integration.

Ask a question and I''ll find the answer in the document

Finding information in a document is now easier with AI