AT&T AirTies Installation guide

Type
Installation guide

AT&T AirTies is a versatile Wi-Fi extender that seamlessly integrates with your AT&T Internet service to eliminate dead zones and provide a strong, reliable Wi-Fi signal throughout your home. With its compact design and simple setup options, the AirTies can be easily placed in any room to extend the range of your existing Wi-Fi network, ensuring uninterrupted connectivity for all your devices.

AT&T AirTies is a versatile Wi-Fi extender that seamlessly integrates with your AT&T Internet service to eliminate dead zones and provide a strong, reliable Wi-Fi signal throughout your home. With its compact design and simple setup options, the AirTies can be easily placed in any room to extend the range of your existing Wi-Fi network, ensuring uninterrupted connectivity for all your devices.

Setting up your Smart Wi-Fi Extender
Choose 1 of 4 simple setup options
1 Connect with AT&Ts Smart Home Manager app
2 Connect with seamless pairing
3 Connect with wireless pairing system
4 Connect with Ethernet
5 Troubleshooting and tips
Tip: Control your home Wi-Fi® network with the Smart Home Manager app.
The Smart Home Manager app is also the best way to set up your Wi-Fi extender.
Do everything from troubleshoot to manage devices from almost anywhere.
1
1
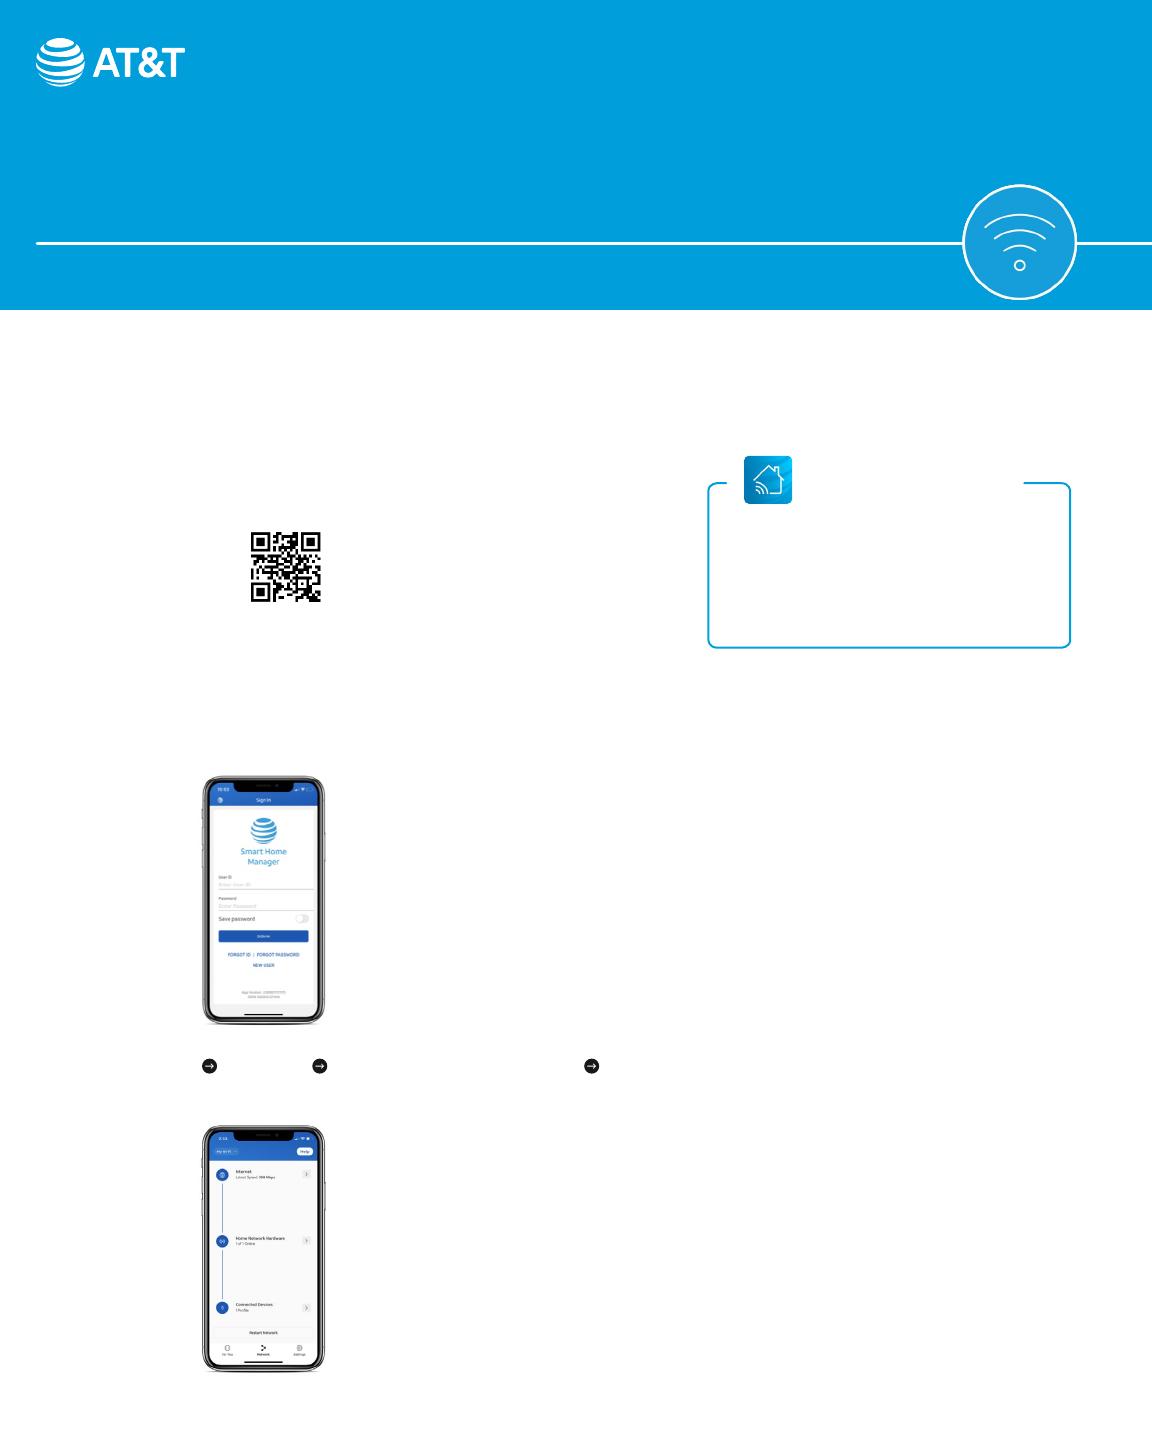
Option 1: Connect with
AT&Ts Smart Home Manager app
You need to have AT&T Internet service for your new Wi-Fi extender to work. Check the compatibility with your Wi-Fi gateway at att.com/wiextender
The extender needs to be in the room next to the gateway during setup.
1. Download the Smart Home Manager app from your
app store or go to att.com/smarthomemanager
For quick setup, open the camera on your smartphone
and hold the camera over the QR code for a few seconds.
2. Sign in with your AT&T user ID and password.
Need help? att.com/shmhelp
3. Select Help Network Home Network Hardware Add Extender.
Once you see the WHITE light, you’re all set.
The Smart Home
Manager app
Control and manage your home Wi-Fi
network with Smart Home Manager app.
Troubleshoot, check your Wi-Fi connection
strength, and manage devices from pretty
much anywhere.
Note: AT&T Smart Home Manager is available to AT&T
Internet service customers with a compatible AT&T Wi-Fi
gateway. Features may depend upon gateway models.
Data rates may apply for download and usage.
2
2
Option 2: Connect with
seamless pairing
You need to have AT&T Internet service for your new Wi-Fi extender to work. Check the compatibility with your Wi-Fi gateway at att.com/wiextender
The extender needs to be in the room next to the gateway during setup.
1. Connect the power supply to the extender and plug the other end into an electrical outlet in close
proximity to the gateway (not controlled by a light switch). It should automatically pair with the gateway.
2. Once paired, unplug it, and move it to the room you want your extender in. Once you see the WHITE light,
you’re all set.
Tip: The lights will stop ashing once it’s
paired. This may take up to 5-6 minutes. For
more help, use the Smart Home Manager
app or att.com/extendersetup
3
3
Option 3: Connect with
wireless pairing system
You need to have AT&T Internet service for your new Wi-Fi extender to work. Check the compatibility with your Wi-Fi gateway at att.com/wiextender
The extender needs to be in the room next to the gateway during setup.
1. Connect the power supply to the extender and plug the other end into an electrical outlet in close proximity to the
gateway (not controlled by a light switch). Push the WPS button and watch for the light to blink GREEN.
Tip: Make sure the extender is plugged in near the
gateway. Both radio bands need to be enabled on
the gateway and have the same network name.
For help, use the Smart Home Manager app or go
to att.com/enhancedwi
2. Press and release the WPS button on the gateway. Then, press the WPS button on the back of the extender.
The light will turn solid WHITE when paired and ready to use or move.
Note: Your gateway should look like one of these.
3. Unplug the extender from the outlet. Move it between the gateway and the area where you want a stronger signal.
Plug the extender into a known working outlet and wait for the WHITE light. Once you see the solid WHITE light on the
extender, you’re all set.
4
4
Option 4: Connect with Ethernet
You need to have AT&T Internet service for your new Wi-Fi extender to work. Check the compatibility with your Wi-Fi gateway at att.com/wiextender
The extender needs to be in the room next to the gateway during setup.
1. Attach the extender to the gateway by connecting one end of the YELLOW Ethernet cable to one of the
YELLOW Ethernet ports on the back of the gateway. Attach the other end of the cable to the YELLOW
Ethernet slot on the back of the extender.
Tip: Make sure the Ethernet cable is rmly
connected. Once both ends are properly
connected, the Ethernet port LED will turn
solid GREEN.
2. Connect the power supply to the extender and plug it into an electrical outlet (not controlled by a light
switch). The power jack LED on the back of the extender should turn solid GREEN. Once you see the
solid WHITE light on the front of the extender indicating you’re paired, you’re all set.
Tip: The power light should turn GREEN within one
second and the extender front light will begin to blink
WHITE within 5 seconds. Then, it will begin to boot.
3. Unplug the extender and move it in to the room you want the extender in..
5
5
Troubleshooting and tips
Do not place the extender on the floor. Visit att.com/extenderguide to help detect the best
placement for your extender.
Check if your extender is working.
Paired and functioning (solid WHITE light)
Troubleshooting
Device is out
of range
Not paired Out of range
Only applicable to WPS Pairing or if
Wi-Fi signal is out of range.
Light will ash
up to 5 minutes
while connecting
Check all cables and cords and reboot the extender using the reset button on the back.
Need more help?
Go to att.com/smarthomemanager or att.com/support
Go to att.com/wiextender for additional
extender support and a list of compatible
gateways.
Additional information
Manage your account. Available 24/7. Download the
myAT&T app at att.com/myattapp
Accessibility support. Braille or large print: call 800.288.2020
¿Hablas espol? Visita att.com/userguides y haz clic en
Ver en español al nal de la pagina. Tambien puedes consultar
la guia del extensor de senal Smart Wi-Fi de AT&T para ver
mas detalles.
© 2021 AT&T Intellectual Property. All rights reserved. AT&T, the AT&T logo and all other marks contained herein are trademarks of AT&T Intellectual Property and/or AT&T aliated companies. All other marks
are the property of their respective owners.
6
6
  • Page 1 1
  • Page 2 2
  • Page 3 3
  • Page 4 4
  • Page 5 5
  • Page 6 6

AT&T AirTies Installation guide

Type
Installation guide

AT&T AirTies is a versatile Wi-Fi extender that seamlessly integrates with your AT&T Internet service to eliminate dead zones and provide a strong, reliable Wi-Fi signal throughout your home. With its compact design and simple setup options, the AirTies can be easily placed in any room to extend the range of your existing Wi-Fi network, ensuring uninterrupted connectivity for all your devices.

Ask a question and I''ll find the answer in the document

Finding information in a document is now easier with AI