Page is loading ...

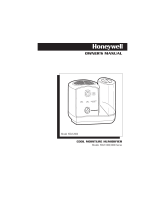
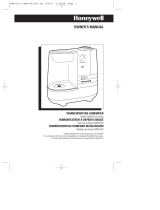
OWNER’S MANUAL
3 US GALLONS (11.3 LITERS)
OUTPUT PER DAY
WARM MOISTURE HUMIDIFIERS
Models:
HWM-330
HWM-331
HWM-335
The Honeywell trademark is used by Kaz, Inc. under license from Honeywell Intellectual Properties, Inc.
4 US GALLONS (15.1 LITERS)
OUTPUT PER DAY
WARM MOISTURE HUMIDIFIER
Model:
HWM-450
QuickSteam_OM_04-25-06.qxd 4/25/06 4:53 PM Page 1

2
When using electrical appliances, basic precautions should always be
followed to reduce the risk of fire, electric shock, and injury to persons,
including the following:
1. Always place this humidifier on a firm, flat and level surface. This humidifier may not work properly
on an uneven surface.
2. Do not place humidifier directly on wood furniture or other surfaces that could be damaged by water.
3. CAUTION: To reduce the risk of severe burns, place this humidifier in an area where it is not
accessible to children.
4. Do not place the humidifier near any heat sources such as stoves, radiators, and heaters.
5. Before using the humidifier, check the power cord for any signs of damage. If the cord is found to be
damaged, DO NOT USE and return the humidifier to the manufacturer under the warranty agreement
for repair.
6. This appliance has a polarized plug (one blade is wider than the other). To reduce the risk of shock,
this plug is intended to fit only one way in a polarized outlet. If the plug does not fit fully in the outlet,
reverse the plug. If it still does not fit, contact a qualified electrician. DO NOT attempt to defeat this
safety feature.
7. To disconnect the humidifier, first turn controls to the OFF position, then grip the plug and pull it from
the wall outlet. Never pull by the cord.
8. A loose fit between the AC outlet (receptacle) and plug may cause overheating and a distortion of the
plug. Contact a qualified electrician to replace loose or worn outlet.
9. The humidifier should always be unplugged and emptied when not in operation or while being
serviced or cleaned.
10. Never tilt or attempt to move the humidifier while it is operating or filled with water. UNPLUG the
humidifier before moving.
11. This humidifier requires regular cleaning. Refer to the CLEANING instructions provided. Never
clean the humidifier in any manner other than as instructed in this manual. You may have to
clean your unit once per week or more depending on the mineral content of your water.
12. Do not immerse the base in water or other liquid. Do not pour water in the humidifier outlet.
13. Do not direct steam directly at individuals, walls or furniture.
14. When a humidifier is used in a closed room or small rooms, check periodically for proper ventilation,
as excessive humidity can cause condensation stains on walls.
15. Do not attempt to remove Medicine Cup, Power Unit, Water Tank, Water Tray or Mineral
Absorption Pad during operation, or within 10-15 minutes after the humidifier has been turned
“off” and unplugged. Serious injury may result. The Water Tray and Mineral Absorption Pad
should only be removed for cleaning and maintenance purposes.
16. DO NOT touch the steam vapor. Steam can cause severe burns.
17. DO NOT block the mist grille. This will damage the humidifier.
IMPORTANT SAFETY
INSTRUCTIONS
READ AND SAVE THESE SAFETY INSTRUCTIONS
BEFORE USING THIS HUMIDIFIER
QuickSteam_OM_04-25-06.qxd 4/25/06 4:53 PM Page 2

3
Introduction
HOW DOES IT WORK?
WARM MOISTURE SYSTEM:
Water passes into the unit where it is heated and purified by the QuickSteam
™
heating plate. The unit then
pulls the air through the top vent and spreads invisible, bacteria-free mist into the room.
Your humidifier is made up of these parts:
Water Tank
Power
Unit
Base
Medicine Cup
Removable Water Tray
Fill Cap
Tank Handle
Mineral
Absorption
Pad
Heating Plate
Mist Grille
Mineral Reservoir
QuickSteam_OM_04-25-06.qxd 4/25/06 4:53 PM Page 3

4
Set-Up
NOTE: We recommend that the humidifier be disinfected prior to
first use. Please see CLEANING INSTRUCTIONS.
Select a firm, level, flat location - at least six inches (15 cm) from
any wall or object for proper air flow (Fig. 1). Place the humidifier
on a water-resistant surface, as water can damage furniture and
some flooring.
Kaz will not accept responsibility for property damage caused by
water spillage.
• Remove the Water Tank by grasping handle and pulling straight up
(Fig. 1). Set aside.
• Remove the Power Unit by grasping it and lightly tilting forward
while pulling up. You will feel the unit disengage from its lock
(Fig. 2). Set the Power Unit aside.
• Remove the Water Tray (Fig. 3). Set the Water Tray aside.
• Place one Mineral Absorption Pad flat on the Heating Plate.
See the MINERAL ABSORPTION PAD section (page 5) for
more information.
• Replace the Water Tray.
• Replace the Power Unit, making sure it is installed properly. Align
the back of the Power Unit directly behind the tabs of the Base and
press down firmly. You will hear a slight click. Your Power Unit will
be flush with the Base (Fig. 4).
• Fill the Water Tank with cool tap water (Fig. 5). See the FILLING
section (page 5) for more information.
NOTE: Save your box for end of season storage. (See END OF
SEASON CARE AND STORAGE section.)
Fig. 1
WALL
6"
Fig. 2
Base
Power
Unit
Fig. 3
Removable
Water Tray
Base
Fig. 4
QuickSteam_OM_04-25-06.qxd 4/25/06 4:53 PM Page 4

5
Mineral Absorption Pad Instructions
CAUTION: HOT SURFACES MAY CAUSE SEVERE BURNS.
DO NOT TOUCH ANY SURFACES UNTIL THEY HAVE COOLED.
Water contains minerals and other particles. The amount of minerals varies dependent on your local water
supply. It is common for these minerals to stick to your humidifier’s Heating Plate and in turn decrease the
performance of your humidifier. Mineral Absorption Pads trap the minerals and help prevent stubborn
mineral buildup on your Heating Plate.
• Before starting your humidifier, place one Mineral Absorption Pad flat on the Heating Plate. After the
humidifier has been operating, the water and all internal parts will become HOT, and caution should be
exercised when handling the Mineral Absorption Pad. Please allow the humidifier water and all internal
parts to cool down (at least 10-15 minutes). Use tongs or long tweezers when handling the pad to
prevent burns.
• The life of the Mineral Absorption Pad will vary, depending on the mineral content of the water being
used. Using normal/moderate mineral content water the Mineral Absorption Pad should be changed
after approximately 2 weeks of continuous use. Again, the life of the pad will vary dependent on your
usage and mineral content of your water.
• For indications that your Mineral Absorption Pad needs to be changed, examine it AFTER the water has
cooled down to see if it is still soft and pliable. If the pad is stiff and hard you should replace it. Another
sign that indicates your Mineral Absorption Pad must be changed is scale buildup on your heating plate.
Filling
• Remove the Water Tank by grasping handle and pulling straight
up. Set aside (Fig. 1).
• Turn the Water Tank upside down so that the Fill Cap is facing
up; unscrew the Fill Cap by turning it counter-clockwise and
set aside.
• Fill the Water Tank with COOL tap water (Fig. 5). DO NOT USE HOT
WATER. Doing so may damage the humidifier.
• Distilled water is not necessary but should be considered in hard
water areas to prevent mineral build-up.
• Replace the fill cap by turning it clockwise .
DO NOT OVER-TIGHTEN. Turn the Water Tank right-side up.
NOTE: Do not add any medication or other additives to water.
NOTE: When carrying the filled Water Tank, please use the
handle and place your other hand under the tank for additional
support.
• Position the Water Tank in the humidifier and push into place
(Fig. 6).
• Some water will flow into the Removable Tray when the filled
Water Tank is properly in place.
• Once the filled Water Tank has been positioned, do not attempt to
move the humidifier. To avoid leaking, you should never move the
humidifier while filled with water.
CAUTION: Do not pour water into the grille on the top of
the humidifier. Doing so may damage the humidifier or
cause personal injury.
Fig. 5
Fig. 6
QuickSteam_OM_04-25-06.qxd 4/25/06 4:53 PM Page 5

6
Manual Control Operation (Models HWM-330 and HWM-331)
POWER
CAUTION: DO NOT PLUG IN THE HUMIDIFIER WITH
WET HANDS AS AN ELECTRICAL SHOCK COULD
OCCUR.
• With the power switch in the OFF position, plug the filled humidifier
into a polarized 120V outlet. DO NOT FORCE THE POLARIZED PLUG
INTO THE OUTLET; it will only fit one way.
OUTPUT / MOISTURE CONTROL
• Set the Moisture Control knob to the desired position (Fig. 7).
HIGH: For fast humidifying
LOW: For everyday moisture control
• Continuous Mode - Your unit will run continuously at your selected output level until you shut it off or it
runs out of water.
ADVANCED MIST™ HUMIDISTAT
The Advanced Mist
™
Humidistat allows you to adjust and select the
humidity level to your personal preference. Your humidifier will turn on
and off throughout the day and night to maintain the desired humidity
level you have selected.
HOW TO SET THE HUMIDISTAT
First, turn the Humidifier on and select your moisture/output level. Set
the Advanced Mist
™
Humidistat on HIGH by turning the knob clockwise
to the end (Fig. 7).
• Let the humidifier run on high for a least one hour
or until your room
has reached a comfortable humidity level.
• At this point, slowly turn your Humidistat knob counter-clockwise until the humidifier shuts off
(Fig. 8).
• Now that your Humidistat knob is set, the humidifier will automatically turn back on when your room
drops below your comfort setting and will automatically turn off again when the setting is reached.
NOTE: If the humidifier will not start or restart when you select a moisture level, the Advanced Mist
™
Humidistat may be set too low. Turn the dial clockwise to the end (Fig. 7).
REFILL / CLEAN HUMIDIFIER
• When the Refill/Clean indicator light is illuminated it implies your unit
is out of water or you need to clean your humidifier (Fig. 9).
• Check your water level. If your Tank is empty, turn your Power knob
to the OFF position, remove the Tank and refill it as described in the
FILLING section.
• If your water level is full, this implies it’s time to clean your
humidifier. Please turn off and unplug the unit and refer to the
CLEANING section.
NOTE: Your unit’s performance will decrease if you do not clean
your heating plate. Your unit may continuously shut off and output
will decrease.
NOTE: Do not turn on the unit until the tank is refilled and reinstalled.
Refill/
Clean
Fig. 7
Fig. 8
Moisture
Control
Knob
Humidistat
Knob
Power
Light
(Illuminated)
Fig. 9
Refill/Clean Light
(Illuminated)
QuickSteam_OM_04-25-06.qxd 4/25/06 4:53 PM Page 6

EasySet
™
Control Operation (Model HWM-335)
POWER
CAUTION: DO NOT PLUG IN THE HUMIDIFIER WITH
WET HANDS AS AN ELECTRICAL SHOCK COULD
OCCUR.
• With the power OFF, plug the filled humidifier into a polarized 120V
outlet. DO NOT FORCE THE POLARIZED PLUG INTO THE OUTLET; it
will only fit one way.
STEP 1: POWER
• Press the Power button to start the humidifier. Your humidifier will
automatically start on High power, continuous run (Fig. 11).
• To turn your humidifier OFF simply press the Power button again.
STEP 2: OUTPUT / MOISTURE CONTROL
Your unit has three output/moisture levels:
HIGH: For fast humidifying
MED: For everyday moisture control
LOW: For minimum operation (ideal for nighttime use)
• Push the Up button (+) to increase output level and push the Down
button (-) to decrease output level. The LED's will illuminate to
reflect which level you have selected (Fig. 12).
• Continuous Mode: Your unit will run continuously at your selected
output level until you shut it off or it runs out of water.
STEP 3: SET HUMIDITY
• Set your desired humidity anywhere between 35% and 55%.
• Push the Up button (+) to increase desired humidity and push the
Down button (-) to decrease desired humidity. The LED's will
illuminate to reflect which desired humidity level you have selected
(Fig. 13).
For example: If you set your humidity at 40%, the 35% and 40%
LED’s will be illuminated.
• Once you have set your desired humidity, the unit will operate under
this desired setting until the unit is turned off.
• When the desired room humidity has been reached the unit will automatically shut off. (The humidity
LED's will remain illuminated.)
• Your unit will turn back on when your room decreases beyond your set level.
NOTE: Your room humidity can often fluctuate. It is normal for your unit to turn itself on and off
throughout the day as it is monitoring your changing environment.
To go back to Continuous Mode, turn your unit off and then back on and select your desired output setting
(see Step 2).
Fig. 11
Moisture
Control
Humidistat
Control
Power
Button
(On/Off)
Fig. 12
Fig. 13
Refill/
Clean
Light
Reset
Button
7
Manual Control Operation (HWM-331)
NOTE: This product is equipped with a Vapor Mist Sensor
Badge
(Fig 10). When the Vapor Mist Sensor Badge located on
the medicine cup, turns from grey to blue warm moisture
is being emitted from the humidifier. Do not touch the medicine cup or warm moisture outlet grille
unless the unit has been turned off and the Vapor Mist Sensor Badge has turned back to grey.
Fig. 10
QuickSteam_OM_04-25-06.qxd 4/25/06 4:53 PM Page 7

POWER
CAUTION: DO NOT PLUG IN THE HUMIDIFIER WITH
WET HANDS AS AN ELECTRICAL SHOCK COULD
OCCUR.
• With the power OFF, plug the filled humidifier into a polarized 120V
outlet. DO NOT FORCE THE POLARIZED PLUG INTO THE OUTLET; it will
only fit one way.
STEP 1: POWER
• Press the Power button to start the humidifier. Your humidifier will
automatically start on High power, continuous run. The display will be
illuminated and will reflect the current room humidity (Fig. 15).
• To turn your humidifier OFF simply press the Power button again.
STEP 2: OUTPUT / MOISTURE CONTROL
Your unit has three output/moisture levels:
HIGH: For fast humidifying
MED: For everyday moisture control
LOW: For minimum operation (ideal for nighttime use)
• To change your moisture level, press the moisture control button
( ) up or down (Fig. 16).
• Once you have selected your moisture level the display will go back to showing the current room
humidity after 3 seconds.
NOTE: If you wish to change or check your output/moisture setting simply press the Moisture Control
button once and it will show you your setting. If you would like to change it, continue to push the button up
or down until you have reached your desired setting. Again, after 3 seconds the display will revert to
showing the current room humidity.
Continuous Mode: Your unit will run continuously at your selected output level until you shut it off or it runs
out of water.
STEP 3: TIMER CONTROL
• You can set your Timer for up to 18 hours. This function should only be used if you desire that the
humidifier be automatically shut off after a certain period of time.
8
Digital EasySet
™
Control Operation (Model HWM-450)
Humidistat
Control
Moisture
Control
Timer
Control
Desired
Humidity
Light
Refill/Clean
Light
Reset
Button
EasySet
™
Control Operation (Model HWM-335) cont’d.
REFILL / CLEAN INDICATOR
• When the Refill/Clean indicator light is illuminated it implies your unit is
out of water or you need to clean your humidifier (Fig. 14).
• Check your water level. If the Tank is empty, remove the Tank and refill it
as described in the FILLING section.
• Press the Reset button to restart the humidifier after the Tank is
reinstalled.
• The humidifier will then resume to its previous settings.
• If the water level is full, this implies it’s time to clean your
humidifier. Please turn off and unplug the unit and refer to the CLEANING section.
NOTE: Do not press the Reset button until the Tank is refilled and reinstalled.
NOTE: Your unit’s performance will decrease if you do not clean your Heating Plate. You unit may
continuously shut off and output will decrease.
Fig. 14
Refill/Clean
Light
(illuminated)
Fig. 15
Fig. 16
Reset
Button
Reset
Button
Power Button
(On/Off)
QuickSteam_OM_04-25-06.qxd 4/25/06 4:53 PM Page 8

• Press the Timer button ( ) up or down to set how many hours you
would like the humidifier to run (Fig. 17).
• When the display indicates your desired time, wait 3 seconds.
• After 3 seconds, your desired time is set and the display will revert
back to showing the current room humidity.
NOTE: If you wish to change your Timer setting or check to see how
much time is left simply press the Timer button once and it will show
you the time left. If you want to change the time remaining, continue to
push the button up or down until you have reached your desired time.
Again, after 3 seconds the display will revert to showing the current
room humidity.
STEP 4: SET HUMIDITY
• You can set your desired humidity in 1% increments anywhere from
25% to 65%.
• To set your desired humidity, press the Humidity button ( ) up
or down (Fig. 18).
• When the display indicates your desired humidity setting wait
3 seconds.
• After 3 seconds your desired humidity is set and the display will
revert back to showing the current room humidity.
NOTE: If you wish to change your Humidity setting or check to see what
you set, simply press the Humidity button once and it will show you the
set humidity. If you want to change it, continue to push the button up
or down until you have reached your new desired humidity. Again, after
3 seconds the display will revert to showing the current room humidity.
• Once you have set your humidity the unit will operate under this
desired setting until the unit is turned off.
• When your desired room humidity has been reached your unit will
shut off and the House Icon ( ) on the top of your display will
illuminate (Fig. 19). It will stay illuminated until your desired humidity
decreases at which time your unit will turn back on.
NOTE: Your room humidity can often fluctuate. It is normal for your
unit to turn itself on and off throughout the day as it is monitoring
your changing environment.
REFILL / CLEAN INDICATOR
• When the Refill/Clean indicator light is illuminated it implies your unit
is out of water or you need to clean your humidifier.
• Check your water level. If your Tank is empty, remove the Tank and
refill it as described in the FILLING section.
• Press the Reset button to restart the humidifier after the Tank is reinstalled (Fig. 20).
• The humidifier will then resume to its previous settings.
• If your water level is full, this implies it’s time to clean your humidifier. Please turn off and
unplug the unit and refer to the CLEANING section.
NOTE: Do not press the Reset button until the Tank has been refilled and reinstalled.
NOTE: Your unit’s performance will decrease if you do not clean your heating plate. Your unit may
continuously shut off and output will decrease.
Digital EasySet
™
Control Operation (Model HWM-450) cont’d.
Fig. 18
Fig. 19
Fig. 20
9
Fig. 17
QuickSteam_OM_04-25-06.qxd 4/25/06 4:53 PM Page 9

CAUTION: HOT STEAM MAY CAUSE SEVERE BURNS
DO NOT TOUCH THE MEDICINE CUP UNTIL IT HAS COOLED.
Soothing vapor can be distributed into the air by using the Medicine Cup
at the top of the unit. To add medicine to the Medicine Cup:
• Turn the humidifier OFF and wait 10 minutes for the unit to cool.
• Remove the Medicine Cup from the unit by pulling firmly upward
(Fig. 21).
• Fill the cup halfway with liquid medicine. Only place the medicine
in the small oval area. Do not put medicine in the grille area.
• Carefully reinstall the Medicine Cup back into the unit.
• After use, remove and clean the Medicine Cup with warm water. Reinstall the clean and dry Medicine
Cup into the unit.
WARNING: DO NOT use any liquid medicines other than those specifically recommended for use
with steam vaporizers or warm HUMIDIFIERS. DO NOT pour medicine through the front or side
grilles or add it to the water tank.
Kaz assumes no responsibility for consequences resulting from the use of medicine in this humidifier.
Fig. 21
Place
medicine
here
Medicine Cup
10
CAUTION: DO NOT CLEAN THE HUMIDIFIER WITH THE
POWER CORD PLUGGED IN THE ELECTRICAL OUTLET
AS AN ELECTRICAL SHOCK COULD OCCUR.
We recommend cleaning the humidifier once a week. It may require
cleaning more often if you have hard water, notice a build up of
impurities or detect unpleasant odors. The importance of routine
cleaning and care cannot be over emphasized.
Cleaning involves two steps: SCALE REMOVAL and DISINFECTING.
Be sure to perform these in the proper order to avoid harmful
chemical interactions.
• First, turn off and unplug the humidifier. Wait at least 10-15 minutes for the unit to cool.
• Remove the Water Tank.
• To remove the Power Unit, grasp the Power Unit and lightly tilt
forward while pulling up. You will feel the unit disengage from its lock
(Fig. 22). Set the Power Unit aside.
• Remove the Water Tray (Fig. 23) and set aside. Be sure to
thoroughly clean the Water Reservoir in the Base. Minerals often
accumulate in this area, so special attention should be used.
• Empty any water from the Base and Removable Tray.
• Be sure the Heating Plate has cooled sufficiently.
• Remove the Mineral Absorption Pad using tweezers or tongs and
check the condition of the Mineral Absorption Pad and the Heating Plate found on the Base. If build-up of
minerals is heavy, follow the Cleaning the Heating Plate instructions.
CAUTION: DO NOT SUBMERGE THE BASE IN WATER. DOING SO MAY CAUSE PROPERTY
DAMAGE OR PERSONAL INJURY. ALLOW THE HUMIDIFIER TO DRY COMPLETELY BEFORE
PLUGGING INTO POWER OUTLET.
Weekly Cleaning
Fig. 22
Base
Power
Unit
Fig. 23
Removable
Water Tray
Mineral Reservoir
Base
QuickSteam_OM_04-25-06.qxd 4/25/06 4:53 PM Page 10

11
STEP ONE:
SCALE REMOVAL
Removable Tray
1. Fill the Removable Water Tray (Fig. 3) with:
• 1 cup (8 oz.) of undiluted white vinegar
2. Let solution stand for 20 minutes.
3. With the vinegar in the Removable Tray, clean
all interior surfaces with a soft cloth or brush to
help remove scales.
4. Rinse the Removable Tray thoroughly with
water to remove scale and cleaning solution.
STEP TWO:
DISINFECTING
Water Tank/Removable Tray
1. Fill the Water Tank with:
• 1 teaspoon of household bleach
and
• 1 gallon of water
Pour some of this solution into the
Removable Tray.
2. Let solution stand for 20 minutes.
3. Rinse with water until the smell of bleach
is gone.
NOTE: Removable Water Tray and Medicine Cup
are top shelf dishwasher safe.
NOTE: THE USE OF OTHER WATER TREATMENT PRODUCTS, CHEMICALS, SOAPS, DETERGENTS OR
ABRASIVE CLEANSERS NOT RECOMMENDED IN THIS MANUAL MAY CAUSE DAMAGE TO THE
HUMIDIFIER OR AFFECT PERFORMANCE.
CAUTION: HOT SURFACES MAY CAUSE SEVERE BURNS.
DO NOT TOUCH ANY SURFACES UNTIL THEY HAVE
COOLED.
CAUTION: DO NOT CLEAN THE HUMIDIFIER WITH THE
POWER CORD PLUGGED IN THE ELECTRICAL OUTLET
AS AN ELECTRICAL SHOCK COULD OCCUR.
If the output drops, or the Refill/Clean light remains on, even while
there is water in the tank, the mineral build-up may need to be
removed from the Heating Plate and the Mineral Reservoir. You may
also have to replace the Mineral Absorption Pad.
How often you perform this special maintenance depends upon the
hardness of the water you are using and how quickly mineral deposits form on the interior surfaces of
the humidifier.
1. Turn off and unplug the humidifier. Allow at least 15 minutes for the unit to cool.
2. The Heating Plate is on the bottom of the Base. To access it, grasp the Power Unit and lightly tilt it
forward while pulling up. You will feel the unit disengage from its lock (Fig. 22). Set the Power Unit aside.
3. Remove the Water Tray and set aside (Fig. 23).
4. Remove the Mineral Absorption Pad using tweezers or tongs to prevent burns.
5. BE SURE THE HEATING PLATE HAS COOLED SUFFICIENTLY. Empty any water from the base and remove
mineral debris from the Mineral Reservoir. Be sure to clean the Mineral Reservoir thoroughly.
Fig. 24
Heating
Plate
Mineral
Absorption Pad
Mineral
Reservoir
Cleaning the Heating Plate
Weekly Cleaning cont’d.
QuickSteam_OM_04-25-06.qxd 4/25/06 4:53 PM Page 11

Consumer Relations
Mail questions or comments to:
Kaz, Inc.
Consumer Relations Dept.
250 Turnpike Road
Southborough, MA 01772
Please be sure to specify model number.
Call us toll-free at: 1-800-477-0457
E-mail: [email protected]
Or, visit our website at: www.kaz.com
Electrical Ratings
The Honeywell QuickSteam™ Series models are rated at 120V, 60 Hz.
NOTE: DO NOT RETURN PRODUCT TO STORE. IF YOU EXPERIENCE A PROBLEM, PLEASE CALL US
TOLL-FREE AT 1-800-477-0457. OUR CONSUMER RELATIONS TEAM WILL HELP AND ADVISE NEXT
STEPS.
CAUTION: DO NOT OPEN THE POWER UNIT OR BASE YOURSELF.
DOING SO MAY VOID YOUR WARRANTY AND CAUSE DAMAGE TO
THE HUMIDIFIER OR PERSONAL INJURY.
Replacement Mineral Absorption Pads
Mineral Absorption Pads: Model Number HMP-12P
12
End-of-Season Care and Storage
• Follow the CLEANING
instructions when the humidifier will not be used for at least one week or more,
or at the end of the season.
• Dry the humidifier completely before storing. DO NOT store with water inside the Removable Tray, Base
or Water Tank.
• Pack the unit in its original carton and store in a cool, dry location.
• Before next use, remember to clean your humidifier.
Cleaning the Heating Plate cont’d.
6. Use a non-metallic brush or soft, dry cloth to wipe the Heating Plate (Fig. 24). The Heating Plate is made
of stainless steel so be sure to use non-abrasives. Some deposits may remain, but should not interfere
with the operation of the unit.
CAUTION: DO NOT CLEAN THE HEATING PLATE UNDER RUNNING WATER.
DOING SO MAY CAUSE PROPERTY DAMAGE OR PERSONAL INJURY.
QuickSteam_OM_04-25-06.qxd 4/25/06 4:53 PM Page 12

Troubleshooting
Problem Possible Cause Corrective Action
Power
Unit is not running, Unit needs cleaning Clean the unit (Heating Plate, Mineral Ditch, etc.) and
some lights are on change Mineral Absorption Pad as needed
Unit is out of water Refill and reinstall Water Tank
Humidity level set too low Reset humidity to a higher level
Unit is too hot Turn off the power and let the unit cool down
Power Unit is not installed Reinstall Power Unit
properly
Unit is not set on level Place the unit on a firm, flat, and level surface
surface
There is too much moisture Turn off the power and completely dry out the unit
inside the unit
Unit is not running, no lights Unit is off due to timer Press Power button
Power unit is not Reinstall Power unit
installed properly
Power outage Press Power button
Humidity level was set but Humidity level set too low Reset humidity to a higher level
unit does not start
Humidity level was set but Humidity level set too high Reset humidity to a lower level
unit does not shut off
Tripping the circuit breaker Too many appliances Remove excessive appliance(s) or place the
plugged in the same circuit humidifier in a different circuit
Light flickering Electrical interference Place the humidifier in a different circuit (power outlet)
Sound
Crackling, popping sound Unit needs cleaning Clean the unit (Heating Plate, Mineral Reservoir, etc.)
and change Mineral Absorption Pad as needed
Gurgling sound Unit is operating normally None needed
There is no difference in Unit is operating normally None needed
sound between the high
and low setting
Humidity Display
Humidity display is too high Moisture/condensation Turn off the power and completely dry out the unit
accumulated in humidity sensor
Unit is overfilled with water Drain the excess water from the base and completely
dry out the unit
Humidity display is too low Unit is too hot Turn off the power and let the unit cool down
Condensation
Condensation forming Humidity level set too high Reset humidity to a lower level and/or reduce the
on the walls and/or windows Output level
Unit is placed too close to Relocate the unit
the wall and/or windows
Steam/condensation Unit is overfilled with water Drain the excess water from the base and completely
coming out of the front grill dry out the unit
13
QuickSteam_OM_04-25-06.qxd 4/25/06 4:53 PM Page 13

©2006 Kaz, Inc. All Rights Reserved.
P/N: 31IM0330195
You should first read all instructions before
attempting to use this product.
A. This 3 year limited warranty applies to repair
or replacement of product found to be
defective in material or workmanship. This
warranty does not apply to damage resulting
from commercial, abusive, unreasonable use
or supplemental damage. Defects that are the
result of normal wear and tear will not be
considered manufacturing defects under
this warranty.
KAZ IS NOT LIABLE FOR INCIDENTAL OR
CONSEQUENTIAL DAMAGES OF ANY NATURE.
ANY IMPLIED WARRANTY OF
MERCHANTABILITY OR FITNESS FOR A
PARTICULAR PURPOSE ON THIS PRODUCT IS
LIMITED IN DURATION TO THE DURATION OF
THIS WARRANTY.
Some jurisdictions do not allow the exclusion
or limitation of incidental or consequential
damages or limitations on how long an implied
warranty lasts, so the above limitations or
exclusions may not apply to you. This warranty
gives you specific legal rights, and you also
may have other rights which vary from
jurisdiction to jurisdiction. This warranty
applies only to the original purchaser of this
product from the original date of purchase.
B. At its option, Kaz will repair or replace this
product if it is found to be defective in material
or workmanship. Defective product should be
returned to the place of purchase in
accordance with store policy. Thereafter, while
within the warranty period defective product
may be returned to Kaz.
C. This warranty does not cover damage resulting
from any unauthorized attempts to repair or
from any use not in accordance with the
instruction manual.
D. Return defective product to Kaz, Inc. with a
brief description of the problem. Include proof
of purchase and a $10 US/$15.50 CAN check
or money order for handling, return packing
and shipping charges. Please include your
name, address and a daytime phone number.
You must prepay shipping charges. Send to:
In U.S.A.:
Kaz, Inc.
Attn: Returns Department
4755 Southpoint Drive
Memphis, TN 38118
USA
In Canada:
Kaz, Inc.
Attn: Returns Department
510 Bronte Street South
Milton, ON L9T 2X6
Canada
3 Year Limited Warranty
14
QuickSteam_OM_04-25-06.qxd 4/25/06 4:53 PM Page 14

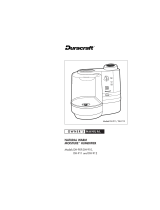
MANUEL D’UTILISATION
RENDEMENT DE
11,3 LITRES (3 GALLONS US)
PAR JOUR
HUMIDIFICATEURS À VAPEUR TIÈDE
Modèles :
HWM-330
HWM-331
HWM-335
La marque de commerce Honeywell est utilisée par Kaz, Inc. avec l’autorisation de Honeywell Intellectual Properties, Inc.
RENDEMENT DE
15,1 LITRES (4 GALLONS US)
PAR JOUR
HUMIDIFICATEUR À VAPEUR TIÈDE
Modèle :
HWM-450
QuickSteam_OM_04-25-06.qxd 4/25/06 4:53 PM Page 15

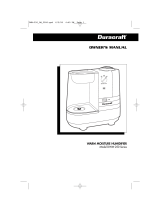
MANUAL DE
UTILIZACIÓN
RENDIMIENTO DE 11,3 LITROS
(3 GALONES) DIARIOS
HUMIDIFICADORES DE VAPOR CALIENTE
Modelos :
HWM-330
HWM-331
HWM-335
Kaz, Inc. utiliza la marca de comercio Honeywell con autorización de Honeywell Intellectual Properties, Inc.
RENDIMIENTO DE 15,1 LITROS (4
GALONES) DIARIOS
HUMIDIFICADORES DE VAPOR CALIENTE
Modelo :
HWM-450
QuickSteam_OM_04-25-06.qxd 4/25/06 4:53 PM Page 29

41
Atención al Cliente
Envíe sus preguntas o comentarios a:
Kaz, Inc.
Consumer Relations Dept.
250 Turnpike Road
Southborough, MA 01772
Mantenimiento al Final de Temporada y Almacenamiento
• Al final de la temporada o si no va a usar el humidificador durante una semana o más, límpielo
siguiendo las instrucciones de LIMPIEZA.
• Deje secar el humidificador completamente antes de guardarlo. NO lo guarde con agua en la bandeja
amovible, en la base ni en el depósito.
• Meta el humidificador en su embalaje original y guárdelo en un lugar fresco y seco.
• Antes de volver a usar el humidificador recuerde que debe limpiarlo.
Filtros de Absorción de Minerales de Recambio
Filtros de absorción de minerales: Número de modelo HMP-12P
Características Eléctricas
Las características eléctricas de los aparatos de la serie QuickSteam
MC
de Honeywell son : 120 V, 60 Hz.
NOTA: NO DEVUELVA EL APARATO AL LUGAR DONDE LO COMPRÓ. EN CASO DE PROBLEMA CON EL
APARATO, LLÁMENOS GRATIS AL 1 800 477-0457. UNO DE NUESTROS EMPLEADOS DEL SERVICIO DE
ATENCIÓN AL CLIENTE LE AYUDARÁ Y LE SUGERIRÁ CÓMO PROCEDER.
CUIDADO: NO INTENTE ABRIR EL BLOQUE MOTOR NI LA BASE, PODRÍA ANULAR LA
GARANTÍA Y DAÑAR EL HUMIDIFICADOR O ACCIDENTARSE.
Por favor, indique el número de modelo.
Llame gratis al: 1-800-477-0457
Envíe un correo electrónico a: consumerrela[email protected]
O visite nuestro sitio Web: www.kaz.com
QuickSteam_OM_04-25-06.qxd 4/25/06 4:53 PM Page 41

44
© 2006 Kaz, Inc. Reservados todos los derechos.
P/N : 31IM0330195
Por favor, lea todas las instrucciones antes de
usar el radiador.
A. La presente garantía limitada de 3 años cubre
la reparación o sustitución de todo producto
con un defecto de fábrica o de mano de obra.
Esta garantía excluye los defectos ocasionados
por el uso comercial, abusivo o desrazonable y
los daños adicionales. Los fallos resultantes
del desgaste normal no se consideran defectos
de fábrica en virtud de la presente garantía
KAZ QUEDA EXENTA DE TODA
RESPONSABILIDAD POR DAÑOS FORTUITOS
O INDIRECTOS DE TODO TIPO. TODA
GARANTÍA IMPLÍCITA DE CALIDAD
COMERCIAL O DE CONVENIENCIA
RELACIONADA CON ESTE PRODUCTO
TENDRÁ LA MISMA VIGENCIA QUE LA
PRESENTE GARANTÍA.
En ciertos lugares no se permite la exclusión o
limitación a daños fortuitos o indirectos, ni los
límites de duración aplicables a una garantía
implícita. Por consiguiente, es posible que
estas limitaciones o exclusiones no se apliquen
en su caso. Esta garantía le confiere unos
derechos precisos, reconocidos por la ley.
Dichos derechos difieren de un lugar a otro y
es posible que usted tenga otros. La presente
garantía sólo será válida con la compra inicial
del producto a partir de la fecha de compra
inicial.
B. Kaz se reserva todo derecho de reparación o
sustitución del presente producto si se
constata que presenta un defecto de fábrica o
mano de obra. Todo producto defectuoso debe
devolverse al lugar donde lo compró y de
acuerdo con la política de dicho comercio.
Seguidamente, todo producto defectuoso cuya
garantía esté en vigor, podrá ser devuelto a
Kaz.
C. Esta garantía no cubre los daños ocasionados
por tentativas de reparación no autorizadas o
por el uso no conforme con el presente
manual.
D. Para devolver un producto defectuoso a Kaz,
Inc., adjunte una descripción breve del
problema junto con una prueba de compra y
un cheque o giro postal de 10,00 $ US ó 15,50
$ CAD para los gastos de manutención,
embalaje de vuelta y reenvío. Indique su
nombre, dirección y un número de teléfono
donde podamos localizarle durante el día. Los
gastos de envío deben pagarse por
adelentado. Enviar a:
En los Estados Unidos :
Kaz, Inc.
Attn: Returns Department
4755 Southpoint Drive
Memphis, TN 38118
USA
En Canadá:
Kaz, Inc.
Attn: Returns Department
510 Bronte Street South
Milton (Ontario) L9T 2X6
Canada
GARANTÍA LIMITADA DE 3 AÑOS
QuickSteam_OM_04-25-06.qxd 4/25/06 4:53 PM Page 44
/