Page is loading ...

INSTRUCTION MANUAL AND
OWNER'S GUIDE
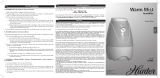
Warm Mist Humidifier
with exclusive Warm Wicking Vapor System
TM
Featuring an innovative absorption sleeve design
Model U-32000 (2.5 Gallon output)
Model U-32010 (3.0 Gallon output)
Model U-32030 (3.5 Gallon output)
INFORMATION HOTLINE: If you have any questions or comments, please feel free to
e-mail us at service.optimus@gmail.com or call us at 1-888-672-5832. Our customer
service representative will be happy to help you. E-mail is the best way to reach us.
PLEASE READ AND SAVE THESE INSTRUCTIONS.
IMPORTANT INSTRUCTIONS:
PLEASE READ AND SAVE THESE IMPORTANT SAFEGUARDS
Thank you for choosing an Optimus humidifier. To ensure the best performance from your
humidifier, please read and save the following instructions.
WHEN USING ELECTRICAL APPLIANCES, BASIC PRECUATIONS SHOULD ALWAYS
BE FOLLOWED TO REDUCE THE RISK OF FIRE, ELECTRIC SHOCK AND INJURY
TO THE PERSON, INCLUDING THE FOLLOWING:
● Read all instructions before using this humidifier.
● To avoid electrical shock or fire, be sure to plug into a 120v AC outlet only. Make sure
the plug is fully inserted. A loose fit between the AC outlet and plug may cause
over heating of the plug. Have a qualified electrician replace the old outlet if the
power cord becomes extremely hot.
● Always unplug the unit when cleaning, or replacing the absorption sleeve, or not in
use.
● To disconnect the unit, turn control to OFF then remove plug from outlet.
● The power cord has a polarized AC plug, which will fit into the outlet one way only (one
blade is wider than the other). If the plug will not insert fully into the outlet, try reversing
the plug. If the plug still fails to fit, have an electrician replace the old outlet. Never alter
the plug to fit into an obsolete outlet. Doing so may compromise safety.
● Do not run cord under carpet, throw rugs, runners or the like. Arrange cord away from
traffic area where it might be tripped over.
● Avoid the use of an extension cord to avoid overheating or risk of fire. However, if you
must use an extension cord, the cord shall be No. 14AWG minimum size and rated no
less than 1875 watts.
● Do not use this product if parts are missing. Do not use this unit if the power cord
shows signs of damage or wear or if the unit has been dropped or misused.
● This humidifier is for indoor use only.
● Place this humidifier on a water-resistant and flat level surface only .This unit may
not function properly or water may spill if it is placed on an uneven surface.
● Never tip or move this appliance while operating or while water is in the base or
tank(s).
● Do not place this appliance near furnaces, heaters stoves, or any other source of heat.
Position this appliance out of the reach of children. Extreme caution is necessary
when this unit is used by or near children or persons with reduced physical, sensory or
mental capabilities, or whenever the unit is left operating and unattended.
● Do not use anything other than water in this appliance. Do not use additives.
● Never block the mist outlet.
● Turn off the humidifier if relative humidity exceeds 60%.
● This appliance requires periodic maintenance, including cleaning or replacement of
the absorption sleeve. Refer to the instructions in this manual.
● Do not attempt to use this humidifier without the absorption sleeve attached.
● Be sure the humidifier’s heating element has cooled down sufficiently before
moving, cleaning, or replacing the absorption sleeve.

GETTING TO KNOW YOUR HUMIDIFIER:
Model No. U-32000 (2.0 Gallon)
Model No. U-32010 (2.5 Gallon)
1.Tank 7.Medicine Cup
2.Cap 8.Tank Carry Handle (top)
3.Base 9.Tank Carry Handle (bottom)
4.Mist Chamber 10.Safety Switch
5.Power Control Knob 11.Locking Device
6.Humidistat Control Knob 12.Grill
Model No. U-32030 (3.0 Gallon)
INTRODUCTION
Congratulations on your purchase of your new Optimus Warm Mist Humidifier with
exclusive Warm Wicking Vapor System
TM
. You have purchased the newest and most
advanced technology available in warm mist humidifiers. This patent-pending technology
creates an extremely quiet, low-maintenance humidifier.
WHAT IS THE WARM WICKING VAPOR SYSTEM
TM
?
The Warm Wicking Vapor System
TM
is a new, revolutionary, patent-pending technology
that eliminates problems associated with other warm mist humidifiers. An absorption
sleeve placed on the heating element traps dirt and unwanted minerals, preventing
buildup on the heating element and near the steam outlet. The sleeve also works to
eliminate annoying bubbling and gurgling sounds common to other warm mist
humidifiers.
。No dangerous mineral buildup on the heating element
。No unsightly mineral buildup near the steam outlet
。No need for tedious cleaning of the heating element
ADVANTAGES OF MAINTAINING PROPER MOISTURE LEVELS
Dry indoor air can be uncomfortable and damaging to people, pets, plants and belongings.
Proper moisture levels can help alleviate or prevent:
。 Stuffy, dry nasal passages 。Dry plants, flowers
。 Dry coughs and irritated throats 。Static electricity
。 Parched lips and itchy, flaky skin 。Dry, cracking wood furniture
IMPORTANT! It is recommended that you remove and inspect the absorption
sleeve every time refilling the tank(s). Clean or replace the sleeve if any mineral
buildup or discoloration on the outside or inside of the absorption sleeve is visible.
Failure to properly maintain the absorption sleeve can result in poor performance
and possible malfunction of your humidifier. For best results, use distilled or
filtered water.
HOW YOUR HUMIDIFIER WORKS
Water flows from the tank(s) into the humidifier base. The water is absorbed up by the
absorption sleeve where it is filtered, heated, and converted into a warm mist. The warm
mist rises up through the mist chamber, dispensing comfortable, soothing, invisible
moisture into the air. During this process, unwanted minerals are trapped inside the
absorption sleeve material.
PRE-OPERATING INSTRUCTIONS
Locate an appropriate, level, flat surface near an electrical outlet for placement of the
humidifier. Be sure to place your humidifier on a water-resistant surface, since
water may cause damage to furniture. Position the humidifier so the power cord does
not become a trip hazard. To ensure proper ventilation, be sure to keep the
humidifier at least 6 inches away from a wall or any other object.
Remove the tank(s) from the base by grasping the top handle. Rotate the mist

chamber locking device to unlock the mist chamber (see illustration above). Lift the
mist chamber off the Base. Locate the absorption sleeve attached to the heating
element under the mist chamber. Be sure the sleeve is tightly attached to the heating
element. A loosely attached absorption sleeve may produce less humidity and
cause malfunctions.
Replace the mist chamber. Turn the locking device to secure the mist chamber to the
base. Replace the tank(s).
CAUTION: Never attempt to use this humidifier without the absorption sleeve
attached.
SET-UP
Remove the tank(s), turn the tank(s) upside down and remove the fill cap by turning it
counter-clockwise.
Fill the tank(s) with cool water. For best results, use distilled or filtered water. Do not
use hot water or any chemical additives. Replace the fill cap by turning it clockwise.
Be sure not to over tighten it. Turn the tank(s) upright and position the tank(s) back
onto the base. Be sure the tank(s) is seated properly on the base and the valve(s) is
open. Water will begin flow into the base.
NOTE: The SAFETY SWITCH is located approximately 3/4 down the right side of the
mist chamber. When the tank (right tank only on 3.5 gallon model) is removed, the
SAFETY SWITCH is released and the humidifier stops producing moisture. When
this occurs, the REFILL light will illuminate. The humidifier will not operate without the
tank properly seated on the base.
When putting the tank back on the base, make sure it is set properly and the SAFETY
SWITCH is compressed.
Never attempt to move the humidifier with water in the tank(s). If moving the
humidifier is necessary, be sure to unplug the humidifier and remove the tank(s).
The humidifier will not operate when the water in the base reaches a minimum level.
When this occurs, the REFILL light will illuminate.
WARNING: Never pour water into the mist chamber grill. Doing so may cause
personal injury and damage to the humidifier.
OPERATION
With the Power Control Knob in the OFF position, plug the power cord into a polarized
120V outlet.
REMEMBER: Do not force the polarized plug into the outlet; it fits one way only.
WARNING: Do not attempt to plug the humidifier in with wet hands, as an electrical
shock may occur.
Turn the Humidistat Control Knob to the MAX position (far right). Turn the Power
Control Knob to the desired position: HIGH for fast humidification or LOW for gradual
humidification. The POWER light will illuminate. Comforting, visible warm mist will
begin in 2-4 minutes.
NOTE: If the humidifier does not produce moisture, the humidistat may be
positioned too low. Turning the Humidistat Control Knob to a higher position
should start the humidifier. Do not force the Humidistat Control Knob beyond
the MAX position. Doing so will cause damage to the humidifier.
When the set humidity in the vicinity is reached, the HUMIDITY light will illuminate
and the humidifier will stop producing moisture. When the humidity drops below the
Humidistat setting, the humidifier will start producing moisture again automatically
and the HUMIDITY light will disappear. The on/off cycle will continue while the
humidifier is in use.
If condensation begins to form on walls or windows, lower the Humidistat Control
Knob setting (turn knob to the left).
When you are finished using the humidifier, be sure to turn the Power Control Knob to
the OFF position.
REFILLING THE TANK(S)
When the water drops to a minimum level in the base, the REFILL light will illuminate
and the humidifier will stop producing moisture. Follow the instruction in the SET UP
section to refill the tank(s).
NOTE: Depending on how level and flat the surface where the humidifier is placed,
models with two tanks may empty into the base together or separately.
REPLACING THE ABSORPTION SLEEVE
IMPORTANT! It is recommended that you remove and inspect the absorption
sleeve every time refilling the tank(s). Clean or replace the sleeve if any mineral
buildup or discoloration on the outside or inside of the absorption sleeve is visible.
Failure to properly maintain the absorption sleeve can result in poor performance
and possible malfunction of your humidifier. For best results, use distilled or
filtered water.
CAUTION: Make sure the heating element has cooled before replacing the
sleeve.
The absorption sleeve is a vital part of the humidifier. Do not attempt to use the
humidifier without the sleeve. Do not alter or attempt to repair any absorption sleeve.
Be sure to use only Optimus absorption sleeves with the humidifier. Using any other
absorption sleeves may cause damage to the humidifier, create a safety hazard, and

void the warranty.
Remove the tank(s) from the base. Rotate the mist chamber locking device to unlock
the mist chamber. Lift the mist chamber off the Base. Remove the absorption sleeve
from the heating element.
Wipe off any buildup on the heating element with a soft cloth or soft toothbrush,.
Attach a new or cleaned absorption sleeve to the heating element. Pull sleeve tightly
around the heating element and secure it with the attached Velcro fastener. See
illustrations below.
NOTE: Make sure the sleeve is tight around the heating element for best
performance.
**** Replacement Sleeve 3-Pack Item No.U-30002
To order replacement parts, please email us at Service.Optimus@gmail.com or call us at
1-888-672-5832. Always give the model number and part description when placing order.
CLEANING THE ABSORPTION SLEEVE
Hand wash the absorption sleeve using running tap water, gently rubbing the inside
and outside of the sleeve with fingers. Do not put absorption sleeve in washer or
dishwasher.
Inspect the absorption sleeve for signs of wear. Do not use if sleeve is torn, tattered,
or has holes. Replace with a new one.
NOTE: Washed absorption sleeves may build up minerals more quickly and will need
more frequent cleaning. They may experience deterioration.
CLEANING THE HUMDIFIER
It is strongly recommended to clean the humidifier at least once a week or sooner if you:
。Have hard water
。Notice a buildup of impurities
。Notice an unpleasant odor.
Always turn off and unplug the humidifier before cleaning. Be sure to wait until the
heating element has cooled sufficiently.
Wipe the tray and the housing of the humidifier with a damp soft cloth periodically. Do not
use harsh, abrasive cleaners. Never submerse the mist chamber in liquid or pour liquid in
or on it. Doing so may damage the unit and may cause injuries.
CLEANING THE TANK(S)
Put 1/2 teaspoon of chlorine bleach and 1/2 gallon of water in the tank. Let solution stand
for 20 minutes, swishing every few minutes. Empty tank(s) and rinse well with water until
the bleach smell disappears.
CLEANING THE BASE
Remove the tank(s) and mist chamber. The base may be cleaned with a damp, soft cloth
or in a dishwasher.
CAUTION: Only the base is dishwasher safe. Do not attempt to put the tank, mist
chamber or absorption sleeve in a dishwasher. Doing so may damage the
humidifier.
END OF SEASON CARE AND STORAGE
Empty all water out of the tank and base.
Clean all surfaces with a damp soft cloth.
Clean the base with a dishwasher or wiping it with a damp, soft cloth.
Remove the absorption sleeve and replace it with a new and dry sleeve.
NOTE: Before storing your humidifier for the season or for an extended period of time,
be sure the absorption sleeve is completely dry to prevent mold or mildew. Air dry
only. Do not use a dryer.
Store the unit in its original carton and in a cool dry location.
Remember to clean and inspect your humidifier before using it the next season.
TROUBLE SHOOTING:
Power light is not illuminated
Be sure the Power Control Knob is in the HIGH or LOW position.
Be sure the humidifier is plugged into the outlet.
Check outlet or circuit breaker.
Humidity light is illuminated
The Humidity light illuminates when the humidity in the vicinity reaches the
Humidistat setting. When the humidity drops below the Humidistat setting, the
humidifier will start producing moisture again and the light will disappear.
Mist output is minimal or none
Be sure Power Control Knob is in the HIGH or LOW position.
Be sure humidifier is plugged into the outlet.
Check absorption sleeve for mineral buildup.
(See REPLACING THE ABSORPTION SLEEVE and CLEANING THE
ABSORPTION SLEEVE).
Refill light is illuminated with water in tank(s)
If the tank is filled with water and the Refill light illuminates, check to see if the
tank is properly seated on the base (right tank on 3.5 gallon model) and
engages the Safety Switch located on the right side of the mist chamber (see
SET-UP).

Cloudy film on tank(s) surfaces
See CLEANING THE TANK(S).
WARRANTY
For your own records, staple or attach your sales receipt to this manual. Please also write
the store name/location and date purchased below.
STORE NAME/LOCATION: ____________________________________
DATE PURCHASED: __________________________________________
ONE YEAR LIMITED WARRANTY:
(SAVE THIS WARRANTY INFORMATION)
Optimus Enterprise, Inc. warrants to its customers and or consumer of this humidifier and
the parts thereof will be free from defect in material and workmanship, under normal use,
for a period of one (1) year from the date of initial purchase. The warranty does not apply
to repairs necessitated by damage, misuse, abuse or alternation and to any repair of
merchandise not used within the United States. Unless otherwise proscribed by law,
Optimus Enterprise, Inc. shall not be liable for any personal injury, property damage or
any incidental or consequential damages of any kind (include water damage) resulting
from malfunctions, defects, misuse, improper installation or alternation of this product.
This warranty is the only warranty extended by Optimus Enterprise, Inc. to its original
customers and/or consumer purchased of this unit. Optimus Enterprise, Inc. disclaims all
other warranties, express or implied, that arise by the operation of law, specifically
including the implied warranties of merchantability and fitness for a particular purpose.
Optimus Enterprise, Inc. shall not be liable for any incidental or consequential damage,
which may have resulted from any alleged breach of warranty. Some states do not allow
limitations on how long implied warranty lasts or the exclusion or limitation of incidental or
consequential damage, so the above limitations or exclusion may not apply to you. This
warranty gives you specific legal rights you may also have other rights which vary from
state to state.
Should the humidifier fail during the warranty period, the owner should:
● After you purchase the product and find parts missing or you have any question,
please e-mail or call Optimus Enterprise, Inc. first. DO NOT RETURN THE UNIT TO
THE STORE.
● Within the first 12 months from date of purchase, Optimus Enterprise, Inc. will repair or
replace the product if it is defective in material or workmanship providing it is returned
to Optimus Enterprise, Inc. with freight prepaid, with evidence of purchase date (cash
register receipt) together with a check or money order for shipping/handling charges.
IMPORTANT: ANY REPAIRS SHOULD BE PERFORMED BY AN AUTHORIZED
SERVICE REPRESENTATIVE. DO NOT ATTEMPT TO REPAIR THIS PRODUCT
YOURSELF. DOING SO MAY VOID YOUR WARRANTY.
PLEASE RETAIN THIS WARRANTY AND SALES RECEIPT TO ENSURE YOUR
PRODUCT WARRANTY.
IMPORTANT: RETURN INSTRUCTIONS:
Your warranty depends on your following these instructions if you are returning the unit
within the warranty period.
● Carefully pack the product in the original container or a suitable one to avoid damage in
shipping.
● Seal the carton. Send the package freight prepaid to the following address:
Optimus Enterprise, Inc.
Customer Service Department
2201 E. Winston Road, Unit #J
Anaheim, CA92806
1-888-672-5832
● Inside an envelope, enclose
1) your name, full address with zip code, daytime phone number
2) a brief explanation of the problem you are having with the unit
3) evidence of purchase date such as a cash register receipt, and
4) A CHECK OR MONEY ORDER of $18.00 for return shipping / handling.
● Optimus Enterprise, Inc. recommends you insure the package as damage in shipments
is not covered by your warranty.
● All shipping charges must be prepaid by you (as noted above).
SERVICE INSTRUCTIONS:
Do not attempt to repair or adjust any electrical or mechanical functions of this unit.
Doing so may void the warranty.
If you have any questions regarding this unit’s operation or believe any repair is
necessary, lease e-mail us at Service.Optim[email protected] or call us at
1-888-672-5832 to speak with a Customer Service Representative.
If an exchange is determined necessary, please return it, in its original carton, along
with the sales receipt, to the store where you purchased it. If you are returning the unit
more than 30 days from the date of purchase, please see the enclosed warranty.
/