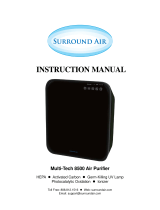
ElectrIQ EAP600HCUV-WIFI User manual

Category
Air purifiers
Type
User manual

ElectrIQ EAP600HCUV-WIFI is a smart Wi-Fi-enabled air purifier designed to improve indoor air quality and provide multiple stages of air purification. It features HEPA, photocatalytic, activated carbon, and molecular sieve filters to remove 99.9% of airborne particles, unpleasant odors, and harmful substances. Additionally, it employs a UVC lamp and plasma ionizer to sterilize the air, removing bacteria, viruses, mold spores, and allergens.

ElectrIQ EAP600HCUV-WIFI is a smart Wi-Fi-enabled air purifier designed to improve indoor air quality and provide multiple stages of air purification. It features HEPA, photocatalytic, activated carbon, and molecular sieve filters to remove 99.9% of airborne particles, unpleasant odors, and harmful substances. Additionally, it employs a UVC lamp and plasma ionizer to sterilize the air, removing bacteria, viruses, mold spores, and allergens.

USER MANUAL
EAP600HCUV-WIFI
Thank you for choosing electriQ
Please read this user manual before using this innovative
Air Purifier and keep it safe for future reference.
Visit our page www.electriQ.co.uk for our entire range of Intelligent Electricals
2
CONTENTS
SAFETY INSTRUCTIONS
3
AIR PURIFIER DIAGRAM
5
ABOUT YOUR AIR PURIFIER
6
INFORMATION ON INDOOR POLLUTANTS
7
OPERATION INSTRUCTIONS
8
BEFORE FIRST USE
8
HOW TO USE
9
CONNECTING THE APPLIANCE TO WIFI
11
CONTROLLING YOUR APPLIANCE THROUGH THE APP
16
CARE AND MAINTENANCE
21
CHANGING THE FILTER
21
CLEANING THE AIR QUALITY SENSOR
21
CLEANING THE CASE
21
CLEANING THE FILTERS AND FILTER HOLDING AREA
21
CLEANING THE FILTER COVER AND CLEAN AIR OUTLET
21
TECHNICAL SPECIFICATION
22
TROUBLESHOOTING
22
SUPPORT
23
3
SAFETY INSTRUCTIONS
Important!
Carefully read the instructions before operating the unit.
This appliance is for indoor use only.
This unit must only be connected to a 220-240V / 50Hz earthed outlet.
Installation must be in accordance with regulations of the country where the
unit is used.
If you are in any doubt about the suitability of your electrical supply, have it
checked and, if necessary, modified by a qualified electrician.
This air purifier has been tested and is safe to use. However, as with any
electrical appliance use it with care.
Disconnect the air purifier from the socket when changing the filters or
cleaning the unit.
Avoid touching any moving parts within the appliance.
Never insert fingers, pencils or any other objects through the guard.
This device is not intended for use by persons (including children) with
reduced physical, sensory or mental capabilities. It is also not intended for
use by those with a lack of experience and knowledge, unless they have
been given supervision or instruction concerning the use of the appliance by
a person responsible for their safety.
Do not leave children unsupervised with this device.
Do not clean the unit by spraying it or immersing it in water. Use a damp
cloth only. Never allow water or vapours to enter the unit.
Do not clean with strong chemical agents or other abrasive materials.
Never connect the unit to an electrical outlet using an extension cord. If a
power outlet is not available, one should be installed by a qualified
electrician.
Never operate this appliance if the cord or power supply are damaged.
Ensure the power cord is not stretched or exposed to sharp objects/edges.
A damaged power supply should be replaced by the manufacturer. Never
extend or attempt to change the power supply lead.
Any service other than regular cleaning or filter replacement should be
performed by an authorised service representative. Failure to comply could
result in a voided warranty.
Do not use the appliance for any purpose other than its intended use.
Avoid removing the power cord from the socket whilst the unit is still in
operation. This could cause electrical damage.
4
Never use the power supply as a switch to start and turn off the air purifier.
Use the provided ON/OFF button located on the control panel.
Always place the unit on a dry and stable surface.
The use of accessory attachments that have not been approved by the
appliance manufacturer is not recommended, as this may result in fire,
cause an electric shock and/or cause personal injury.
Ensure hands are fully dried before plugging or unplugging the appliance.
The appliance should not be installed in laundry or wet rooms.
Energy Saving and Unit Safety Protection Tips
Do not cover or restrict the airflow from the outlet or inlet grills.
For maximum performance and safety the minimum distance from a wall
or objects should be 30cm. Keep away from other electrical appliances.
Keep the filters clean. Under normal conditions, filters should only need
cleaning once every two weeks (approximately). Since the filters
remove airborne particles, more frequent cleaning may be necessary,
depending on the air quality.
5
AIR PURIFIER DIAGRAM
Control Panel
Front Cover
Air Inlet
Base
Handle
Air outlet
Back Cover
Rating Label
Base
6
ABOUT YOUR AIR PURIFIER
The EAP600HCUV-WIFI provides multiple stages of air purification using
professional air filtration and intelligent sterilisation technologies. This unit features
advanced HEPA and photocatalytic and activated carbon filters for improved air
filtration.
Primary filter, made of non-woven materials, are used for removing large
particles like hair and dust.
Antibacterial HEPA filter to remove 99.9% of airborne particles of 0.25
micrometres or larger.
Activated carbon filter removes unpleasant odours and absorbs harmful
substances such as formaldehydes and benzenes.
Molecular sieve absorption layer removes smaller particles
Photocatalytic filter using titanium dioxide (TiO2) to further decompose
pollutants.
UVC lamp removes airborne bacteria and viruses.
Plasma Ioniser sterilises the air further and removes mould spores and allergens
from the air.
The EAP600HCUV-WIFI also features an air quality indicator bar that will provide a
visual indication of the current air quality.
In addition the appliance can be connected to your home network, allowing settings
to be changed and the device to be monitored through your smartphone from
anywhere in the world. The app also provides the ability to program the air purifier
for even smarter operation.
Applications:
Personal use in domestic and office space to improve air quality
Helps smokers to reduce contaminants within the air
Can help improve the symptoms of asthma and pollen allergies.
Great for children’s rooms and small offices
NOTE: This air purifier is not a substitute for proper ventilation, regular vacuum
cleaning or for use in place of a cooker hood whilst cooking. If the relative humidity
is above 60% we recommend using a dehumidifier to reduce the humidity.
7
INFORMATION ON INDOOR POLLUTANTS
VOC (Volatile Organic Compound): VOCs come from motor vehicle exhausts,
gasoline vapour, pollutants such as formaldehyde, ammonia and many other
common and chemical solvents such as paints and glues, or can be a by-product of
mould growth. VOCs cause irritation to the eyes and or nose as well as causing
headaches, nausea and even potential damage to the central nervous system.
Pressed wood furniture, newly decorated rooms, paint and cleaning solvents are
common sources of VOCs.
Mould / Fungus: These can affect our respiratory system and cause allergic
reactions, like a runny nose, eye and throat irritation, headaches, fatigue and
aggravation of asthma.
Other indoor pollutants include bacteria, viruses, dust mites and pollen.
Emissions from electronic office equipment: Many studies, including those from
EPA and the University of California Berkley, have reported that emissions from
office equipment such as computers and printers, include VOCs, ultra-fine particles
and ozone. These emissions have been proven to have a negative effect on the
health of many people which can be reduced by using an air purifier.
Using HEPA filters, Activated Carbon filters and Plasma Ionisation: An effective
HEPA filter is absolutely necessary to remove particles, even at a microscopic level;
it ensures that the particles are not spread. Plasma Ionisers will sterilise the air and
reduce bacterial growth.
The antibacterial activated carbon on the EAP600HCUV is a natural material
biosynthesized from walnut shell, the absorption area of activated carbon is very
large at up to 300,000 square meters. The activated carbon filter will absorb
unpleasant odours and reduce the VOC content in the air.
The Plasma Ioniser will sterilise the air and reduce bacterial growth.
8
OPERATION INSTRUCTIONS
USING THE TOUCH CONTROLS
The controls respond to touch, so you
don’t need to apply any pressure.
Use the ball of your finger, not its tip.
Make sure the controls are always
clean, dry, and that there is no objects
covering them.
BEFORE FIRST USE:
1) Unpack the appliance and remove the filter
cover from the front of the unit by pulling
both sides of the cover at the top and then
lifting away from the base.
2) Remove the filters from the plastic
protective packaging
3) Install the activated Carbon and Photo
Catalyst filter into the front of the unit.
4) Install the HEPA filter into the front of the
unit.
5) Install the pre filter into the front of the unit.
6) Replace the filter cover on the side of the
appliance, ensuring it clicks into place.
7) Connect the plug to an earthed socket
9
HOW TO USE:
POWER
Press to turn the appliance on and off.
SETTINGS
BUTTON
Allows the Ioniser and UVC functions to be turned on and off.
When activated the relevant indicator will be displayed on the
control panel.
FAN SPEED
BUTTON
Press to change between the three fan speeds. The current fan
speed will be indicated by the length of the fan speed bar.
TIMER
BUTTON
With the unit turned on, Press and hold the timer button to
activate the timer. Repeatedly press the timer button to select in
how many hours it should turn off. The duration can be set
between 1 and 12 hours in 1 hour increments. To turn off the
timer, press and hold the timer button again.
RESET
Press when the filter replacement lights are illuminated to reset
the counter for the filter life monitor after changing the filter.
Ioniser
Indicator
WIFI
Indicator
Power Button
Digital
Display
Touch Buttons
10
AUTO BUTTON
Press to activate auto mode, the fan speed will be automatically
adjusted based on the air quality.
Please note:
The features (Ioniser and UV Light) cannot be used in
auto mode.
After selecting Auto mode the unit will take approx. 3
minutes to monitor the air before the mode becomes
active.
AIR QUALITY
DISPLAY
The unit utilises a PM2.5 sensor to measure the air quality. When
turning on the unit will take around 90 seconds before showing
the air quality on the screen.
FILTER
REPLACEMENT
INDICATORS
The display will show when the filters require replacement.
Replace the filters then press the Reset button to reset the filter
life monitor
ADJUSTMENT
OF THE PM 2.5
READING
If the reading for the air quality is abnormal, this may be caused
by particles attached to the sensor. To correct the reading press
and hold the Settings button until a bleep is heard. Then use the
Auto and Settings buttons as Up and Down to adjust the value.
DIGITAL DISPLAY
During use the display panel will automatically cycle through showing the Temperature, Humidity,
Timer Duration and Air quality (PM) figures.
TEMPERATURE
HUMIDITY
TIMER DURATION
AIR QUALITY
11
CONNECTING THE APPLIANCE TO WIFI
DOWNLOAD THE APP TO YOUR PHONE
Download the ”TUYA SMART” app, from your chosen app store, using the QR codes below,
or by searching for the app in your chosen store.
Android IOS
CONNECTION METHODS AVAILABLE FOR SETUP
The air purifier has two different setup modes, Quick Connection and AP (Access
Point). The quick connection is a quick and simple way to set the unit up. The AP
connection uses a direct local WIFI connection between your phone and the air purifier
to upload the network details.
Before starting the setup, with the air purifier plugged in and in standby mode, press
and hold the power button for 5 seconds (until you hear a bleep) to enter the WIFI
connection mode.
Please ensure your device is in the correct WIFI connection mode for the connection
type you are attempting, the flashing of the WIFI light on your air purifier will indicate
this.
Connection Type
Frequency of Flashes
Quick Connection
Flashes twice per second
AP (Access Point)
Flashes once per three seconds
CHANGING BETWEEN CONNECTION TYPES
To change the unit between the two WIFI connection modes, press and hold the
Power button for 5 seconds.
12
REGISTER THE APP
2. Read the Privacy policy
and press the Agree
Button.
3. Enter your email address or
phone number and press
continue to register.
4. A verification code will be
sent by the method selected
in step 3. Enter the code into
the app.
2. The app is now registered.
It will automatically log you
in following registration.
5. Type in the password you
would like to create. This
needs to be 6-20 characters,
with letters and numbers.
1. Press on the register button
at the bottom of the screen.
13
SETTING UP YOUR HOME WITHIN THE APP
TUYA is designed so it can work with a large number of compatible smart devices
within your home. It can also be set up to work with multiple devices within different
houses As such during the setup process, the app requires that different areas are
created and named to allow easy management of all your devices. When new
devices are added, they are assigned to one of the rooms you have created.
CREATING ROOMS
1. Press on the ADD HOME
button.
2. Type in a name for your
home,
3. Press on the location button
to select the location of your
home. (See SETTING
YOUR LOCATION below)
4. New rooms can be added
by pressing the ADD
ANOTHER ROOM option at
the bottom. (See ADD
ANOTHER ROOM below)
5. Untick any rooms that are
not required on the app.
6. Press DONE in the top right
corner.
SETTING YOUR LOCATION
Use your finger to
move the orange
HOME symbol.
When the symbol
is in the
approximate
location of your
home, press the
confirm button in
the top right
corner.
ADD ANOTHER ROOM
Type in the
name of the
room, and
press Done in
the top right
corner
14
CONNECTING USING QUICK CONNECTION
Before initiating the connection, make sure the unit is in standby mode, with the WIFI
light flashing twice per second. If not follow the instructions for changing the
connection mode. Also ensure your phone is connected to the WIFI network. (We
advise turning mobile data off during setup)
2. Select the type of device
as “Air Purifier within the
Home Appliance tab.
3. Ensure the WIFI light on the
air purifier is flashing twice
per secondthen press on
the orange button at the
bottom of the screen to
confirm.
4. Enter your WIFI password
and press confirm.
5. This will then transfer the
settings to the air purifier.
Wait for this to complete. If
this fails, retry. If still
unsuccessful please review
the troubleshooting section
for further help.
1. Open app and press “+ to
add device, or use the add
device button
15
CONNECTING USING AP MODE (ALTERNATIVE METHOD)
Before initiating the connection, make sure the unit is in standby mode, with the WIFI
light flashing once per second. If not follow the instructions for changing the WIFI
connection mode. Also ensure your phone is connected to the WIFI network. (We
advise turning mobile data off during setup)
1. Open app and press “+ to
add device, or use the add
device button
2. Select the type of device
as Air Purifier within the
Home Appliance tab.
3. Press on the AP mode
button in the top right of the
screen.
4. Ensure the WIFI light on the
air purifier is slowly flashing
(once per three seconds),
then press on the orange
button at the bottom of the
screen to confirm
5. Enter your WIFI password
and press confirm.
6. Go to network settings in your
phone and connect to the
“SmartLife xxx” connection.
There is no password to
enter. Then return back to the
app to complete setup.
This will then transfer the settings to the air purifier.
Once the connection process has completed, go back to the network settings on your phone to ensure
your phone has reconnected to your WIFI router.
16
CONTROLLING YOUR APPLIANCE THROUGH THE APP
THE HOME SCREEN
Each device has its own entry on the home screen to allow the user to either quickly turn the unit
on or off, or to enter the device screen to make other changes.
DEVICE SCREEN
Change Home: If you
have a number of units at
different houses, you can
change between them
Add Device: Add a device
to the app, and go through
the setup process.
Environmental
information: Provides
outdoor temperature and
humidity based on the
location details entered
Rooms: Use to view the
units set up within each
room
Smart Scene: Allows you
to program intelligent
behaviour based on the
internal and external
environment
Add Device: Add a device
to the app, and go through
the setup process.
Room Management:
Allows rooms to be added,
removed or renamed.
Profile: Provides the
option for changing
settings, and adding
devices using a QR code
provided by a friend.
POWER Button: Use to
quickly turn the unit on or
off.
Name of Air Purifier:
Press to enter the Device
Screen
17
DEVICE SCREEN
The device screen is the main control screen for the air purifier, providing access to the
controls to amend the functions and settings
NOTES:
Due to continuous development of the app, the layout and available features
may be subject to change.
Edit Name: Use to
change the name of the
air purifier.
Functions / Settings:
Displays the features
currently active
Back: Returns to the
Home Screen
Current Air Quality:
Displays the current
PM 2.5 air quality
reading and a
description of the air
quality.
Power Button: Use to turn the
unit on or off.
SPEED:
Use to change the Fan speed
between Low, Medium and High
FUNCTION / SETTINGS:
Use to activate the Ioniser and
UV Light.
TIMER:
Use to add an off timer
while the unit is
running, or an on timer
while the unit is turned
off
18
SMART SCENES
Smart Scenes is a powerful tool providing the option to customise the operation of the air
purifier based both on conditions within the room and outside influences. This gives the user
the option of specifying much more intelligent actions. These are split into two categories
Scene and Automation.
SCENE
Scene allows for a one touch button to be added to the Home screen. The button can be
used to change a number of settings in one go, and can change all the settings within the
unit. A number of scenes can easily be setup, allowing the user to easily change between a
number of preset configurations.
Below is an example of how to set up a scene:
3. Select Scene to create a
new Scene
4. Press the Pen next to
“Please Enter Scene Name” to
input the name for your Scene
Show on Dashboard: Leave
this on if you require the scene
to be displayed as a button on
the Home Screen
Press the Red Plus to add the
action required. Then select
the air purifier from the list of
devices.
5. Chose the function, set the
value for the function, and
then press the back button in
the top right corner, to return
to the previous screen.
6. Once all the functions required have been added, press the Save button in the top right corner to
finalise and save your new Scene
1. Press on the Smart Scene
tab at the bottom of the
Home screen
2. Press on the Plus in the top
right corner to add a smart
scene.
19
AUTOMATION
Automation allows an automatic action to be set up for the device. This can be triggered by
the Time, air quality of the room, weather conditions, and a range of other influences.
1. Press on the Smart Scene
tab at the bottom of the
Home screen
2. Press on the Plus in the top
right corner to add a smart
scene.
3. Select Automation to
create a new Automation
Scene
4. Setup is very similar to the
scene setup on the previous page,
and includes an extra section for
specifying a trigger for the scene to
start.
Press the Pen next to “Please
Enter Scene Name” to input the
name for your Scene
Press the Red Plus next to “When
any condition is satisfied” to add
the trigger
Press the Red Plus next to
“Execute following actions” to add
the action required. Then select
the air purifier from the list of
devices.
6. Chose the function,
set the value for the
function, and then
press the back button
in the top right corner,
to return to the
previous screen.
5. Select the condition when the
automation should start. A
number of triggers can be
combined.
7. Once all the functions required have been
added, press the Save button in the top right
corner to finalise and save your new scene.
The automation is now set up, it can be turned on
and off using the toggle on the image shown on
step 2.
20
PROFILE TAB
The profile tab gives you the option to edit both your
detail, and use the added features of the unit.
CHANGING THE NAME OF YOUR DEVICE
When in any of the device screens further settings for
the device can be accessed, by pressing on the three
dots in the top right hand corner. The top option
within this allows you to change the name of the
device to something relevant to the use of the
product, such as “Living Room Air Purifier”. Within
the menu, you also have the option of setting up a
pattern lock or change your password.
DEVICE SHARING
This allows you to share access to the controls of
your air purifier with friends and family.
INTEGRATION
This allows the unit to be integrated with your
favourite home automation hardware such as Google
Home and the Amazon Echo.
CONNECTION TROUBLESHOOTING
1. Check whether the device is powered on and is in the correct WIFI connection
mode, if not please refer to the CHANGING BETWEEN CONNECTION MODES
section.
2. Ensure the WIFI password has been entered into the app correctly (Case
sensitive)
3. Check that the phone is connected to the WIFI you are connecting the device to.
4. Ensure the network you are connecting it to is 2.4Ghz (5Ghz WIFI networks are
not supported), and that there is a strong WIFI signal to the item.
5. If your router is dual band, ensure that the 2.4ghz network has a different network
name (SSID). Further advice on changing router settings will be available from
your Internet service provider / Router manufacturer.
6. Check the settings on the router. Encryption should be WPA2-PSK and
authorisation type should be set to AES
7. Try using the alternative connection method. i.e. If connection is failing when
attempting to connect through CF mode, try AP mode.
  • Page 1 1
  • Page 2 2
  • Page 3 3
  • Page 4 4
  • Page 5 5
  • Page 6 6
  • Page 7 7
  • Page 8 8
  • Page 9 9
  • Page 10 10
  • Page 11 11
  • Page 12 12
  • Page 13 13
  • Page 14 14
  • Page 15 15
  • Page 16 16
  • Page 17 17
  • Page 18 18
  • Page 19 19
  • Page 20 20
  • Page 21 21
  • Page 22 22
  • Page 23 23

ElectrIQ EAP600HCUV-WIFI User manual

Category
Air purifiers
Type
User manual

ElectrIQ EAP600HCUV-WIFI is a smart Wi-Fi-enabled air purifier designed to improve indoor air quality and provide multiple stages of air purification. It features HEPA, photocatalytic, activated carbon, and molecular sieve filters to remove 99.9% of airborne particles, unpleasant odors, and harmful substances. Additionally, it employs a UVC lamp and plasma ionizer to sterilize the air, removing bacteria, viruses, mold spores, and allergens.

Ask a question and I''ll find the answer in the document

Finding information in a document is now easier with AI