Page is loading ...

THE INFORMATION CONTAINED IN THIS DRAWING IS
THE SOLE PROPERTY OF SYNERGY MFG. ANY
REPRODUCTION IN PART OR WHOLE WITHOUT THE
WRITTEN PERMISSION OF SYNERGY MFG IS
PROHIBITIED.
Revisions
Rev.
Description
Date
Approved
A
Initial Release Per ECO 17-050
11/15/17
AS
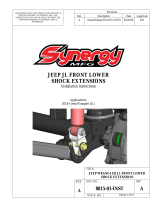
Jeep TJ/LJ Front Lower
Shock Extension
Installation Instructions
Applications:
1997-2006 Jeep Wrangler (TJ/LJ)
TITLE:
JEEP TJ/LJ FRONT LOWER SHOCK
EXTENSION INSTALLATION
INSTRUCTIONS
SIZE
DWG NO:
REV
A
8167-01-INST
A
SCALE: N/A
PAGE 1 OF 6

JEEP TJ/LJ FRONT LOWER SHOCK EXTENSION
INSTALLATION INSTRUCTIONS
DOC NO. 8167-01-INST PAGE 2 OF 6
Thank you for purchasing the best aftermarket products available for your vehicle. We strongly feel that the
parts you are about to install should meet or exceed your expectations for performance. Proper assembly is
critical to the performance of these components and the vehicle as a whole. Please take the time to carefully
read these instructions and familiarize yourself with the installation procedure before working on your
vehicle. If you have any questions PLEASE contact Synergy Manufacturing BEFORE beginning
installation. Thanks again for supporting Synergy – enjoy the performance benefits of the best aftermarket
products available for your vehicle!
Synergy Manufacturing
Phone: (805) 242-0397
Email: [email protected]
Modifying or otherwise altering vehicle components may cause the vehicle to handle differently than
originally designed. It is the driver’s responsibility to familiarize themselves with the performance and
handling characteristics of the modified vehicle. Vehicles with larger diameter than stock tires must be
driven carefully and cannot be expected to perform as stock or meet OEM performance with regard to
handling, braking or crash performance. Ensure all replacement components are compatible with vehicle
capacities so as not to overload components, especially tires. It is up to the individual to ensure that the
vehicle and all components are compatible with the intended vehicle use, including load ratings, road
conditions, and driver abilities. Thorough and frequent vehicle inspections are recommended to ensure a
safe and reliable state of readiness, especially after off-highway use.

JEEP TJ/LJ FRONT LOWER SHOCK EXTENSION
INSTALLATION INSTRUCTIONS
DOC NO. 8167-01-INST PAGE 3 OF 6
Parts List
8167-01 JEEP TJ/LJ FRONT SHOCK RELOCATION BRACKETS
QTY
Part Number
Description
2
816701-PC
JEEP TJ/LJ FRONT LOWER SHOCK EXTENSION, POWDERCOATED
4
N/A
3/8-16 X 1.25” GRADE 8 HEX HEAD BOLT
4
N/A
3/8-16 LOCK NUT
8
N/A
3/8 GRADE 8 FLAT WASHER
GENERAL NOTES
These instructions are also available on our website; www.synergymfg.com.
Check the website before you begin for any updated instructions and
additional photos for your reference.
The Jeep Wrangler platform has a large array of aftermarket parts available.
Not all parts will work with each other. It is up to the end user to determine
which parts are compatible with their vehicle. These mounts are designed
to allow the Synergy 2” front lift springs to cycle through the designed
range of movement with most aftermarket 0-2” lift shocks but may be
useful in many other scenarios.
Tools Needed
Basic hand tools
Wrenches or sockets in sizes: 13mm and 9/16”
7/16” drill bit and drill
Estimated Installation Time
1 Hour

JEEP TJ/LJ FRONT LOWER SHOCK EXTENSION
INSTALLATION INSTRUCTIONS
DOC NO. 8167-01-INST PAGE 4 OF 6
Installation
1. Remove the lower end of the shocks from the axle brackets. See Figure 1.
Figure 1. Lower Shock End in Axle Bracket
2. Use a 7/16” drill bit to slightly increase the diameter of the stock shock mounting bolt holes in the
axle. See Figure 2.
Figure 2. Drilling Out Shock Mounting Holes

JEEP TJ/LJ FRONT LOWER SHOCK EXTENSION
INSTALLATION INSTRUCTIONS
DOC NO. 8167-01-INST PAGE 5 OF 6
3. Install shock extension brackets with the 3/8” hardware on the axle with the opening facing up and
the bent edges out, the welded edges facing the center of the vehicle. Use a washer under each bolt
and under each nut. See Figures 3 and 4.
Figure 3. Shock Extensions Installed With Opening Facing Up, Bent Edges Out
Figure 4. Shock Extensions Installed With Bent Edge on Right, Facing Tire

JEEP TJ/LJ FRONT LOWER SHOCK EXTENSION
INSTALLATION INSTRUCTIONS
DOC NO. 8167-01-INST PAGE 6 OF 6
4. Install shocks on the top of the shock extensions with the stock hardware. See Figure 5.
Figure 5. Shock Installed on Extension with Stock Hardware
5. Torque stock hardware to 21 lb-ft and new 3/8” hardware to 35 lb-ft. Recheck hardware after the
first 100 miles.
Installation is complete!
/
