Page is loading ...


ENGLISH
OPERATING INSTRUCTIONS FOR THE STREAMLIGHT STINGER
®
LED FAMILY INCLUDING: STINGER
®
LED, STINGER DS
®
LED,
POLYSTINGER
®
LED, POLYSTINGER DS
®
LED, STINGER
®
LED HP &
STINGER DS
®
LED HP
Thank you for selecting the Stinger LED, Stinger DS LED, PolyStinger LED, PolyStinger DS LED,
Stinger LED HP or Stinger DS LED HP. As with any fine tool, reasonable care and maintenance of
this product will provide years of dependable service.
Please read this manual before using your Stinger LED, Stinger DS LED, PolyStinger LED, PolyStinger
DS LED, Stinger LED HP or Stinger DS LED HP. It includes important safety and operating instructions
and should be saved.
Flashlight must be charged overnight before first use.
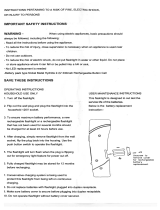
USING THE LIGHT
The Stinger LED, Stinger LED HP & PolyStinger LED feature a head-mounted push button switch.
The Stinger DS LED, Stinger DS LED HP & PolyStinger DS LED feature a second independent tactical
push button tailcap switch.
• Depress the pushbutton switch once to turn the light on at full intensity.
• Press and hold the switch to cycle through brightness levels. Release at desired level.
• A quick double-click of the switch will activate the rapid flash function.
• A single press of the switch from any “on” mode will turn the flashlight off.
SAFETY
A. While eye damage from the Stinger LED Family of lights is unlikely, it is a Class 2 LED product and
YOU SHOULD NOT STARE INTO THE BEAM
.
B. The Stinger LED Family of lights is not approved for use in hazardous atmospheres.
C.
SAVE THESE INSTRUCTIONS
. This manual contains important safety, operating and maintenance
information for your flashlight and charger.
D.
CAUTION:
To reduce risk of fire, electrical shock, or personal injury, do not attempt to use the
charger to recharge any other product. Likewise, do not attempt to charge the Stinger LED Family of
lights with any other charger.
E. Do not try to repair the unit or charger yourself. Take it to a qualified service facility or return it to
the factory.
F. Use only battery #75175. The contact arrangement in the flashlight precludes the use of other
batteries. Recycle worn out or damaged batteries properly. Do not attempt to incinerate the battery
as it may explode in a fire. Handle the battery carefully and never allow it to short circuit.
G. Use of this product for other than a lighting device is not recommended. Streamlight specifically
disclaims liability for other than recommended use.
CAUTION LED RADIATION –
AVOID DIRECT EYE EXPOSURE – CLASS 2 LED PRODUCT
Maximum LED output<60 mW per IEC 60825-1. Edition 1.2 2001-08

CHARGING
Fully charge your flashlight before first use. Several charge/discharge cycles may be needed to
achieve full battery capacity. The flashlight may be stored in the charger continuously when not
in use.
To charge the flashlight, first turn it off and insert it into the charger. The triangular plate on the
head fits into a mating recess in the charger. With the plate toward the charger, slip the barrel of
the light between the charger arms and pull downward until it locks into place. The red LED on the
charger housing must light to insure that the battery is being charged.
Keep the flashlight and charger contacts clean at all times. Poor contacts can cause charger
malfunction. An abrasive pencil eraser works well to clean the contacts.
STEADY CHARGER
Full charge in 12 hours. Red LED remains on as long as flashlight is in the charger.
FAST CHARGER
The optional Fast Charger will charge a fully depleted battery within 2.5 hours. When the flashlight
is inserted into the Fast Charger, the red LED on the charger will blink rapidly a few times and then
light steadily, indicating the fast charge rate is being applied. When the charger senses that the
battery has received a full charge, the charger switches to a lower “maintenance” rate and the red
LED blinks. A secondary safety circuit will discontinue the fast rate after approximately 3.5 hours if
for any reason the primary circuit fails to terminate the fast charge.
NOTE: Observe the red LED:
1. If the LED does not blink rapidly and continuously, indicating a full charge, within 2.75 hours check
the contacts and the charger’s power supply wiring. If no obvious problem is found, return the
system to Streamlight for service.
2. Proper function of the fast charge circuitry can be determined by inserting a flashlight into the
charger for at least 5 minutes. Turn the flashlight “on” and the red LED should switch to blink mode
within 5 minutes.
The Fast Charger is equipped with circuitry to prevent fast charging in temperature extremes
(below 40˚ F and above 115˚ F). When temperature is within the acceptable range fast charging
will begin.
PIGGYBACK
®
CHARGER
Available in fast and steady models (primary charger), Piggyback chargers feature a steady•rate
charger holder for a spare battery. The red Piggyback LED will glow indicating charge a long as the
battery remains in the charger.
NOTE: When the spare battery is out of the Piggyback charger, keep the yellow battery cap over the
battery contacts to avoid shorting out the battery.
Before mounting a Streamlight charger in a vehicle, please read the following sections.
CHARGER MOUNTING
The charger should never be mounted against any heat sensitive surface.
Before drilling any holes, make sure there is room to insert and remove the flashlight.
Two (2) self•tapping #8 x 2” screws are included to mount the charger. The correct size hole for
these screws in sheet metal is 1/8.”

VEHICULAR CHARGING
A 12VDC power cord (#22051) is equipped with a cigarette plug and is available for mounting a
Streamlight charger in a vehicle. The plug can be removed and the wires can be attached directly
to a power source for a more permanent installation. (A two amp fuse must be used on the positive
lead.)
IMPORTANT: Before making electrical connections in a vehicle, keep in mind that a shorted auto
battery can easily start a fire. Make all connections with insulated lugs or other connectors intended
for such use. Be sure that your installation is fused.
The striped power lead is positive and the unmarked lead is negative. When connecting the charger
to a fuse block the striped, positive power lead goes to the connector that is dead when the vehicle’s
fuse is removed. The charger body is electrically isolated from the charge circuit and allows positive
ground installations. The charger is diode protected and if connected in reverse polarity simply won’t
operate until connected properly.
Streamlight recommends connecting chargers to an unswitched source of power to ensure the
flashlight is always fully charged. If the vehicle will not be driven for several days, the flashlight
should be removed from the charger to avoid vehicle battery drain.
Charging the flashlight with a Steady Charger draws a constant .2 amperes from a vehicle.
The optional Fast Charger will draw between .5 and .7 amps for up to 2 1/2 hours during the fast
charge period. During maintenance charge, current is pulsing and effectively draws .1 amps.
BATTERY REPLACEMENT
Simply unscrew the tailcap and slide the battery from the flashlight. Replace the battery inserting
the contact end first and reattach the tailcap.
CARE AND USE OF NICKEL-CADMIUM BATTERIES
In order to obtain the maximum performance and life from nickel•cadmium batteries:
1. Do not periodically “condition” or “exercise” your flashlight battery despite what you may have been
told about nickel-cadmium “memory.” The actual existence of “memory” in a battery used under the
conditions of flashlight service is extremely unlikely. Streamlight specifically discourages a regular
cycle of deep discharging, which is not only unnecessary, but will greatly shorten battery life and
could lead to a hazardous battery failure.
2. Rarely there may be a small leakage of alkaline electrolyte from the safety vent on top of the
cell. It appears as a powdery substance and can affect the integrity of the electrical contact. We
recommend that your battery be periodically inspected and the contact area wiped clean. Use
caution when handling a battery that has leaked. The electrolyte is a strong caustic and can burn or
irritate the skin and eyes.
3. Although the flashlight is designed to be left on charge continuously, there is an exception; if the
surrounding temperature is below 10°F, continuous charging is not recommended.
Genuine Streamlight Parts and Accessories.
IMPORTANT: Be sure to use genuine Streamlight replacement parts.

STREAmLIghT
®
LImITED LIfETImE WARRANTY
Streamlight warrants this product to be free of defect for a lifetime of use. We will repair, replace
or refund the purchase price, at our option, of any Streamlight product that does not work or that you
manage to break for as long as you own it.
Of course, this limited lifetime warranty excludes abuse, batteries and chargers. Rechargeable
batteries and chargers have a one (1) year warranty with proof of purchase. Please return your
Streamlight to our factory to take advantage of this guarantee. Go to www.streamlight.com for the
location of an authorized Streamlight repair center near you.
Serial # ___________________________________________________________________
Date of Purchase_________________
This warranty gives you specific legal rights and you may also have other rights.

IMPORTANT – Be sure to use genuine Streamlight
®
replacement parts.
PRODUCT USE: The Streamlights are intended for use as high intensity, heavy duty, recharge-
able, portable light sources. Use of the Streamlights for any purpose other than light sources is
specifically discouraged by the manufacturer.
The rechargeable battery contained in this product is recyclable. At the end of its useful life,
under various country and state laws, it may be illegal to dispose of this battery in the municipal solid waste stream.
Check with your local solid waste officials for details in your area for recycling options or proper disposal.
©2009 997547 Rev F 8/09
/