Page is loading ...


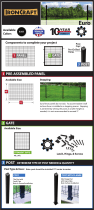
Euro Style Composite Fencing
Installation Instructions
Tools Needed:
Supplies:
Prior to installing fencing:
Prior to digging, confirm location of underground utilities with local
authorities.
Apply for permits if required by local authorities and codes.
Local zoning laws, neighborhood associations and/or historic districts may
regulate size, type, placement and ability of fencing. Ensure compliance
prior to installation.
For questions or more information please visit
www.homedepot.com
Saw
Wrench
Rubber Mallet
Auger
Wood Anchor*
*for Surface
mounting to
concrete or
wood
Concrete Anchor*
Power drill

1. Planning:
Determine total area to be fenced.
Site-Built installation: Ensure the right amount of boards and components per section.
Make adjustments for odd widths at the back corners or build partial sections equally. Example: if
you have 8 feet left in a run, consider building two 4ft sections rather than a 6ft and a 2ft.
Determine the number of posts including gate post & gate location (if applicable).
2. Layout (See diagram below)
2A. Establish total area to be fenced. Insert stakes 6” inside of proposed area extending an additional 3’
laterally so as not to disturb string lines when digging post holes.
2B. Attach string line to staked area. Verify corners are square using the 3’ x 4’ x 5’ method.
2C. Fence corners are determined by where strings intersect.
2D. Mark locations for subsequent posts starting with the first location and measuring the appropriate
distance determined by install method.
• 72” Post center to Post center
Mark gate location and size.
Place proper post at each location.
Tip: When marking measurements with spray paint, mark both the ground and string (see illustration).
For questions or more information please visit
www.homedepot.com
72”


Euro Style Composite Fencing
Installation Instructions
Sloped Terrain
**If your yard is not completely flat and has sloped terrain, please refer
to the following:
Determining Slope
Before you purchase or gather materials to build a fence, take the time to determine
the slope of your yard. Stake out the end points along the perimeter of your fence.
Tie mason line in between the two points. Instruments such as a water level or a
transit help you determine if the line between the two points is level. You may need
to run mason line between more than two points if the slope is extra steep to get an
accurate reading.
Sloped Properties
There are 4 ways to deal with sloped ground when building a Euro Style fence.
• The first option is to grade the slope. Grading a slope involves cutting, digging
and re-directing the land so that it is level. However, this process may not fit your
budget or schedule, as it is time consuming and costly.
• The second option is to step build your fence so that it follows the slope of your
property, leaving gaps between ground and bottom of fence.*
• The third option is to rack the fence so that if follows the slope of your property,
leaving no gaps in between the ground and bottom of the fence.
• The fourth option is to run the tops of the fences straight, so each section is lined
up with each other, leaving gaps at the bottom.*
*maximum height of 78” from ground to post top.
For questions or more information please visit
www.homedepot.com
/