Page is loading ...

INSTALLATION INSTRUCTIONS
THANK YOU...
for selecting an American Standard . . . the benchmark of fine quality for over 100
years. To ensure that your installation proceeds smoothly--please read these instructions carefully
before you begin. All you need to finish the installation are your selected fittings. (Certain installations
may require professional help.) Also be sure your installation conforms to local codes.
GENERAL INSTALLATION INFORMATION
Carefully uncrate and inspect your new bath for any
shipping damage. If such damage is found, report it to
your vendor immediately.
Protect all finished surfaces of the bath during
construction and installation using a drop cloth. If
packaging foam is removed for inspection purposes,
save for foot installation procedure.
Fittings (bath filler, drain, feet, and water supplies) are
not provided with the bath and must be ordered
separately.
752515-100 Rev. D
© American Standard Inc. 2002
All product names listed herein are trademarks
of American Standard Inc. unless otherwise noted.
HIGH GLOSS ACRYLIC
FITTINGS NOT INCLUDED
List of Required Components (not included):
• 1591.170 Drain*
• 9112.017 Bath Filler*
• 9114.012 Water Supplies*
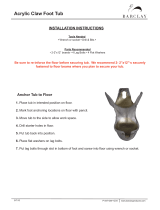
• 9111.039 Ball & Claw Feet
• 9110.039 Reminiscence Feet
* Available at your American Standard Distributor
List of Required Tools and Supplies:
Tools
• Drill
• Drill bits for wood
or tile
• Level
• Tape Measure
• Pipe Wrench
• Crescent Wrench
• Slip Joint Pliers
• Screw Driver
• Standard
Woodworking Tools
• Personal Safety
Equipment
• Caulking Gun
Supplies
• Putty
• Caulking (silicone)
• 1/4" - 20 x 3"
toggle bolts
• flat washers
(as required)
• 1/4" lockwasher (4)
• 1/4" nut (4)
• Masonry Anchor
(concrete installations)
• 5/16" Lag Bolts
(wood floor installations)
FOR AFTER-SALES SERVICE CALL 1 (800) 223-0068 WEEKDAYS.
INSTALLER: PLEASE LEAVE THESE INSTRUCTIONS
WITH HOMEOWNER AS THEY PROVIDE IMPORTANT
CLEANING INFORMATION.
Fig. 1
72-1/8 x 37-1/2 x 27-1/4 In.
(1832mm x 953 mm x 692mm)
130 Lbs. (59 Kg.)
413 Lbs. (186 Kg.)
34 Gal. (129 L)
18 x 42 In. (457mm x 1067mm)
67 x 31 In. (1702 x 787mm)
14 In. (356 mm)
22 LBS./Sq. Ft. (107 Kgs/Sq. m. )
23.8
48.3
GENERAL SPECIFICATIONS FOR 2908 BATHING POOL
INSTALLED SIZE
WEIGHT
WEIGHT w/WATER
GAL TO OVERFLOW
BATHING WELL AT SUMP
BATHING WELL AT RIM
WATER DEPTH TO OVERFLOW
FLOOR LOADING
(PROJECTED AREA)
PTS.
CUBE (FT
3
)
953mm
(37-1/2)
*
724mm
(28-1/2)
114mm
(4-1/2)
140mm
(5-1/2)
127mm
(5)
89mm
(3-1/2)
TYP.
343mm
(13-1/2)
57mm
(2-1/4)
C/L OF 1/2 NPT
SUPPLIES
C/L OF
DRAIN
FINISHED WALL
FINISHED
FLOOR
REMINISCENCE
FOOT
1-3/8 O.D.
TAILPIECE
C/L OF
OVERFLOW
38mm
(1-1.2)
REMINISCENCE
BALL &
CLAW FOOT
1832mm
(72-1/8)
464mm
(18-1/4)
REF.
870mm
(34-1/4)
REF.
692mm
(27-1/4)
584mm
(23)
OUTLINE OF
SKID RESISTANT
SURFACE
H
C
C/L
368mm
(14-1/2)
203mm
(8)
508mm (20)
699mm
(27-1/2)
108mm
(4-1/4)
114mm
(4-1/2)
324mm
(12-3/4)
FINISHED WALL
1/2 N.P.T. INLETS
WALL FLANGES
W/SCREWS
PROVIDE CROSS
BRACING IN WALL
FOR ANCHORS

INSTALLATION INSTRUCTIONS
The variety of installations possible for this bath may require installation procedures other than those shown. Ensure roughing-
in dimensions are proper, plumb and square. Provision must be made in all installations to attach bath to floor. Slots
are provided in each foot for fastening purposes. Use appropriate fastening hardware according to your flooring
construction.
NOTE: Water supplies and bath drain should be installed prior to securing bath to floor.
1. Remove bath from packaging, do not remove protective foam cover from bath.
2. Carefully turn bath upside down and set on floor. Foam will protect finish of bath as assembly is completed.
3. Unpack feet to be mounted to bath, each foot is individually marked on the back with the numbers 1, 2, 3, or 4.
4. Using the fasteners provided with the feet, mount feet onto bath in the appropriate position, as shown in Fig. 2 below.
Three holes are provided in each leg. Feet may be adjusted as necessary to provide best fit, and smallest gap between
bath and foot. When attaching bolts, use two of the closest holes that provide the best fit. Some space between bath and
feet is normal due in part to the manufacturing tolerances of this product.
5. After foot mounting is complete, carefully upright bath to normal position. Move bath into desired position. (See rough-in
drawing for dimensions of bath filler supplies from wall.)
6. After bath is in position, mark on floor, through the slot in each foot, for rigid mounting bath to floor.
7. Move bath to a safe location.
8. CAUTION: bath must be secured to floor. Select one of the following methods for anchoring: If hole was drilled
through floor, toggle bolts should be used to secure bath. If floor is concrete, use masonry anchors and appropriate bolts.
If floor is solid wood, 5/16" lag bolts may be used. Drill flooring material with appropriate drill bit.
752515-100 Rev. D
(2)
DRAIN CONNECTION ASSEMBLY AND LEAK TEST
Follow instructions provided with drain for proper assembly procedure. Provide a 1-3/4" dia. hole through floor in location
specified in Fig. 1, connect bath drain to waste line. Tighten all drain joints securely. Clean the bath and fill with water and
check for leaks around all drain connections.
POST INSTALLATION CLEAN-UP
Remove all construction debris from bath. Do not use wire brushes or any other metal implement on bath surface.
Post installation clean-up generally can be completed using warm water and liquid dishwashing detergent. Stubborn dirt or
stains may be removed using granular Spic and Span
®
mixed with water.
Painter's naphtha can be used to remove excess adhesives and/or wet oil-base paint.
HARSH CHEMICALS SHOULD NEVER BE USED ON ACRYLIC SURFACES.
Abrasive cleaners must not be used since they will scratch and dull the surface. Dulled areas can be restored by rubbing with
a white automotive-type polishing compound and waxing with a liquid wax.
If a scratch should occur in the backing material, it is easily repaired by using paste or liquid shoe polish followed by buffing.
#1
Fig. 2
Front
of Bath
#3
#4
#2
Foot Ledge
Floor
attachment
slot
Foot
BATH
Frame
/