Page is loading ...

1
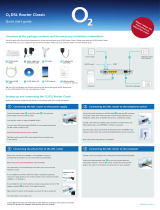
TECHNICOLOR TG789VAC V2 GATEWAY
INSTALLATION GUIDE FOR AT&T
FIRMWARE VERSION 10.5.8.U AND LATER
AT&T MANAGED BROADBAND
Document version 3.0
5/17/2018

2
File: Technicolor TG789VACv2 Installation Guide .docx
Version: 3.0
Number of pages: 39
Release date: 17-05-2018
Previous version: 2.0
Planned revision date: n/a
This document will be updated, if appropriate, after management reviews, for legal or technical reasons.
Change history
Version
Changes
0.1
Draft version
1.0
Final version
1.1
Fixed typos
1.2
Fixed typos
1.3
Update for AT&T custom firmware 10.5.2.O with AT&T specific
embedded templates
LAN port 4 is always management port
Changed the name AT&T Netgate into AT&T VPN Gateway
2.0
ADSL/VDSL/FTTH router configurations + basic wireless setup for
firmware 10.5.2.O
3.0
TG789VAC v2 support
IPv6 support in Router mode, IPv6 transparent in Bridge mode
AT&T custom firmware 10.5.8.U with templates
Service names updated

3
TABLE OF CONTENTS
1 Introduction ............................................................................................................................................................... 5
1.1 Welcome letter .................................................................................................................................................. 6
2 Technicolor Gateways ................................................................................................................................................ 7
2.1 Technicolor TG789VAC v2 gateway.................................................................................................................... 7
2.2 Customized firmware ........................................................................................................................................ 9
2.3 External configuration software ........................................................................................................................ 9
3 Physical installation .................................................................................................................................................. 10
3.1 Package description ......................................................................................................................................... 10
3.2 Physical Installation Environment ................................................................................................................... 11
3.3 Connections Overview .................................................................................................................................... 11
3.3.1 Splitterless ................................................................................................................................................... 11
3.3.2 Installation of a POTS splitter ...................................................................................................................... 12
3.3.3 Installation of an ISDN-splitter .................................................................................................................... 13
4 Start of the installation ............................................................................................................................................ 15
4.1 Initial Setup ..................................................................................................................................................... 15
4.2 Reconfigure my GATEWAY ............................................................................................................................... 21
4.2.1 Securing the gateway .................................................................................................................................. 24
4.2.2 Configuring the network access credentials ............................................................................................... 24
4.2.3 Access Line type .......................................................................................................................................... 25
4.2.4 Network time Protocol ................................................................................................................................ 26
4.2.5 Wireless LAN configurations ....................................................................................................................... 26
4.2.6 Finalizing the configuration ......................................................................................................................... 29
4.3 The web interface to the gateway ................................................................................................................... 30
5 Installation troubles ................................................................................................................................................. 33
5.1 Installation menu did not appear .................................................................................................................... 33
5.2 Wizard did not detect the Gateway................................................................................................................. 33
5.3 LED diagnostics ................................................................................................................................................ 35
5.4 Browsing to the Gateway ................................................................................................................................ 36
5.5 Troubleshooting .............................................................................................................................................. 37
5.5.1 How to perform a hardware reset to factory defaults. ............................................................................... 37
5.5.2 Factory default service settings .................................................................................................................. 37
5.5.3 Wrong configuration profile selected ......................................................................................................... 37
5.6 Helpdesk contact phone numbers .................................................................................................................. 38
5.7 Software download ......................................................................................................................................... 38

4
Preface
This document describes how to install the Technicolor TG789VAC v2 ADSL/VDSL2/FTTH gateway provided by AT&T as
part of the AT&T Managed Broadband access. AT&T Managed Broadband is available in selected countries, each
country requires a country specific configuration. This guides you through the set-up process and provides a short
problem determination flow. The Installation guide proposes two different ways to configure the Technicolor
TG789VAC v2 device:
• Configuration for Ethernet connected VPN-devices like the AT&T VPN Gateway, uCPE110, uCPE115, Flexware
or Cisco Ethernet based routers e.g. 881/1921.
• Basic configurations for Home Office VPN users supporting AT&T VPN based services using the AT&T Global
Network Client, such as SD-WAN Static Network Based (fka ANIRA) , SD-WAN Static OTT (fka AVTS) and AVPN
Internet Aggregation. In this configuration the TG789VAC v2 LAN can be shared with other Internet users.
This document does not integrate the AT&T VPN Gateway or AT&T Global Network Client installation guides, please
refer to your AT&T account representative to obtain this documentation.
Have a good installation and enjoy quality AT&T services.

5
1 INTRODUCTION
This documentation describes the TG789VAC v2 gateway, its physical installation, its configuration, how to get support
and a modem problem determination flow.
• Welcome letter
• Package description
• Modem description
• Physical installation
• Modem configuration
• Most common configuration problems

6
1.1 Welcome letter
AT&T Business
Subject: Do-it-yourself installation package
Service: Managed Broadband (IP DSL) for
• SD-WAN Static OTT (fka AVTS)
• SD-WAN Static Network Based (fka ANIRA)
• AVPN Internet Aggregation
Dear Customer,
Thank you for your confidence in the AT&T Managed Broadband Service. This access technique provides you with high-
speed connection to your Corporate Network and the Internet.
AT&T delivers Managed Broadband service in close cooperation with a central person / support group within your
company (Customer Point of Contact or CPOC). This group would distribute the Do-It-Yourself package and is also
responsible for a correct set up of your network settings. To ensure a controlled flow of information and equipment,
the support group will be the interface between you as end-user and AT&T.
At this moment, we are in the progress of enabling your DSL line(s). As soon as the line is ready, we will inform the
support group within your company, so you can commence with the installation of the modem and start using the
service.
Now you have received the Do-It-Yourself installation package. So following the installation guidelines included in this
package, you can install the xDSL modem. The modem is pre-configured; so minimal configuration is required. If you
applied for AT&T assisted installation, the installation will be done for you at the agreed date.
Please note that 10 working days after we have enabled your DSL connection, we will begin to charge your company
the agreed monthly DSL connectivity fee and monthly service charge. We recommend you read through the
installation guideline within this period. In case the DSL installation does not function to your satisfaction, please
contact your support group within the 10 working days so we are able to postpone the moment of billing.
AT&T is fully dedicated to ensuring high performance of your DSL connection. In case you experience problems or you
have any questions, our Support Center is fully dedicated to provide you with support. Please, address your question
to the support group within your company, after which they can call our Support Center. In order to offer the best
assistance, please make sure your support group has your Account and User ID nearby.
Yours sincerely,
AT&T Enablement Team
AT&T Global Network Services

7
2 TECHNICOLOR GATEWAYS
This chapter describes the Technicolor TG789VAC v2 DSL gateway, which is one of the modems/gateways used by AT&T
on DSL connections.
2.1 Technicolor TG789VAC v2 gateway
The TG789VAC v2 is an Integrated multi-mode ADSL/VDSL/FTTH gateway, supporting:
• ADSL over POTS for a TG789VAC v2 ADSL/POTS variant (Plain Old Telephone Service), an analogue telephone
line.
• ADSL/RE-ADLS2/ADSL2/ADSL2+
• VDSL2 with Vectoring technology
• Support for FTTH via Gigabit-Ethernet WAN port
• Firmware 10.5.8.U and later
• Auto-sensing for ADSL/VDSL2 and switches between them
• 4 ports Gigabit-Ethernet auto-sensing port for LAN connections.
• An USB-port to connect to a workstation or 3G USB stick.
• 2 FXS ports and VOIP functionality.
• Wi-Fi IEEE 802.11b/g/n/ac, will not be used in standard configurations, can be enabled via GUI and external
software.
The TG789VAC v2 gateway is a versatile device, which can be configured as a bridge or a router (or gateway) to suit all
different DSL environments. It has a built-in firewall which makes it possible to protect the LAN-side or Home network
from unauthorized access from the Internet.
Illustration 2.1: Technicolor TG789VAC v2gateway
The TG789vn supports several features, which are not supported by AT&T:
• Printer server function
• USB 3G function
• Voice over IP
• IPTV
These functions have been disabled.

8
The LED functions:
A
Power LED
B
Ethernet LAN switch
C
Wireless indication 1x 2.4 GHz, 1x 5GHz
D
Broadband
E
Internet
The remaining LEDs will not be used.
Illustration 2.2: LED overview
The ports to connect all cables to are at the backside of the modem. The layout of the ports is displayed in illustration
2.3.
Illustration 2.3: The port layout of the TG789VAC v2
The ports used are the yellow 4-port switch and the gray DSL-port. In some circumstances the red GigabitEthernet port
is used for FTTH support. This connection must then be made to an external fiber-optic modem.
The power socket is located next to the power switch on the right hand side on the modem.

9
On the right side of the black power button the reset button is visible in a small hole.
2.2 Customized firmware
The TG789VAC v2 now uses a customized firmware which better suits AT&T requirements and gives better on-site
configuration support. Most important elements:
• The default user is now “ATTuser” , which after configuration only has user rights.
• The gateway WAN connection is auto-sensing for ADSL and VDSL2 and enables’ the required connectivity
models. No reboot is required.
• Embedded templates
◦ Bridge mode
◦ Austria; this model switches between ADSL with PPPoA to VDSL2 with PPPoE, and supports DHCP-
spoofing on both. This means the LAN attached client device can remain in DHCP mode and does not
need to be reconfigured. This device receives the public Internet address on its Wide Area Network
interface.
The configuration for specific countries will be done via external template files. These allow configuration as router
with support for Secure WiFi as well.
2.3 External configuration software
AT&T needs to support access in over 20 countries and wants to present the same hand-off and customer environment
in all situations. To support this AT&T has made external configuration software available via the AT&T global ftp
server, from which is can be downloaded. The software can be found via this URL:
ftp://ftp.attglobal.net/pub/MoW_Broadband/
The configuration options prepared are intended to support an ethernet attached IP VPN device for a small office or a
shop, or as standalone router with a dual-antenna wireless option. Both options can support IPv4 and IPv6 dual stack
environments. By default the AT&T IP DSL environment supports allocation of an IPv6 /128 prefix, and also a /60
Delegated IPv6 prefix to use for SLAAC or DHCPv6 IPv6 addressing on the LAN side of the router.

10
3 PHYSICAL INSTALLATION
This chapter describes the physical installation of the TG789VAC v2 Technicolor Gateway
model, hereafter called “DSL-device”.
3.1 Package description
The following items should be present in the Do-It-Yourself (DiY) package:
• 1 Technicolor TG789VAC v2 gateway box containing:
◦ 1 TG789VAC v2 modem
◦ 1 PSU
◦ 1 RJ11 cable
◦ 1 RJ45 Cat5e Ethernet straight cable
• Country localization kit containing
◦ 3 RJ 11 Straight Cables 2x 3 meters, 1x 5 meters
◦ 1 wall-socket converter if applicable
◦ 1 Splitter
◦ 1 PSU socket converter if applicable
◦ 1 Welcome letter
Examples of the RJ 45 and RJ-11 connectors:
Depending on the voice line present in the location, analogue or ISDN, the installation description differs. In some
countries the caretaker of the local loop, the actual wire-pair to the home, will install the splitter. If so, then this part
will not be included in the DiY package.
Figure 1 RJ-11 (left) and RJ-45 (right) connector.
The RJ-11 has 4 wires, the RJ-45 has 8 wires.

Page 11
11
3.2 Physical Installation Environment
The environment in which the DSL-device is being installed must have normal ventilation and support the following
conditions:
• Temperature: 0°to 40°C (32 to 105 F)
• Humidity: 20% to 80%
The DSL-device is passively cooled, so must not be placed directly on another heat-generating device.
Power requirements:
• AC voltage: 100 to 120, 220 to 240 V
• Frequency: 50/60 Hz
The adapter is auto-sensing for both voltage and frequency.
3.3 Connections Overview
The following paragraphs discuss the different installation options. Basically there are three options possible:
1. Splitterless , i.e. a direct connection from modem to wall socket
2. With a splitter (both POTS and ISDN)
3. Without a splitter (both POTS and ISDN)
3
3
3
.
.
.
3
3
3
.
.
.
1
1
1
S
S
S
p
p
p
l
l
l
i
i
i
t
t
t
t
t
t
e
e
e
r
r
r
l
l
l
e
e
e
s
s
s
s
s
s
Splitterless connectivity is also called “naked DSL”. It means there is no spectrum on the line supporting the classic
POTS phone service. If the connection is intended to support phone services, then these will consist of Voice over IP
and the phone will use a fxp port on the xDSL modem. This is not supported by AT&T. A direct connection from the
wall-socket to the modem is installed:
Figure 2 Splitterless installation for data-only xDSL access.
The connection of the RJ-11 cable to the wall-socket may require a converter to the local plug type. This should be
present in the localization kit. No line-sharing voice services are supported on the access connection.
RS CS TR RD TD CD
TALK / DATA
TALK
Ethernet cable
RJ-
11*
Wall
socket
RJ-45 RJ-45
xDSL-modem/Router
RJ-11
* Can/will differ to comply
with country standards
Replace with
Flexware, Cisco
Ethernet based
routers

12
The second part of the connection is the RJ-45 cable from the modem to the CPE, which can be any Ethernet
connected device.
3
3
3
.
.
.
3
3
3
.
.
.
2
2
2
I
I
I
n
n
n
s
s
s
t
t
t
a
a
a
l
l
l
l
l
l
a
a
a
t
t
t
i
i
i
o
o
o
n
n
n
o
o
o
f
f
f
a
a
a
P
P
P
O
O
O
T
T
T
S
S
S
s
s
s
p
p
p
l
l
l
i
i
i
t
t
t
t
t
t
e
e
e
r
r
r
POTS-splitters prevent high frequency energy from reaching the POTS device and to provide isolation from impedance
effects of the PORTS device on DSL. As the splitter is installed at the demarcation point, only 1 splitter is required for all
devices.
A POTS splitter has to be installed directly connected to the wall-socket, at the location where the phone line enters
the building, or at least between all devices and the demarcation to the telephone carrier.
Figure 3 Installation with a xDSL modem supporting line-sharing via a POTS-splitter
This picture in Figure 3 shows an example for a standard splitter. The splitter can differ per country. The splitter has 3
sockets, visible at the bottom of the illustration:
• The arrow on the left (blue) points to the socket for the phone line (RJ-11, 4 contacts), which comes from
your wall.
• The arrow in the middle (green) points to the socket for the DSL modem. This can be either an RJ-45 (8
contacts) or an RJ-11 (4 contacts) socket.
• The arrow on the right (red) points to the socket for your telephone cable (RJ-11, 4 contacts).
The device in Figure 2 states “splitter” clearly. This is not always so. If you do not know which type of splitter is
present, check the appendix A: “Country kits”.
RS CS TR RD TD CD
TALK / DATA
TALK
RJ-
11
Wall
socket
POTS-splitter
RJ-45
1 2 3
4 5 6
7 8 9
*
8 #
xDSL-modem/Router
1 2 3
4 5 6
7 8 9
*
8 #
RJ-11
or RJ-45
* Can differ to comply with country standards
RJ-11*
RJ-11*
RJ-11*
RJ-11*
RJ-11*
Phone
FAX
Phone
In-house wiring
Ethernet cable
RJ-45

Page 13
13
4. Unplug your phone connector from the wall socket and connect the splitter to the wall socket as show in
illustration 3.3.
5. Re-plug your phone to the filter, to the port called phone (on the right side in the picture).Your phone must be
always able to receive and make calls.
6. Connect the RJ11 (or RJ-45) cable to the last free socket of the filter (in the middle on the picture) and
connect the other end of the RJ 11 (or RJ-45) cable to the modem on the grey DSL connector (see rear picture
of the modem).
7. Plug the RJ45 cable into your computer Ethernet port or into the WAN-port on the AT&T VPN Gateway or
Cisco Ethernet based routers for multi-users (see AT&T VPN Gateway user guide installation) and connect the
other end on the modem to one of the yellow connectors (see the rear modem picture).
8. Connect the power cable to the modem (see rear picture of the modem).
9. Plug the power supply to a power outlet and to the TG789VAC v2.
Now the physical modem installation is done.
3
3
3
.
.
.
3
3
3
.
.
.
3
3
3
I
I
I
n
n
n
s
s
s
t
t
t
a
a
a
l
l
l
l
l
l
a
a
a
t
t
t
i
i
i
o
o
o
n
n
n
o
o
o
f
f
f
a
a
a
n
n
n
I
I
I
S
S
S
D
D
D
N
N
N
-
-
-
s
s
s
p
p
p
l
l
l
i
i
i
t
t
t
t
t
t
e
e
e
r
r
r
An ISDN installation normally has an NT1 unit installed, which is the demarcation (or end-point) of the
Telecommunication company’s responsibility of the ISDN line. An ISDN-splitter has to be installed directly connected to
the wall-socket or ISDN line, at the location where the phone line enters the home, before the line enters the NT1 unit,
as displayed in Illustration 3.4 on page 14. In some countries this is handled by the local Telephone company or
licensed installation companies, in others the customer is permitted to do this.
Figure 4 ADSLoverISDN using an ISDN splitter in the path from wall-socket to ISDN NT1.
The ISDN splitter ( Figure 4 ) is an un-powered active device, which draws its power from the ISDN line of the carrier.
RS CS TR RD TD CD
TALK / DATA
TALK
Wall
socket
ISDN-splitter
RJ-45
1 2 3
4 5 6
7 8 9
*
8 #
ADSL-modem
RJ-11
or RJ-45
NT1
RJ-11* RJ-45
RJ-45
RJ-45
RJ-45
RJ-45
RJ-11*
* Can differ to comply with country standards
RJ-11
or RJ-45
FAX
Phone
RJ-45

14
Un-plug your NT1 connector from the wall socket and connect the splitter to the wall socket with the appropriate
cable via the port called “Line” as displayed in Illustration 3.4.
1. Connect the NT1 cable to the ISDN splitter in the port marked “ISDN or Phone”. Your phone should now work
again.
2. Connect the RJ11 (or RJ-45) cable to the last free socket of the splitter (the top right on the picture) and
connect the other end of the RJ 11 (or RJ-45) cable to the DSL-device using the grey connector (see rear
picture of the modem on page 9).
3. Plug the RJ45 cable into your computer Ethernet port or into the WAN-port on the AT&T VPN Gateway or
Cisco Ethernet based routers for multi-user environments (see AT&T VPN Gateway user guide installation)
and connect the other end to the 1st yellow port of the modem (see the rear modem picture on page 9).
4. Connect the power cable to the rear of the modem (see rear picture page 9).
5. Plug the power supply to a 230V/50Hz or 110V/60Hz and to the modem.
Now the physical modem installation is done.

Page 15
15
4 START OF THE INSTALLATION
When the included AT&T Installation CD-ROM is inserted in your PC, the CD-ROM will automatically start up. The
following panel will appear:
Figure 5 Main panel
If this panel does not appear, pls open the base directory and click on “setup.exe”.
If this is the first time you configure the DSL device, click on “Initial setup”. If you already have configured the DSL
device before and you want to change some settings, select “Reconfigure my gateway”.
4.1 Initial Setup
When selecting “Initial setup” the following screen will appear:

16
Figure 6 Start of the Setup Wizard
Select “Next” to go to the next screen to select the DSL device:
A new screen with safety instructions and regulatory notices is displayed.
Figure 7 If the exact type of the device is not listed , select "Other".

Page 17
17
Figure 8
To continue confirm that you have read the instructions and notices by tagging the box. This will show the “Next”
button.
Figure 9
Click “Next”.

18
Figure 10
Click “Next”.
Figure 11
Click “Next”.

Page 19
19
Figure 12
Click “Next”.
Figure 13
Important: To configure the modem connect to port 4 of the yellow LAN ports. Port 4 is the management port and
does not support standard network functions.

20
Figure 14
Click “Continue”.
The DSL device now needs to be configured with connection specific details, so the menu will continue with the
“Reconfigure my gateway” menu.
/