Amano Amano TCX 21 Owner's manual

Category
Wall clocks
Type
Owner's manual

This manual is also suitable for

AMANO
®
TCX-11
Time Partner
Electronic Time Clock
Operation Manual
Thank you…
for purchasing another fine product from
Amano Cincinnati, Inc.
Important
Note that the government standard for DST is subject to change. Your
clock is factory-set for correct DST based upon when it was
manufactured, but any revision to DST begin or end dates may require
updating the system-set DST calendar.
If you live in Arizona, Hawaii, parts of Indiana, or any other area that
does not use Daylight Saving Time, refer to this document’s DST
settings instruction for details regarding disabling the DST function.
Do not return this clock to the retailer. If you have any questions or need
assistance, please call us toll free at:
1-800-253-9836
Proprietary Notice
This document contains proprietary information and such information
may not be reproduced in whole or part without the written permission
from Amano Cincinnati, Inc., 140 Harrison Ave., Roseland, New Jersey,
07068.
Amano Cincinnati, Inc. reserves the right to make equipment changes
and improvements, which may not be reflected in this document.
Portions of this document may have been updated to include the latest
hardware or firmware version, if applicable.
We recommend that this document be read in its entirety before any
attempt is made to operate the equipment.
Need Ribbons, Keys and Accessories?
Visit
www.amano.com
or
Call - (800)-253-9836
Amano TCX-11 Operation Manual 1
Specifications
Power Requirements: AC100V ± 10%, 50/60Hz
AC120V ± 10%, 60Hz
AC230V ± 10%, 50/60Hz
Ambient Temperature: -10°C to 45°C (14°F to 113°F)
Ambient Humidity: 10% to 90% (non-condensing)
Dimensions: 6 7/8” (175 mm) wide x 8 1/4” (210 mm) high x
6 1/4” (159 mm) deep
Weight: 3.196 Kg (7 lbs.)
Environment: Indoor use only; dust-free environment. Keep
out of direct sunlight.
External View
Print Button
Analog Clock
Print Window
LCD Display
Printer Platen
and Margin
A
d
j
ustment
Cover Lock
Amano TCX-11 Operation Manual 2
Removing the Cover & Packing Material
1. Turn the key clockwise to unlock the
cover.
2. Lift the cover up, then pull it towards
you to remove it.
3. Lift the printer block and remove the
spacer.
4. Remove the spacer between the
Ribbon Cartridge and the Printer
Carriage Tab.
5. Reinstall the cover of your unit.
Internal View
LCD Display
Program Buttons
Reset
Button
Analog
Clock
Ribbon
Cartridge
Card Stopper
Card Stopper
Adjustment Screw
Printer Platen
Amano TCX-11 Operation Manual 3
Power Connection
Before connecting power, verify that the AC outlet voltage falls in the
range of 100-240 Volts AC and that the power cord and plug are
appropriate for your AC source. Plug the power cord into a properly
grounded 120 or 240 Volt wall outlet.
Wall Mounting
Note: Mounting screw locations should be marked on the wall. Do not insert a
drill bit through the mounting holes of the back plate when drilling holes.
1. Disconnect the power cord from the power source.
2. Unlock and remove the cover.
3. Locate the teardrop mounting hole and the two ¼" mounting holes in
the back plate.
4. Approximate the final location of the clock. Insert one #10 wood screw
or equivalent into the wall 1-1/2" (38 mm) from the top center location
of the clock.
5.
Hang the clock on the screw using the teardrop mounting hole.
6.
Secure the clock to the wall by inserting screws through the bottom
two mounting holes.
7. Reconnect the power cord to the power source.
8. Re-install the cover and secure.
Amano TCX-11 Operation Manual 4
Make a Test Print
1. Make sure that there is power to the TCX-11 (Refer to Page 3).
2. Insert a piece of paper, or time card into the TCX-11. The clock will
automatically print YEAR, MONTH, DATE and TIME with AM or PM.
3. If the imprint is satisfactory, the TCX-11 is ready for use.
4. If you wish to change the time and/or print style on the TCX-11, enter
the Program Mode to make changes to the print styles. The next
page gives instructions on programming the TCX-11 to fit your
needs.
Adjusting the Margin
1. Unlock and remove the
cover. Note – suggest
unplugging the clock
before performing
margin adjustment.
2. Locate the Card Stopper
Adjustment Screw on the
right side of the clock,
below the printer platen.
3. Position a piece of paper or
time card as desired.
4. Loosen the screw to move
the Card Stopper forward or
back. Tighten the screw as
needed. (See top
illustration.) The print
margin can be adjusted to a
maximum of 7/8” (22 mm).
Amano TCX-11 Operation Manual 5
Program Mode Guide
Unlock and remove the cover. Locate the PROGRAM, CHANGE and
ENTER buttons on top of the clock.
The PROGRAM button is used to enter and exit the Program Mode.
Press the PROGRAM button at any time to exit the Program Mode. If a
program step is in the process of being changed when this button is
pushed, the new information will not be saved.
The CHANGE button is used to change the information on the display.
When you are reviewing the main programming menu, use the CHANGE
button to advance to the next programming step. When you are revising
a programming step, use the CHANGE button to change the blinking
information.
The ENTER button is used to accept the information shown on the
display and save it in memory.
The RESET button is located on the right-side of the clock. Pressing this
button will clear any jams or errors.
Entering the Program Mode
1. Unlock and remove the cover.
2. Press and hold the PROGRAM button to access the Main
Programming Menu. The Main Programming Menu consists of the
Following:
Menu Code Menu Function
P1
dA
tE
Sets the date
P2 Cloc
Sets the clock time
P3
dLS
t
Disable/Enable Daylight Saving Time
P4
Prn
t
Sets the print style using Quick Print Set-Up Codes
P5
O
thr
Accesses Other Options Menu
Amano TCX-11 Operation Manual 6
3. When P1 dAtE flashes in the display, release the
PROGRAM button. To move to the next menu item,
press the CHANGE button.
Note: If no other button is pressed after five minutes, the clock will return to the
Normal Mode and the clock hands will reset.
Setting the Year, Month and Date
1. When the display flashes P1 dAtE, press the ENTER
button.
2. Press the CHANGE button until the correct year
appears, then press the ENTER button.
3. Press the CHANGE button until the correct month
appears, then press the ENTER button.
4. Press the CHANGE button until the correct date
appears, then press the ENTER button.
5. When the display flashes the correct year, month and
date, press the ENTER button.
6. When the display flashes P1 dAtE, press the CHANGE
button to move to Setting the Clock Time.
Setting the Clock Time
Note: Use a 24 hour and 60 minute format when setting the time.
For example, 2:00 PM = 14:00.
1. Press the PROGRAM button for two seconds.
2. Press the CHANGE button until the display flashes
P2 CLoc, then press the ENTER button.
3. Press the CHANGE button until the correct hour
appears, then press the ENTER button.
4. Press the CHANGE button until the correct minute
appears, then press the ENTER button.
5. When the display flashes the correct time, press the
ENTER button.
6. When the display flashes P2 CLoc, press the
CHANGE button to move to the Daylight Saving
Time On/Off Setting.
Amano TCX-11 Operation Manual 7
Disabling/Enabling Daylight Saving Time (DST)
Note: When this setting is set to ON, the clock’s time will automatically change
for DST. When this setting is set to OFF, the clock’s time will not change
for DST. The dates to begin and end DST are set in the Other Options
Menu (See page 8).
1. When the display flashes P3 dL St, press the ENTER
button.
2. Press the CHANGE button to alternate between On
and Off.
3. When the display flashes the correct setting, press
the ENTER button.
4. When the display flashes P3 dL St, press the
CHANGE button to move to the Quick Set-Up Code
setting.
The Quick Set-Up Code Setting
Note: If you do not wish to use one of the Quick Set-Up Code settings, you may
set an alternate style on the following page.
1. When the display flashes P4 Prnt, press the ENTER
button.
2. The display will flash the current setting. Press the
CHANGE button to scroll through each of the Quick
Set-Up Code Settings.
Code Print Style Print Direction
Pr-1
Day, 24Hr., 100th/Hr Right Side Print
Pr-2
Day, 12Hr., 60th/Hr. Right Side Print
Pr-3
Month, Date, 24Hr., 100th/Hr. Right Side Print
Pr-4
Month, Date, 12Hr., 60th/Hr. Right Side Print
Pr-5
2 Digit Year, Month, Date, 12Hr., 60th/Hr. Right Side Print
Pr-6
4 Digit Year, Month, Date, 12Hr., 60th/Hr. Right Side Print
Pr-7
4 Digit Year, Month, Date, 24Hr., 60th/Hr. Right Side Print
3. When the display flashes the correct setting, press
the ENTER button.
4. When the display flashes P4 Prnt, press the
CHANGE button to move to the Other Options menu.
Amano TCX-11 Operation Manual 8
Accessing the Other Options Menu
1. When the display flashes P5 Othr, press the ENTER
button.
2. The display will flash the first programming step in
the Other Options sub-menu. Press the CHANGE
button to advance through the menu selections.
Menu Code Menu Function
I1 Prnt
Set Print Style using Symbol or Print Style Codes
I2 LAn9
Sets the Language of the print out
I3 Prdr
Sets the Print Direction (left or right hand)
I4 APrt
Disable, enable, or configure the Auto print option
I5 2Er0
Disable/enable Leading Zero in print out
I6 bdLt
Set the date that Daylight Saving Time begins
I7 EdLt
Set the date that Daylight Saving Time ends
I8 dIA9
Accesses the Diagnostic Routine
Setting Up Alternate Print Styles
Note: If you do not wish to use one of the Quick Set-Up Code settings, you may
select from the Alternate Print Style sub-menu.
1. When the display flashes 11 Prnt, press the ENTER
button.
2. Press the CHANGE button to move from Code
setting to Symbol setting. If you select Code, you
must enter a Print Style Code from Table 1 on the
next page. If you select Symbol, you can “build” a
custom Print Style using Tables 2 and 3 on pages
11 and 12.
3. When the display flashes the correct setting, press
the ENTER button.
Selecting a Print Code
Note: Refer to Table 1 on the next page for Print Style Codes.
1. When the display flashes Pr COdE, press the ENTER
button.
2. Press the CHANGE button until the desired number
appears in the first position. Press the ENTER
button.
3. Press the CHANGE button until the desired number
appears in the second position. Press the ENTER button.
Amano TCX-11 Operation Manual 9
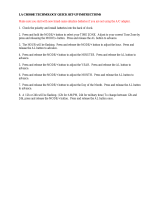
4. Press the CHANGE button until the desired number
appears in the third position. Press the ENTER button.
5. Press the CHANGE button until the desired number
appears in the fourth position. Press the ENTER
button.
6. When the display flashes all four correct numbers,
press the ENTER button.
7. When the display flashes 11 Prnt, press the CHANGE
button to move to the Language Setting.
Table 1: Print Style Codes for the Program Mode
Code Print Style Print Direction
6510 DAY, 12H, 60th Right Side Printing
6210 DAY, 24H, 10th Right Side Printing
6810 DAY, 24H, 100th Right Side Printing
6520 DATE, 12H, 60th Right Side Printing
6620 DATE, 24H, 60th Right Side Printing
6820 DATE, 24H, 100th Right Side Printing
6540 DATE, MONTH, 12H, 60th Right Side Printing
6640 DATE, MONTH, 24H, 60th Right Side Printing
6840 DATE, MONTH, 24H, 100th Right Side Printing
6680 DATE, MONTH, YEAR, 24H, 60th Right Side Printing
6530 MONTH, DATE, 12H, 60th Right Side Printing
6630 MONTH, DATE, 24H, 60th Right Side Printing
6830 MONTH, DATE, 24H, 100th Right Side Printing
6570 YEAR, MONTH, DATE, 12H, 60th Right Side Printing
6071 YEAR, MONTH, DATE, RCV’D Right Side Printing
6072 YEAR, MONTH, DATE, SENT Right Side Printing
6073 YEAR, MONTH, DATE, FAX’D Right Side Printing
6074 YEAR, MONTH, DATE, VOID Right Side Printing
6075 YEAR, MONTH, DATE, PAID Right Side Printing
6076 YEAR, MONTH, DATE, CFM’D Right Side Printing
6077 YEAR, MONTH, DATE, APR’D Right Side Printing
6078 YEAR, MONTH, DATE, CMPL’D Right Side Printing
6079 YEAR, MONTH, DATE, ORIGN Right Side Printing
6070 YEAR, MONTH, DATE, FILE Right Side Printing
5510 DAY, 12H, 60th Left Side Printing
5210 DAY, 24H, 10th Left Side Printing
5810 DAY, 24H, 100th Left Side Printing
5520 DATE, 12H, 60th Left Side Printing
5620 DATE, 24H, 60th Left Side Printing
5820 DATE, 24H, 100th Left Side Printing
5540 DATE, MONTH, 12H, 60th Left Side Printing
5640 DATE, MONTH, 24H, 60th Left Side Printing
5840 DATE, MONTH, 24H, 100th Left Side Printing
5680 DATE, MONTH, YEAR, 24H, 60th Left Side Printing
5530 MONTH, DATE, 12H, 60th Left Side Printing
Amano TCX-11 Operation Manual 10
Code Print Style Print Direction
5630 MONTH, DATE, 24H, 60th Left Side Printing
5830 MONTH, DATE, 24H, 100th Left Side Printing
5570 YEAR, MONTH, DATE, 12H, 60th Left Side Printing
5071 YEAR, MONTH, DATE, RCV’D Left Side Printing
5072 YEAR, MONTH, DATE, SENT Left Side Printing
5073 YEAR, MONTH, DATE, FAX’D Left Side Printing
5074 YEAR, MONTH, DATE, VOID Left Side Printing
5075 YEAR, MONTH, DATE, PAID Left Side Printing
5076 YEAR, MONTH, DATE, CFM’D Left Side Printing
5077 YEAR, MONTH, DATE, APR’D Left Side Printing
5078 YEAR, MONTH, DATE, CMPL’D Left Side Printing
5079 YEAR, MONTH, DATE, ORIGN Left Side Printing
5070 YEAR, MONTH, DATE, FILE Left Side Printing
If you cannot locate the desired print style from the above list, refer to the
instructions on the next page for programming the print style using
symbols.
Customizing a Print Style Using Character Symbols
Note: The maximum displacement (print length) of the print head is 152 dots or
1.4" (35 mm). When viewed on the LCD display, this value becomes a
percentage, where the maximum allowable value is 99%. To determine if
your desired symbol will print, add the lengths of each character used from
the table. The total should be less than 150 dots or 99%. Please refer to
Tables 2 and 3 representing the print styles, number of dots, or line
lengths.
1. When the display flashes Pr SYbL, press the ENTER
button.
2. Press the CHANGE button until the character symbol
you want to print appears, then press the ENTER
button.
3. A n symbol will appear in the display to designate
the first Symbol Code has been assigned.
4. Continue to assign codes until you have finished.
5. Press the CHANGE button until the En code flashes,
then press the ENTER button.
6. When the display flashes II Prnt, press the CHANGE
button to move to the Language Setting.
Amano TCX-11 Operation Manual 11
Table 2: Custom Print Style Samples
Print Style Example Code to Enter Length
DAY,12Hr,60th/Hr FRI PM 1:45
dAY SPCE 1260th
82
DAY,24Hr,60th/Hr FRI 13:45
dAY SPCE 2460th
68
DAY,24Hr,10th/Hr FRI 13.7
dAY SPCE 2410th
58
DAY,24Hr,100th/Hr FRI 13.75
dAY SPCE 24100th
68
DATE,12Hr,60th/Hr 13 PM 1:45
dAtE SPCE 1260th
82
DATE,24Hr,60th/Hr 13 13:45
dAtE SPCE 2460th
68
DATE,24Hr,10th/Hr 13 13.7
dAtE SPCE 2410th
58
DATE,24Hr,100th/Hr 13 13.75
dAtE SPCE 24100th
68
MONTH,DATE,12Hr,60th/Hr APR13 PM 1:45
month SPCE dAtE SPCE 1260th
115
MONTH,DATE,24Hr,60th/Hr APR13 13:45
month SPCE dAtE SPCE 2460th
101
MONTH,DATE,24Hr,10th/Hr APR13 13.7
month SPCE dAtE SPCE 2410th
91
MONTH,DATE,24Hr,100th/Hr APR13 13.75
month SPCE dAtE SPCE 24100th
101
YEAR,MONTH,DATE,12Hr,60th/Hr 95 APR13 PM 1:45
YEAr SPCE month SPCE dAtE
SPCE 1260th
143
YEAR,MONTH,DATE,24Hr,60th/Hr 95 APR13 13:45
YEAr SPCE month SPCE dAtE
SPCE 2460th
129
YEAR,MONTH,DATE,24Hr,10th/Hr 95 APR13 13.7
YEAr SPCE month SPCE dAtE
SPCE 2410th
119
YEAR,MONTH,DATE,24Hr,100th/Hr 95 APR13 13.75
YEAr SPCE month SPCE dAtE
SPCE 24100th
129
YEAR,MONTH,DATE,SYMBOL1 95 APR13 RCV’D
YEAr SPCE month SPCE dAtE
SPCE SY-1
127
YEAR,MONTH,DATE,SYMBOL2 95 APR13 SENT
YEAr SPCE month SPCE dAtE
SPCE SY-2
124
YEAR,MONTH, DATE,SYMBOL3 95 APR13 FAX’D
YEAr SPCE month SPCE dAtE
SPCE SY-3
127
YEAR,MONTH, DATE,SYMBOL4 95 APR13 PAID
YEAr SPCE month SPCE dAtE
SPCE SY-4
124
Amano TCX-11 Operation Manual 12
Table 3: Symbol Codes and Lengths
Code Character Length
2dYEAr
2 Digit Year 25=16.45%
nnonh
Month 30=19.74%
dAtE
Date 20=13.16%
dAY
Day 20=13.16%
JLAN
Julian Date 30=19.74%
12 10th
12 Hr & 10
th
/Hr 49=32.24%
12 20th
12 Hr & 20
th
/Hr 59=38.82%
12 60th
12 Hr & 60
th
/Hr 59=38.82%
12 100th
12 Hr & 100
th
/Hr 59=38.82%
24 10th
24 Hr & 10
th
/Hr 35=23.03%
24 20th
24 Hr & 20
th
/Hr 45=29.61%
24 60th
24 Hr & 60
th
/Hr 45=29.61%
24 100th
24 Hr & 100
th
/Hr 5=29.61%
SLSh
Slash ( / ) 10=6.58%
dASh
Dash ( - ) 07=4.61%
SPCE
Space ( ) 03=1.97%
4dYEAr
4 Digit Year 28=14.00%
SY-1
RCV’D 43=28.29%
SY-2
SENT 40=26.32%
SY-3
FAX’D 43=28.29%
SY-4
VOID 40=26.32%
SY-5
PAID 40=26.32%
SY-6C
FM’D 43=28.29%
SY-7
APR’D 43=28.29%
SY-8
CMPL’D 53=34.87%
SY-9
ORIGN 50=32.89%
SY-10
FILE 40=26.32%
En
End of File -
Ad
Add a Character -
dL
Delete a Character -
Setting the Language
1. When the display flashes I2 LAn9, press the ENTER
button.
2. Press the CHANGE button until the correct
language appears, then press the ENTER button.
3. When the display flashes I2 LAn9, press the
CHANGE button to move to the Print Direction.
Please refer to the table below for Language selections.
English Spanish French Portuguese
LI En9 L2 SPn L3 Frn L4 Pt9
Amano TCX-11 Operation Manual 13
Setting the Print Direction
1. When the display flashes I3 Prdr, press the ENTER
button.
2. Press the CHANGE button until the correct direction
appears, r 9ht for Right Side Printing, or LEFt for Left
Side Printing, then press the ENTER button.
3. When the display flashes I3 Prdr, press the CHANGE
button to move to the Auto Print Setting.
Setting the Auto Print
1. When the display flashes I4 APrt, press the ENTER
button.
2. Press the CHANGE button until the correct printing
mode appears, then press the ENTER button.
Auto Print (on P:): Will automatically print a single
print when media is inserted.
Manual Print (OFF): Requires you to use the PRINT
button when printing.
Precision Print (on P:5): Enables you to print multiple or
consecutive prints when holding down the PRINT button.
3. When the display flashes I4 APrt, press the CHANGE
button to move to the Leading Zero Setting.
Setting the Leading Zero On or Off
Note: The Leading Zero appears on the print out before single digit times and
dates (For example DEC. 06, 08:00)
1. When the display flashes I5 2ErO, press the ENTER
button.
2. When the display flashes OFF or on, press the
CHANGE button to toggle between off and on. Press
the ENTER button to select.
3. When the display flashes I5 2ErO, press the
CHANGE button to move to the Begin Daylight
Saving Time setting.
Amano TCX-11 Operation Manual 14
Setting Begin Daylight Saving Time
Note: The government standard for DST is subject to change. Your clock is
factory-set for correct DST based upon when it was manufactured, but any
revision to DST begin or end dates may require updating the system-set
DST calendar.
The steps below change the begin date for DST. DST is enabled and
disabled in the Main Programming Menu. Updating the begin date for DST
needs to be done just one time*, since the clock's rolling calendar function
will auto-calculate the begin date for each year thereafter. To change the
end date for DST, refer to the next section.
1. When the display flashes I6 bdLt, press the ENTER
button.
2. Press the CHANGE button until the correct year
appears, then press the ENTER button.
3. Press the CHANGE button until the correct month
appears, then press the ENTER button.
4. Press the CHANGE button until the correct date
appears, then press the ENTER button.
5. When the display flashes the correct year, month and
date, press the ENTER button.
6. When the display flashes I6 bdLt, press the CHANGE
button to move to the End Daylight Saving Time
Setting (17 EdLt will display).
Setting End Daylight Saving Time
Note: The government standard for DST is subject to change. Your clock is
factory-set for correct DST based upon when it was manufactured, but any
revision to DST begin or end dates may require updating the system-set
DST calendar.
The steps below change the end date for DST. DST is enabled and
disabled in the Main Programming Menu. Updating the end date for DST
needs to be done just one time*, since the clock's rolling calendar function
will auto-calculate the end date for each year thereafter. To change the
end date for DST, refer to the next section.
1. When the display flashes 17 EdLt, press the ENTER
button.
2. Press the CHANGE button until the correct year
appears, then press the ENTER button.
3. Press the CHANGE button until the correct month
appears, then press the ENTER button.
Amano TCX-11 Operation Manual 15
4. Press the CHANGE button until the correct date
appears, then press the ENTER button.
5. When the display flashes the correct year, month and
date, press the ENTER button.
6. When the display flashes 17 EdLt, press the
CHANGE button to move to the Diagnostics Mode
(see Exit Program Mode to end).
The Diagnostic Routine
The Diagnostic Routine checks the LCD segments, the number of prints,
and clears the memory (Print Style, Language, Leading Zero Suppress,
Clock and Calendar, Right/Left Print, and Daylight Saving Time
features).
1. When the display flashes I8 dlA9, press the
ENTER button. The Diagnostic Routine consists of
the following:
Menu Code Menu Function
d1 LCd
Tests the segments of the LCD
d2 NPrt
Displays total number of print outs
d3 Clr
Clears memory and restores default settings
2. When the display flashes dl LCd (LCD segments
check), press the ENTER button.
3. When all of the LCD segments are turned on, press
the ENTER button to advance to the next step.
4. When the display flashes d2 nPrt (total number of
prints), press the ENTER button.
5. The number of prints counted will be displayed. Press
the ENTER, then CHANGE button to advance to the
next step.
6. When the display flashes d3 CLr (memory clear),
press the ENTER button.
7. To clear the memory and reset the defaults, press the
CHANGE button until the 3 appears, then press the
ENTER button. Press the CHANGE button until the 2
appears, then press the ENTER button.
8. When the display flashes 32, press the ENTER
button.
Amano TCX-11 Operation Manual 16
Exit Program Mode
Press the PROGRAM button and the display will show the current date.
The clock hands will reset to the current time.
Note: The TCX-11 uses a Lithium battery to maintain the user settings incase of
a power failure. If a power failure occurs and the Lithium battery is dead,
the time clock settings may revert to default settings (i.e., DST Begin and
End dates may change).
Replacing the Ribbon
To Remove:
1. Remove the cover.
2. Pull the two white release
tabs upward and remove
the ribbon cassette.
To Insert:
1. If the print mechanism is
down and a piece of paper
cannot be inserted, press
the RESET button to move
the carriage up. This will
make the ribbon installation
easier.
2. Insert the ribbon cassette. Be sure to mount the ribbon between
the printer head and ribbon guide as arrows illustrate.
3. Turn the knob on the cassette clockwise one turn to take up any
slack in the ribbon.
4. Replace the cover and check the print quality to confirm that you
have installed the ribbon correctly.
Amano TCX-11 Operation Manual 17
Error Messages
Error Code Cause
E1 Prt
Home sensor, motor carriage stuck
E2 Prt
Time sensor, carriage stuck
E3 Prt
Home sensor
E4 Prt
Carriage stuck
Er Pr t
General print error
dLt
Daylight Saving Time Program
For error messages E1 through E4, turn off the power before checking to
see that the carriage is not stuck or jammed. Also, check to see that the
ribbon cables are in good condition. After clearing any jams, restore the
power and press the RESET button. Contact your Amano Cincinnati
representative for assistance.
The dLt error message signifies that an attempt was made to get into the
Program mode during the Daylight Saving changeover one-hour lockout.
Wait one hour and you will be able to program the clock.
AJR-310103 z Copyright ©2007 Amano Cincinnati, Inc. z 1/07/0
  • Page 1 1
  • Page 2 2
  • Page 3 3
  • Page 4 4
  • Page 5 5
  • Page 6 6
  • Page 7 7
  • Page 8 8
  • Page 9 9
  • Page 10 10
  • Page 11 11
  • Page 12 12
  • Page 13 13
  • Page 14 14
  • Page 15 15
  • Page 16 16
  • Page 17 17
  • Page 18 18
  • Page 19 19
  • Page 20 20

Amano Amano TCX 21 Owner's manual

Category
Wall clocks
Type
Owner's manual
This manual is also suitable for

Ask a question and I''ll find the answer in the document

Finding information in a document is now easier with AI