8
Remote control
Page
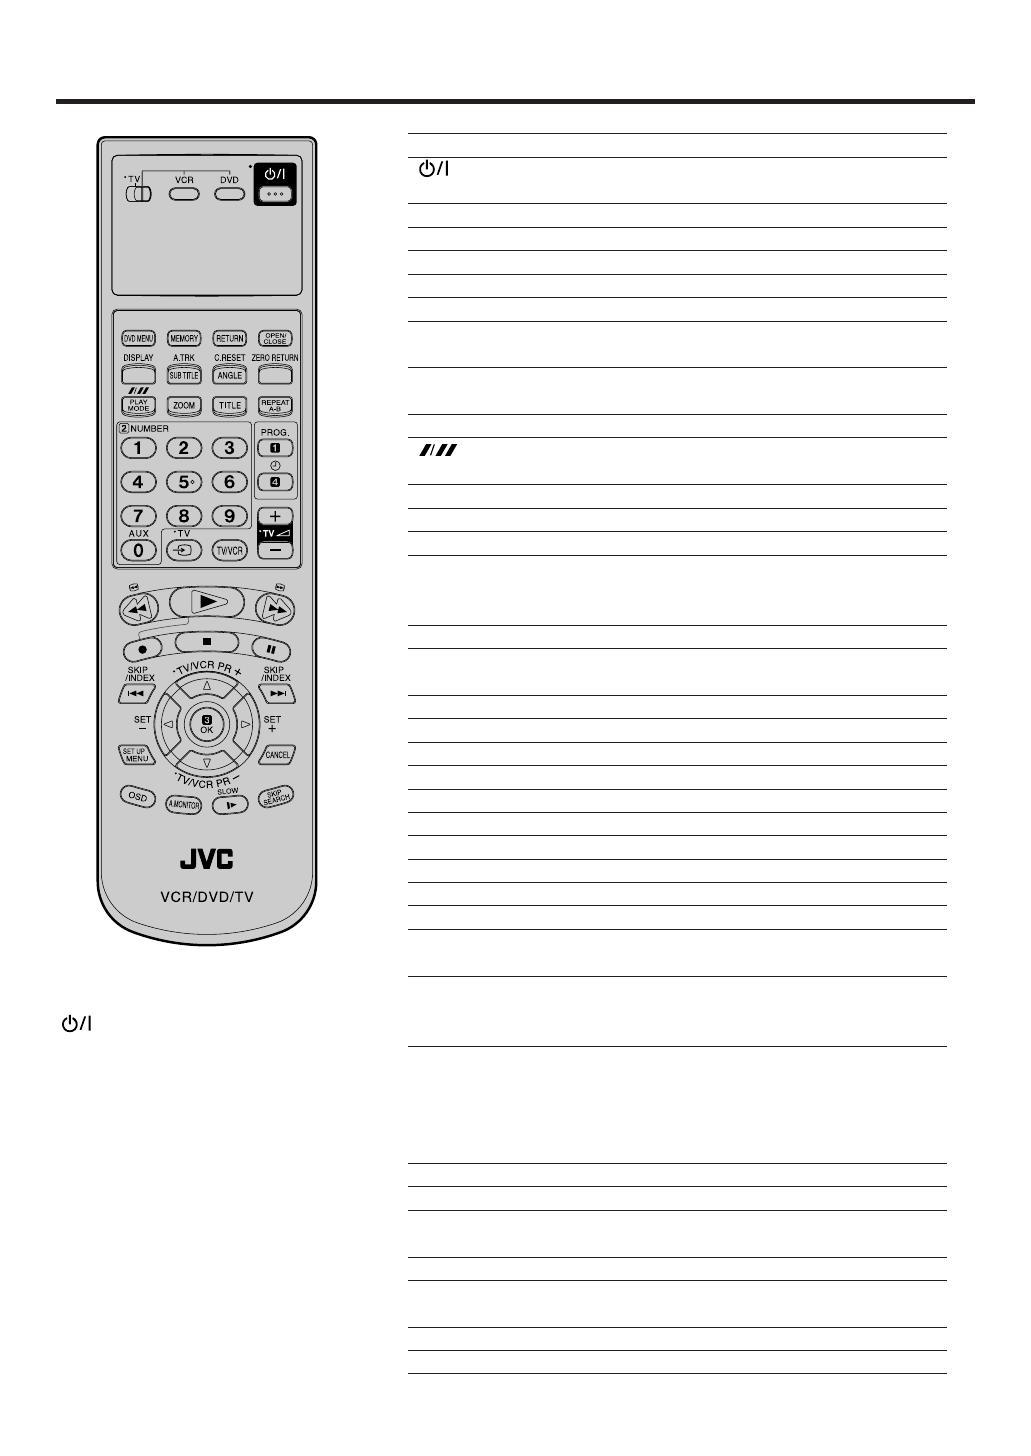
TV/VCR/DVD switch
Switch to operate TV or VCR or DVD 14,41
Power on/off 14
Turn the connected TV on or off 8
DVD MENU Display menu of DVD software 49
MEMORY Index for DVD 46
RETURN Remove DVD set up menu 50
OPEN/CLOSE Open or Close the tray 42
DISPLAY Change the front Display mode 26
A.TRK Digital AUTO TRACKING 24
SUB TITLE Set Subtitle of a DVD disc 48
C. RESET Reset the counter to 00:00 26
ANGLE Change playback angle of a DVD disc 49
ZERO RETURN
Stop the tape when the counter reaches 00:00
26
(SP/LP) Sets the tape speed for recording 28,30,39
PLAY MODE Select playback mode 45,46
ZOOM Zoom (for DVD playback) 44
TITLE Select title of a DVD disc 49
REPEAT A-B Repeat playback between A and B (DVD/CD) 45
0-9 Direct channel selection of TV 28,30
Input setting 15~18,31,33,46,47
Enter a password 50
AUX Scart input or AV-Front input 34,39
PROG. S
HOWVIEW-Recording 31
Confirmation of Timer-Recording 34
•
Set the unit to start recording at a preset time.
32,34
TV ∏ (INPUT) Switch the connected TV to external mode 8
TV/VCR Switches between TV and VCR 29
TV @ +/– Adjust the connected TV’s volume 10
8 Rewind/Review playback 23,24,43
1 Playback 23,42,47
9 Fast Forward/Forward search playback 23,24,43
2 Recording 28,30,39
3 Stop 23,42,47
4 Still picture/Recording pause on/off 24,28,39,43
SKIP 6/7 Skip chapter to forward or reverse direction 43
INDEX 6/7 Search for the INDEX mark of a tape 27
TV/VCR PR +/– Select channel of the connected TV or VCR
8,28,30,39
C/D Cursor buttons
SET –/+ Setting buttons 32~34
Manual tracking buttons in playback mode 24
B/A Cursor buttons - To move Up in the VCR menu
you press the A. To move Down in the VCR
menu you press the B.
OK
Enter information in the menu/Select option in the menu
SET UP MENU Display menu of setup 14~21,41,50~59
CANCEL Delete Timer program 34
Cancel input data in the setting mode
18,21,46~50
OSD Display VCR or DVD operation status 28~30,60
A.MONITOR Switches sound 37,38
Change sound track language of DVD 48
SLOW Slowmotion playback 24,43
SKIP SEARCH Skip the unwanted short material of a tape 24
JVC TV Remote Control
This Remote can control some functions
(
, NUMBER (0-9), TV ∏, TV @ +/–,
TV PR +/– and OK) of a remote controllable
JVC TV by slide TV/VCR/DVD switch to TV.
NOTE:
• It’s not possible to operate a unit not
equipped with a remote sensor.
• This Remote can control a JVC TV only.
• When you operate the VCR or DVD, the
TV/VCR/DVD switch must be slided to
VCR/DVD again. Otherwise the DVD/
VCR may not operate properly.
• Since this unit is combined type of DVD
and VCR, the remote code of DVD is
individual. So please note that the DVD-
keys on the RCU of the other JVC
RECEIVER/TV is not effective for this unit.
2A73501AE(06-11) 4/17/02, 8:22 PM8


