Page is loading ...

Serial Port Sharing Quick Start (520016-Rev 2.1) Page 1
Serial port sharing
Quick Start Guide
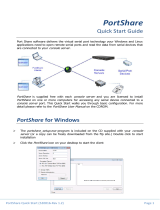
Opengear's port sharing software solutions enable your Windows and Linux applications
to communicate with serial devices that are connected to serial ports on your remote
console server
. You are licensed to install the software on one or more computers for
connecting to any serial port on your
console server
.
Serial to Ethernet Connector (for Windows)
The Eltima
Serial to Ethernet Connector
(
SEC
) software establishes client-server
connections between the serial ports on remote
console servers
and applications on
your Windows PC or server servicing COM ports. The software program
serial_ethernet_connector_6.1.524.exe
can be freely downloaded
http://opengear.com/download/eltima/
Install the
SEC
software on your Windows PC
Enter the license key code. You will need to enter the username e.g.
opengear
and your unique license activation code e.g
. 000G23-ER56K5A-……
Note: A License Code sheet containing the username and license activation code may
have been provided with your console server. If not please email
your console server’s
serial number to support@opengear.com and you will be sent License Code details.
Create Client connection to the serial port on your console server. For more
guidance go to the Eltima’s online
SEC
manual and knowledge base
at http://wiki.eltima.com/user-guides/sec-pc/guide.html

Serial Port Sharing Quick Start (520016-Rev 2.1) Page 2
PortShare (for Linux)
The PortShare
opengear-serial-client
is an open source utility for Linux, AIX, HPUX,
SCO, Solaris and UnixWare that maps the
console server
serial port to a host tty port.
The
portshare_setup.exe
program can be freely downloaded
http://opengear.com/download/portshare/linux/
Set up the
console server
and attach and configure the remote serial port device.
Ensure the console server IP configuration is ok and that you can access the unit
(ping, telnet...). Configure the
console server
serial port to RAW or RFC2217 mode
To install the PortShare serial client:
1) Build and install the package (as root):
$ ./configure && make && make install
Note that the `--prefix=' option is ignored by configure.
2)
Configure the devices by editing
/etc/portshare-devices
(sample configurations
and the format is shown below)
3) Start the portshare devices:
/usr/local/sbin/portshare-serial-client start
Examples showing the virtual port configuration and using a remote console serial
port as a local
tty
port on the Linux host.:
/etc/portshare-devices
devname:rastype:rasname:physport:type:options
where :
devname
-> Device full pathname
rastype
-> Console server type (e.g. im4248 or acm5003)
rasname
-> Console server host name or IP address
physport
-> Physical port number on
console server
type
-> Server type : rfc2217 or socket (raw TCP)
opts
-> per-port interface options (optional)
To connect via a secure ssh tunnel, use the '-P' parameter as part of "opts", and give
the TCP port number used for the local end of the tunnel. e.g. "-P 22222" will attempt
to connect to local TCP port 22222. Also set the rasname to "localhost". The ssh tunnel
must already be setup for this to work.
Connect to port 1 on a 48 port Console Server at IP address 10.111.254.1, using
RFC2217:
/dev/otty01:cm4148:10.111.254.1:1:rfc2217
Connect to port 8 on a 8 port Console Server at IP address 10.111.254.2, using
RFC2217:
/dev/otty02:acm5508:10.111.254.2:8:rfc2217
Create an ssh tunnel from localhost to a console Server. This tunnel connects to
serial port 3 on the console server and uses rfc2217. The rfc2217 TCP port base
on the console manager has been set to an alternate base of 9000. The local
TCP port used for the tunnel is 12345:
ssh -L 12345:10.111.254.3:9003 <username>@10.111.254.3 -N
Now use this tunnel to make the connection:
/dev/otty03:cm4008:localhost:3:rfc2217:-P 12345
/


