INSTALLING METAL GUTTER SYSTEMS
TOOLS REQUIRED
Eye protection, pencil, tape measure, string, level, hack saw, drill, screwdriver, hammer, pliers, ladder, tin snips and gloves.
PLANNING - Measure Roof Line and Locate Downspouts
Use chart to fi ll in quantity of each item needed to complete your job. (Note: Stores may not stock every item listed below)
40'
20'
20'20'
40'
Downspouts
10'
EXAMPLE:
# Description Quantity
A
Gutter - 10 ft.
B
Downspout - 10 ft. (2x3 or 3x4)
C
Inside Mitre
D
Outside Mitre
E
Right End Cap
F
Left End Cap
G
Seamer - 2/pack
Easiest, best way to connect gutters
H
Slip Joint Connector For ease of instal-
lation, gently pry open fl anges
I
Hidden Hanger with Screw
J
Fascia Bracket or
Snap Lok Fascia Bracket
K
Screw or Spike & Ferrule
L
Hidden Hanger
M
Hidden Hanger with Roof Strap
N
End Drop
O
Front “A” Elbow (2x3 or 3x4)
P
Side “B” Elbow (2x3 or 3x4)
Q
Downspout Band
Metal or Plastic
R
SeamerMate™
S
Downspout Extension
GUTTER MATERIAL SELECTION GUIDE
A
B
C
D
E
F
G
H
I
J
O
P
Q
R
S
K
L
M
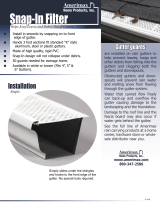
Gutter Cover
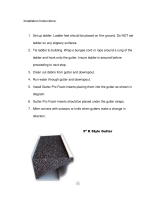
Drip Edge
Hinged Gutter
Guard
INSTALLING HANGERS:
3
Use one hanger every 24 in. or every
18 in. for heavy ice & snowload areas.
(Fig. 3.1)
Fascia Bracket or
Snap Lok Bracket
Fascia Bracket: 4 per pack, includes hanging
nails. Nail along guide string every 24 in.
Snap Lok Fascia Bracket: 4 per pack, Nails or
screws required. (Fig. 3.2)
Hidden Hanger with Screw
Power drive ¼ in. hex head screw into
fascia board. (Fig. 3.3)
Hidden Hanger or
Hidden Hanger with Roof Strap
Hidden Hanger: Requires nails or screws.
Hidden Hanger with Roof Strap: Only use
when no fascia board exists. (Fig. 3.4)
Screw or Spike and Ferrule
Insert ferrule into gutter and fasten screw
or spike through gutter, ferrule and fascia
board. (Fig. 3.5)
Fig. 3.1
Fig. 3.2
Fig. 3.3
Fig. 3.4
Fig. 3.5
(800) 347-2586
www.amerimax.com
OR
OR
OR
OR
OR
# Description Quantity
Wide Flange Outlet
Metal or Plastic
Strainer
Hinged Gutter Guard
Gutter Guard and Cover 3 ft. & 4 ft.
Drip Edge - 10 ft.
Splashblock
Dripper Flipper
FLEX-A-SPOUT
®
- Extends to 55 in.
Sheet Metal Screws - 8 pack
OR
OR
OR
N
Flex-A-Spout
®
Dripper
Flipper
MEASURE:
1
REMOVE old gutters and inspect fascia
board. REPLACE IF NEEDED. Tack a
string to fascia board and level (A). Lower
string approximately ¼ in. for every 10 ft.
of gutter and retack string. This is sloped
toward downspout. If your house has
drip edge, slip gutter under drip edge.
(Fig. 1.1)
Fig. 1.1
ATTACHING MITRES:
4
For a corner, use a mitre attached to
gutter with seamers or slip joints. Apply
SeamerMate™ to inside mitre joint and all
connecting points as illustrated. (Fig. 4.1)
Fig. 4.1
ASSEMBLE GUTTER:
2
5 inch Gutter: Begin at end of gutter
run, opposite downspout end. Apply
SeamerMate™ to end cap. Attach to end of
gutter. Join gutter lengths using Seamers
- (directions printed on bag) or Slip Joint
Connectors (for ease of installation, gently
pry open fl anges) (Fig. 2.1a)
6 inch Gutter: Gutters connect by cutting 3
in. off top lip and sliding together. (Fig. 2.1b)
Fig. 2.1b
Fig. 2.1a
se o
18 in.
(Fig. 3
Fig.
Each downspout and elbow has
one end crimped. Parts are joined
by fi tting the larger end of one over
the smaller end of the other, forcing
them together tightly. Downspouts
should fi t snug against the wall.
Use sheet metal screws to secure
downspouts and elbows. Attach
a front or side elbow at the
downspout’s bottom to direct water
away from the foundation. (Fig. 5.2)
Fig. 5.3
Fig. 5.4
ATTACHING DOWNSPOUTS:
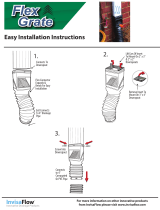
To connect the gutter to the downspout use
either an outlet or an end with drop. For the end
with drop, connect to the gutter with a Seamer
or slip joint connector. Apply Seamermate™ to
end with drop and joint as instructed. If at the
end of a run, seal with SeamerMate™ and an
end cap. To use an outlet, fi rst make a hole in
the gutter for the outlet. Trace the opening of the outlet on the outside of the gutter, drill
a hole and cut with tin snips (Fig. 5.1).
5
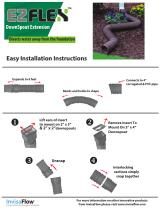
Use a Downspout Extension, Splashblock,
Dripper Flipper, or Flex-A-Spout
®
to get
water further away
from the foundation.
(Fig. 5.4)
Fasten downspouts
against wall with 2 bands
per 10 ft. section using
nails or screws. (Fig. 5.3)
NOTE:
• 2" x 3" downspouts drain 186 gallons per minute
• 3" x 4" downspouts drain 434 gallons per minute
Increasing the size of downspouts or number of downspouts is recommended
for wide roof areas, heavy downpour areas, and for gutter systems that overfl ow.
INSTALLING DRIP EDGES:
Help direct roof run-off into gutters. To install, lift
shingles and insert drip edge under shingles.
Push back until drip edge projects approx. ½
in. beyond fascia. Nail under shingles every 5
ft. (Fig. 6.1)
6
Drip Edge
Fig. 6.1
Wide Flange
Outlet - Metal
Outlet - Plastic
Strainer
Splashblock
Sheet Metal
Screws
bloc
Fig. 5.1
Fig. 5.2

