Page is loading ...

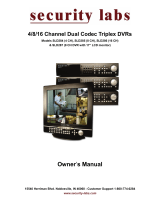
SLD230M
Mobile DVR
Owner’s Manual
Security Labs, Inc - 15540 Herriman Blvd. - Noblesville, IN 46060
Customer Service: 1-800-774-0284
www.security-labs.com

2
CONTENTS
1. Features………………………………………………………. 3
2. Specifications………………………………………………….4
3. Rear Panel Description……………………………………… 5
4. Function Key Description…………………………………….6
5. Playback Mode……………………………………………….. 7
5.1 Play Mode…………………………………………........ 7
5.2 Search……….…………………………………….........8
6. Recording Mode……………………………………………… 9
7. Menu Set Up………………………………………………….. 9
7.1 Enter Main Menu……………………………………..... 9
7.2 System Status……………………………………..........10
7.3 Date / Time………………………………………….......11
7.4 Record Setting…………………………………………..12
7.5 Record Mode…………………………………………... 13
7.6 Alarm Output………………………………………….... 16
7.7 Engineering Setup……………………………………... 17
7.7.1 Set Password…………………………………... 17
7.7.2 Camera Title Setup…………………………….. 18
7.7.3 Video Quality…………………………………….. 18
7.7.4 Hard Disk Erase……………………………….. 19
7.7.5 Color Bars………………………………………. 20
7.7.6 Load Factory Defaults………………………. 20
8. Recording Reference Time Table…………………………... 21
9. IMPORTANT SAFEGUARDS – READ BEFORE
OPERATING THIS UNIT……………………………………23

3
1. Features
??
Automatically detects NTSC/PAL
(Please connect the video source, before connecting the power supply.)
?? Tapeless recording replaces conventional time-lapse
recording.
?? MJPEG video compression
??
Motion detection recording.
?? Recording modes: continuous, schedule, and motion
detection.
??
1 channel audio recording.
?? Quick and easy search for events by time / date.
?? Equipped with anti-vibration and shock resistant chassis.
?? Easy to operate front panel.
?? Alarm notification when storage capacity is full.
??
Automatically returns to original operation when recovering
from a power failure.
?? Suitable for many types of transportation applications.
??
Supporting function to format a new hard disk drive.

4
2. Specifications
Operation Mode Display
Front panel LEDs, OSD
Recording Speed 720 x 240 : 1–10 Frames/sec (adjustable)
360 x 240 : 1–15 Frames/sec (adjustable)
Recording Mode Manual
Schedule
Motion Detection (Sensitivity Adjustable)
Audio Recording 1 ch
Compression MJPEG
Camera Input 1 ch BNC (NTSC/PAL)
Video Output Composite video (BNC) x 2
Playback Function Playback — forward or reverse
Fast forward
Fast reverse
Forward one frame
Zoom
HDD (Hard Drive) 30 GB
Built-in Buzzer Video input signal loss trigger,
Motion detection alarm
Watch-Dog Function Automatically returns to original
operation when recovering from a
power failure.
Search Mode Date, Time
Operation Temperature 41 to 104 Degrees F (5 to 40 Degrees C)
Power Supply AC100V~240V, 50/60Hz
DC 12V/4A
Power Consumption 12 W
Dimensions 6 7/8” x 9 1/8” x 2” (W x D x H)
175 mm x 233 mm x 52 mm (W x D x H)
Weight 3.08 lbs. (1.4 Kg)

5
3. Installation
Rear panel
Power Supply: DC 12 Volts / 4 Amps
OUTPUT: 6 Pin Mini Din - Video / Audio output terminal, accessory DC power.
INPUT: 6 Pin Mini Din - Video / Audio input, accessory DC power.
VIDEO IN
:
Connect to a camera, or monitor “Video output”.
VIDEO OUT: Connect to a monitor “Video In”.
VCR OUT: Connect to a VCR ”Video In”.
AUDIO IN: Connect to a camera or monitor “Audio Out”.
AUDIO OUT:
Connect to a VCR or monitor “Audio In”.
NOTE:
DVR automatically detects NTSC/PAL, please connect the video
camera before connecting the power supply.

6
. Function Key Description
Front Panel
MENU: Menu set up
ENTER: Enter to sub-menu or editing procedure.
EXIT: Press this function key to return to the previous selection.
REC
: In standby mode, press this key to enter the record mode.
PLAY: In standby mode, press this key to play the last recorded file.
SEARCH: In standby mode, press this key to display log file lists.
Dual Function Key Descriptions:
STOP<?,?>:
In the menu setup mode, move to the left (up) item during the editing
procedure.
In playback mode, press this key to stop playback and return to standby
mode.
STEP <?, >:
In the menu setup mode, move to the right (down) item during the editing
procedure.
In playback mode, press this key to pause or manually advance images.
REW <-,??>:
In the menu setup mode, use this key to decrease a value.
In playback mode, press this key to fast reverse images.
F.F. <+, ??>:
In the menu setup mode, use this key to increase a value.
In playback mode, press this key to fast forward images.

7
5. Playback Mode
5.1 Play Mode
In standby mode, press the <PLAY> key to enter the playback mode,
or press the <SEARCH> key to enter the log files list (including: date,
time), then press the <PLAY> key or <ENTER> key to display image.
(The details of the Search function are explained in the next section.)
?
Quick Image Search:
During playback
:
Press the <F.F.> key, for fast forward search image (x2, x4).
Press the <REW> key, for normal and fast reverse image (x1, x2,
x4).
? Pause / Still Frame:
During playback:
Press the <STEP> key, to pause and manually advance images.
? Zoom:
During playback:
Press the <ENTER> key to enlarge the picture by a factor of 2.
This will magnify the central area of the picture when recordings
are made with the resolution set to 720 x 240. When recordings are
made with the resolution set to 360x240, the zoom function will
allow the picture to fill the entire screen
? Stop mode:
Press the <STOP> key to stop play mode and return to standby
mode.

8
5.2 SEARCH
To perform a time / date search, press the <SEARCH> key to display the
screen below:
Use the <? > or<? > key to move the cursor (Highlight) up or down to the
area to be adjusted, press the <+ > or <- > key to make changes.
Year / Month:
Enter the year / month by pressing <+ > or <- > key to select the
year / month.
Day / Hour / Minute:
Enter the correct day and time by pressing
<
+
>
and
<
-
>
key.
After all selections have been made, press the <PLAY> or <ENTER> key
to enter play mode, or <EXIT> key to return to standby mode.
Legend:
Red Bar: Indicates previously made Motion Recordings.
Blue Bar: Indicates previously made manual or schedule
recordings.

9
MAIN MENU
SYSTEM STATUS
DATE / TIME
RECORD SETTING
RECORD MODE
ALARM BUZZER SETUP
ENGINEERING SETUP
6. Recording Mode
Manual Recording:
In Standby mode, press the <REC> key to start
recording, press the <STOP> key to stop manual
recording.
??
For functions including: Schedule Recording and Motion
Detect Recording please refer to Menu Setup below.
?? If Schedule Recording, or Motion Detect Recording, (set in
Recording Mode) are enabled, the <STOP> key does not
function when pressed in order to protect recordings.
?? During recording, items under Main Menu may not be accessed
to make adjustments, except System Status and Recording
Mode.
7. Menu Set Up
7.1 Enter Main Menu
Press the <MENU> key to enter the Main Menu.
All of the items in the main menu contain sub
menus that will be described step-by step in the
following section Use the cursor to select the
needed sub menu by using the <? > or <? >
keys.
Press the <ENTER> key to show the sub menu.
Press the <EXIT> key to return to the previous
page.
7.2 System Status
From the Main Menu, select System Status.
SYSTEM STATUS
TOTAL CAPACITY : 29.2GB
REMAINING TIME
:
0.2
HR

10
Press the <ENTER> key to show the system
status summary page.
Press the
<EXIT>
key to return to the Main Menu,
Press the <EXIT> key again to return to normal
video.
NOTE:
??
TOTAL CAPACITY – Displays the size
of the internal hard disk drive.
?? REMAINING TIME – The amount of time
left before the hard disk drive is full.
0.2HR indicates a full drive, with a
standard 200Meg of space constantly
available to assist the recording process.
?? QUALITY – Choose from LOW, MID, or
HIGH in the Record Setting Menu.
??
RESOLUTION
– Choose from 720 x 240
or 360 x 240 in the Record Setting Menu.
?? FRAME RATE - Adjusted by Rec Rate in
the Record Setting Menu.

11
7.3 Date / Time
From the Main Menu, select
Date / Time.
Press the
<ENTER> key to show the sub menu pictured to the
right.
Press <? > or <? > key to move the cursor.
Press <+ > or <- > key to make changes
Time and date for the on-screen display is set from
this menu.
Date Format:
The date format can be one of the following
a. YY/MM/DD (year – month – day)
b. MM/DD/YY (month – day – year)
c. DD/MM/YY (day – month – year)
Date
:
ON / OFF
Toggles the date for the on screen display ON/OFF using the <-> or
<+> key.
Time
:
ON / OFF
Toggles the time for the on screen display ON/OFF using the <-> or
<+> key.
Location
:
Set the location of the time and date display using the <-> or <+> key.
The position can be one of the following:
a. LEFT TOP
b. RIGHT TOP
c. LEFT BOTTOM
d. RIGHT BOTTOM
e. TOP
f. BOTTOM
Press the <Exit> key to return to the Main Menu
DATE / TIME
DATE FORMAT MM/DD/YY
DATE ON 06/09/04
TIME ON 20:30:00
LOCATION RIGHT BOTTOM

12
7.4 Record Setting
From the Main Menu, select
Record Setting
. Press
the <ENTER> key to show the sub menu pictured to
the right.
Press <? > or <? > key to move the cursor
Press
<
+
> or <
-
>
key to make changes.
Press the <EXIT> key to return to the Main Menu.
Please Note:
The typical goal behind selecting record quality,
resolution, and frame rate is achieve the highest
quality, maximum amount of recorded frames, and
best resolution, and still be able to record the amount
of time needed at once on the unit’s hard disk drive to
fit your application. These three items interact with
each other in determining the amount of space a
frame of video will need to be stored on the unit’s hard
disk drive. The extreme flexibility of this DVR will
allow you to easily get the best combination for your
situation.
Quality: Three choices to select from:
High :
Large file capacity and high image quality display.
Mid : Medium file capacity and medium image quality display.
Low : Small file capacity and lower image quality display.
Resolution : 720 × 240 (playback picture will fill entire screen)
360 x 240 (playback picture will fill 50% of the screen, or full
size using the Zoom Function).
REC Rate: Press <+ > or <- > key to adjust the recording rate (frames of
video recorded per second = FPS)
When the Quality setting is HIGH:720x240 1~6 FPS
360x240 1~9 FPS
When the Quality setting is Mid or Low:720x240 1~10 FPS
360x240 1~15FPS
Disk Full: Press <+ > or <- > key to adjust between:
Overwrite: When the disk is full, information at the beginning of the disk
will be recorded over (Loop Recording).
RECORD SETTING
QUALITY MID
RESOLUTION 720X240
REC RATE 10 FPS
DISK FULL OVERWRITE
AUDIO IN OFF
RECORD TIME
TOTAL TIME : 38.5HR
REMAINING TIME : 0.3HR

13
Stop: When the disk is full, the unit automatically stops recording.
Audio In
: Press
<
+
>
or
<
-
>
key to adjust between:
ON : Audio recording “ON”.
OFF: Audio recording ”OFF”.
Record Time:
Total Time: The quality, resolution, and the recording rate settings
affect the total available recording time.
Remaining Time: The amount of recording time left on the hard disk
drive before Overwrite begins or recording Stops.
Note: Actual remaining time will vary depending on the
complexity of the images you are recording Remaining time
displayed is a minimum estimate.
.
Press the <EXIT> key to return to the Main
Menu, Press the <EXIT> key again to return to
normal video.
7.5 Record Mode
From the Main Menu move the cursor to Record Mode, press the
<ENTER> key to show the menu below:
Press <? > or <? > key to move the cursor.
Press <+ > or <- > key to make changes.
.
RECORD MODE
SCHEDULE RECORDING
REC BEGIN / END
OFF 20:00 / 08:00
MOTION DETECTION RECORDING
REC BEGIN / END SEN GRID
OFF 20:00 / 08:00 3 SET
POST ALARM TIME : 10 SEC

14
This unit has two types of automatic recording modes:
a. Schedule Recording: Unit will record during a programmed time
period.
REC:
ON : For Schedule Recording “ON”.
OFF: For Schedule Recording “OFF”.
<STOP> key does not function during Schedule Recording.
BEGIN / END:
Begin: Start time for recording.
End
:
End time for recording.
Examples: The clock in this unit incorporates a 24 hour (Military)
format. To set the unit to record from 8:00AM to 6:00PM (enter 8:00 /
18:00). To record from 5:00PM to 8:00AM the next day (enter 17:00 /
8:00).
b. Motion Detection Recording: Motion detection recording can be
made available during a specified time
period each day.
REC
:
ON : For Motion Detection Recording “ON”.
OFF: For Motion Detection Recording “OFF”.
<STOP> key does not work during Motion Detect Recording.
BEGIN / END:
Begin: Time to activate motion detection circuit.
End : Time to deactivate motion detection circuit.
Example: For 24H availability of motion recording, the settings of the begin time
must be the same as the end time (i.e. 06:00 – 06:00). To
enable motion detection recording during a certain time period,
perhaps at night from 9:00PM – 7:00AM (enter 21:00 / 7:00)
SEN (Motion Sensitivity): There are 5 levels of sensitivity for motion
detection.

15
1: High motion sensitivity rate (through)
5: Low motion sensitivity rate.
Grid (Motion Activity Grid): Move the cursor to Grid, then press the
<ENTER> key to enter the Motion Activity Grid display :
(Red tinted blocks indicate the area under motion detection, the factory default is for all
areas to be active)
Press
<
?
>
or
<
?
>
key to move the cursor
Press <+ > or <- > key to switch ON/OFF the motion detection area.
Post-alarm Time: Adjusts the extra amount of recording time after motion
detection activity stops (Time setting range from 0~99 Sec).
Press the <EXIT> key to return to the previous page.

16
7.6 Alarm Buzzer Setup
From the main menu select Alarm Buzzer Setup,
and press the <ENTER> key to show the menu to
the right
Press the <? > or <? > key to move the cursor.
Press the <+ > or <- > key to change the settings.
Press the <EXIT> key to return to previous page.
Motion Alarm:
ON : Buzzer will sound during motion detection.
OFF
: Buzzer will not sound during motion detection.
Video Loss:
ON : Buzzer will sound during a loss of video signal input.
OFF
: Buzzer will not sound during a loss of video input.
Buzzer Period: Adjustable from 1 to 15 minutes after trigger.
When the BUZZER PERIOD is set to “00”, the buzzer will
sound for only 2 seconds.
ALARM BUZZER SETUP
MOTION ALARM: ON
VIDEO LOSS : ON
BUZZER PERIOD: 05 MIN

17
7.7 Engineering Setup
From the main menu select Engineering Setup.
Press the
<ENTER>
key to show the menu on
the right.
Press the <? > or <? > key to move the cursor.
Press the <+ > or <- > key to change the value
settings
Press the <EXIT> key to return to the previous
page
7.7.1 Set Password
Move the cursor to Set Password.
Press the
<ENTER>
key to show the menu on the
right.
Press the <? > or <? > key to move the cursor.
Press the <+ > or <- > key to adjust the numbers
of the password. Enter the factory default “0000” or
your current password that you want to change.
FOUR NUMBERS ARE REQUIRED.
Press <ENTER> key again to show the menu on
the right.
Enter your new four digit password then press the
<ENTER> key. Enter your new password again
on the Confirm Password line and press the
<ENTER>
key again.
Press the <ENTER> key or <EXIT>key to return to
the previous menu.
7.7.2 Camera Titles Setup
From Engineering Setup, press the <ENTER> key,
select Camera Titles Setup press the
<ENTER> key to enter the menu on the right. The
camera titles can be up to eight (8) characters in
CHECK PASSWORD ****
SET PASSWORD
ENTER NEW PASSWORD ****
CONFIRM PASSWORD ****
ENGINEERING SETUP
SET PASSWORD
CAMERA TITLE SETUP
VIDEO QUALITY
HARD DISK ERASE
COLOR BARS ON
LOAD FACTORY DEFAULTS
CAMERA TITLE SETUP
OFF < 1 >

18
length and configured using the following
available characters: A-Z 0-9.
Press <? > or <? > key to move the cursor.
Press <+ > or <- > key to make changes.
Select:
ON : To show the camera title
OFF: To hide the camera title
Press the <EXIT> key to return to the previous page.
7.7.3 Video Quality
From Engineering Setup press the <ENTER> key.
The brightness, contrast, chroma, and
sharpness of the recorded picture may be adjusted.
Press <? > or <? > key to move the cursor.
Press <+ > or <- > key to make changes.
These settings change the image quality for recorded images, not for live
monitoring images.
7.7.4 Hard Disk Erase
From Engineering Setup, press the <ENTER> key.
Move the cursor to Hard Disk Erase press
<ENTER> key to show the menu
on the right.
CHECK PASSWORD
****
BRIGHT 22
CONTRAST 40
CHROMA 25
SHARP 31

19
Current password must be entered, before
formatting the data on the hard disk. Press the
<ENTER> key to show the Hard Disk Erase
menu
Reconfirm:
Select “
YES
”
,
then press the
<ENTER>
key to
begin erasing the data on the hard disk.
WARNING:
ALL STORED IMAGES WILL
BE ERASED.
Press <EXIT> key to return to the previous
page.
Please use this same procedure to format a new or
replacement hard disk.
7.7.5 Color Bars
From Engineering Setup, press the <ENTER> key.
Move the cursor to select
COLOR BARS,
press
the <ENTER> key to display the bars. Press the
<EXIT> key to return to the previous screen.
HARD DISK ERASE
NO YES
HARD DISK ERASE
IN PROGRESS
50%

20
Color Bars are very useful to set the correct hue and intensity
of a color monitor.
7.7.6 Load Factory Default
From Engineering Setup, press the <ENTER>
key. Move the cursor to LOAD
FACTORY DEFAULT and press the
<ENTER> key.
To load factory defaults, select “YES”, then press
the <ENTER> key to complete the setup
procedure.
Press <EXIT> key to return to the previous
page.
8. Recording Reference Time Table
HDD 30G
REC Rate: High
Resolution = 720x240 Resolution =
360x240
FRAMES RECORD TIME - HOURS FRAMES RECORD TIME - HOURS
LOAD DEFAULT
NO YES
/