Page is loading ...

USER’S MANUAL
DVDR-X30

1
SAFETY INSTRUCTIONS
Safety Symbols
This symbol indicates there is a dangerous voltage within the DVD Recorder, which
may have sufficient magnitude to constitute a risk of electric shock if not handled
correctly. To avoid the risk of electric shock, do not open the housing at any time.
This symbol identifies important operating and maintenance (servicing)
instructions. Be sure to follow instructions identified with this symbol to avoid
potential damage to your unit.
Safety Precautions
WARNING: TO REDUCE THE RISK OF FIRE OR ELECTRIC SHOCK, DO NOT
EXPOSE THIS APPLIANCE TO RAIN OR MOISTURE. DANGEROUS HIGH
VOLTAGES ARE PRESENT INSIDE THE ENCLOSURE. DO NOT OPEN THE
CABINET. REFER SERVICING TO QUALIFIED PERSONNEL ONLY.
DO NOT STARE INTO BEAM OR BLINDNESS MAY RESULT.
This DVD Recorder employs a laser system. To prevent direct exposure to laser beam, do not try to open the
enclosure or defeat the interlocks. Use of controls, adjustments or the performance of procedures other than
those specified may result herein hazardous radiation exposure. To prevent direct exposure to laser beam, do
not try to open the enclosure. Visible laser radiation when open and interlocks defeated.
Other Precautions
Do not put any objects in the tray other than approved video and audio discs.
Do not open the unit, touch the inner parts or insert any foreign objects into the unit.
Place the unit on a level, open surface. Do not locate the unit under direct sunshine, near heating devices or in
very dusty or dirty places. Otherwise, the unit may be damaged.
Hold the plug tight when connecting or disconnecting the AC power supply. Do not put any weight on AC
cord or attempt to service the AC cord if it becomes damaged.
Keep unit away from open windows or near anyplace where water may get into the unit and damage it.
Do not stack heavy objects on the unit.
Condensation may form in the unit when moving it from very cold to very warm or humid locations. In such
cases, wait for the unit to come to room temperature and the condensation to evaporate before using the unit.
Do not place the unit near radio receiver or other video or audio devices. Should a nearby
radio receiver experience interference while the unit is running, turn the DVD Recorder off.

2
SAFETY INSTRUCTIONS
5.Heat
Position the unit away from heat
sources such as radiators, heat
registers, stoves, or other products
(including amplifiers) that produce
heat.
6.Water and Moisture
Do not use this product near water
such as near a bathtub, wash bowl,
kitchen sink, or laundry tub, in a wet
basement, near a swimming pool or
the like.
7.Cleaning
Unplug this product from the A/C
outlet before cleaning. Use a damp
cloth to clean the unit. Do not use
liquid or aerosol cleaners.
8.Power Cord Protection
Power supply cords should be routed
so that they are not likely to be walked
on or pinched by items placed upon
or against them. Pay particular
attention to cords at plugs, convenience
receptacles, and the point where they
exit from the product.
9.Overloading
Do not overload wall outlets or
extension cords as this can result
in a risk of fire or electric shock.
1.Read this Manual
After unpacking this product read
the manual carefully and follow
all the operating instructions.
2.Power Sources
This product should be operated
only from the type of power source
indicated on the unit. If you are not
sure of the type of power supply to
your home, consult your product
dealer or local power company.
3.Grounding or Polarization
If this product is equipped with a polarized
alternating current line plug(a plug having
one blade wider than the other), it will fit into
The outlet only one way. This is a safety feature.
If you are unable to insert the plug fully into
the outlet, try reversing the plug. If the plug
should still fail to fit, contact your electrician
to replace your obsolete outlet. Do not defeat
the safety purpose of the polarized plug.
If this product is equipped with a three-wire
grounding type plug, it will only fit into a grounding
type power outlet. This is a safety feature. If you are
Unable to insert the plug into the outlet, contact your
electrician to replace your obsolete outlet. Do not
defeat the safety purpose of the grounding type plug.
4.Ventilation
Slots and openings in the cabinet
are provided for ventilation and to
ensure operation of the product and
to protect it from overheating. Do
not block or cover these openings.

3
SAFETY INSTRUCTIONS
10.Lightning
Unplug the unit from the wall
outlet during storms to prevent
damage from lightning and
power surges.
11.Objects and Liquids
Never push objects into this
product as that could result in
a fire or electric shock. Never
spill liquids on the product.
12.Attachments
Do not use attachments not
recommended by the product
manufacturer as they may cause
hazards.
13.Accessories
Do not place this product on an
unstable platform. The product
may fall, causing serious injury
or serious damage to the product.
14.Disc Tray
Keep your fingers clear of the
disc tray as it is closing. Neglecting
to may cause serious personal injury.
15.Burden
Do not place heavy objects on
the product. The object may fall
causing serious personal injury
and serious damage to the product.
16.Discs
Do not use a cracked, deformed
or repaired disc. These discs are
easily broken and may cause
serious personal injury and product
malfunction.
17.Damage Requiring Service
Unplug the unit from the A/C outlet and refer servicing to
qualified service personnel under the following conditions:
a) When the power cord or plug is damaged.
b) If liquid has been spilled into or objects have fallen into
the product.
c) If the product has been exposed to rain or water.
d) If the product does not operate normally.
e) If the product has been dropped or damaged in any way.
f) When the product exhibits a distinct change in
performance.
18. Servicing
Do not attempt to service this
product yourself as this may
expose you to dangerous voltage
or other hazards. Refer all servicing
to qualified service personnel.
19. Replacement Parts
Be sure the service technician has
used authorized replacement parts.
Unauthorized substitutions may
result in fire, electric shock, or other
hazards.
20.Safety Check
Upon completion of any service or
repairs, ask the service technician
to perform safety checks to determine
that the product is in proper operating
condition.
21.Splashing
The apparatus shall not be exposed to dripping or
splashing and no objects filled with liquids,
such as vases, shall be placed on the apparatus.
22.Battery Usage
Battery leakage may result in bodily injury or damage to
the unit. In order to avoid battery problems, please follow
These instructions.
Install all batteries correctly, with+and -aligned as marked
on the unit.
Do not mix batteries(old/new,carbon/alkaline, etc.).
Remove batteries when the unit is not used for a long time.

4
SAFETY INSTRUCTIONS
PRODUCTS WITH PROGRESSIVE SCAN OUTPUTS (525P/625P)
NOTICE REQUIREMENTS
(From the 525p/625p Addendum to the DVD License Agreement)
Licensee will incorporate the following wording, as appropriate, together with the applicable list
of Licensee's high definition television sets, in all product manuals or the like applicable to any
DVD Recorder with a YUV progressive scan output:
For DVD Recorders with 525p, but not 625p, progressive scan output:
CONSUMERS SHOULD NOTE THAT NOT ALL HIGH DEFINITION TELEVISION SETS ARE
FULLY COMPATIBLE WITH THIS PRODUCT AND MAY CAUSE ARTIFACTS TO BE
DISPLAYED IN THE PICTURE. IN CASE OF 525 PROGRESSIVE SCAN PICTURE
PROBLEMS, IT IS RECOMMENDED THAT THE USER SWITCH THE CONNECTION TO
THE STANDARD DEFINITION OUTPUT. IF THERE ARE QUESTIONS REGARDING OUR
TV SET COMPATIBILITY WITH THIS MODEL 525p DVD RECORDER, PLEASE CONTACT
OUR CUSTOMER SERVICE CENTER.
For DVD Recorders with 625p, but not 525p, progressive scan output:
CONSUMERS SHOULD NOTE THAT NOT ALL HIGH DEFINITION TELEVISION SETS ARE
FULLY COMPATIBLE WITH THIS PRODUCT AND MAY CAUSE ARTIFACTS TO BE
DISPLAYED IN THE PICTURE. IN CASE OF 625 PROGRESSIVE SCAN PICTURE
PROBLEMS, IT IS RECOMMENDED THAT THE USER SWITCH THE CONNECTION TO
THE STANDARD DEFINITION' OUTPUT. IF THERE ARE QUESTIONS REGARDING OUR
TV SET COMPATIBILITY WITH THIS MODEL 625p DVD RECORDER, PLEASE CONTACT
OUR CUSTOMER SERVICE CENTER.
For DVD Recorders with both 525p and 625p progressive scan outputs:
CONSUMERS SHOULD NOTE THAT NOT ALL HIGH DEFINITION TELEVISION SETS ARE
FULLY COMPATIBLE WITH THIS PRODUCT AND MAY CAUSE ARTIFACTS TO BE
DISPLAYED IN THE PICTURE.IN CASE OF 525 OR 625 PROGRESSIVE SCAN PICTURE
PROBLEMS, IT IS RECOMMENDED THAT THE USER SWITCH THE CONNECTION TO
THE 'STANDARD DEFINITION OUTPUT.IF THERE ARE QUESTIONS REGARDING OUR
TV SET COMPATIBILITY WITH THIS MODEL 525p AND 625p DVD RECORDER, PLEASE
CONTACT OUR CUSTOMER SERVICE CENTER.

5
SAFETY INSTRUCTIONS
This product incorporates copyright protection technology that is protected by method claims of certain
U.S. patents and other intellectual property rights owned by Macrovision Corporation and other rights
owners. Use of this copyright protection technology must be authorized by Macrovision Corporation, and
is intended for home and other limited viewing uses only unless otherwise authorized by Macrovision
Corporation. Reverse engineering or disassembly is prohibited.
Manufactured under license from Dolby Laboratories. "Dolby", and the double-D symbol are
trademarks of Dolby Laboratories.

6
CONTENTS
SAFETY INSTRUCTIONS . . . . .. . . . . . . . . . . . . . . . . . 1- 5
CONTENTS . . . . . . . . . .. . .. . . . . . . . . . . . . . . . . . . . . . . . . . 6
INTRODUCTION
DVD R/RW Recorder and Progressive scan Player . . . . . . . 7
Opt ica l dis c com pat ibi lit y . . . . . . . . . . . . . . . . ... . . . . . . . . . . 8
Car ing f or op tic al di scs . . . . . . . . . . . . . . . . . . . . . . . . . . . . . . . .8
Make sure the package contents are complete . . . . . . . . .. . . . .9
Installing batteries in the remote control . . . .. .. .. .. .. . . .. . . .9
Ope rat ing t he re mot e con tro l . . . . . . . . . . . . . . . . . . . . . . .. . . . .9
FUNCTIONAL OVERVIEW
Rem ote c ont rol . . . . . . . . . . . . . . . . . . . . . . . . . . . . . . . . . . . . . . 10
Fro nt pa nel . . . . . . . . . . . . . . . . . . . . . . . . . . . . . . . . . . . . . . . ... 1 1
Fro nt VF D dis pla y . . . . . . . . . . . . . . . . . . . . . . . . . . . . . . . . . . .12
Bac k pan el . . . . . . . . . . . . . . . .. . . ... . . . . . . . . . . . . . . . . . . . . . 13
CONNECTIONS
Composite video(Typical connection) . . . . . . . . . .. . . . .. . . . 14
Aud io ou tpu t con nec tio ns . . . . . . . . . . . . . . . . . . . . . . . . . . . . .1 5
Ant enn a & TV co nne cti ons . . . . . . . . . . . . . . . . . . . . . . . . . . . .15
AV2 Inputs (VIDEO IN)DV input . ... . . . . . . . . . . . . . . . .. .. 16
DVD RECORDER OPERATION
Pow eri ng on t he un it . . . . . . . . . . . . . . . . . . . . . . . . . . . . . . . . .1 7
Ini tia l Set up Pr oce dur e . . . . . . . . . . . . . . . . . . . . . . . . . . . . . . 17
Usi ng th e men us . . . . . . . . . . . . . . . . . . . . . . . . . . . . . . . . . . .. . 1 7
Ins ert ing a D isc . . . . . . . . . . . . . . . . . . . . . . . . . . . . . . . . . . . . . 18
Usi ng Di sc me nus . . . . . . . . . . . . . . . . . . . . . . . . . . . . . . . . . . . 18
Bas ic di sc pl ayb ack . . . . . . . . . . . . . . . . . . . . . . . . . . . . . . . . .. 19
Adv anc ed pl ayb ack . . . . . . . . . . . . . . . . . . . . . . . . . . . . . . . . . 20
Slo w mot ion p lay bac k . . . . . . . . . . . . . . . . . . . .. . . . . . . . . . . . 20
Rep eat ing a s egm ent y ou de fin e . . . . . . . . . . . . . . . . . . . . . . .20
Mul ti- ang le fu nct ion . . . . . . . . . . . . . . . . . . . . . . . . . . . . . . . . . 21
Cha ngi ng th e aud io tr ack . . . . . . . . . . . . . . . . . . . . . . . . . . . . . 2 1
Sub tit les . . . . . . . . . . . . . . . . . . . . . . . . . . . . . . . . . . . . . . . . . . . 2 1
View ing J PEG f ile s . . . . . . . . . . . . . . . . . . . . . . . . . . . . . . . . . . 22
Pla yin g MP3 f ile s . . . . . . . . . . . . . . . . . . . .. . . . . . . . . . . . . . . 22
RECORDING
Int rod uct ion t o rec ord ing . . . . . . . . . . . . . . . . . . . . . . . . . . . 2 3
Set tin g rec ord ing o pti ons . . . . . . . . . . . . . . . . . . . . . . . . . 2 4
Set tin g the a uto c hap ter o pti on . . . . . . . . . . . . . . . . . . . . . . . 24
Che cki ng th e Time a nd Da te . . . . . . . . . . . .. . . . . . . . . . . . 2 4-2 5
The Ti tle s cre en . . . . . . . . . . . . . . .. . . . . . . . . . . . . . . . . . . . . . . 2 5
Type s of Re cor din gs . . . . . . . . . . . . . . . . . . . . . . . . . . . . . . . 25
Mak ing a L ive R eco rdi ng . . . . . . . . . . . . . . . . . . . . . . . . 25 -26
Rec ord ing . . . . . . . . . . .. . . . . . . . . . . . . . . . . . . . . . . . . . . . . . 26
Tim er Re cor din g . . . . . . . . . . . . . . . . . . . . . . . . . . . . . . . . 26- 27
FINALIZATION . . . . . . . . . . . . . . . . . . . . .. . .. . . . . . . . . . . . 2 8
SYSTEM SETUP
Gen era l . . . . . . . . . . . . . . . . . . . . . . . . . . . . . . . . . . . . . . . . ..2 9
Pla yba ck . . . . . . . . . . . . . . . . . . . . . . . . . . . . .. 29- 30
Rec ord . . . . . . . . . . . . . . . . . . . . . . . . . . . . . . . . . . . . . . 3 0-3 1
Lan gua ge . . . . . . . . . . . . . . . . . . . . . . . . . . . . . . . . . . . . . . . .3 1
Cha nne l sca n . . . . . . . . . . . . . . . . . . . . . . . . . . . . . . . . . .32 -33
Clo ck . . . . . . . . . . . . . . . . . . . . . . .. . . . . . . . . . . . . . . . . . . . .33
EDIT
Edi t a tit le of D VD RW . . . . . . .. . . . . . . . . . . . . . . . . . . . . . . . . 34
Cha pte r edi t . . . . . . . . . . . . . . . . . . . . . . . . . . . . . . .. . . . . . . . . . . 34
Edi t a dis c on th e DVD R . . . . . .. . . . . . . . . . . . . . . . . . . . . . 35
TROUBLE SHOOTING
Pla yba ck . . . . . . . . . . . . . . . . . . . . . . . . . . . . . . . . . . . . . . . . . . . . . 36
Recording
. . . . . . . . . . . . . .. . . . . . . . . .. . . . . . . . . . . . . . 36
SPECIFICATIONS . . . . . . . . . . .. . . .. . . . . . . .. . . . . . . . . . . . . 37
ATTACHMENT
. . . . . . . . . . . . . . . . . . . . . . .. . . . . . . . . . . 38

7
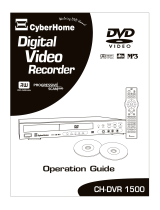
DVD R/RW Recorder and Progressive Scan Player
PROGRESSIVE
SCAN
The recording provides you the ability to create your own DVD discs from your home movies, favorite TV
programs and more. Because of the outstanding compatibility of DVD R/RW discs, the discs you create will be
suitable for playback in most DVD Players. You can record from the unit's built-in TV tuner or an external video
source like a video camera. And when you're ready to watch your recordings or commercial DVD, you can enjoy
them in the highest quality with the unit's progressive scan video out and digital audio out.
DVD R/RW Recorder
Record from your TV, camcorder, VCR, DVD
Live, timer and scheduled recording functions
Multiple recording modes, HQ, SP, EP, SLP
Up to 6 hours recording on one DVD R/RW Disc
On-Screen disc title navigator gives you quick, easy
access to your recordings
Built-In TV tuner, side and rear A/V inputs
Editing features with Add/del, Hide Chapters
Your recordings are playable on most DVD players.
Progressive scan DVD R/RW
Progressive scan video with 3:2 pull down playback
DVD+R, DVD+RW, DVD-R, DVD-RW, DVD, CD-
R,CD-RW, SVCD,MP3, JPEG, HDCD Kodak picture
CD, MPEG4.
Component Video, S-Video and Composite Video
Outputs
96 kHz / 24 bit D/A converter
Stereo and 5.1CH Audio outputs, Optical and Coaxial
digital outputs.
Advanced playback functions: Slow playback, Repeat
playback, Parental control, Mp3 format, JPEG format,
Screen saver, Zoom In/Out, Track selection, On-
screen display and more.
INTRODUCTION
JPEG

8
INTRODUCTION
Optical disc compatibility
This unit is compatible with a wide range of available
optical discs for recording and playback.
Discs suitable for Recording and Playback
You must use DVD R or DVD RW discs to record on this
unit.
DVD R: These discs can only be written to once. Existing
recordings can be hidden but not deleted. So, any disc space
already used by a recording cannot reclaim. DVD R discs
are required to be "Finalized" before they will be
compatible with standard DVD player. Once a disc is
finalized, no further recordings can be made.
DVD RW:DVD RW discs can be written to and erased
multiple times. Existing recordings can be deleted and disc
space regained. These discs do not require a finalization
procedure. As soon as a recording is made, the disc will be
compatible with standard DVD player.
Discs suitable for Playback
DVD R/RW:These discs can be played back when
recorded in standard DVD video format.
TM TM
TM TM
CD-AUDIO: An on-screen navigator is provided to
select and play tracks when using CD-Audio discs.
CD-R/RW:This unit features an on-screen navigator for
easy access to playable files stored on CD-R/RW discs,
such as JPG images and MP3 music.
Caring for Optical Discs
1. Hold a disc by the rim or with an index finger in the
central hole. Never touch the signal surface.
2. Finger prints or stains on the surface of the disc may
cause signal loss.
3. Use a soft cloth and wipe in a radiating manner from
the center of the disc to the outer rims when cleaning
the disc surface.
4. Never add labels or adhesive tapes on the discs be
careful not to scratch or damage the disc surface.
5. To prevent discs from becoming bent or deformed,
they should be vertically kept in the disc storage case.
to prevent damage, avoid leaving discs in your car,
where they may be subject to direct sunlight and high
temperature.
6. Do not use any disc accessory to improve the audio
quality, disc protective solutions or lens cleaner.
these products may damage the disc surface.
Labels
Tapes
Labeling Side
Surface
The unit are coded for Region 4, and are compatible with
discs marked accordingly.
4

9
INTRODUCTION
Make sure the package contents are complete
In addition to the DVD recorder, your package contains the following accessories.
Remote control
Batteries(AAA)
A/V cable (Composite
Manual
Installing batteries in the remote control
This unit comes completely with batteries for the remote
control. When installing batteries, be sure to take note of
the polarity markings on the inside of the battery
compartment and match them up with those on the
batteries.
1
2
Slide off the back cover
Install the batteries in
the compartment.
Notes on batteries
1. If the remote control functions better when it is closer
to the unit, the batteries may be running low.
2. In case of any leakage of batteries, dispose the
batteries right away and avoid touching the chemical
discharge. Make sure to clean the remote control's
battery compartment before installing new batteries.
3. Do not mix batteries of different types, or use old
batteries.
Operating the remote control
When using the remote control, be sure to stay within a
30degree angle of the sensor (More than 3 meter )on the
receiver. Keep in mind that any obstructions between
the remote control and the receiver will effect
performance.
Video, Stereo Audio)
30 30
Warranty

FUNCTIONAL OVERVIEW
Remote Control
10
1. STANDBY - Turn the unit on and set
the unit to Standby mode.
2.AV2-Select input sources to front
CVBS in, Front S-VIDEOO in.
3. AV1-Select input sources to Rear
CVBS in, Rear S-VIDEO.
4.STOP - Press once to stop
playback and hold the last position
in memory. Playback can be
resumed where it was left off by
pressing PLAY. Press twice to
clear the last playback position.
5.PLAY /PAUSE - Playback a disc,
chapter or track. Press again during
playback to pause. Playback or Pause
the disc.
6.EARSE-Press to earse the DVD RW
disc.
7.REC - Press to begin a live recording.
8.PRO.DISC-Press once to protect
DVD+RW disc that has been recorded.
Press twice to unprotect.
9. REC. MODE - Select the
recording quality mode: HQ, SP, EP,
SLP.
10.REV/FWD - Scan in fast reverse or
forward on DVD or other discs.
11. MENU - Access DVD or other disc's
menu, and can turn PBC funtion
ON/OFF when playing SVCD.
12/14. (CH+/-)/ UP/DOWN - In RF IN
mode, use to select a channel or to
highlight the item you desired.
13/31. -
. SETUP - Access the on-screen
Setup Menu for settings adjustment.
Use direction keys to highlight the
item you desired.
16.NUMBER KEYS - Enter
numeric values while setting options.
17.STEP-Step by step playback.
18.SLOW - Slow motion playback
mode in1/2,1/4 ,1/8or 1/16 speed.
Press PLAY to resume normal
playback.
19. AUDIO - Select an audio track
on DVD disc or other discs.
20.PSCAN - Select the video out format
for progressive scan mode or interlace
scan.
21.REPEAT- Select to repeat A-B,
Chapter, Title or Disc.
22.RETURN -Resume playback for
DVD discs or other discs.
23.OPEN / CLOSE - Open /Close the
disc tray.
24.TV/DVD-Press to TV mode and Press
to DVD playback mode.
RIGHT/LEFT To highlight the
item you desired.
15
25.MUTE - Temporarily cancel audio
playback.
26. FINALIZE-Press to finalize the
DVD+R disc.
27. TIMER -Access the timer
menu for scheduled recording
Setup.
28.PREV/NEXT- Advance to the next
track or play previous track on DVD or
other disc.
29.USB-Press to select playing the picture
or music in stored, if an USB is inserted.
30.Select - Select option in menus. Play a
disc, chapter or track with some discs.
For other discs, press PLAY key.
32.DV-Press to select DV IN as input
source.
33.GOTO -
To Select your desired time,
chapter of the disc to play.
34.ADD/CLEAR-Use to delete characters
when entering words, further more, you
can use it to program your playback
order.
35. SUB-T -Select an available
Subtitle.
36.TITLE-Access the title screen on DVD
discs, displaying a graphical
representation of the recordings and
providing easy navigation.
37/38.VOL(-/+)-Use to increase or
decrease volume value.
39.ZOOM - Press to magnify the
screen with DVD or other discs and JPG
discs.
40.OSD - Bring up the on-screen display
showing information for the playback
section.
1
2
3
4
5
6
7
8
9
10
11
12
13
14
15
16
17
18
19
20
21
22
23
24
25
26
27
28
29
30
31
32
34
35
36
37
38
39
40
33

11
FUNCTIONAL OVERVIEW
Front Panel
9. S-VIDEO INPUT - S-VIDEO input for recording.
To select this input, use the SOURCE button and
choose FRONT S-VIDEO.
10.
11/12.
13.
14. -Press to select playing the picture or music in
stored, if an USB is inserted.
VIDEO INPUT - Composite video input for
recording. To select this input, use the SOURCE
button and choose FRONT CVBS.
STEREO AUDIO INPUTS-Use with Front
CVBS IN , or Front S-VIDEOIN for recording.
DV IN - The i-link DV input Jack. Connecting the
DV or digital camcorder for recording, To select this
input. Use the SOURCE button and source DV IN.
USB
1. STANDBY - Turn the unit on and sends the
unit to standby mode. In standby mode, the unit will
use a minute amount of power to enable power-on by
the remote control.
2. PLAY/PAUSE - Begin playback of a disc, chapter or
track. Press again during playback to pause, and again
to resume playback.
3. STOP - Press once to stop playback of a disc and
save the location of the stop point. The disc can be
played back from the stop point by pressing PLAY. To
erase the stop point and reset the play location to the
beginning of the disc, press STOP a second time.
4. REC- Begin a live recording.
5. SOURCE - Select input sources when the
recorder is in live record mode - TV Tuner, Front
CVBS, Rear CVBS, Rear S-Video, DV, And switch
DVD recorder mode to live recording mode.
6/7. PREV/NEXT- Advance to the next track or play
previous track on DVD or other disc.
8. OPEN/CLOSE - Press to open or close the
disc tray.

12
FUNCTIONAL OVERVIEW
Front VFD Display
1. FUNCTION INDICATORS
Indicate the status of advanced disc playback
Functions:
REC Recording indicator.
PBC PBC (Playback Control) Function is enabled.
These indicators show the playback status of a
DVD, CD or other optical disc-Currently Playing,
Paused.
Indicate the timer recording
2. PROCESSOR INDICATORS
These indicators display the status of the surround
sound processors and type of sound track currently
active. CHANNEL the TV channel indicates
DOLBY the Dolby Digital processor is active.
TV. Indicate the TV channel.
3. DISC TYPE INDICATORS
Display the type of optical disc inserted - DVD,
SVCD,CDDA (Music CD), or Mp3.
4.TITLE /CHAPTER/TRACK INDICATOR
Display the number of the current Title, Chapter or
Track on DVD, Music CDs and other discs.
5.MULTI-FUNCTION DISPLAY
When playing a DVD or other optical disc, displays
the elapsed time of the playback session or track.
Also displays disc tray status, system messages and
more. When the unit is in Standby Mode, displays the
system clock.

13
FUNCTIONAL OVERVIEW
Back Panel
1. RF IN / OUT - For antenna or cable TV connection. pass through connection to TV does not transfer the output
signal from the DVD recorder.
*Some units do not have a pass through connector. In this case, use a splitter (See page 16).
2.STEREO AUDIO INPUTS-Use with S-VIDEO IN or VIDEO IN for recording.
3.S-VIDEO INPUT- S-VIDEO input for recording. To select this input, use the SOURCE button and choose Rear S-
VIDEO.
4.COMPOSITE VIDEO OUTPUT-Standard video output is supported by most TVs
5. 5.1CH AUDIO OUTPUT - Connect to TV or other audio equipment supporting 5.1CH audio in.
6. COAXIAL DIGITAL AUDIO OUTPUT - Use a special coaxial digital audio connector to send the RAW code or
LPCM digital signal to devices supporting digital decoding.
7.COMPONENT/PROGRESSIVE SCAN VIDEO OUTPUT-Use this output with Tvs supporting component video
or progressive scan input for best video quality. Select this output in the DVD recorders SETUP MENU.
8.S-VIDEO UTPUT-Connect to TV with S-VIDEO in for better picture quality than standard composite video.
9.OPTICAL DIGITAL AUDIO OUTPUT-Use to connect to a receiver or other device with 5.1channel decoders.
This output is the coded digital signal.
3
7
5
1
2
6
4
8 9

14
CONNECTIONS
Connecting the video output to your TV
In order to use the DVD recorder, you need to make a video connection to your TV. The capabilities of your TV and
the cables you have on hand will determine the connections you can use. There are 3 possible connection types:
- Composite Video - The most widely used connection. This unit includes an A/V cable for Composite Video.
- S-Video - A higher quality connection that requires a special S-Video cable and an S-Video capable TV.
- Component Video - The highest quality video connection. Supported on high-end TVs and requires a special
cable.
Composite Video (Typical connection)
This unit ships with a composite video (A/V) cable for connection to TV with a standard video input as shown below.
This is the most widely used type of connection. On most TV's, this connector is colored yellow, and is normally
accompanied by stereo audio inputs, colored red and white for stereo channels right and left respectively.
1 2
3
First, use the supplied A/V cable to connect to the
composite video input on your TV. This is normally a
yellow-colored connector that matches the video output
on the back of this unit. If you wish to hear sound
through the TV, connect the red and white stereo audio
connections as well.
On your TV , select the video input. This is normally done
by selecting
Video 1 or Video Input with the remote
control. On some TV s, this is done by selecting a
particular channel.
Composite Video
Input Jack
Composite Video /
Stereo Audio Cable
,
Turn on the TV and DVD recorder and select the DVD
playback mode with the remote control.
TV with
Composite
Video Input
(Typical
Connection)
R
STEREO AUDIO IN
L

1
2
3
S-Video Connection
This is a higher quality connection than standard composite video, and requires a special S-Video cable not included.
The S-Video connector is distinguishable by its 4 pins, as shown below. If your TV has an S-Video input jack, it's
recommended that you use this type of connection for better picture quality.
Turn on the unit and select the DVD mode.
Component Video Connection
The highest quality video connection, component video requires separate cables for the Y, Cb/Pb, Cr/ Pr signals. To
use the progressive scan option on this unit, you need to use the component video output. Using the component video
output requires these steps:
1
First, use the supplied A/V cable to connect to the
component video input on your TV. Select this input.
Resetting the video output
If you inadvertently switch the OUTPUT FORMAT setting to
PROGRESSIVE while using a standard TV not capable of
PSCAN, you will lose video. If this happens, reset the
recorder to its default video settings by pressing PSCAN
and SELECT on the remote control.
S-Video
Input Jack
S-Video Cable
1
Component Video
Input Jacks
Y
Cb/Pb
Cr/Pr
Component
Video Cable
First, use a special S-Video cable. Connecting the S-
Video output from the unit to the corresponding input
on your TV.
On your TV, select the S-Video input. This is
normally done by selecting Ycb/cr or Ypb/pr or
S-VIDEO with the remote control. On some TV S
this is done by selecting a particular channel.
Change the TV OUT MODE to the progressive scan
by press the PSCAN and SELECT key, select the
correct video input on your TV.
S
L
R
TV with
S-Video Input
TV with
Component
Video Input /
Progressive Scan
capabil ity
Y Pb
VIDEO
INPUT
Pr
L
R
CONNECTIONS
15

16
CONNECTIONS
Audio Output Connections
This unit features a variety of audio outputs for connection to a receiver or other audio equipment.
- Use the included A/V cable to connect the stereo audio outputs for connection to a TV or stereo receiver.
- Optical and Coaxial digital audio outputs send an encoded digital bitstream, suitable for receivers with Dolby
decoding capability. These outputs require special cables not included.
Receiver with Dig ital
Audio Input
COAXIAL DIGITAL AUDIO IN
STEREO AUDIO IN
TV or receiver
with stereo
audio in
R
L
Antenna & TV Connections
This unit is available with and without an antenna pass through connection. For units with an antenna input connector
and with pass through connector, as shown below to the left , use antenna or cable TV connection to connect RF input
and RF output connect to a TV.
TV with
coaxial
antenna or
cable TV
connection
ANTENNA OR CABLE TV CONNECTION
ANTENNA OR CABLE TV CONNECTION
TV with
coaxial
antenna or
cable TV
connection
IN
OUT OUT
Splitter
OR
Without Passthrough Connector
With Passthrough Connector
OPTICAL DIGITAL AUDIO IN

17
CONNECTIONS
AV2 Inputs (VIDEO IN) and DV INPUT
Connecting Audio/Video recording sources to the A/V Inputs
Audio/Video inputs are provided on the front side and back of the unit for connection of outside audio/video sources
such as VCRs, camcorders, DVD players, etc. External video sources must support S-Video, Composite Video and/or
Stereo Audio to be suitable for recording.
L RV
COMPOSITE VIDEO /
STEREO AUDIO OUTPUT
VIDEO IN
Audio/Video sources such as
DVD player or VCR with
Composite Video Out
Audio/Video source such as
camcorder supporting
S-VIDEO Out
Audio/V ideo source such as
DVD player or VCR with
Composite Video Out
Audio/Video source such as
camcorder supporting
S-VIDEO Out
R
V
S
R
S-VIDEO IN
COMPOSITE VIDEO /
STEREO AUDIO OUTPUT
S-VIDEO / STEREO
AUDIO OUTPUT
DIGITAL VIDEO IN
L
L

Notes on Power states
¡°¡±
18
DVD RECORDER OPERATION
Powering on the unit
Initial Setup Procedure
Only after all connections are complete, connect the
power cord and power on the unit.
1
2
Plug the standard jack end into a wall socket or
power strip.
Press STANDBY on the remote control or front panel
to bring the system out of standby mode. The system
is now ready to use.
There are 3 power states for this unit:
1. OFF - not connect the power cord. The unit draws no
power and cannot be turned on by the remote control.
2. STANDBY - the unit has not been taken out of standby
by pressing either the standby key on the remote
control or the standby button on the front panel. The
unit draws a slight amount of power to enable the
remote control receiving circuit.
3. ON - the standby button on the remote control or the
standby button on the front panel has been pressed.
The unit is ready to use.
Using the Menus
When the unit is first powered on, you'll be prompted to
set the time and date as well as TV Tuner options. You
can always change any of the settings you chosen
during the initial setup later in the DVD recorder's
SETUP MENU.
2
Use the UP/DOWN keys to increase or decrease the
value of a selected field or move to a field above or
below. Use the LEFT/RIGHT keys to move to the
previous or next fields.
Press SELECT to select an option and continue.
Time and Date
Setting the time and date correctly is important, as the timer
recording depends on an accurate setting. The time format
used is 24H. Use the UP/DOWN keys to increase or decrease
the time or date and the LEFT/RIGHT keys to move to a
different field. When you have done, press SELECT key.
The initial setup is now complete. Remember, any settings
chosen during the initial setup can be changed at any time in
the DVD recorder's SETUP MENU. Press SETUP to exit the
initial setup and begin using your DVD recorder.
Date(mm/dd/yy)
Time(hh:mm:ss)
01/01/ 01
21:45: 23
Date(mm/dd/yy)
Time(hh:mm:ss)
01/01/ 01
21:45: 23
Press RETURN/EDIT to exit edit mode,
Press UP/DOWN or 0-9 to edit.
SYSTEM SETUP
CLOCK
SYSTEM SETUP
CLOCK
1

OR
FRONT PANEL
19
2
Inserting a Disc
Press the OPEN/CLOSE button on the remote control
or front panel to open the disc tray.
2
Insert a disc.
Labeling Side
Surface
3
Close the disc tray by pressing OPEN / CLOSE on
the remote control or front panel.
Using Disc Menus
Playing a Disc from the Menu
Most DVD will automatically display a menu after
the disc is inserted. This first menu is the first of
possibly many layers, and is therefore known as the
menu.
Use the ARROW keys on the remote control
to navigate through the menu to the
appropriate selection to start the movie.
Press ENTER to confirm your selection.
Accessing a menu after play has started
If you wish to re-enter the menu after disc play
has started, use the MENU key. MENU also exits
the menu at any time.
1
2
3
1
2
1
DVD RECORDER OPERATION
/