1
Connecting the A-49 to an iPad
Before you continue, please make sure to access the following URL and check the operating requirements and other relevant information.
http://www.roland.com/support/
NOTE
• The rst-generation iPad cannot be used.
• The iPad app you’re using must support CoreMIDI.
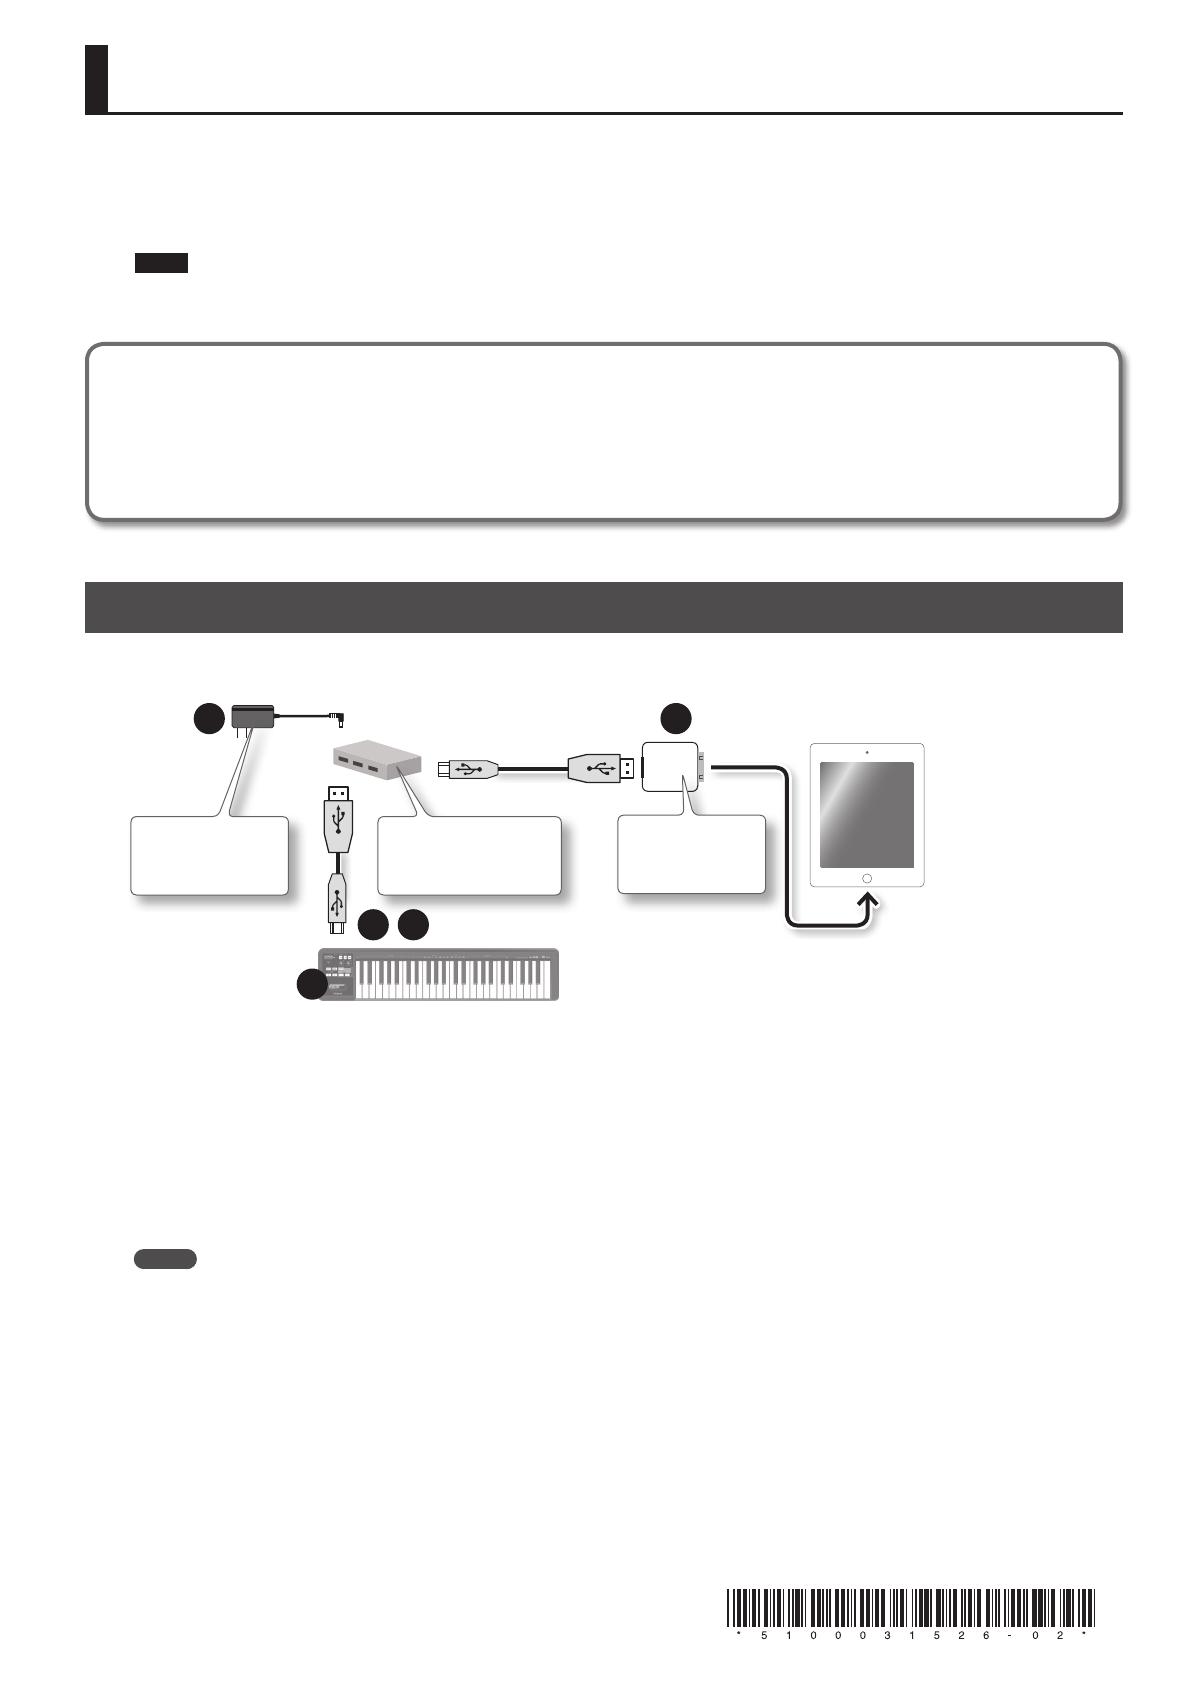
You’ll need to provide the following items
• iPad (made by the Apple Inc.)
• Apple iPad Camera Connection Kit (Camera Connector; made by the Apple Inc.)
• USB hub (commercially available; a type to which an AC adaptor or other power supply is connected)
• Two USB cables (included with the A-49 or commercially available)
Using the A-49 with an iPad
When using the A-49 with an iPad, switch the USB driver used by the A-49 to “GENERIC.”
Use the following procedure to make this setting.
1
3
2
5
Apple iPad Camera
Connection Kit
(Camera Connector)
AC adaptor included
with the USB hub
4
USB hub that works with a
connected power supply
(commercially available)
1. Power up your USB hub (connect the AC adaptor to the USB hub).
2. Connect the USB hub to the iPad using the Camera Connector of the Apple iPad Camera Connection Kit.
3. While holding down the [S1] button and [S2] button, connect the A-49 to the USB hub.
Once the A-49’s power has turned on, release the [S1] button and [S2] button.
4. Press the [FUNCTION] button " [ADV] key (keyboard) " [-] button, in that order.
5. Disconnect the USB cable from the A-49, and then reconnect it.
MEMO
• It will not be necessary to switch the USB driver the next time you use the A-49 while connected to the iPad. Following steps 1–2, simply connect
the A-49 to the USB hub and it will be ready for use.
• Operation may be unstable if you use a USB hub of a type that does not have a connected power supply, or if you connect the A-49 directly to the
iPad.
A-49

