Page is loading ...

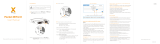
Quick Installation Guide
—— Triple Power Lithium-ion Battery
Packing List (BMS)
I
Packing List (Battery Module)
II Installation Prerequisites
III
Floor/Wall Mounting
IV Battery Module Installation to Base Mounting
V
Place the BMS on top of the battery module and affix it with M4 screws using an L-type wrench. Ensure that the BMS and
battery unit align on matching sides as shown in the diagram below.
Battery Module Installation to Module
VI
-Tighten the expansion screw sleeve
- Drill holes(at least 80mm) with driller
- Mark the postion of the holes
BMS Installation to Battery Module
VII
Note: The Quick Installation Guide briefly describes required installation steps. If you have any questions, refer to the User
Manual enclosed with the BMS for more detailed information.
(193±2) mm
Make sure the wall is strong enough to withstand the weight of battery.
-Adjust the balance
NOTE!
NOTE!
Ensure that the installation location meets the following conditions:
The building is designed to withstand earthquakes
The location is far the sea to avoid salt water and humidity, 1000mfrom over
The floor is flat and level
There are no flammable or explosive materials, at a minimum of 0.9m
The ambience is shady and cool, away from heat and direct sunlight
The temperature and humidity remain at a constant level
There is minimal dust and dirt in area
There are no corrosive gases present, including ammonia and acid vapor
Where charging and discharging, the ambient temperature ranges from 0°C to 45°C
The Triple Power battery module is rated at IP65 and thus can be installed outdoors as well as indoors. However,
ifinstalled outdoors, do not allow the battery pack to be exposed to direct sunlight and moisture.
If the ambient temperature exceeds the operating range, the battery pack will stop operating to protect itself.
The optimal temperature range for operation is -10°C to 50° Frequent exposure to harsh temperatures may C.
deteriorate the performance and lifetime of the battery module.
ŸŸŸŸŸŸŸŸŸŸ
Ÿ
Ÿ
Ÿ
Ÿ
Ÿ
Ÿ
Ÿ
Ÿ
In practice, the requirements of battery installation may be different due to enviroment and locations.
In that case, follow up the exact requirements of the local laws and standards.
Step 3: Match the battery with base mounting
For two battery s:module
Place the second one on top of the module and two sides are locked with M4 screws.
·
Match the BMS to the battery modules
Fix the battery module and wall bracket with expansion bolts.
·
Place the BMS on top of the module and two sides are locked with M4 screws(N).
Note: One battery module or connected to the BMS, need to be installed a bracket to fix.
·
Charging Cable (+) x1 (2m) Power Cable(0.12m) x1
CAN Cable x1 (2m)
Wall Bracketx1 Expansion Bolt x2 Expansion Screw x2
M4 Screw x2
Base M x1ounting User Manual x1
Rotation Wrench x1
M5 Screw x2 Flat Gasket x2
Expansion Bolt x2
Copyright Declaration
The copyright of this manual belongs to SolaX Power Co.,Ltd.. Any corporation or
individual should not plagiarize, partitially copy or fully copy(including software,etc.),
and no reproduction or distribution of it in any form or by any means. All rights
reserved.
SolaX Power Co.,Ltd,.reserves the right of final interpretation. The information is
Tripl e Power Li thium -ion Ba ttery
User Manual
30Ah
Charging Cable (-) x1 (2m)
COMM Cable x1 (0.2m)
Ring Terminal x1
Guard Ring x2
BMS x1
Accessories (1) of thethree and four Battery Modules (HV10230×3/4):
Accessories (2) of the three and four Battery Modules (HV10230×3/4):
Quick Installation Guide
--Triple Power Lithum-ion Battery
Quick Installation Guide
--Triple Power Lithum-ion Battery
Note:The two power cables need to be purchased separately
OneBattery Module (HV10230 ×1):
Power Cable (690mm) x1
COMM Cable (600mm) x1 M4 Screw x2
Power Cable (1200mm) x1
COMM Cable(1200mm) x1
Power Cable(1200mm) x1
Power Cable(1800mm) x1
Expansion Bolt x2
Base M x1ounting Guard Ring x4
Cover Plate x1
Quick Installation Guide x1
Accessories of Wall bracket x1
Quick Installation Guide x1
Snap-fit x2
Battery Module x1
M4 Screw x2

VIII Connecting Cables to Inverter
Connecting Cables to One Battery Module
IX
XConnecting Cables to Two Battery Modules
XI
XII Connecting Cables to Three Battery Modules
XIII
Connecting Cables to Four Battery Modules
XIV
Connecting Cables to Four Battery Modules
XV
Commissioning
If all batteries are used for the installation, follow these steps for
beginning operation.
614.00520.00
BMS to Inverter:
BAT+ to BAT+(A:2m),
BAT- to BAT-(B:2m),
CAN to CAN(D:2m)
spring
chamber
wire strands
DC plug housing(-)
screw connection
DC socket housing(+)
screw connection
Step2. Insert the stripped cable up to the stop (negative cable for DC plug(-) and
positive cable for DC socket(+) are live). Hold the housing on the screw
connection.
Step3. Press down the spring clamp until it clicks audibly into place (You should be
able to see the fine wie strands in the chamber)
Step1. Strip the cable(A/B:2m) to 15mm.
Step4. Tighten the screw connection(tightening torque:2.0±0.2Nm)
Step2.
Step3. Step 4.
+
-
BMS to Slave1: B+ to B+(C:1200mm), B- to B-(A1:690mm), COMM to COMM1(E:200mm)
Ensure that both ends of the cables are connected to the correct connector, which are on the
right side of the BMS and battery module.
Ÿ
Slave1
Slave2
BMS
BMS to Slave1:
B+ to B+ (C:120mm);
COMM to COMM1 (E:0.2m)
BMS to Slave2:
B- to B- (A1:690mm)
Slave1 to Slave2:
B- to B+ (A1:690mm); COMM2 to
COMM1 (B1:600mm)
Install a fixed wall bracket on the battery module, and thencheck to make sure the connections
are securely locked.
Connecting Cables to Three Battery Modules
Install a fixed wall bracket on the battery modules and the cover plate of the third battery module.
BMS to Slave1:
B+ to B+ (C:120mm); COMM to
COMM1 (E:200mm);
BMS to Slave3:
B- to B- (A1:1.8m); Get the cables
through corrugate pipe.
Slave1 to Slave2:
B- to B+ (A1:690mm); COMM2 to
COMM1 (B1:600mm)
Slave2 to Slave3:
B- to B+ (A2:1.2m); COMM2 to COMM1
(B2:1.2m); Get the cables through
corrugate pipe.
Install the fixed wall brackets on the battery modules
And thencheck to make sure the connections are securely locked.
BMS to Slave1:
B+ to B+ (C:120mm);COMM to COMM1 (E:200mm);
BMS to Slave4:
B- to B- (A3:1.2m), Get the cable through corrugate pipe.
Slave1 to Slave2:
B- to B+ (A1:690mm);COMM2 to COMM1 (B1:600mm);
Slave2 to Slave3:
B- to B+ (A3:1.2m);COMM2 to COMM1 (B2:1.2m);
Slave3 to Slave4:
B- to B+ (A1:690mm) and COMM2 to COMM1
(B2:1.2m).
Get the cables through corrugate pipe.
Verify the model number of each battery module to ensure thatthey are allthe
same model.
Once all battery module(s) are installed, follow these steps for beginning operation:
1) Open the cover board of theBMS
2) Move the circuit breaker switch to theON position
3) Press the POWER buttonto turn on the T-BAT system
4) Turn on the AC switch of inverter
B+
B-
COMM1
(2)
(1) (3)
Slave1
Slave2
Slave3
The two ends of the corrugated
pipe need to be protected with guard rings. BMS
Slave1
Slave2
Slave3
Slave4
COMM1
B+
COMM2
B-
The BMS and battery modules need to be grounded.
The BMS and battery modules need to be grounded.
Between battery modules need to be grounded.
The BMS and battery modules need to be grounded.
Between battery modules need to be grounded.
GND
+
-
To Inverter
BAT-
BAT+
CAN
/