Florestone
Tub / Shower
Features
2851 Falcon Drive • Madera, CA 93637
T. 559.661.4171 • T. 800.446.8827
F. 559.661.2070 • florestone.com
FACTORY INSTALLED OPTIONAL
HYDROMASSAGE SYSTEMS.
Florestone Tub/Showers are available with full-therapy jet
action hydromassage systems, creating a complete
body-surround therapy massage action, soothing away body
aches and tension. Fitting are available in matching PVC
colors, chrome or polished brass finishes.
OPTIONAL GRAB BARS.
In most applications Florestone Products can mount
additional grab bars to its line of tub/showers.
Drawings are required.
COLORS
Standard: White
OPTIONAL MANUFACTURERS'
MATCH COLORS
AMERICAN STANDARD
ELJER
KOHLER
For other colors, call for availability and price.
QUALITY YOU CAN TRUST.
Since 1947, Florestone Products Company
has built a reputation based on product
quality, ease of installation and reliability.
Today we serve contractors, engineers,
specifiers, architects and builders with
products, service and distribution
nationwide. The manufacturing methods,
craftsmanship and attention to detail of
Florestone Fiberglass Showers are second
to none.
WIDE VARIETY OF SIZES
AND STYLES.
We offer a wide choice of models, sizes,
and styles. The "tile back" look gives you
another decorative option.
Bone
Candlelight
Daydream
Fawn Beige
Light Mink
Loganberry
Rain Forest
Rhapsody Blue
Spring
Sterling Silver
Shell
Warm White
Classic Grey
Dusty Rose
Glacier Blue
Island Sea
Natural
Peach Bisque
Platinum
Ruby
Sage
Sandlewood
Twilight Blue
Verde
Zinfandel
Almond
Biscuit
Chamois
Country Grey
Desert Bloom
Ice Grey
Innocent Blush
Jersey Cream
Mexican Sand
Merlot
Seafoam Green
Skylight
Teal Tender Grey
Thunder Grey
Timberline
Wild Rose

Tub / Showers Installation Instructions
8
FLORESTONE
TUB / SHOWERS
SHOULD BE
INSTALLED BY A
PROFESSIONAL PLUMBING
CONTRACTOR.
Complete two sides of the squared and
framed pocket according to dimensional
drawings
Some Florestone units are too large to
pass through doorways. Make sure the
unit is in the installation area before
framing is completed.
*Note on Code Compliance:
Since local codes and regulations
vary, Florestone Products will not be
responsible for code compliance.
Please check with your local city
and county building departments for
specific regulations or restrictions
before ordering.
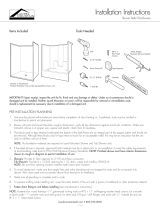
Florestone
Tub / Showers
Installation Instructions
Dimensions may vary ±
¼
" inch-
check unit before installation.
FRAMING
SETTING SHOWER / BATH UNIT
Install unit into position with front apron firmly on the floor. Use a
level (3¥ min.) on the offset of front and side faces. Level top ledge
of dam. Plumb and leveló shim if necessary. Mortar or plaster base
is recommended.
SECURE UNIT
Fasten back and sidewall flanges to studs with large-headed #6
galvanized nails. Use #12 sheet metal screws for installation into
steel studs.
ROUGH PLUMBING
Rough plumbing must extend above sub-floor or slab 1". Lay out
accurate location of valves and, working from unfinished side of unit,
drill º" holes. From finished side of unit enlarge holes with a hole
saw. For large openings use a saber saw. Because the one-piece
construction eliminates the possibility of reaching over the tub end to
connect the drain and overflow, unit should be located to provide
access through the walls to make connections. Check for leaks
before installing drywall and closing off plumbing access. With fire
rated walls, finished wall board must be in place before units are
installed.
CAULK
Caulk all openings around valves and outlets with a silicone caulking.
CLEANING
Clean up with liquid detergent and warm water.
AVOID USING ABRASIVE CLEANERS.
They may scratch and dull the surface of the unit.
-
 1
1
-
 2
2
Florestone 6036TS-3WTB-LH Installation guide
- Type
- Installation guide
- This manual is also suitable for
Ask a question and I''ll find the answer in the document
Finding information in a document is now easier with AI
Related papers
Other documents
-
 Ella H931084F Installation guide
-
Ella 93058-HB Installation guide
-
Ella OAF3240DH-L Installation guide
-
Jacuzzi FIN6036CRL1CHA Installation guide
-
Laurel Mountain 6030TS3PTL064 Installation guide
-
Ella H93085-HB-D Installation guide
-
American Standard Mainstream 2948LC-LHO.020 Owner's manual
-
Schluter KL1BL19EB110 User manual
-
Unbranded KKB81152PVCE Installation guide
-
 Laurel Mountain 6032TS1PSL064 Installation guide


