Page is loading ...

Instruction Manual

IMPORTANT INFORMATION: REGULATIONS
Federal Communications Commissions (FCC) Declaration of Conformity
(For USA Only)
Responsible Party: Brother International Corporation
100 Somerset Corporate Boulevard
Bridgewater, NJ 08807-0911 USA
declares that the product
Product Name: Brother USB Writer
Model Number: PE-Design
complies with Part 15 of the FCC Rules. Operation is subject to the following two conditions: (1)
this device may not cause harmful interference, and (2) this device must accept any interference
received, including interference that may cause undesired operation.
This equipment has been tested and found to comply with the limits for Class B digital device,
pursuant to Part 15 of the FCC Rules. These limits are designed to provide reasonable
protection against harmful interference in a residential installation. This equipment generates,
uses, and can radiate radio frequency energy and, if not installed and used in accordance with
the instructions, may cause harmful interference to radio communications. However, there is no
guarantee that interference will not occur in a particular installation. If this equipment does cause
harmful interference to radio or television reception, which can be determined by turning the
equipment off and on, the user is encouraged to try to correct the interference by one or more of
the following measures:
– Reorient or relocate the receiving antenna.
– Increase the separation between the equipment and receiver.
– Consult the dealer or an experienced radio/TV technician for help.
– Changes or modifications not expressly approved by the manufacturer or local sales
distributor could void the user’s authority to operate the equipment.
Canadian Department of Communications Compliance Statement
(For Canada Only)
This Class B digital apparatus complies with Canadian ICES-003.
Radio Interference
(Other than USA and Canada)
This machine complies with EN55022 (CISPR Publication 22) /Class B.

1
Congratulations on choosing our product!
Thank you very much for purchasing our product. To obtain the best performance from this unit and
to ensure safe and correct operation, please read this Instruction Manual carefully, and then keep
it in a safe place together with your warranty.
Please read before using this product
For designing beautiful embroidery patterns
• This system allows you to create a wide variety of embroidery patterns and supports a wider
range of sewing attribute settings (thread density, sewing pitch, etc.). However, the final result
will depend on your particular sewing machine model. We recommend that you make a trial
sewing sample with your sewing data before sewing on the final material.
For safe operation
• Avoid dropping a needle, a piece of wire or other metallic objects into the unit or into the card
slot.
• Do not store anything on the unit.
For a longer service life
• When storing the unit, avoid direct sunlight and high humidity locations. Do not store the unit
close to a heater, iron or other hot objects.
• Do not spill water or other liquids on the unit or cards.
• Do not drop or hit the unit.
For repairs or adjustments
• In the event that a malfunction occurs or adjustment is required, please consult your nearest
service center.
Notice
Neither this Instruction Manual nor the Installation Guide explains how to use your computer under
Windows
®
. Please refer to the Windows
®
manuals.
Copyright acknowledgment
Windows
®
is a registered trademark of Microsoft Corporation. Other product names mentioned in
the Instruction Manual and Installation Guide may be trademarks of registered trademarks of their
respective companies and are hereby acknowledged.
Important
Using this unit for unauthorized copying of material from embroidery cards, newspapers and
magazines for commercial purpose is an infringement of copyrights which is punishable by law.
Caution
The software included with this product is protected by copyright laws. This software can be used
or copied only in accordance with the copyright laws.
For additional product information and updates, visit our web site at:
http://www.brother.com/ or http://solutions.brother.com/
SAVE THESE INSTRUCTIONS
This product is intended for household use.

2
Turn Any Design
Into Original Embroidery
With PE-DESIGN
■ Layout ready-made designs
(☞p. 15)
■ Large-sized patterns
(
☞
p. 176 in the Instruction Manual (PDF format))
This software provides digitizing and
editing capabilities, allowing you the
creative freedom to design original
embroidery. Easily turn illustrations,
photos and lettering into custom
embroidery designs.

3
■ Photo Stitch function (☞p. 24, p. 127)
Embroidery can easily be created from photos taken with a digital camera.
■ Combining with background
images
(☞p. 42)
■ Creating custom logos
(☞p. 20, p. 70, p. 77, p. 80, p. 90 and p. 126)
Photo Stitch 1
(Sepia)
Photo Stitch 1 (Color)
Photo Stitch 1
(Mono)
Photo Stitch 2
(Color)
Photo Stitch 2
(Mono)

4
What You Can Do
With PE-DESIGN
Make Vivid Embroidery From Any Illustration or Photo
With Layout & Editing, images and photos can be automatically converted into embroidery patterns that can
be sewn with the desired stitches.
■ Auto Punch function
(☞p. 20, p. 126)
Illustration and images can easily be converted into
embroidery. In addition, the color and sew type can
be changed as desired.
■ Drawing Shapes to Create an
Embroidery Design
(☞p. 29, p. 70)
■ Cross Stitch function
(☞p. 27, p. 134)
Illustration and images can easily be converted into
cross-stitch embroidery. In addition, the size of the
cross-stitches can be changed as desired.
■ Combining Embroidery
Patterns
(☞p. 38, p. 47, p. 52)

5
Increased Variety With the Many Stitches and Colors
This software includes 10 stitches for region sewing and 5 stitches for line sewing. By changing the stitches
and colors, the same design can be given a different appearance. Try combining various settings.
c
For more details, refer to “Setting the thread color and sew type” on page 94.
Increased Variety of Fonts
Embroidery can be created using not only the built-in fonts, but also the TrueType fonts on your computer.
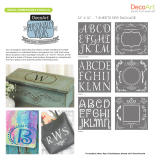
■ Monograms
(☞p. 90, p. 171 in the Instruction Manual
(PDF format))
Create monograms by simply selecting a font,
typing in the text, then selecting a decorative
pattern. A wide variety of decorative patterns are
available.
■ Easy editing
(☞p. 35, p. 80)
Change the text arrangement to edit the text as you
wish.

6
Sew Types
The sewing attributes for each sew type are first set to their default settings; however, by changing the settings
of the sewing attributes, you can create custom stitching.
c
For more details, refer to “Line sewing attributes” on page 98 and “Region sewing attributes” on
page 101.
Line sew types
Zigzag Stitch Running Stitch/Triple Stitch
Motif Stitch E/V Stitch
Region sew types
Satin Stitch Fill Stitch
Programmable Fill Stitch Motif Stitch

7
Cross Stitch Concentric Circle Stitch
Radial Stitch Spiral Stitch
Piping Stitch Piping Stitch (motif setting)
Stippling Stitch Stippling Stitch (motif setting)
c
For more details, refer to “Programmable fill stitch” on page 103, “Piping stitch” on page 105, “Motif
stitch” on page 106, and “Stippling stitch” on page 108.
b Memo:
The stitching for the programmable fill stitch and the motif stitch depends on the selected stitch pattern.

8
Basic Operation Map
This package consists of five applications.
Create Embroidery Patterns Using All Four Applications
The main application (Layout & Editing) is supported by Design Center, Font Creator, Programmable Stitch
Creator and Design Database.
Data Management
Layout & Editing (
☞
p. 47)
Further Customization
Create embroidery patterns
Font Creator
(
☞
p. 217 in the Instruc-
tion Manual (PDF format)
)
Create custom font patterns
Custom fonts can be created
to be used in text. If symbols
and double-byte characters
are also registered, the font
can be used at any time.
• Automatically convert images to
embroidery designs
• Custom lettering
• Custom designs
• Digitize
Design
Database
(
☞
p. 187 in the Instruction
Manual (PDF format))
Manage design files
• Search for files
• Open files
• Organize files
• Convert files
• Write to cards
Design Center
(
☞
p. 145)
Manually create embroidery
patterns from image
With Design Center, extract
outlines from an image, edit
the shapes of lines and
regions, and then specify
sewing attributes and colors for
each part of the pattern.
Edit/combine embroidery patterns
Programmable
Stitch Creator
(
☞
p. 199 in the Instruction
Manual (PDF format)
)
Create custom stitch patterns
Create and edit fill/stamp stitch
patterns and motif stitch
patterns.
• Combine designs
• Adjust the position, size and shape
• Specify sewing attributes
• Apply stamp patterns
Write to original cards/Save to USB media
Embroider with the machine

9
New Features of Version 8
■ Stitch Generation Features
● A motif pattern can be applied to the stippling stitch.
● The underlay stitching function has been improved.
- New underlay stitching patterns have been added to the settings available for region sewing of text
and manual punching patterns.
- The density for underlay stitching of regions can be set to Dense, Medium or Light.
■ Editing Functions and User Interface
Layout & Editing
● The Remove Overlaps and Merge commands have been added for editing shapes.
- Remove Overlaps: The overlapping regions of the shapes are removed.
- Merge: The overlapping regions of the shapes are merged.
● Designs can be created that combine embroidery with an image used in the background.
Print the image on the fabric by using an iron-on transfer sheet or printable fabric, and then embroider
on this fabric. The positioning sheet allows you to easily align the embroidering position.
● Rulers have been added at the top and left side of the Design Page. Measurement units when checking
sizes and positions can be switched between millimeters and inches.
● Multiple files can be opened. Data can be copied and pasted between files.
● The Sewing Attribute Setting dialog box, Thread Color dialog box, and Text Attribute Setting dialog
box are in a combined dialog box, which is easier to use.
● The functions in the Import dialog box for importing embroidery designs have been improved.
● The functions in the Sewing Order/Lock dialog box have been improved.
- Embroidery patterns can be locked (no changes, such as moving, enlarging/reducing or editing, can
be performed).
- The sewing attribute of the objects in each color can be changed.
● The functions in the Image to Stitch Wizard have been improved.
- Sepia modes have been added to the Photo Stitch and Cross Stitch functions.
- A feature has been added to convert regions to lines when automatically converting to an embroidery
pattern with the Auto Punch function.
- Single cross-stitches and backstitches can be edited when automatically converting an image to an
embroidery pattern with the Cross Stitch function.
● The image can be rotated in 90° increments.
● Tools for drawing lines freehand have been added.
● Arranged text on an arc can be selected from transform text pattern.
● Stitch data can be divided by color.

10
Design Center
● An eraser tool has been added to the Tool Box in the Line Image Stage.
● The maximum setting for Thinning Process when converting a line image to a figure handle image has
been increased. This allows thicker figure handle lines to be created.
Font Creator
● A TrueType font character can be opened as a template. In addition, a custom font can be created
automatically from a TrueType font.
● Characters other than letters of the alphabet, numbers and symbols can be registered.
● If a template image was open when custom font data is saved in PEF file, the template image will be
saved with the data.
■ General
● New sample embroidery files have been added to the Design Library.
● The estimated sewing time has been added to the design properties.
● Embroidery hoop sizes 200 × 200 mm(7.3/4 × 7.3/4 inches) and 200 × 300 mm(7.3/4 × 11.3/4 inches)
have been added to the Design Page Property dialog box.
● File formats have been added to those available for images that can be opened as templates or original
images.
- GIF(.gif) format is supported.
- LZW-compressed .tif is also supported.

11
Table of Contents
Instruction Manual (Basic)
New Features of Version 8................................9
Table of Contents...................................... 11
How To Use Manuals ................................ 13
Support/Service......................................... 14
Online Registration..........................................14
Checking for the Latest Version of
the Program .................................................... 14
Tutorial ....................................................... 15
1. Importing Embroidery Patterns ................... 15
2. Automatically Converting an Image to an
Embroidery Design......................................19
3. Drawing Shapes to Create an Embroidery
Design .........................................................29
4. Entering Text...............................................35
5. Combining Embroidery Patterns ................. 38
6. Print and Stitch............................................ 42
Arranging Embroidery Designs
(Layout & Editing) ..................................... 47
Layout & Editing Window ................................47
Opening/Importing Embroidery Designs .........47
Checking Embroidery Patterns .......................51
Editing Embroidery Designs............................52
Reshaping Embroidery Patterns .....................56
Editing a Stitch Pattern....................................62
Specifying the Design Page Size and Color ...68
Changing Application Settings ........................69
Drawing Shapes..............................................70
Manually Creating Professional-Level
Embroidery Patterns (Manual Punching) ........77
Adding Text .....................................................80
Entering Monograms.......................................90
Applying Sewing Attributes to Lines and
Regions ...........................................................93
Editing Regions .............................................114
Checking and Editing the Sewing
Order/Lock ....................................................117
Importing Image Data....................................120
Changing the Image Settings ........................123
Automatically Converting an Image to an
Embroidery Pattern
(Image to Stitch Wizard)................................125
Saving and Printing ....................................... 138
Basic Design Center Operations............ 145
Creating an Embroidery Design
From an Image ..............................................145
Manually Creating Embroidery Patterns
From Images (Design Center) ................ 153
Design Center Window..................................153
Original Image Stage.....................................154
Line Image Stage ..........................................156
Figure Handle Stage......................................158
Sew Setting Stage.........................................163
About the Instruction Manual
(PDF Format)............................................ 170

12
Table of Contents
Instruction Manual (Advanced)
Tutorial (Advanced)................................. 171
Entering Monograms .....................................171
Creating Appliqués ........................................174
Creating Split Embroidery Designs................176
Creating Design for Multi-Position Hoops......182
Managing Embroidery Design Files
(Design Database) ................................... 187
Design Database Window .............................187
Starting Up Design Database ........................187
Checking Embroidery Designs ......................188
Opening Embroidery Designs........................189
Organizing Embroidery Designs....................190
Searching for an Embroidery Design.............192
Converting Embroidery Design Files to
Different Formats...........................................193
Writing Embroidery Design Files to
an Original Card ............................................194
Outputting a Catalog of Embroidery
Designs..........................................................196
Basic Programmable Stitch Creator
Operations ............................................... 199
Programmable Stitch Creator Window ..........199
Creating Fill/Stamp Stitch Pattern .................199
Creating Motif Stitch Pattern..........................203
Creating Custom Stitch Patterns
(Programmable Stitch Creator) .............. 205
Opening a Pattern File...................................206
Creating a New Pattern .................................207
Viewing the Pattern While Creating It............208
Creating a Pattern in Fill/Stamp Mode...........208
Editing a Pattern in Fill/Stamp Mode .............209
Creating Embossing/Engraving Effects
in Fill/Stamp Mode.........................................211
Creating a Pattern in Motif Mode...................212
Editing a Pattern in Motif Mode .....................213
Saving Patterns .............................................214
Changing the Settings ...................................215
Basic Font Creator Operations .............. 217
Font Creator Window.....................................217
Manually Creating Custom Font ....................219
Creating Custom Fonts (Font Creator)..225
Opening a File .............................................. 225
Selecting a Character and Preparing the
Template....................................................... 226
Creating a Font Character Pattern................ 229
Editing Font Character Patterns ................... 230
Editing the Points of a Font Character
Pattern .......................................................... 231
Checking the Created Font Patterns ............ 232
Saving Font Character Patterns ................... 234
Changing the Settings .................................. 235
Tips and Techniques ...............................237
Enlarging/Reducing Stitch Patterns .............. 237
Sewing Direction........................................... 237
Sewing Order................................................ 237
Sewing Wide Areas ...................................... 238
Jump Stitch and Jump Stitch Trimming ........ 238
Fonts Suitable for Embroidering ................... 239
Creating Outlined Characters
(Using Text Converted to Outline Object)..... 240
Converting Characters (Japanese, Chinese,
Korean, etc) to Embroidery Patterns ............ 241
Menus/Tools.............................................243
Layout & Editing............................................ 243
Design Center ............................................... 249
Design Database .......................................... 254
Programmable Stitch Creator ....................... 256
Font Creator.................................................. 259
Troubleshooting ......................................263
Index .........................................................265

13
How To Use Manuals
The following manuals are included with this software.
Installation Guide
This guide contains descriptions about the preparations necessary to begin using the software. Follow the
instructions provided in this guide to complete the preparation and installation of the software.
Instruction Manual (Basic/this manual)
This manual contains descriptions of Layout & Editing and Design Center.
In order to understand how to use these applications, basic operations are first introduced through examples.
Follow these procedures to gain an understanding of the general operations of these applications.
Precautions, additional information, and details on useful functions and the various settings are described
later. Customer service information is also provided in this manual.
Instruction Manual (Basic and Advanced/PDF format)
This manual is provided in a PDF format on the enclosed CD-ROM. The following information is provided in
addition to the Instruction Manual described above.
Details on Design Database, Programmable Stitch Creator and Font Creator are provided. Refer to this
manual for information on these applications. Basic operations for each of these applications are described
through examples. Then, precautions, additional information, and details on useful functions and the various
settings are provided.
For a better understanding of the PE-DESIGN operations, an advanced tutorial, tips and techniques, and lists
of menus/tools for each application are provided. In addition, this manual contains a troubleshooting section.
Refer to this section if you have any problems while using this software.
■ Opening the Instruction Manual (PDF format)
Click All Programs, then PE-DESIGN 8, then Instruction Manual.
Otherwise, click Help, then Instruction Manual in the menu of any application.
■ Printing the Instruction Manual (PDF format)
For details on printing from Adobe
®
Reader
®
, refer to the Help for Adobe
®
Reader
®
.
b Memo:
• Adobe
®
Reader
®
is required for viewing and printing the PDF version of the Instruction Manual.
• If Adobe
®
Reader
®
is not on your computer, it must be installed. It can be downloaded from the Adobe
Systems Incorporated Web site (http://www.adobe.com/).

14
Support/Service
Contact Technical Support if you have a problem. Please check the company web site (http://
www.brother.com/) to find the technical Support in your area. To view the FAQ and information for software
updates, visit the Brother Solutions Center at (http://solutions.brother.com/).
Online Registration
If you wish to be contacted about upgrades and provided with important information such as future product
developments and improvements, you can register your product online by following a simple registration
procedure.
Click Online Registration on the Help menu of Layout & Editing to start up the installed Web browser and
open the online registration page on our Web site.
The online registration page on the Web site appears when the following address is entered in the Address
bar of the Web browser.
http://www.brother.com/registration/
Checking for the Latest Version of the
Program
Click Help in Layout & Editing, then Check for updates.
The software is checked to determine whether or not it is the latest version.
If the message shown below appears, the latest version of the software is being used.
If the message shown below appears, the latest version of the software is not being used. Click Yes, and then
download the latest version of the software from the Web site.
a Note:
• On the above website, first select your country and next choose product.
• Have the information ready before contacting Technical Support.
• Make sure your computer's operating system is current with all updates.
• Have the make and model of your computer and Windows
®
Operating System. (Refer to the
Installation Guide for system requirements.)
• Information on error messages that appear. This information will help expedite your questions
more quickly.
b Memo:
Online registration may not be available in some areas.
b Memo:
If the
Always check for most recent version
at startup
check box is selected, the software
is checked at startup to determine whether or
not it is the latest version.

15
Tutorial
Tutorial
This section describes the operations of Layout & Editing through the procedures for making embroidery
patterns. First, follow the procedures to create the embroidery patterns and learn the basic operations.
1 Importing Embroidery Patterns (☞ p. 15)
Start up Layout & Editing, and import an embroidery pattern. Then, transfer the created embroidery pattern
to an original card.
2 Automatically Converting an Image to an Embroidery Design (☞ p. 19)
Create an embroidery pattern with the Image to Stitch Wizard.
3 Drawing Shapes to Create an Embroidery Design (☞ p. 29)
Use the Shape tools to draw a design, and then specify the sewing attributes.
4 Entering Text (☞ p. 35)
Create a text pattern, and then arrange it on a shape.
5 Combining Embroidery Patterns (☞ p. 38)
Create an original design by combining various embroidery patterns.
6 Print and Stitch (☞ p. 42)
Create an original design by combining a printed image and an embroidery pattern.
1. Importing Embroidery Patterns
Sample embroidery patterns are provided with this software. These embroidery patterns can be imported into
the Layout & Editing, written to an original card, and used with the embroidery machine.
Here, we will start up Layout & Editing, import an embroidery pattern, then write the pattern to a card.
Step 1 Starting up Layout & Editing
Step 2 Importing embroidery patterns
Step 3 Transferring the design to an original card

16
Tutorial
Step 1
Starting up Layout & Editing
Click , and then select All Programs,
then PE-DESIGN 8, then PE-DESIGN 8
(Layout & Editing).
Step 2 Importing embroidery
patterns
Now, we will import the patterns for the flower,
butterfly and sun.
Click on the Toolbar.
Click .
If has not been clicked, click it.
→ The contents of Design Library are
displayed.
c
“Importing embroidery designs” on
page 48.
Click Category selector.
Move the scroll bar until Floral3 appears, and
then click it.
Drag the flower to import it into the Design
Page, as shown in the illustration.
From the Category selector, select Animals,
and then drag the butterfly into the Design
Page.
From the Category selector, select Children,
and then drag the sun into the Design Page.
1
1
2
Design Library view button
3
1. Click
2. Drag
3. Click
4
5
6

17
Tutorial
Tutorial
To adjust the positions of the embroidery
patterns, click the pattern to be moved, and
then position the pointer over the pattern.
When the shape of the pointer changes to
, drag the pattern to the desired location.
Step 3 Transferring the design to
an original card
You can sew a pattern transferred to your sewing
machine by writing it to media that can be used with
your machine.
For this example, we will transfer the design to an
original card.
Insert an original card into the USB card writer
module.
Click File, then Write to Card.
Click OK.
When the writing is finished, the following
message appears. Click OK.
a Note:
When imported stitch patterns are enlarged
or reduced, the embroidering quality may be
reduced. Therefore, we recommend not
enlarging or reducing stitch patterns.
c
“Enlarging/Reducing Stitch
Patterns” on page 237 in the
Instruction Manual (PDF
format).
b Memo:
You can also transfer designs to a floppy disk,
CompactFlash card, and USB media. You will
need to check your machine for the correct
media to use.
7
1
a Note:
When writing to an original card that already
contains data, all data on the card will be
deleted. Before using an original card, check
that the designs on the card are no longer
needed, and be sure to store all necessary
data to a hard disk or other storage media.
c
“From an embroidery card” on
page 49.
a Note:
• If the card writer module is not correctly
connected, the error message “No card
writer module is connected. Please
connect card writer module.” will appear.
• If the original card is not inserted or is
defective, the error message “No original
card is inserted. Please insert an original
card.” will appear.
b Memo:
Stitch data is compressed to fit on an original
card. Depending on the compression method,
the size of the data may change. On average,
a maximum of 200,000 stitches can fit on one
card. However, the number of stitches in a
pattern can vary depending on the type of
machine that is used.
2
3
4

18
Tutorial
c
For details on saving embroidery
patterns, refer to “Saving the embroidery
design” on page 22.
a Note:
Precautions for using the card writer
module/original cards
• The original card is inserted correctly
when you hear it snap into place.
• Never remove an original card or unplug
the USB cable while the LED indicator is
flashing.
• Correctly insert or remove the original
card according to the Instruction Manual
for the embroidery machine.
/