Page is loading ...

Complete step by step instruction booklet
AquaMarine 900
Aquis 1050

2
Important Safeguards
This appliance is not intended for use by
children or infirm persons without supervi-
sion. Young children should be supervised
to ensure that they do not play with the
appliance.
Warning: To guard against injury, basic
safety precautions should be observed,
including the following:
1. Read and follow all safety instructions before
using this appliance.
2. Danger: To avoid possible electric shocks,
special care should be taken since water is
employed in the use of aquarium equipment. For
each of the following situations do not attempt
repairs yourself. Return the appliance to an
authorised service facility for service or discard the
appliance.
a) If the light falls into water, do not reach for it,
unplug it and then retrieve it. If the electrical
components of the appliance get wet, unplug the
appliance immediately (non immersible equipment
only).
b) If the aquarium shows any sign of abnormal
water leakage, immediately unplug it from the
power source.
c) Carefully examine the aquarium after installa-
tion. It should not be plugged in when there is water
on parts which are not intended to be wet.
d) Do not operate any aquarium electrical
appliance if it has a damaged cord or plug, or if it is
malfunctioning, or dropped or damaged in any
manner.
A “drip loop” (See the diagram) should be arranged
by the user for each cord connecting an aquarium
component to a receptacle. The drip loop is the part
of the cord below the level of the receptacle or the
connector if an extension cord is used. It is used to
prevent water traveling along the cord and coming
in contact with the receptacle.
If the plug or receptacle does get wet, do not
unplug the appliance. Disconnect the fuse or circuit
breaker that supplies the power to the appliance,
then unplug and examine for presence of water in
the receptacle.
3. Close supervision is necessary when the
appliance is used by or near children.
4. Always unplug the aquarium from the electrical
outlet, when not in use, before putting on or taking
off parts, before any type of maintenance, or
cleaning. Never yank the cord to pull it from the
outlet. Grasp the plug and unplug to disconnect.
5. Do not use the aquarium for reasons other than
the intended use. The use of attachments that are
not recommended or sold by the aquarium
manufacturer may cause the product to be unsafe.
This is not recommended.
6. Do not install or store the aquarium where it will
be exposed to weather or temperatures below
freezing.
7. Make sure any component mounted on a tank is
securely installed before operating it.
8. Read and observe all the important notices on
the aquarium.
9. Ensure input voltage is the same voltage as your
local power supply.
10. A G.F.C.I (Ground Fault Circuit Interrupter) &
surge protector is recommended for all electrical
appliances. (Light unit only)
11. Ensure your hand is dry when turning the power
switch on/off and when inserting/removing the
power cord from the receptacle.
12. If you are in any doubt about the electrical
installation or safety of this product you must
consult a qualified electrician.
For Guarantee Conditions, please refer to
the Guarantee form that is enclosed with
this product.
Drip loop

PL LAMP
24W
Marine
Blue
140 0 0
Kelvin
PLANT
SUITABLE
FOR
MARINE
Read and follow all the instructions, even if you
feel you are familiar with the product and find a
place to keep the instructions handy for future
reference. Your attention is drawn particularly to
the sections concerning “IMPORTANT
SAFEGUARDS” and the “AQUA ONE
GUARANTEE”. Please ensure you retain your
original purchase receipt in the event that
guarantee service is required.
Carefully unpack the aquarium making sure
you keep all the packing material until all the
parts of the product have been found and the
product has been assembled.
This product is shipped to you in a factory
sealed carton. Should the product malfunction
in any way or if the unit is damaged and
requires replacement, contact the store where
the product was purchased for inspection.
Replacement Parts
Use Aqua One Genuine Spare Parts
Only. See your local Aqua One Dealer
and look for the number listed below for
the spare part you require. Alternatively
you will find these numbers on the
barcode, located on the back of the
product.
Lamp PL-24W Marine Blue 53214
Lamp PL-24W Triphosphor 53204
Lamp PL-36W Marine Blue 53215
Lamp PL-36W Triphosphor 53205
Before First Use / Preparation
3
Precision Manufactured in the P.R.C.
Designed in Australia by Aqua One
Distributed in Australia by:
Kong's (Aust.) Pty. Limited
48 Williamson Rd. Ingleburn
2565 NSW Australia
Distributed in New Zealand by:
Kong's (NZ) Limited
52 Glenlyon Avenue. Greerton
Tauranga New Zealand
Distributed in Hong Kong by:
Kong’s Aquarium Supplies Co., Ltd
No 31, 3/F Thriving Industrial Centre
26-38 Sha Tsui Road, Tsuen Wan
Hong Kong
Distributed in the UK by:
Kong’s (UK) Limited,
C/O Aqua Pacific UK Ltd.
PO Box 268
Romsey Hampshire
SO51 0WW
United Kingdom
www.aquaone.com.au
Aqua One and Kong’s are registered trademarks.
220 - 240V ~ 50HZ

Feeding Lid
Aquarium Body
Light Unit
2 x 36W
Light Unit
2 x 24W
Support Arm
Aquarium Lid
High Quality
Curved Glass
Know Your Aquarium, Filter & Light
Max
Water Level
Aquis 1050
Canister Filter
AquaMarine
Remote
Ballast
Timers
Cabinet
Fuse
4
F
u
s
e

6HWWLQJ8S<RXU)LOWHU/LJKW8QLW
)
)
,IGHTSOFF4IMEROFF
4IMERON
,IGHTSON4IMEROFF
)NDICATION!RROW
6HWWLQJWKH7LPHU
4URNTHEMAINPOWERSUPPLYSWITCHhOFFv)TISLOCATEDONTHESIDEPANELOFTHEREMOTEBALLASTUNITABOVETHE
POWERCORD
-OVETHEREDSWITCHONTHETIMERTOhLIGHTONTIMEROFFvPOSITION
4HETIMERISSETINHRTIME3ETTHETIMEBYTURNINGTHEBLUEDIALTILLTHECORRECTHOURLINESUPWITHTHE
INDICATIONARROW
,IFTALLOFTHEBLUETABS
!TTHEHOURYOUWISHTHELIGHTTOTURNONANDTHEHOURYOUWISHTHELIGHTTOTURNOFFPUSHTHEBLUETABS
DOWN
0USHALLTABSDOWNINBETWEEN&OREXAMPLEIFYOUWISHTHELIGHTTOTURNONATAMINTHEMORNINGAND
TURNOFFATPMHAVEALLTABSBETWEENANDINCLUSIVEPUSHEDDOWN
-OVETHESWITCHTOTHEhTIMERONvPOSITIONANDENSURETHELIGHTSWITCHESAREINTHEhONvPOSITIONATTHETOP
OFTHEAQUARIUMLIDANDTHEMAINPOWERSUPPLYSWITCHISINTHEhONvPOSITION
2EPEATTHISPROCESSFORTHESECONDLIGHT
"LUETABS$OWN"LUETABS5P

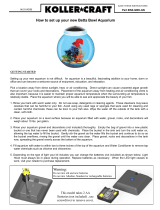
Aquarium Set Up Instructions
1. Setup aquarium cabinet as per supplied
instructions and place in desired location.
Some important things to remember:
a. Keep the aquarium away from direct sunlight,
areas that may have large temperature fluctua-
tions or high traffic.
b. The floor underneath the aquarium must be
able to support a minimum weight of 400kg.
c. Leave adequate room between the aquarium
and the wall to allow room for the hoses from
the canister filter, approximately 8 – 10cm.
2. Open aquarium lid and fold back support
arms; they lock into place at either end of the
clear plastic light cover.
3. Setup your Aquis 1050 canister filter as per
in closed instruction manual.
4. Sit the remote ballast unit on the shelf inside
the cabinet. The opposite side to the filter unit.
5. Feed the 2 cords from the light unit into the
back of the cabinet through the holes provided.
6. Plug them into the remote ballast. Ensure
they are inserted firmly.
7. Arrange a “drip loop” (p2) and plug the power
cord from the remote ballast into a receptacle,
turn on and ensure all 4 lights are working and
set the timers. (p5)
8. Once the filter unit is in place and your have
set up the light system wash hands and arms. It
is very important to remove any dirt, moisturizer
and any other impurities. Do this whenever you
work on the aquarium.
Please use the following instructions as a guide
to set up your new AquaMarine aquarium. Seek
specialist advice from your supplying retailer as
different marine environments require specific
conditions.
9. The AquaMarine 900 holds approximately
175L of water. It will require approximately 6kg
of synthetic sea salt to start the aquarium.
Aqua One AquaSalt is a synthetic salt (sold
separately) available in an 8kg bucket which
will be enough salt to start the aquarium and
approximately 1 water change.
10. Install your Aqua One 200 Watt Heater. Set
it at 25°C. Remember to place it in an area
which will receive good water flow and where it
will not come into contact with anything else in
the aquarium. Refer to the instruction sheet
which is supplied with the heater for correct
setup.
11. Fill the aquarium with tap water approxi-
mately 5cm below the maximum water level
indicator (p4) and de-chlorinate it using Aqua
One water conditioner. (Sold separately)
12. Add the salt and wait until it has settled
slightly then start the filter and turn the heater
on. Fill the aquarium to the maximum water
level (p4) Refer to the Aquis 1050 instructions
“starting your filter” on p8. It is important to
follow these instructions step by step.
13.Point the outlet of filter down towards the
bottom of the tank in order to dissolve the salt
quicker.
14. Once the water has cleared and the
temperature of the water has reached 25°C,
use an Aqua One Hydrometer / Thermometer
(sold separately) to check the specific gravity
and temperature of the water. Consult your
supplying retailer on the correct specific gravity
for the marine environment you wish to create.
1.022 at 25°C is a good starting point. If the
specific gravity is to high remove some water
from the aquarium and top it up with
de-chlorinated tap water. If it is to low add more
synthetic salt.
15. Wash aquarium substrate. You will only
require a thin layer of approximately 1.5cm
spread evenly across the base of the aquarium.
16. Place a portion of substrate into a bucket.
Aquarium Set-up
6

Aquarium Set Up Instructions
The remote ballast unit has two individual
timers on it. This will allow you to set the blue
actinic lights to come one first and turn off last.
If you wish to simulate natural light conditions.
This function does not have to be used. You can
simply override these timers by using the two
light switches on top of the aquarium lid.
Refer to page 5 of this instruction booklet for
timer setup instructions.
No more than 8 hours of light each day and
definitely no natural light. Longer light times will
accelerate algae growth in the aquarium and
has no benefit to coral or fish.
:H UHFRPPHQG UHSODFLQJ WKH OLJKW JOREHV
once every twelve months based on the light
being on 8 hours a day as the spectrum of light
changes over time and may cause excess
algae growth .
Aquarium Set-up Continued
17. Run water through & churn it over with your
hand until the water running out of the bucket is
clear. It is important to remove as much dirt and
dust from the substrate as possible.
18. Turn the filter off.
19. Open Aquarium Lid and fold back Support
Arms; they lock into place at either end of the
clear plastic light cover.
20. You may need to remove a small amount of
water before adding the substrate to the
aquarium as this may cause the tank to
overflow.
21. Spread washed aquarium substrate evenly
over the bottom of your aquarium. Remember
to wash your hands and arms to remove any
contaminates.
22. Turn the filter back on.
23. Put glass lids into place and close the
aquarium lid.
24. Due to the nature of the marine aquarium
and the many different methods available for
starting the nitrogen cycle, Aqua One recom-
mends you research these methods and seek
advice from your retailer as to which method
best suits you. It is an important step in estab-
lishing a stable biological filter for breaking
down ammonia and nitrite in your aquarium. It
is very important to be patient and monitor your
aquarium during the cycling period.
Aqua One’s ProDrop test kits (sold separately)
are designed to test your aquarium water
accurately and easily while the log book (sold
separately) allows you to keep an up to date
record of the changing conditions in your
aquarium. Keep an eye out for these and other
quality Aqua One products at your retailer.
Aqua One, fish keeping has never been
easier…
Lighting Set-up
7
Notes

Tank Maintenance
DAILY: Feed your fish as per instructions on
your fish food container.
Check fish ensure they are eating, breathing
and swimming normally.
Check temperature.
Count fish numbers.
Check coral or other invertebrates for signs of
colour fade or slime build up.
Ensure all filters, pumps, heaters and other
aquarium accessories are functioning correctly.
WEEKLY: Test pH, ammonia, nitrite, nitrate,
phosphate kH and specific gravity and record it
in your log book (sold separately). If you are
keeping coral or other sensitive marine animals
you may wish to perform further testing. Seek
advice from your marine aquarium specialist.
Use quality test kits, Aqua One have a range of
ProDrop test kits (sold separately) which will
allow you to easily and accurately monitor your
water quality.
Some species require specific water conditions
please seek advice from your marine aquarium
specialist.
FORTNIGHTLY: 25% Water Change
What you will need: A bucket, gravel cleaner,
towel, algae scraper, water conditioner, filter
supplement and either synthetic salt or pre
mixed water. All items are available from your
local Aqua One retailer.
1. Wash your hands and arms.
2. Make up your salt water. Follow instructions
on your synthetic salt packaging, or have your
premixed drums ready for use.
3. Check the pH, temperature and specific
gravity of both your tank water and the new
water. Make any adjustments which need to be
made to the new water. You may wish to
purchase a second heater to warm the new
water.
4. Once the water is ready for use open
aquarium lid and fold back support arms;they
lock into place at either end of the clear plastic
light cover and remove the glass lids.
5. Turn the filter off.
6. The fish and coral do not need to be removed
when doing any maintenance.
7. Place the towel on the floor in front of the
aquarium to guard from water spillage.
8. Use an algae scraper (sold separately) and
gently scrape away any algae growing on the
glass or filter pipes.
9. Using a gravel cleaner* (sold separately)
empty approximately 25% of the aquarium
water into the bucket. Take note of how much
water is emptied.
10. Fill the aquarium up slowly to the level
indicated on page 4.
11. Turn the filter back on and ensure that water
is flowing from the outlet.
12. Leave the aquarium for a short period of
time to allow it to settle, then test pH specific
gravity and temperature.
13. Clean glass lids prior to placing them back
on the aquarium.
14. Add liquid supplements if required.
15. Replace glass lids and close aquarium lid.
Check your fish and coral.
* Refer to the instructions on the back of your
gravel cleaner to ensure correct use.
8

Trouble Shooting
Note: This is only a guide! You should seek
professional advice from your local marine
specialist at the time of purchase.
DO NOT ADD ALL FISH AT ONCE!
Build stock levels slowly over time. Add a filter
supplement to help the biological system cope
with the additional waste.
Do not over crowd. Remember all fish will grow,
so allow them adequate space.
If you are in any doubt about the electrical
installation or safety of this product you must
consult a qualified electrician.
LIGHT UNIT DOES NOT WORK
1. Ensure switches are in the “on” position on
the top of the aquarium lid.
2. Check remote ballast is plugged into power
supply and the switch is on.
3. Ensure the switch on the remote ballast is in
the “on” position.
4. Check the timers on the remote ballast have
been set up correctly. Refer to page 5 of this
instruction booklet.
5. TURN POWER OFF FIRST to the remote
ballast. Remove power cord from the recep-
tacle. Remove the fuse and check, replace if
needed.
6. Check the globes are in good condition.
Replace if needed.
7. TURN POWER OFF FIRST! Check the plugs
from the light unit into the remote ballast.
AQUARIUM POSSIBLY LEAKING
1. Make sure water level in the aquarium is not
to high refer to page 4.
2. If an air stone is being used check it is not
bubbling water over the rim of the aquarium if
so turn the air pump down or move the airstone
from the edge of the aquarium.
3. Make sure the aquarium is sitting on a level
surface.
4. Remove any salt creep as it can drain water
from the aquarium.
5. Ensure glass lids are in correct position.
6a. Open the aquarium lid and turn the filter off.
Mark the water level. Remove any excess
water that may be sitting on the edge of the
aquarium. Leave for an hour. If water level drops
proceed to step 6b.
6b. Remove the fish, decorations and gravel.
Empty the aquarium and clean the glass
DO NOT WASH IN SOAP OR DETERGENT.
Place a piece of newspaper on a flat level
concrete surface. Carefully fill the aquarium
ensuring not to spill any water on to the news-
paper. Leave the aquarium for several hours and
then inspect the newspaper for wet patches.
Refer to the Aquis 1050 Canister Filter instruc-
tion manual if you are having trouble with the
filter unit.
Aquarium Model: AquaMarine 900
Dimensions: 90 x 41 x 48cm
(6mm glass)
Aquarium Volume: 175L
Light Wattage:
2 x 36W 2 x 24W
Power Requirements: 220 ~ 240V
Suitable: Marine
Introduction of Fish
9
Notes

Aquarium Specialist
Name:
Phone Number:
Address:
Contact:
Tank Information
Aquarium / Model / Size (cm)
Volume
Aquarium Location
Date the tank was set up
Date first fish was introduced
Gravel / Substrate
Filtration Information
Filter Type / Flow Rate /
Filter Media
Biological / Mechanical / Chemical
Date Nitrogen Cycle started
Date Nitrogen Cycle finished (NO
2
) 0ppm
Lighting Information
Lighting / Type
Number of tubes / Wattage
Brand of tube and spectrum
Date purchased (tubes)
Heater Information
Brand / Model
Wattage
Other Tank Accessories
Power Heads / Brand / Flow rate
Chiller / Brand / Size (hp)
Protein Skimmer / Brand / Size
Air Pumps / Brand / Output
Ultraviolet Sterilizer / Brand / Size
Ozonizer / Brand
10
Aquarium Log
175L 200W
90 x 41 x 48cm Aqua One Glass Heater
AquaMarine900
Aquis 1050 / 750L/hr
PL
2 x 24W / 2 x 36W

Test
Date
Carbonate
Hardness
pH
O
C Ammonia Nitrite Nitrate Other Other OtherOther
Aquarium Log
11

Aquarium Log
12
Type of Fish Size of Fish No. in Tank Date Added Food /Frequency /Amount
Warning:
This appliance must not be disposed of together with domestic waste. It must be disposed of
at an authorised centre set up for the recycling of electrical and electronic appliances. By
collecting and recycling waste, you help save our natural resources. Please Make sure this prod-
uct is disposed of in an environmental friendly and safe way.
Instruction Version: 28/11/07 Aquis 1050
/