Page is loading ...

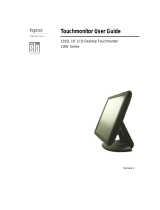
Touchmonitor User Guide
For 15" LCD Desktop Touchmonitors and Non-Touchmonitors
1524L Series
Revision B
Auto Enter - + Menu/Exit
2004 Printed in USA
P/N 008549

User Guide
15" LCD Desktop Touchmonitor
1524L Series
Revision B
P/N 008549

iii
Copyright © 2004 Elo TouchSystems Inc. All Rights Reserved.
No part of this publication may be reproduced, transmitted, transcribed, stored in a retrieval system,
or translated into any language or computer language, in any form or by any means, including, but not
limited to, electronic, magnetic, optical, chemical, manual, or otherwise without prior written
permission of Elo TouchSystems.
Disclaimer
The information in this document is subject to change without notice. Elo TouchSystems makes no
representations or warranties with respect to the contents hereof, and specifically disclaims any
implied warranties of merchantability or fitness for a particular purpose. Elo TouchSystems reserves
the right to revise this publication and to make changes from time to time in the content hereof
without obligation of Elo TouchSystems to notify any person of such revisions or changes.
Trademark Acknowledgments
IntelliTouch, SecureTouch, AccuTouch, Entuitive, and MonitorMouse are trademarks of Elo
TouchSystems, Inc.
Other product names mentioned herein may be trademarks or registered trademarks of their
respective companies. Elo TouchSystems claims no interest in trademarks other than its own.

iv

v
Chapter 1
Introduction 7
Product Description . . . . . . . . . . . . . . . . 7
Precautions . . . . . . . . . . . . . . . . . . . . 7
About the Product . . . . . . . . . . . . . . . . . 8
Chapter 2
Installation and Setup 9
Unpacking Your Touchmonitor. . . . . . . . . . . 9
Product Overview . . . . . . . . . . . . . . . . 10
Main Unit . . . . . . . . . . . . . . . . . . . 10
Rear View . . . . . . . . . . . . . . . . . . 10
Touch Interface Connection . . . . . . . . . . . 11
Installing the Driver Software . . . . . . . . . . 12
Installing the Serial Touch Driver. . . . . . . 13
Installing the Serial Touch Driver for Windows
XP, Windows 2000, Me, 95/98 and NT 4.0 13
Installing the Serial Touch Driver for MS-DOS
and Windows 3.1 . . . . . . . . . . . . . 14
Regulatory Information 33
Warranty 37
Index 39
Table of Contents
Installing the USB Touch Driver for Windows
XP, Windows 2000, Me, 95/98 and NT 4.0 15
Chapter 3
Operation 17
About Touchmonitor Adjustments . . . . . . . . 17
Front Panel Controls . . . . . . . . . . . . . 18
Controls and Adjustment . . . . . . . . . . . . 19
OSD Menu Functions . . . . . . . . . . . . 19
OSD Control Options. . . . . . . . . . . . . 20
Preset Modes . . . . . . . . . . . . . . . . 21
Power Management System . . . . . . . . . 22
Display Angle . . . . . . . . . . . . . . . . . . 22
Chapter 4
Troubleshooting 23
Solutions to Common Problems. . . . . . . . . 23
Appendix A
Appendix B
Care and Handling of Your Touchmonitor . . . . 28
Appendix C
Touchmonitor Specifications. . . . . . . . . . . 30
AccuTouch Touchscreen Specifications . . . 31
15" LCD Touchmonitor (ET1524L-XXWC-1)
Dimensions . . . . . . . . . . . . . . . . . . 32
Installing the USB Touch Driverr. . . . . . . 15

vi
Copyright © 1996, Borland International. All rights reserved. BORLAND CONFIDENTIAL
January 9, 2002 9:17 am (D:\Vera new\8549 15 in Econ AT User Guide\15 in Economy AT\15
in Econ ATTOC.fm)

1-7
C HAPTER
1
C
HAPTER
1
I
NTRODUCTION
Product Description
Your new touchmonitor combines the reliable performance of touch technology
with the latest advances in LCD display design. This combination of features
creates a natural flow of information between a user and your touchmonitor.
This LCD monitor incorporates 15” color active matrix thin-film-transistor
(TFT) liquid crystal display to provide superior display performance. A
maximum resolution of XGA 1024x768 is ideal for displaying graphics and
images. Other outstanding designs that enhance this LCD monitor’s
performance are Plug & Play compatibility, and OSD (On Screen Display)
controls.
N
OTE
Some monitors do not have the touchscreen capability.
Precautions
Follow all warnings, precautions and maintenance as recommended in this
user’s manual to maximize the life of your unit. See Appendix B for more
information on touchmonitor safety.

1-8 User Guide
About the Product
Your LCD Desktop Touchmonitor is a 15” XGA TFT color display with the
following features:
• The internal microprocessor digitally controls auto-scanning. For horizontal
scan frequencies between 31.5 KHz and 60.2 KHz, and vertical scan
frequencies between 56.3 Hz and 75.0 Hz. In each frequency mode, the
microprocessor-based circuitry allows the monitor to function at the
precision-of a fixed frequency.
• High contrast color TFT LCD display support resolution up to XGA
1024x768. Compatible with VGA, SVGA, XGA (non-interlaced) and most
Macintosh compatible color video cards.
• Power management system conforms to VESA DPMS standard.
• Supports DDC1/2B for Plug & Play compatibility.
• Advanced OSD control for picture quality adjustment.
• Detachable stand for wall-mounting application.
• Optional touch screen function.
For full Product Specifications refer to Appendix C.

2-9
C HAPTER
2
C
HAPTER
2
I
NSTALLATION
AND
S
ETUP
This chapter discusses how to install your LCD touchmonitor and how to install
the driver software.
Unpacking Your Touchmonitor
Check that the following 7 items are present and in good condition:
Power cable US/Canada
VGA cable
European power cable
Serial cable
CD and Quick Install
Guide
LCD monitor
USB Cable

2-10 User Guide
Product Overview
Main Unit
Rear View

2-11
Touch Interface Connection
N
OTE
:
Before connecting the cables to your touchmonitor and PC, be sure that the computer
and touchmonitor are turned off.
1 Connect one end of the power cord to the monitor and the other end to the
outlet.
2 Connect one end of the video cable to the rear side of computer and the other
to the LCD monitor. Tighten by turning the two thumb screws clockwise to
ensure proper grounding.
3 Connect one end of either the touchscreen serial(RS232) cable or the touch
screen USB cable(but not both) to the rear side of the computer and the other
end to the LCD monitor. Tighten by turning the two thumb screws clockwise to
ensure proper grounding(optional module USB cable does not have thumb screws)
4 Press the power button on front panel to turn the monitor power on.
1
2
3
3

2-12 User Guide
Installing the Driver Software
Elo TouchSystems provides driver software that allows your touchmonitor to
work with your computer. Drivers are located on the enclosed CD-ROM for the
following operating systems:
• Windows XP
• Windows 2000
• Windows Me
• Windows 98
• Windows 95
•Windows NT 4.0
Additional drivers and driver information for other operating systems are
available on the Elo TouchSystems web site at www.elotouch.com.
Your Elo touchmonitor is plug-and-play compliant. Information on the video
capabilities of your touchmonitor is sent to your video display adapter when
Windows starts. If Windows detects your touchmonitor, follow the instructions
on the screen to install a generic plug-and-play monitor.
Refer to the appropriate following section for driver installation instructions.
Depending upon whether you connected the serial communication cable or
the USB communication cable, you should install only the serial driver or
the USB driver.

Installing the Serial Touch Driver
Installing the Serial Touch Driver
for Windows XP,
Windows 2000, Me, 95/98 and NT4.0
N
OTE
:
For Windows 2000 and NT 4.0 you must have administrator access rights to install the
driver.
1 Insert the Elo CD-ROM in your computer's CD-ROM drive.
2 If the AutoStart feature for your CD-ROM drive is active, the system
automatically detects the CD and starts the setup program.
3 Follow the directions on the screen to complete the driver setup for your
version of Windows.
4 If the AutoStart feature is not active:
5 Click Start > Run.
6 Click the Browse button to locate the EloCd.exe program on the CD-ROM.
7 Click Open, then OK to run EloCd.exe.
8 Follow the directions on the screen to complete the driver setup for your
version of Windows.
To install Windows 2000 and Windows XP, you must use the "update driver" method;
you will not find a setup.exe file within the download.
2-13

2-14 User Guide
Installing the Serial Touch Driver for MS-DOS and
Windows 3.1
You must have a DOS mouse driver (MOUSE.COM) installed for your mouse
if you wish to continue using your mouse along with your touchmonitor in
DOS.
To install Windows 3.x and MS-DOS from Windows 95/98, follow the
directions below:
1 Insert the CD-ROM in your computer’s CD-ROM drive.
2 From DOS, type d:\EloDos_W31 to change to the correct directory on the
CD-ROM (your CD-ROM drive may be mapped to a different drive letter).
3 Type install and press Enter to start the installation.
4 Align the touchscreen.
You must have already completed Steps 1 and 2 before proceeding.
To run the INSTALL program:
1 Type INSTALL at the DOS prompt in the directory containing the driver
install files.
2 INSTALL asks you to select the software to install. Then choose
d:\EloDos_W31 from the displayed list.
3 INSTALL also asks you for the paths to use during installation, or you may
use its defaults. INSTALL creates directories as necessary, and warns you if
they exist.
If you are updating your software, you may wish to specify the paths containing
the earlier versions, and overwrite the obsolete files. All executable programs
are upward compatible. For a list of differences from each previous version of
the drivers, be sure to select "Differences from Previous Versions" during the
installation process.
INSTALL updates your AUTOEXEC.BAT file with the drivers you select.
INSTALL makes a copy of your original AUTOEXEC.BAT file, called
AUTOEXEC.OLD. If you already have Elo driver commands in your
AUTOEXEC.BAT file, they will be commented out.
When INSTALL is finished, it leaves a file called GO.BAT in the subdirectory
you specified. GO loads the touchscreen driver, runs the calibration program
ELOCALIB, and gives you some final instructions.
If you are using Windows 3.1, you will also calibrate the touchscreen within
Windows 3.1 with the Touchscreen Control Panel.

1Insert the Elo CD-ROM in your computer’s CD-ROM drive.
If Windows 98, Windows Me or Windows 2000 starts the Add New
Hardware Wizard:
2Choose Next. Select “Search for the best driver for your device
(Recommended)” and choose Next.
3When a list of search locations is displayed, place a checkmark on “Specify a
location” and use Browse to select the \EloUSB directory on the Elo
CD-ROM.
4Choose Next. Once the Elo TouchSystems USB touchscreen driver has been
detected, choose Next again.
5You will see several files being copied. Insert your Windows 98 CD if
prompted. Choose Finish.
If Windows 98, Windows Me or Windows 2000 does not start the Add New
Hardware Wizard:
N
OTE
:
For Windows 2000 you must have administrator access rights to install the driver.
1Insert the Elo CD-ROM in your computer’s CD-ROM drive.
If the AutoStart feature for your CD-ROM drive is active, the system
automatically detects the CD and starts the setup program.
2Follow the directions on the screen to complete the driver setup for your
version of Windows.
If the AutoStart feature is not active:
1Click Start > Run.
2Click the Browse button to locate the EloCd.exe program on the CD-ROM.
3Click Open, then OK to run EloCd.exe.
4Follow the directions on the screen to complete the driver setup for your
version of Windows.
Installing the USB Touch Driver
Installing the USB Touch Driver for Windows XP,
Windows 2000, Me, 95/98 and NT4.0
2-15
To install Windows 2000 and Windows XP, you must use the "update driver" method;
you will not find a setup.exe file within the download.

2-16 User Guide

3-17
C HAPTER
3
C
HAPTER
3
O
PERATION
About Touchmonitor Adjustments
Your touchmonitor will unlikely require adjustment. Variations in video output
and application may require adjustments to your touchmonitor to optimize the
quality of the display.
For best performance, your touchmonitor should be operating in native
resolution, that is 1024x768 at 60k-75 Hz. Use the Display control panel in
Windows to choose 1024x768 resolution.
Operating in other resolutions will degrade video performance. For further
information, please refer to Appendix A.
All adjustments you make to the controls are automatically memorized. This
feature saves you from having to reset your choices every time you unplug or
power your touchmonitor off and on. If there is a power failure your
touchmonitor settings will not default to the factory specifications.

3-18 User Guide
Front Panel Controls
Control Function
1
Power Switch
Turns the display system power on or off.
2
Power LED
Lights up to indicate the power is turned ON.
3
Menu/Exit
To enter or exit OSD manual.
4
+
To select the function item clockwise. To increase the value
of the parameter in the OSD you have selected for
adjustment.
5
−
To select the function item counter clockwise.To decrease
the value of the parameter in the OSD you have selected for
adjustment.
6
Enter
To enter the function in the OSD you have selected for
adjustment.
7
Auto
Auto-adjust
Enable/Disable
1. Press the Menu/Exit and + buttons at the same time
and hold for two seconds to enable/disable the OSD
functions. OSD default is enabled.
2. Press the Menu/Exit and - buttons at the same time and hold
for two seconds to enable/disable the power lock function.
Enter
-
5
Auto
1234
67
+
Menu/Exit

3-19
Controls and Adjustment
OSD Menu Functions
To Display and Select the OSD Functions:
1 Press Menu/Exit key to activate the OSD menu.
2 Use + or - to move clockwise or counterclockwise through the menu. Then
press the Enter key, the parameter will be highlighted when selected.
3 Then use + or - to increase or decrease the value of the parameter, or make
selection between different options.
4 To quit the OSD screen at any time during the operation, press Menu/Exit
key. If no keys are pressed for a short time period, the OSD automatically
disappears.
N
OTE
:
The OSD screen will disappear if no input activities are detected for 45 seconds.

3-20 User Guide
OSD Control Options
Control Description
Brightness
Increases or decreases brightness
Contrast
Increases or decreases contrast
H-Position
Moves the screen left or right
V-Position
Moves the screen up or down
Phase
Increases or decreases the snow noise of the image after auto
adjustment is made.
Clock
The dot clock is fine-adjusted after auto adjust.
OSD H-Position
Moves the OSD position horizontally on the screen. When the +
button is pressed, the OSD control menu will move to the right
side of the screen. Likewise, when the - button is pressed, the
OSD control menu will move to the left side.
OSD V-Position
Moves the OSD position vertically on the screen. When the +
button is pressed, the OSD control menu will move to the top side
of the screen. Likewise, when the - button is pressed, the OSD
control menu will move to the lower side.
Color Balance
Press + or - to select C1/9300, C2/6500 and USER. Only when
selecting USER can you make adjustments to the R/G/B content.
Press Enter to restore to factory default setting.
Auto-Adjust
Press Auto to enable this function. The Auto-Adjust will
automatically adjust V-Position, H-Position, Clock and
Clock-Phase.
Recall Defaults
Returns the monitor to its default settings.
OSD Language
Select from English, French, Japanese, German and Spanish.
Information
Indicates the current resolution, H-Frequency and V-Frequency.
/