La Crosse Technology WS-8011UM User manual
- Category
- Alarm clocks
- Type
- User manual
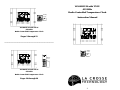
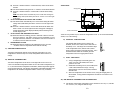
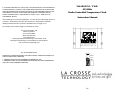
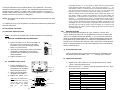
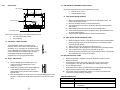
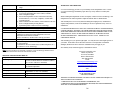
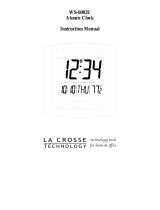
La Crosse Technology WS-8011UM is a versatile device that provides accurate time, temperature, and weather information. With its atomic clock capabilities, it automatically synchronizes with the WWVB radio signal to display the precise time and date. The wireless remote sensor allows you to monitor the temperature in another location, such as a patio or greenhouse. Its customizable features let you choose between standard and daylight saving time, select your time zone, and toggle between Fahrenheit and Celsius.
La Crosse Technology WS-8011UM is a versatile device that provides accurate time, temperature, and weather information. With its atomic clock capabilities, it automatically synchronizes with the WWVB radio signal to display the precise time and date. The wireless remote sensor allows you to monitor the temperature in another location, such as a patio or greenhouse. Its customizable features let you choose between standard and daylight saving time, select your time zone, and toggle between Fahrenheit and Celsius.


-
 1
1
-
 2
2
-
 3
3
-
 4
4
-
 5
5
-
 6
6
-
 7
7
-
 8
8
-
 9
9
-
 10
10
-
 11
11
-
 12
12
-
 13
13


La Crosse Technology WS-8011UM User manual
- Category
- Alarm clocks
- Type
- User manual
La Crosse Technology WS-8011UM is a versatile device that provides accurate time, temperature, and weather information. With its atomic clock capabilities, it automatically synchronizes with the WWVB radio signal to display the precise time and date. The wireless remote sensor allows you to monitor the temperature in another location, such as a patio or greenhouse. Its customizable features let you choose between standard and daylight saving time, select your time zone, and toggle between Fahrenheit and Celsius.
Ask a question and I''ll find the answer in the document
Finding information in a document is now easier with AI
Related papers
-
La Crosse Technology TX6U User manual
-
 La Crosse Technology WS-6003U User manual
-
La Crosse WS-6002U User manual
-
 La Crosse Technology WS-6002U User manual
-
La Crosse Technology WS-9412U User manual
-
 La Crosse Technology WT-3132 User manual
-
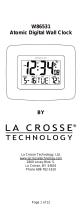 La Crosse Technology W86531 User manual
-
La Crosse Technology WS-8011UM User manual
-
 La Crosse Technology WT-2171 User manual
-


Other documents
-
Honeywell TE218ELW User manual
-
-
-
 SkyScan 87800 User manual
-
Easylife Silent Wall Clock Operating instructions
-
Nickelodeon TT-ACLED-494 User manual
-
Timex T045 User manual
-
Atlantic 1332 User manual
-
Marathon CL030062-FD User manual
-
La Crosse 30041 User manual
