Page is loading ...

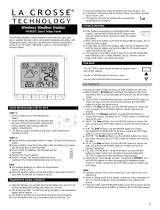
La Crosse Technology, Ltd. Page 1
308-1451H FAQS
The links below will work in most PDF viewers and link to the topic area by clicking the link. We
recommend Adobe Reader version 10 or greater available at: http://get.adobe.com/reader
CONTENTS
308-1451H FAQS ...................................................................................................................... 1
Batteries ................................................................................................................................... 2
Forecast Station Factory Restart ............................................................................................ 2
Outdoor Temperature Transmitter .......................................................................................... 3
Compatible Outdoor Transmitters ........................................................................................... 3
Quick Connect ........................................................................................................................ 3
Dashes shown for Outdoor Temperature ................................................................................ 3
Power Requirements .............................................................................................................. 3
Outdoor Temperature changes constantly .............................................................................. 3
Inaccurate Outdoor Temperature reading ............................................................................... 4
Intermittent Outdoor Temperature/Humidity ............................................................................ 4
Outdoor Temperature is stuck or HH.H or LL.L ....................................................................... 4
Outdoor transmitter fell and does not work. ............................................................................ 4
Outdoor transmitter drains batteries quickly ............................................................................ 5
Temperature Trend Arrows ..................................................................................................... 5
MIN/MAX Temperature readings ............................................................................................ 5
Frost Alarm ............................................................................................................................. 5
Temperature Alarms ............................................................................................................... 6
Channels ................................................................................................................................ 6
Multiple Outdoor Transmitters ................................................................................................ 6
Mounting/Positioning Outdoor Transmitter .............................................................................. 7
Position forecast station ......................................................................................................... 7
Distance/Resistance/Interference ........................................................................................... 7
Forecast Station ....................................................................................................................... 8
How tall are the time numbers? .............................................................................................. 8
Supported Time Zones ........................................................................................................... 8
12-Hour or 24-Hour Time Format ........................................................................................... 8
Power Requirements .............................................................................................................. 8
Indoor Comfort Statement ...................................................................................................... 8
Manually Set Time/Date: Program Menu ................................................................................ 9
Sunrise/Sunset Times ............................................................................................................ 9
No WWVB Tower Icon ...........................................................................................................10

La Crosse Technology, Ltd. Page 2
Dashes, HH.H, LL.L or stuck Indoor Temperature/Humidity ..................................................10
Inaccurate Indoor Temperature reading .................................................................................10
Time is off by hours ...............................................................................................................10
Set Time Alarm ......................................................................................................................10
Activate/Deactivate Time Alarm .............................................................................................11
Snooze Alarm ........................................................................................................................11
Forecast Icons Inaccurate .....................................................................................................11
Forecast Arrows ....................................................................................................................11
Clothing Index .......................................................................................................................11
Absolute Barometric Pressure ...............................................................................................11
Absolute Pressure Unit of Measure .......................................................................................11
Pressure History ....................................................................................................................12
Moon Phase ..........................................................................................................................12
Tides .....................................................................................................................................12
Forecast Station is dim ..........................................................................................................13
Forecast Station has distorted or frozen display ....................................................................13
Forecast Station is blank: No letters, numbers or dashed lines ..............................................13
Forecast Station drains batteries quickly ...............................................................................13
Forecast Station has missing segments ................................................................................13
Batteries
Explanation: Many problems are resolved with fresh batteries of the appropriate voltage. Many items
sent in under warranty work when tested with fresh batteries. Batteries manufactured this year will have
an expiration date 10 years (or more) in the future. Battery technology has improved and batteries will
maintain voltage longer in storage. However, the environment the batteries reside in for the 10 years can
deplete the power.
We suggest name brand Alkaline batteries for indoor displays.
Use Alkaline or Lithium batteries in the outdoor sensors.
A minimum voltage of 1.48V for each battery is necessary for proper performance.
Use batteries dated at least six years in advance of the current year. Batteries dated earlier than six
years from now may still work, but may be unstable in performance.
Good name brand batteries make less noise, which reduces the chance of RF (radio frequency)
interference from the battery compartment.
Forecast Station Factory Restart
Explanation: The factory restart returns the forecast station and outdoor sensor to an “out-of-the-box”
state and often resolves an issue.
Factory Restart:
1. Remove all power from outdoor sensor and forecast station.
2. Press one of the buttons on the forecast station at least 20 times to clear all memory.
3. Verify that the forecast station is blank before proceeding (some lines are painted on and will not
disappear).
4. Leave batteries out of both units for 15 minutes (very important).

La Crosse Technology, Ltd. Page 3
5. Insert fresh Alkaline batteries into the forecast station.
6. Insert fresh batteries into the outdoor sensor.
7. Press the TX button on the outdoor sensor to transmit RF signal.
8. Keep the outdoor sensor 5-10 feet from the forecast station.
9. When RF connection is established, the temperature will appear on the station. Allow the outdoor
sensor and forecast station to sit together for 15 minutes to establish a strong connection.
10. Do not press buttons for 15 minutes.
For optimum 433MHz transmission, place the outdoor sensor no more than 300 feet (91 meters, open
air) from the forecast station.
See the section on mounting and distance/resistance/interference for details on mounting the outdoor
sensor.
Outdoor Temperature Transmitter
Compatible Outdoor Transmitters
A TX142THv2 outdoor transmitter comes packaged with this forecast station.
The TX142TH, TX14TH, TX14TH-LCD-G and TX14TH-LCD-B (433MHz) transmitters are compatible
with this forecast station.
Quick Connect
Explanation: The quick connect is used for a forecast station and outdoor sensor that have been working
but lost connection due to interference or low batteries. This is not a thorough factory reset.
1. Bring the outdoor sensor, forecast station together, and place the units 5-10 feet apart with nothing
between them.
2. Hold the CH button on the forecast station. The outdoor temperature area will flash.
3. Remove battery cover from the outdoor sensor and press and release the TX button to send the
signal.
4. Wait for 2 minutes for the outdoor temperature to appear on the forecast station.
Factory Restart: If the above procedure does not work, please try the factory reset.
Dashes Shown for Outdoor Temperature
Explanation: Dashes mean the connection is lost between the forecast station and the outdoor sensor.
Batteries often resolve the connection.
Distance/Resistance can cause loss of connection between the outdoor sensor and the forecast
station.
Turn the forecast station 90 degrees towards the outdoor sensor to provide better reception. This
allows more antenna surface to face the outdoor sensor signal.
Try the quick connect or factory restart.
Power Requirements
2-AA batteries power the outdoor transmitter.
We recommend alkaline batteries for the transmitter.
You may choose to use lithium batteries for temperatures below -20°F/-28.8°C.
Outdoor Temperature changes constantly
You may have an additional compatible outdoor transmitter within range.
Occasionally a neighbor will have a compatible outdoor transmitter that is within range.
Check Channels: Confirm that the channel selected on the outdoor transmitter matches the channel
shown on the forecast station.

La Crosse Technology, Ltd. Page 4
Inaccurate Outdoor Temperature reading
Explanation: High outdoor temperature readings are generally a location issue. Low outdoor temperature
readings are power related or a sensors going bad.
The outdoor sensor reads the environment where it is mounted. When mounted inside the home, it
will read inside temperature/humidity.
When the outdoor sensor reads high during the day, but not at night, it is a positioning problem.
Look for heat sources such as sunlight, door or window frames or reflected heat.
Side-by-side test: Bring the outdoor sensor in the house and place it next to the forecast station for 2
hours.
Compare indoor and outdoor temperature. The temperatures should be within 4 degrees to be within
tolerance.
If the outdoor sensor reads correctly when next to the forecast station, try a different location outside.
Intermittent Outdoor Temperature/Humidity
Explanation: Intermittent problems are the hardest to resolve. RF (radio frequency) communication may
come and go occasionally. This can be normal in some environments (e.g. moister climates). If outdoor
sensor signal is lost, please wait 2-4 hours for the signal to reconnect on its own.
Check Channels: Confirm that the channel selected on the outdoor transmitter matches the channel
shown on the forecast station.
Move the outdoor transmitter to a closer location.
Freezer test: Confirm the forecast station is reading the correct outdoor transmitter. Place the
transmitter in the freezer for an hour and watch the temperature drop on the forecast station.
Indoor distance test: Please complete the Restart with transmitter and forecast station5-10 feet
apart and inside to establish a strong connection.
If there is a reading in the outdoor temperature area after 15 minutes, move the transmitter to another
room with one wall between the transmitter and the forecast station. Observe to see if the
temperature remains on consistently for 1 hour.
If the temperature remains on while in the house, then it is likely a distance/resistance issue. Move
the transmitter to different locations outside to find a location where the temperature reading will hold.
Distance/Resistance can cause loss of transmitter signal.
Check Batteries.
Outdoor Temperature is stuck or HH.H or LL.L
Explanation: These symbols are error messages indication the outdoor sensor is outside of its readable
range.
Check Batteries. Overpowered or underpowered batteries can cause this reading.
Replace outdoor sensor.
Note: The last outdoor reading may remain (not change) for several hours when connection is lost. The
outdoor temperature reading will flash when the connection is first lost or intermittent.
Outdoor transmitter fell and does not work.
Explanation: If there is no physical damage to the outdoor sensor, the fall may not have caused internal
damage. A fall can shock the outdoor sensor or the batteries in the outdoor sensor. Batteries that have
fallen on a hard surface may be damaged and unable to function properly.
Complete a Restart with fresh batteries.
Use Batteries dated at least six years in advance of the current year. Batteries dated earlier than six
years from now may still work, but may be unstable in performance.

La Crosse Technology, Ltd. Page 5
Note: An outdoor sensor that has fallen into puddle, snow, or other standing water, will likely have water
damage and needs to be replaced. Outdoor sensors are water resistant, not waterproof.
Outdoor transmitter drains batteries quickly
Test a new set of alkaline batteries. Write down the date of installation and the voltage of the
batteries.
When the batteries fail, please note the date and voltage again.
Check the distance and resistance between the outdoor sensor and forecast station. Outdoor sensors
at the end of the range may work while batteries are fresh but not after they drain a bit.
Check for leaking batteries, which may damage the outdoor sensor.
Battery life is over 24 months when using reputable battery brands for both Alkaline and Lithium
batteries.
Replacement Outdoor Sensors
Visit your local Retailer or La Crosse Technology® Store http://store.lacrossetechnology.com/ (Please
copy and paste this link to your browser address bar).
Note: Be sure to order the correct model and frequency to avoid receiving the incorrect item.
Call La Crosse Technology® Store at 608-785-7939 or e-mail from our website if you are unsure
about the correct item to order. Each item carries the original new product warranty and includes
access to La Crosse Technology technical support.
Temperature Trend Arrows
The indoor and outdoor temperature trend indicators will update every 30 minutes or less. These trends
represent temperature changes over the past three hours.
UP ARROW: Temperature has risen more than 2°F/1°C in the past three hours
RIGHT ARROW: Temperature has not changed more than 2°F/1°C in the past three hours
DOWN ARROW: Temperature has fallen more than 2°F/1°C in the past three hours
MIN/MAX Temperature readings
Explanation: The forecast station shows the daily minimum and maximum temperatures each day
starting at midnight (12:00 AM). The forecast station automatically resets the MIN/MAX temperatures at
midnight (12:00 AM).
You can manually reset the MIN/MAX data at any time.
View MIN/MAX data: Press and release the MAX/MIN button to view the Maximum, Minimum, then
Current Indoor and Outdoor Temperatures.
Multiple Transmitters: Press and release the CH button to select the desired outdoor channel to
view the Minimum and Maximum Outdoor Temperatures. Press and release the MAX/MIN button to
view the Maximum, Minimum then Current Temperatures for that channel.
Reset all MIN/MAX data: Hold the MAX/MIN button for 5 seconds and the Indoor and all Outdoor
Minimum and Maximum Temperatures will reset manually to current temperatures.
Frost Alarm
FROST ALARM: The Frost Alarm will sound when the outdoor temperature drops to 34°F (1.1°C).
ACTIVATE Press and release the TEMP ALERT button to activate the Frost Alarm on all channels
(when multiple transmitters in use). The Frost Alarm icon will appear in the outdoor temperature
area when active.
DEACTIVATE Press and release the TEMP ALERT button until the Frost Alarm icon no longer
shows.

La Crosse Technology, Ltd. Page 6
Temperature Alarms
Outdoor Temperature Alarms: A high and low outdoor temperature alarm may be set on the forecast
station.
Note: When multiple transmitters are in use on different channels, a high and/or low temperature may be
set for each channel.
Set Temperature Alarm Channel 1:
1. Press and release the CH button to select channel 1 (when multiple transmitters in use).
2. Hold the TEMP ALERT button until the High Temp Alert icon appears and the temperature will
flash. Use the + or - button to select your High Temp alarm value. Press and release the SET button
to move to the Low Temp alarm.
3. The Low Temp Alert icon will appear and the temperature will flash. Use the + or - button to
select your Low Temp alarm value. Press and release the SET button to confirm and exit to current
temperature.
4. The Temp Alert icon will show in the outdoor temperature area when a temperature alarm is
active. When the temperature alarm sounds, the Temp Alert icon and the temperature value will flash.
Press any button to silence the alarm temporarily.
Set Temperature Alarm Channels 2 or 3: Use the CH button to select the channel. Follow steps 2-4
above to set temperature alarms on other channels.
Deactivate Temperature Alarm: Press and release the TEMP ALERT button three times to deactivate
all temperature alarms. The alert icons will disappear.
Channels
Explanation: The forecast station will accommodate up to three remote outdoor transmitters. The
channel selection (CH) button on the forecast station allows you to see the temperature in various
locations: outdoors, baby’s room, greenhouse, basement, etc.
Press and release the CH button to view channel 1, 2 or 3 on the display when multiple transmitters
are used.
Note: You cannot change channels if only one transmitter is connected.
CHANNEL SCROLL: Press and release the CH button until you see a circling arrow appear in the
outdoor data area. The display will automatically rotate through the channels for all connected
transmitters.
Press and release the CH button to lock the display into one channel.
Then view channels individually with a press of the CH button.
Multiple Outdoor Transmitters
To connect multiple remote transmitters to the forecast station:
Remove the battery cover from all the transmitters (leave off for setup).
Set the first outdoor transmitter to channel 1 and insert 2 AA batteries.
Set the second outdoor transmitter to channel 2 and insert 2 AA batteries.
Set the third outdoor transmitter to channel 3 and insert 2 AA batteries.
Press and hold CH button on forecast station for 5-10 seconds.
The forecast station will search for all outdoor transmitters.
Press the TX button on the back of each outdoor transmitter to transmit RF signal.
When RF (radio frequency) connection is established, the respective temperature & humidity of the
selected channels will appear on the main unit.

La Crosse Technology, Ltd. Page 7
Allow the transmitters and the forecast station to stay 5-10 feet apart for 15 minutes to establish a
solid connection.
Install the battery covers on each sensor.
After 15 minutes, place the remote transmitters in appropriate locations within range of the display.
Press and release the CH button to view channel 1, 2 or 3 on the display when multiple transmitters
are used.
Mounting/Positioning Outdoor Transmitter
First: Place the outdoor sensor in the desired shaded location and the forecast station in the home. Wait
approximately 1 hour before permanently mounting the outdoor sensor to ensure that there is proper
reception.
POSITION
Mount outdoor temperature outdoor sensors vertically.
Protect the outdoor sensor from standing rain or snow and from the overhead sun, which can cause it
to read incorrectly.
Mounting under an eave or deck rail works well.
If you choose, you can construct a small roof or box for the outdoor sensor. Be sure a box has vents.
Mount the outdoor sensor on the North side where to prevent sun from causing incorrect readings.
Mount at least 6 feet in the air for a strong RF (radio frequency) signal.
Outdoor sensors are water resistant, not waterproof.
Avoid more than one wall between the outdoor sensor and the forecast station.
The maximum transmitting range in open air is over 300 feet (91 meters).
Obstacles such as walls, windows, stucco, concrete and large metal objects can reduce the range.
Do not mount near electrical wires, transmitting antennas or other items that will interfere with the
signal.
RF (radio frequency) signals do not travel well through moisture or dirt.
Do not mount the outdoor sensor on a metal fence. This significantly reduces the effective range.
MOUNT
Option 1:
Install one mounting screw (not included) into a wall.
Place the outdoor sensor onto the screw (hanging hole on the backside).
Gently pull down to lock the screw in place.
Option 2:
Insert the mounting screw through the front of the outdoor sensor and into the wall.
Tighten the screw to snug (do not over tighten).
Position forecast station
The forecast station has a wide base to sit on a desk or table.
Choose a location 6 feet or more from electronics such as cordless phones, gaming systems,
televisions, microwaves, routers, baby monitors, etc., which can prevent signal reception.
Place within range of the outdoor transmitter.
Be aware of electrical wires and plumbing within a wall. This will interfere with signal reception.
The maximum transmitting range in open air is 300 feet (91 meters).
Obstacles such as walls, windows, stucco, concrete, and large metal objects can reduce the range.
For best WWVB reception, orientate the forecast station with the front of the back facing Ft. Collins,
Colorado.
Distance/Resistance/Interference
Distance:
The maximum transmitting range in open air is over 300 feet (91 meters) between the outdoor sensor
and the forecast station. This range is in open air with ideal conditions.
Consider what is in the signal path between the forecast station and the outdoor sensor.
Avoid placing electronic in the signal path between the forecast station and the outdoor sensor.

La Crosse Technology, Ltd. Page 8
Resistance:
Obstacles such as walls, windows, stucco, concrete and large metal objects can reduce the range.
When considering the distance between the outdoor sensor and the forecast station (300 feet open
air), cut that distance in half for each wall, window, tree, bush or other obstruction in the signal path.
Closer is better.
Windows reflect the RF (radio frequency) signal.
Metal absorbs the signal and reduces the range.
Stucco has a metal mesh that absorbs the signal.
Do not mount the outdoor sensor on a metal fence. This significantly reduces the effective range.
Interference:
Consider items in the signal path between the outdoor sensor and the forecast station.
Sometimes a simple relocation of the outdoor sensor or the forecast station will correct the
interference.
Windows can reflect the radio signal.
Metal will absorb the RF (radio frequency) signal.
Stucco has a metal mesh that absorbs signal.
Avoid transmitting antennas: (ham radios, emergency dispatch centers, airports, military bases, etc.)
Electrical wires (utilities, cable, etc.)
Vegetation is full of moisture and reduces signal.
It is difficult for RF (radio frequency) signal to travel through a hill.
Forecast Station
How tall are the time numbers?
The time numbers are 0.59 inches tall.
Supported Time Zones
This forecast station offers seven time zones:
AST=Atlantic
EST= Eastern
CST= Central
MST= Mountain
PST= Pacific
AKT= Alaska
HAT=Hawaiian
The forecast station was designed to work in North America.
12-Hour or 24-Hour Time Format
Displays the time in 12-hour or 24-hour format.
Default is 12-hour time.
Use the Program Menu to switch time formats.
Power Requirements
3-AA alkaline batteries power the forecast station.
Indoor Comfort Statement
COMFORT STATEMENT: The comfort statement is based on the indoor humidity.
WET: Humidity is above 64%
COMFORTABLE: Humidity is between 43% and 64%
DRY: Humidity is below 42%

La Crosse Technology, Ltd. Page 9
Manually Set Time/Date: Program Menu
PROGRAM MENU: The SET button will move through the program menu. The + or - buttons will change
a value. Hold the SET button for 5 seconds to enter the program menu.
WWVB: WWVB and ON will flash. Press and release the + or - button to select OFF if you wish to
disable the WWVB reception. Press and release the SET button to confirm and move to the next
menu item.
TIME ZONE: The Time Zone will flash three letters. Press and release the + or – button to select
from seven Time Zones: AST=Atlantic, EST= Eastern, CST= Central, MST= Mountain, PST= Pacific,
AKST= Alaska, HAST=Hawaiian time zone. Press and release the SET button to confirm and move
to the next menu item.
DAYLIGHT SAVING TIME: DST and ON will flash. Press and release the + or - button to select OFF
if you do not observe DST change. Press and release the SET button to confirm and move to the next
menu item.
12/24-HOUR TIME: 12Hr will flash. Press and release the + or - button to select 12-hour time. Press
and release the SET button to confirm and move to the next menu item.
FAHRENHEIT OR CELSIUS: °F or °C will flash. Use the + or - button to select your preference.
Press and release the SET button to confirm and move to the next menu item.
HOUR: The Hour will flash. Use the + or - button to set the Hour. Be sure to set the Hour correctly for
AM or PM. Press and release the SET button once.
MINUTES: The Minutes will flash. Use the + or - button to set the Minutes. Press and release the
SET Button once to confirm and move to the next menu item.
SECONDS: The Seconds will flash. Use the + or - button to clear the seconds to 00. Press and
release the SET Button to confirm and move to the next menu item.
YEAR: The Year will flash. Use the + or - button to set the Year. Press and release the SET button to
confirm and move to the next menu item.
MONTH: The Month will flash. Use the + or - button to set the Month. Press and release the SET
button to confirm and move to the next menu item.
DATE: The numeric day will flash. Use the + or - button to set the Date correctly.
Note: If no buttons are pressed for 20 seconds, set mode will time out and return to live display mode,
reflecting whatever adjustments were made before it timed out
Note: Press the + or - button once to adjust by 1 unit or hold for fast scroll adjustment
Sunrise/Sunset Times
CITY SELECTION-SUNRISE/SUNSET TIMES:
Note: Preset City abbreviations are at the end of the instruction manual and quick setup guide.
Choose the city closest to you in a north/south direction. This will provide the most accurate
sunrise/sunset times as the sun moved from East to West.
To select a city location: Select your country, state, and then city location.
Hold the CITY button for 5 seconds.
USA will flash next to the sunrise/sunset time.
Press and release the + or - button to select USA, CAN, or MEX as your country.
Press the CITY button to confirm the country and select a state.
Note: When selecting Canada or Mexico you will move directly to city selection.
The state will flash. Press and release the + or - button to select a state.
Press the CITY button to confirm the state and select a city.
The city location will flash.
Press and release the + or - button to select a city from the list at the end of this manual.
Press the CITY button to confirm and exit.
After a short calculation time, the forecast station shows the times for sunrise and sunset, moon phase
and lunar tide.

La Crosse Technology, Ltd. Page 10
TIP: When DST is in effect, the forecast station will need to receive the WWVB time signal to make the
adjustment for DST. The WWVB signal includes an embedded bit to tell the Station to adjust for DST.
Until the forecast station receives the WWVB signal for the first time, the sunrise/sunset times will be one
hour off.
No WWVB Tower Icon
The forecast station has not received a WWVB time signal in the past 24-hours.
Position the forecast station for better reception.
Be sure you have good batteries in the forecast station.
Hold the + and – buttons together to send the forecast station on a signal search at night.
Allow up to 5 nights to receive the time signal.
Dashes, HH.H, LL.L or stuck Indoor Temperature/Humidity
Explanation: These symbols are error messages indication the indoor sensor is outside of its readable
range. For indoor readings, this is generally a power related issue.
Batteries may be overpowered or underpowered. Remove batteries from the forecast station.
Press any button 20 times. Leave the forecast station unpowered for 1-2 hours.
Install fresh Alkaline batteries with correct polarity.
If the indoor temperature is still shows dashes, HH.H or LL.L, the forecast station may need
replacement.
Inaccurate Indoor Temperature reading
Explanation: When the indoor temperature is inaccurate, it is often due to the location of the display or
overpowered/under powered batteries. You can test the accuracy at you home.
Side-by-side test: Bring the outdoor sensor in the house and place it next to the forecast station for 2
hours.
Compare indoor and outdoor temperature. The temperature should be within 4 degrees to be within
tolerance.
Look for heat sources such as sunlight, door or window frames or reflected heat or cold near the
forecast station.
Check batteries.
Time is off by hours
Check to see if the WWVB Tower icon appears on the forecast station. If not, the forecast station has
not received a WWVB time signal in the past 24-hours.
Reposition the forecast station with the front or back facing Colorado.
Check that the Time Zone selected correctly reflects your location. Adjust the time zone in the
Program Menu.
Check that the DST indicator is correct for your location (most areas observe DST so this should be
ON). Adjust the DST indicator in the Program Menu.
Set Time Alarm
Set Time Alarm 1: Press and release the ALARM button once to enter Alarm mode. The Alarm Time and
A1 will show.
HOUR: Hold the ALARM button for 3 seconds. The Hour will flash. Use the + or - button to set the
Hour. Be sure to set the Hour correctly for AM or PM. Press and release the ALARM button once.
MINUTES: The Minutes will flash. Use the + or - button to set the Minutes. Press and release the
ALARM button once.
Set Time Alarm 2: Press and release the ALARM button twice to enter Alarm mode. The Alarm Time
and A2 will show. Follow the steps above to program alarm 2.

La Crosse Technology, Ltd. Page 11
Activate/Deactivate Time Alarm
ACTIVATE Press and release the ALARM button to enter the correct Alarm mode. Press and release
the + button and the alarm icon will appear (above the time, alarm 1, below the time, alarm 2).
The number in the bell icon indicates which alarm is active.
DEACTIVATE Press and release the ALARM button to enter the correct Alarm mode. Press and
release the + button and the alarm icon(s) will disappear indicating alarm 1 and/or alarm 2 is off.
Snooze Alarm
When alarm 1 or alarm 2 sounds, press the SNOOZE/LIGHT button once to activate the snooze
feature for 10 minutes.
The alarm icon and the snooze icon Zz will flash when the snooze is active.
Press any button to deactivate the snooze feature.
Forecast Icons Inaccurate
Weather Forecast Icons: (Sun, Slightly Cloudy, Cloudy, Rainy, or Snow).
These icons forecast the weather in the next 12-24 hours. The forecast icons displayed, predict the
weather in terms of getting better or worse and not necessarily sunny or rainy as each icon indicates.
Note: After set up, disregard readings for weather forecasts for the next 48-60 hours. This will allow
sufficient time for the forecast station to collect air pressure data at a constant altitude and therefore
result in a more accurate forecast.
Forecast Arrows
WEATHER TENDENCY INDICATOR (Up or Down arrows):
Working together with the weather icons is the Weather Tendency Indicators. When the Indicator
Points Upwards, it means that the Air-pressure is increasing and the weather is expected to improve,
but when Indicator Points Downwards, the Air-pressure is falling and the weather is expected to
become worse.
Clothing Index
Hunter: The Hunter Clothing Icon combinations display based on Outdoor Temperature from the
transmitter on channel 1 only. The Hunter represents CURRENT TRENDS in Temperature.
Absolute Barometric Pressure
The forecast station reads Barometric Pressure.
The numeric pressure value adjusts automatically as the forecast station reads changes in air
pressure.
Since this number is absolute pressure it may not be the same as a local reporting Station that reads
in relative pressure.
Note: The pressure number cannot be calibrated.
Absolute Pressure is measured in a vacuum without the influences of terrain, weather, water, foliage
and elevation. The air pressure it would be consistent at every elevation and decrease as it went
higher.
Relative Pressure is a combination of air pressure and altitude. Relative air pressure will make
readings in local areas relative to each other to allow for proper forecasting.
Absolute Pressure Unit of Measure
Hold the HISTORY button for 5 seconds to switch from InHg (inches or mercury) or hPa (Hectopascal) for
the numeric pressure display and the pressure graph.
Inches of Mercury is common for weather reports and aviation in the United States.
Hectopascal is equivalent to millibar and commonly used to measure atmospheric pressure outside
the United States.

La Crosse Technology, Ltd. Page 12
Pressure History
Numeric History:
Press and release the HISTORY button to view the past 12-hours of numeric pressure history.
In the small box to the right of the numeric pressure a number from 0 to -12 will appear.
0 is current pressure. -1 through -12 reflects the history in one-hour increments.
Note: The history graph and forecast icons will not change when you view pressure history.
12-hour Pressure History Graph
The bar chart indicates the air pressure history trend over the last 12 hours in 5 steps, 0h, -1h, -2h, -3h, -
6h & -12h.
The columns represent the change in the measurements of ”InHg” or “hPa” at specific times.
The “0” in the middle of this scale is equal to the current pressure and each bar represents the past
pressure high or low in InHg or hPa compared to the current pressure.
Read the graph from left to right.
When the bars are rising, it means that the weather is getting better due to the increase of air
pressure.
When the bars go down, it means the air pressure has dropped. Expect the weather to get worse from
the present time (0h).
Note: The bar graph will scroll continually to prevent LCD burnout.
Moon Phase
The moon phase is divided by 6 sections, showing 12 phases of the moon.
Note: With the moon shown against a light colored background, the phases will show opposite to a paper
calendar. The segments highlighted portray the part of the moon that is visible in the sky. For instance,
the moon will be blank during a new moon and dark during a full moon.
New Moon occurs when the moon is between the earth and sun so the illuminated portion of the moon is
on the backside facing the sun and we cannot see it. After a new moon, the illuminated (visible) portion
will increase or wax until the full moon occurs.
Full Moon occurs when the earth, moon, and sun are in approximate alignment, with the moon and the
sun on opposite sides of the earth. The illuminated portion of the moon faces the earth, giving us
complete visibility of one side of the entire moon. After a full moon, the illuminated portion will decrease or
wane until the new moon occurs.
First Quarter and Last Quarter moons occur when the moon is at a 90-degree angle to the earth and
sun. Therefore, we see half of the moon illuminated and half is in shadow.
Waxing means growing or expanding illumination and happens after a new moon.
Waning means decreasing illumination and occurs after a full moon.
Crescent refers to the moon being less than half-illuminated. Crescents can be waning or waxing.
Gibbous describes a moon phase when more than half is illuminated. Gibbous can be waxing or
waning.
Tides
The tides reflected on this Station are the ebb and neap tides of the lunar month. Not daily high and low
tides.
When the forecast station states high tide, the tides will be higher than usual, etc.
When the sun, moon and earth line up at new and full phases of the moon, tides will be higher.
When the moon is at right angles to the sun and Earth at the first and last quarter, the tides are
weaker.
Full & new moon = spring tide (TIDE HI).
Quarter = neap tide (TIDE LO)
Other = mean water level (TIDE MID)

La Crosse Technology, Ltd. Page 13
Forecast Station is dim
Explanation: Most forecast stations have a gray background. Place the forecast station at eye level, to
determine if it is dim. Forecast stations that sit in the sunlight can develop a cloudy film over time.
This is generally a power related issue.
Batteries may be overpowered or underpowered. Remove batteries from forecast station.
Press any button 20 times. Leave the forecast station unpowered for 1-2 hours.
Install fresh alkaline batteries with correct polarity.
Forecast Station has distorted or frozen display
Explanation: On a brand new forecast station, check for thin plastic film of printed scratch guard that
may be on the screen of the forecast station. This thin piece of plastic has printed numbers for store
displays. When the batteries are installed, the “real” numbers show behind the printed scratch guard and
create distortion.
With all power removed, the forecast station should be blank.
If numbers still appear, please check for scratch guard.
Power:
Check that the batteries are installed correctly.
This is generally a power related issue.
Batteries may be overpowered or underpowered.
Remove batteries from forecast station.
Press any button 20 times. Leave the batteries out of the display for 2 hours.
Insert batteries into the forecast station.
Forecast Station is blank: No letters, numbers or dashed lines
Check that the batteries are installed correctly.
Batteries may be overpowered or underpowered.
Remove batteries from forecast station.
Press any button 20 times. Leave the batteries out of the display for 2 hours.
Insert batteries into the forecast station.
Forecast Station drains batteries quickly
Test a new set of alkaline batteries. Write down the date of installation and the voltage of the
batteries.
When the batteries fail, please note the date and voltage again. This is helpful in determining the
problem.
Check for leaking batteries, which may damage the forecast station.
Battery life is over 12 months when using reputable battery brands.
Forecast Station has missing segments
Explanation: When parts of numbers, letters, or pictures are missing on the display, it is often power
related.
Batteries may be overpowered or underpowered. Remove batteries from forecast station.
Press any button 20 times. Leave the forecast station unpowered for 1-2 hours.
Install fresh alkaline batteries with correct polarity.
/