Page is loading ...

AFTER SALES SUPPORT
1300 777 137
MODEL: EA2085 PRODUCT CODE: 704964 03/2021
Model Number: EA2085
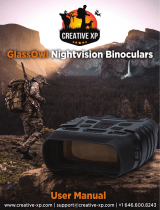
INSTRUCTION MANUAL

AFTER SALES SUPPORT
1300 777 137
MODEL: EA2085 PRODUCT CODE: 704964 03/2021
02
Welcome
Congratulations on choosing to buy a Signify product.
All products brought to you by Signify are manufactured to the highest standards of performance
and safety, and, as part of our philosophy of customer service and satisfaction, are backed by our
comprehensive 1 Year Warranty and customer technical support line.
This comprehensive instruction manual will provide you with a detailed guide on how to operate your
product and will also assist you in troubleshooting any problems that you may encounter.
If you have any queries regarding the use of this product, please feel free to phone our technical
support line for some friendly advice. If you are experiencing difculties or believe that the product
may have a technical fault, we will assist you in rectifying the issue. We can generally solve most
problems simply and quickly over the phone, so please always phone us rst!
We are sure that you will enjoy using this product and you can expect to gain years of service from
this product when it is used and maintained in the correct manner.

AFTER SALES SUPPORT
1300 777 137
MODEL: EA2085 PRODUCT CODE: 704964 03/2021 03
Contents
Welcome 02
Warranty Details 04
General Information and Safety Instructions 05
Product Overview 07
Getting Started 08
Before First Use 08
Instructions 10
Powering the Night Vision Device ON and OFF 10
Setting the Date and Time 10
Adjusting the Zoom Levels 11
IR Night Vision 11
Adjusting the Focus 12
Image Recording Modes 12
Video and Image Playback 13
Managing Saved Files using the Night Vision Device 15
Menu Options and Settings 18
Repair and Refurbished Goods or Parts Notice 21
Other Useful Information 22
Cleaning and Maintenance 22
Storage 22
Responsible Disposal 23
Specication Table 23

AFTER SALES SUPPORT
1300 777 137
04
MODEL: EA2085 PRODUCT CODE: 704964 03/2021
The product is guaranteed to be free from defects in workmanship and parts for a period of 12
months from the date of purchase. Defects that occur within this warranty period, under normal
use and care, will be repaired, replaced or refunded at our discretion. The benets conferred by this
warranty are in addition to all rights and remedies in respect of the product that the consumer has
under the Competition and Consumer Act 2010 and similar state and territory laws.
Our goods come with guarantees that cannot be excluded under the Australian Consumer Law.
You are entitled to a replacement or refund for a major failure and for compensation for any other
reasonably foreseeable loss or damage. You are also entitled to have the goods repaired or replaced
if the goods fail to be of acceptable quality and the failure does not amount to a major failure.
Night Vision Device
Warranty Details

AFTER SALES SUPPORT
1300 777 137
MODEL: EA2085 PRODUCT CODE: 704964 03/2021 05
RETAIN FOR FUTURE USE
Read this manual thoroughly before rst use, even if you are familiar with this type of product. The
safety precautions enclosed herein reduce the risk of re; electric shock and injury when correctly
adhere to. Please keep this user manual in a safe place along with your purchase receipt, warranty
card and carton for future reference. If applicable, pass these instructions and packaging on to the
next owner of the product. Always follow basic safety precautions and accident prevention measure
when using an electrical product.
1. Read all instructions before using the Night Vision Device.
2. The Night Vision Device is not intended for use by persons with reduced physical, sensory
or mental capabilities, or lack of experience and knowledge, unless they have been given
supervision or instruction concerning use of the product by a person responsible for their safety.
3. Do not use the Night Vision Device for anything other than its intended use.
4. Do not immerse the Night Vision Device in water or any other liquids.
5. Repairs to any electrical equipment should only be performed by qualied personnel. Improper
repairs may place the user at serious risk and will void the warranty.
6. Do not use the Night Vision Device if they have been dropped or damaged in any way. Contact
our After Sales Support Line on 1300 137 777 for further advice.
7. This product is not a toy. Keep the Night Vision Device out of reach of children.
8. This product is not user-serviceable. Contact with high voltage components may cause a risk of
electric shock, therefore do not attempt to open the cover of the Night Vision Device.
9. The manufacturer and retailer are not responsible for any eventual damages caused by improper
or faulty use.
10. Do not place the Night Vision Device near a hot burner (gas or electric), other heat emitting
sources or open ames.
11. The Night Vision Device is intended for private use and not suitable for commercial purposes.
12. Only use batteries with voltage that corresponds to the data on the rating plate of the Night Vision
Device.
13. Never touch the Night Vision Device with wet or damp hands.
14. Do not use the Night Vision Device in damp rooms or in the rain, if avoidable.
15. Do not place the Night Vision Device such that there is a risk of it falling into a tub or sink.
16. Ensure that children not push objects into the housing or eye relief of the Night Vision Device.
17. Insert the batteries observing the correct polarity (+/-). Failure to properly align the battery polarity
can cause personal injury and/or property damage.
General Information and
Safety Instructions

AFTER SALES SUPPORT
1300 777 137
MODEL: EA2085 PRODUCT CODE: 704964 03/2021
06
18. Never attempt to clean the Night Vision Device by immersing it in water and do not use a steam
cleaner to clean it. Otherwise, you could damage the Night Vision Device.
19. In case of batteries requiring replacement, only replace with same or equivalent batteries. The
Night Vision Device requires Alkaline batteries. Do not use rechargeable or other types of battery
as this may cause poor performance or the Night Vision Device may not function.
20. Remove old or discharged batteries from the Night Vision Device immediately.
21. Remove the batteries when the Night Vision Device will not be used for extended periods of time
to prevent damage due to leaking, rusted or corroded batteries and battery terminals.
22. Never touch leaking batteries without protective gloves. In case of contact with skin, wash the
area with plenty of soap and water. Avoid battery acid coming into contact with your eyes. In
case of contact with eyes, rinse eyes with plenty of water and contact a doctor immediately.
23. When the Night Vision Device is not in use, being cleaned or placed into storage ensure that the
unit is switched off.
CAUTION: Danger of explosion if the batteries are incorrectly replaced. Replace only with the
same or equivalent type.
IMPORTANT: Dispose of all used batteries at designated disposal points. Never dispose of
batteries in a re as this may cause an explosion or leakage of dangerous chemicals and fumes.
Warning!
Risk of blindness! Never use this device to look directly at the sun or in the direct
proximity of the sun. Doing so may result in a risk of blindness.
General Information and Safety
Instructions (cont.)

AFTER SALES SUPPORT
1300 777 137
MODEL: EA2085 PRODUCT CODE: 704964 03/2021 07
1. Focus Wheel
2. Micro USB Port / Micro TF Card Slot Cover
3. IR Up / Zoom-in Button
4. IR Down / Zoom-out Button
5. Power Button
6. Strap Loops
7. IR LED Housing
8. MENU Button
9. MODE Button
10. SHOT Button
11. Battery Compartments
12. Viewing Screen (eye viewing end)
13. Tripod Mount
Product Overview
2
4
6
5
3
1 7
8
9
10
12
Included (not pictured):
Instruction Manual, Warranty Card, Getting Started Guide, Micro USB Cable, Neck Strap,
Cloth Storage Bag, Lens Cleaning Cloth, 6 x AA Activ Energy Batteries
11
13

AFTER SALES SUPPORT
1300 777 137
MODEL: EA2085 PRODUCT CODE: 704964 03/2021
08
Before First Use
Inserting the Batteries
1. Press the clips on the battery compartments found on the base of the
Night Vision Device and remove the covers carefully.
2. Place three batteries in each compartment, ensuring the batteries are
installed following the correct polarity (+/-) shown on the interior of the
battery compartments.
3. To replace the covers, insert the tabs of the covers into the grooves on the Night Vision Device,
then press the covers so that the clips lock rmly into place.
WARNING: Use only Alkaline batteries with the Night Vision Device, other primary battery types
such as Zinc Carbon should not be used.
CAUTION: The Night Vision Device does not support the charging of batteries.
CAUTION: Danger of explosion if the batteries are incorrectly replaced. Replace only with the
same or equivalent type.
WARNING: Do not expose batteries to excessive heat, direct sunlight, open ames or any other
heat sources.
IMPORTANT: Dispose of all used batteries at designated disposal points. Never dispose of
batteries in a re as this may cause an explosion or leakage of dangerous chemicals and fumes.
IMPORTANT: The ribbon located inside the compartment is for the easy removal of the batteries.
The batteries should be inserted so that the ribbon sits under the batteries. Always check the end
of the ribbon is tucked inside the compartment before closing the covers.
Neck Strap Installation
It is recommended to attach the neck strap before using the Night Vision Device.
1. Place the Night Vision Device on a at surface with the viewing screen facing towards you.
2. Open the metal clips found on the ends of the neck strap.
3. Attach the clips to the loops found on each side of the Night Vision Device, ensuring the metal
clips are closed and securely attached.
Getting Started

AFTER SALES SUPPORT
1300 777 137
MODEL: EA2085 PRODUCT CODE: 704964 03/2021 09
Getting Started (cont.)
4. Adjust the length of the neck strap using the sliding buckle to your preferred length.
Memory Card Installation
This Night Vision Device requires a micro TF card (not included) to record video / still image content.
For correct performance, we recommend using a Class 10 TF card to ensure fast data transfer rates.
The Night Vision Device supports Class 10 micro TF cards up to 32GB capacity.
IMPORTANT: It is recommended to format the micro TF card on a weekly basis to ensure
ongoing trouble-free performance. Before formatting the micro TF card, copy and save your
important les to other storage media.
NOTE: The micro TF card can be formatted in the Night Vision Device without connection to
another device. See formatting instructions on page 19 to format the micro TF card using the
Night Vision Device.
1. Open the micro USB port / micro TF card slot cover found on the side
of the Night Vision Device.
2. Insert the micro TF card (not included) into the micro TF card slot
ensuring that the card contacts are facing up (ie. are facing towards
the top of the Night Vision Device), and the label on the micro TF card
is facing down.
3. Gently push the micro TF card into the slot until you hear a click and
the card remains in place.
4. To remove the micro TF card, push the micro TF card gently, and it will
pop out automatically. At this time, you can carefully remove the card.
NOTE: If an unformatted micro TF card is installed into the Night Vision Device, when the unit
is rst powered on, CARD WARNING will be displayed on the viewing screen. The Night Vision
Device will prompt you to format the micro TF card using the Night Vision Device itself. To
continue with formatting the card, press the SHOT button.
CAUTION: Only insert or remove the micro TF card when the Night Vision Device is turned off.
WARNING: Pay close attention to the orientation of the micro TF card. Do not attempt to insert it
by force. Using force to insert the micro TF it may damage the device and card itself.
CAUTION: Do not remove the micro TF card while it is saving or reading data. This may cause
damage to the data or the micro TF card to malfunction.

AFTER SALES SUPPORT
1300 777 137
MODEL: EA2085 PRODUCT CODE: 704964 03/2021
10
Instructions
Powering the Night Vision Device ON and OFF
1. To power ON the Night Vision Device, press and hold the button for approximately 3 seconds.
The viewing screen will illuminate indicating that the Night Vision Device is on. The battery level
icon is displayed in the lower left side of the viewing screen. As the battery power diminishes less
bars will be displayed on the icon indicating that the batteries are being consumed.
2. To power OFF the Night Vision Device, press and hold the button until the viewing screen
switches off.
NOTE: It is recommended that when the Night Vision Device is not in use it is switched off
immediately to preserve battery power.
Setting the Date and Time
Video and still image les captured by the Night Vision Device are date and time stamped by default
when captured.
To set the date and time on the Night Vision Device follow the steps below.
1. Power the Night Vision Device ON.
2. Press the MENU button.
3. Press the and buttons to scroll through the menu until the 'Date & Time' option appears.
4. Press the SHOT button to select the 'Date & Time' option.
5. Press the and buttons to input the current date and time. Press the MODE button to
advance from Month to Day and Year and so on.
NOTE: The default date format is displayed as MM/DD/YYYY. Please bear this in mind when
setting the date and time.
6. To change the date format, use the MODE button scroll until the date format is highlighted. Then
use the and buttons to toggle between the different date formats.
7. Once you have entered the current date and time, press the SHOT button to save and return to
the menu screen.
8. Press the MENU button again to return to the viewing screen.
NOTE: Time and date settings will need to be reset when the batteries are replaced.
Date and time stamping can be modied and switched off. Refer to the menu options on page 18 for
modifying date and time stamping settings.

AFTER SALES SUPPORT
1300 777 137
MODEL: EA2085 PRODUCT CODE: 704964 03/2021 11
Instructions (cont.)
Adjusting the Zoom Levels
The Night Vision Device has adjustable digital zoom levels up to 4x maximum.
To adjust the zoom level when using the Night Vision Device follow the steps below.
NOTE: Zoom levels can be adjusted at any time following the steps outlined below.
1. Power the Night Vision Device ON.
2. To increase the zoom level, press and hold the button. The zoom indicator on the right side
of the screen will appear and the zoom level indicator will move upwards showing the zoom level
increasing.
3. To decrease the zoom level, press and hold the button. The zoom indicator on the right
side of the screen will appear and the zoom level indicator will move showing the zoom level
decreasing.
NOTE: Once the zoom level has been adjusted, the focus may also require adjustment. Follow
the steps on page 12 for adjusting the focus.
IR Night Vision
The Night Vision Device can be used in low light levels at distances up to 400M. There are 7 levels of
IR night vision to select from depending on the light levels the device is operating within. Lower levels
of ambient light require higher levels of IR night vision to be used.
To enable the IR night vision and adjust the IR night vision levels follow the steps below.
1. Power the Night Vision Device ON.
2. Press the button once to switch on the IR night vision.
3. A icon will appear on the lower left side of the viewing screen with the number 1 displayed.
This represents IR night vision level 1.
4. Press the button again to switch to level 2. Repeat until level 7 is reached.
NOTE: It is extremely important to note that only when the batteries are at full power, will all 7
night vision IR levels be accessible. If the batteries are not displayed as three full bars on the
viewing screen, not all levels can be accessed. And if the battery levels are below 25% (about
one bar), then the IR night vision feature will not be able to be accessed at all. Please see the
table on the next page for more information.

AFTER SALES SUPPORT
1300 777 137
MODEL: EA2085 PRODUCT CODE: 704964 03/2021
12
Instructions (cont.)
5. To adjust between IR night vision levels, press the or the until you reach the optimum
level.
6. To switch off the IR night vision, press button until the icon disappears. Alternatively,
press the and after the optimum level is reached, the next press will also switch off the IR
night vision.
See the table below for IR night vision capabilities.
Battery Power Min Night Vision Level Max Night Vision Level
100% 1 7
50% or less 1 5
25% or less 1 3
<25% Not available
Adjusting the Focus
Once the Night Vision Device is powered ON, the viewing screen will illuminate and the Night Vision
Device will default to video mode. Lift the Night Vision Device to your eyeline and look at the viewing
screen to check if the image is in focus.
Follow the steps below to adjust the focus.
1. Monitor the viewing screen with both eyes.
2. Hold the Night Vision Device securely with your right hand.
3. Using your left hand, gently and slowly rotate the focus wheel to the left and right until the image
becomes sharp.
NOTE: As you move the Night Vision Device to observe other objects, the focus may need to be
adjusted if the object is closer or farther away. Follow the above steps again each time the focus
requires adjustment.
Image Recording Modes
Video and still image resolutions can be adjusted using the MENU button. See instructions on page 18 for
accessing and using the menu options.
When powered ON, the Night Vision Device defaults to video mode at 640 x 480. This is displayed on
the top left of the viewing screen as 640.
The top right of the screen will show a time in HH:MM:SS format and represents the total recording
time available on the installed micro TF card.

AFTER SALES SUPPORT
1300 777 137
MODEL: EA2085 PRODUCT CODE: 704964 03/2021 13
Instructions (cont.)
Recording Video
Before commencing recording, ensure that IR night vision levels, focus and zoom levels are all set to
your preference as any changes to these settings are captured during recording.
1. To begin recording, press the SHOT button. The red recording icon will appear on the viewing
screen indicating the video is recording. The video timer in the top right will reset to 00:00:00 and
begin counting the recording time. The date and time stamp will appear in yellow on the bottom
of the viewing screen.
2. To nish recording, press the SHOT button. The le will automatically save to the micro TF card.
Taking Still Images
Before capturing a still image, ensure that IR night vision levels, focus and zoom levels are all to your
preference as the captured image will be the same as seen on the viewing screen.
The default resolution of still images is VGA (640 x 480) and is displayed on the top left of the viewing
screen as VGA . The remaining shots available in the current resolution will be displayed on the top
right of the viewing screen. The date and time stamp will be captured on the still image for reference.
NOTE: The maximum number of shots that can be displayed is 9999. If you are using a card with
large memory such as 32GB, there will be more than 9999 available shots. Each time you take
a shot the counter will show 9998 and then revert to 9999. Once you have reached 9999 shots
available, the counter will begin to count down.
1. To take still images, press the MODE button. The icon will appear in the top left of the viewing
screen.
2. To capture a still image, press the SHOT button. The image automatically saves onto the
(installed) micro TF card.
3. To take another image, press the SHOT button again.
4. Once you are nished taking still images, press the MODE button to return to the playback or
video modes.
Video and Image Playback
There are three options for playing back saved les on the Night Vision Device. These are on-board
viewing, via connected PC, or directly accessing the micro TF card. Each option for playback is
explained below.
On-Board Viewing
To review the saved les directly on the viewing screen of the Night Vision Device follow the steps below.
1. Power the Night Vision Device ON.

AFTER SALES SUPPORT
1300 777 137
MODEL: EA2085 PRODUCT CODE: 704964 03/2021
14
Instructions (cont.)
2. Press the MODE button twice to select playback mode. The icon will display on the top left of
the viewing screen indicating the Night Vision Device is in playback mode.
3. Use the and buttons to scroll through the saved les. The number of saved les, be it
video or photo is displayed in the top right hand corner when in the playback mode.
4. The icon or the icon will display in the bottom left of the viewing screen indicating if the
saved le is a video le or a still image le.
5. To play a video le displayed on the viewing screen press the SHOT button. To pause the video,
press the SHOT button again. To fast forward, press the and to rewind, press the . To
stop fast forward or rewind, press the SHOT button. To stop the video at anytime, press the
MENU button.
NOTE: If you are playing a video, the total time of the video is displayed on the top right of the
viewing screen as 00:00:00 (HH:MM:SS). Second from the right represents the current time the
playback is at and is displayed as 00:00:00 (HH:MM:SS).
6. Once you are nished using playback mode, press the MODE button to return to the video or still
image modes.
Playback via Connected PC
If you want to view your saved les on your PC, you can directly connect the Night Vision Device
using the supplied micro TF USB cable. This allows for viewing of the saved les without the removal
of the installed micro TF card.
Follow the steps below to view les on your PC without removing the micro TF card.
1. Fully uncoil the micro TF USB cable.
2. Open the micro USB port / micro TF card slot cover found on the side of the Night Vision Device.
3. Insert the micro TF USB cable into the micro TF USB port on the Night Vision Device.
4. Connect the other end of the USB cable to a USB port on your PC.
5. Power on your PC and allow it to start fully.
6. Power the Night Vision Device ON.
7. Once powered on the Night Vision Device will appear as as a USB drive within your operating
system.
8. Access the drive and open the folder labelled DCIM, within this folder there will be a sub folder
labelled 100MEDIA, open this folder to access the saved les.
9. Playback or view the les using you PC’s operating system as you would any video or still image le.
10. Once you have nished viewing the les on your PC, close the folder rst and then follow the
normal procedures for ejecting devices from PC's safely. Then remove the micro USB cable from
your PC and the Night Vision Device.

AFTER SALES SUPPORT
1300 777 137
MODEL: EA2085 PRODUCT CODE: 704964 03/2021 15
Instructions (cont.)
Playback Directly from the Micro TF Card
To playback directly from the micro TF card, rst it must be removed from the Night Vision Device
and then inserted into a card reader / PC or compatible reading device.
Follow the steps below to playback directly from the micro TF card.
1. Ensure that the Night Vision Device is powered OFF.
2. Open the micro USB port / micro TF card slot cover found on the side of the Night Vision Device.
3. To remove the micro TF card, push the card gently, and it will pop out automatically.
4. Carefully remove the micro TF card from the Night Vision Device.
5. Insert the micro TF card into your PC / laptop or card reader.
6. Access the micro TF card and open the folder labelled DCIM, within this folder there will be a sub
folder labelled 100MEDIA, open this folder to access the saved les.
7. Playback or view the les using your PC’s operating system as you would any video or still
image le. Once you have nished viewing the les on your PC, close the folder rst and then
follow the normal procedures for ejecting devices from PC's safely. Then remove the micro TF
card from your PC.
NOTE: Alway ensure that you close all folders rst and then follow the normal procedures for
safely ejecting software or devices from PC's safely.
NOTE: Any changes made to the les on the micro TF card will be permanent.
NOTE: We recommend copying les immediately to another media device to protect important
les from damage or accidental deletion.
WARNING: Files deleted from the micro TF card cannot be recovered.
Managing Saved Files using the Night Vision Device
Files saved on the micro TF card can be managed directly from the Night Vision Device.
Important les can be locked which will prevent accidental deletion when using the Night Vision
Device. These les can be later unlocked to be deleted using the Night Vision Device, however it
prevents les from being deleted accidentally.
Files that are no longer required can be deleted from the micro TF card to make space available for
new videos or still images.

AFTER SALES SUPPORT
1300 777 137
MODEL: EA2085 PRODUCT CODE: 704964 03/2021
16
Instructions (cont.)
NOTE: Locked les must be unlocked before they can be deleted using the Night Vision Device.
Locking, Unlocking and Deleting Saved Files
Locking les prevents them from being accidentally deleted using the Night Vision Device. These
les are then protected and must be unlocked before they can be deleted.
NOTE: When les are deleted using the Night Vision Device, they are permanently erased and
cannot be recovered. We strongly recommend locking les that you wish to permanently save.
Follow the steps below for locking, unlocking and deleting les using the Night Vision Device.
Locking a File
1. Power the Night Vision Device ON.
2. Navigate to playback mode using the MODE button.
3. Press the and buttons to scroll through your saved les until the le you wish to lock is
displayed on the viewing screen.
4. Press the MENU button.
5. 'Lock' and 'Delete' options will be displayed, press the SHOT button to select 'Lock'.
6. You can choose to lock a single le or to lock all les.
7. Use the and buttons to navigate the selection and choose from 'Lock one' or 'Lock All'
and press the SHOT button.
8. To conrm you wish to 'Protect File?' or 'Protect All?', select 'Yes' and press the SHOT button.
NOTE: If you change your mind and no longer wish to lock the le/les, use the to select
'No' and press the SHOT button.
9. Once nished, press the MENU button twice to return to playback mode. To exit playback, press
the MODE button.
10. When a le is viewed using on-board playback a will be displayed indicating that the le is
locked.
Unlocking a File
1. Power the Night Vision Device ON.
2. Navigate to playback mode using the MODE button.
3. Press the and buttons to scroll through your saved les until the le you wish to unlock
is displayed on the viewing screen. Locked les will display a indicating the le is protected.

AFTER SALES SUPPORT
1300 777 137
MODEL: EA2085 PRODUCT CODE: 704964 03/2021 17
Instructions (cont.)
4. Press the MENU button.
5. 'Lock' and 'Delete' options will be displayed, press the SHOT button to select 'Lock'. This will
take you to the 'Unlock one' or 'Unlock All' options.
6. You can choose to unlock a single le or you can choose to unlock all les that have been
previously locked.
7. Use the and buttons to navigate the selection and choose from 'Unlock one' or 'Unlock
All' and press the SHOT button.
8. To conrm you wish to 'Unprotect File?' or 'Unprotect All?', select 'Yes' and press the SHOT
button.
NOTE: If you change your mind and no longer wish to unlock the le/les, use the to select
'No' and press the SHOT button.
9. Once nished, press the MENU button twice to return to playback mode. To exit playback, press
the MODE button.
10. When the le is viewed using on-board playback the will be not be displayed.
NOTE: When a le is unlocked it can then be deleted using the Night Vision Device. Ensure that
important les remain locked to protect them from being accidentally deleted.
Deleting Files
The Night Vision Device can be used to delete les on the micro TF card to make additional space for
recording new video or still images.
Before les can be deleted, they must be unlocked and not display the when viewed in playback
mode. See instructions on page 16 for unlocking les using the Night Vision Device.
NOTE: When les are deleted using the Night Vision Device, they are permanently erased and
cannot be recovered. We strongly recommend locking les that you wish to permanently save.
Follow the steps below to delete a le using Night Vision Device.
1. Power the Night Vision Device ON.
2. Navigate to playback mode using the MODE button.
3. Press the and buttons to scroll through your saved les until the le you wish to delete is
displayed on the viewing screen. Locked les will display a indicating that they are protected,
if you wish to delete a locked le follow the instructions on page 16 to unlock the le before
continuing. Locked les cannot be deleted using the Night Vision Device.
4. Press the MENU button.

AFTER SALES SUPPORT
1300 777 137
MODEL: EA2085 PRODUCT CODE: 704964 03/2021
18
Instructions (cont.)
5. 'Lock' and 'Delete' options will be displayed, press the button to select 'Delete' and press
the SHOT button.
6. You can choose to delete one le or to delete all les.
7. Use the and buttons to navigate the selection and choose from 'One' or 'All' and press
the SHOT button.
8. To conrm you wish to 'Delete this File?' or 'Delete All File?', select 'Yes' and press the SHOT
button. If you have chosen to delete all les, all your unprotected saved videos and images well
be deleted permanently from the micro TF card. If you have chosen to delete a single le, the
selected image or video will be deleted and the next le will appear on the screen, if you wish to
delete the next image or video press the SHOT button again and so on.
NOTE: If you change your mind and no longer wish to delete the le/les, use the to select
'No' and press the SHOT button.
9. Once nished, press the MENU button twice to return to playback mode. To exit playback, press
the MODE button.
NOTE: Protected les cannot be deleted. If the 'Delete' option is selected on a locked le, a
warning box will pop up on the screen ! 'File Locked'. To delete a protected le, rst unlock the
le following the steps on page 16. Then follow the steps on page 17 to delete the le.
NOTE: When deleting les, if you select the 'All' option only the unprotected les will be deleted.
The locked les will not be deleted and remain on the micro TF card.
Menu Options and Settings
Pressing the MENU button when in video or still image mode allows the user to alter a variety of
settings on the Night Vision Device.
To navigate within this menu, use the and buttons to scroll through the options. The SHOT
button conrms selections, while the MENU button will exit the current selection.
Below outlines each menu option, the operation and alterations that can be selected. Follow the
on-screen instructions to modify the below settings.
Photo Resolution: Select from VGA (640 x 480) or
1M
(1280 x 960) still image resolutions. Higher
resolutions provide better images, however, use more space on your micro TF card. Either VGA or
1M
will be displayed on the top left of the viewing screen depending upon which option you have
selected.
Video Size: Select from 640 (640 x 480) or 960 (1280 x 960) video resolutions. Higher resolutions
provide better video clarity, however, use more space on your micro TF card. Either 640 or 960 will be
displayed on the top left of the viewing screen depending upon which option you have selected.

AFTER SALES SUPPORT
1300 777 137
MODEL: EA2085 PRODUCT CODE: 704964 03/2021 19
Instructions (cont.)
Night Vision Sensitivity: Select 'Low', 'Middle' or 'High' sensitivity settings. Higher settings allow for
better results in darker conditions, however, will use more power as a result. We recommend using
the 'Middle' setting where possible to preserve battery power. Either the or or will be
displayed on the top left of the viewing screen under the or depending upon which option you
have selected.
Power Frequency: Select from '50Hz' or '60Hz' settings. We strongly recommend 50Hz as this
matches the power frequency in Australia.
Power Save: Select from '3 mins', '5 mins', '10 mins' or 'OFF'. This determines the auto shut off
time of the Night Vision Device. If no action is sensed by the Night Vision Device, it will shut down
based on your selection above. The 'OFF' setting will turn off the 'Power Save' mode altogether and
will then require the user to manually power OFF the Night Vision Device each time it is used. We
recommend this setting only for experienced users, or where long periods of use are required.
Date & Time: Set the date and time for date stamping of video and still images. Bear in mind the
default date format is MM/DD/YYYY, however can be altered following the instructions on page 10.
Date Stamp: Select from 'Off', 'Date' and 'Date & Time'.
The 'Off' option will remove all date and time stamping from your video and still images recorded
from that point forward.
The 'Date' option will only record the date information on the video or still image from that point
forward.
The 'Date & Time' option (default setting) will record both date and time information on video and
still images.
Language: Select from 12 different languages. The default language of the Night Vision Device is
'English'.
Format: This option is used to format your micro TF card using the Night Vision Device.
The 'Yes' option will remove all les and data from the micro TF card. Only select this option once
you have saved all your important les to another device.
The 'No' option will leave all les as is and there will be no changes made to the micro TF card.
WARNING: Formatting the micro TF card will remove all les saved on the card including locked
les. Once these les are lost due to formatting the micro TF card the les are not recoverable.
We strongly recommend that you copy all les to another form of media before formatting the
micro TF card using the Night Vision Device.

AFTER SALES SUPPORT
1300 777 137
MODEL: EA2085 PRODUCT CODE: 704964 03/2021
20
Instructions (cont.)
Reset All: Resets all factory default options. If the 'Yes' option is selected, the Night Vision Device will
return back to the original factory default settings. Refer to the below table for the default settings.
Setting Default
Photo Resolution VGA (640 x 480)
Video Size 640 (640 x 480)
Night Vision Sensitivity Middle
Power Frequency 50Hz
Power Save 10 minutes
Date & Time 01/01/2019 13:00
Date Stamp Date and Time
Language English
FW Version: This shows the current version of the Night Vision Device rmware.
/